
Last Seen Blogs

blessedblues
Blessed Blues

wizbybianca
ウィズ

karenfordonte
Caring For Donte

pukingutz
PUKINGUTZ |warrior cats blog|

zaerxa
#1 SKK hater (not)
Text
Preventive Maintenance for Washing Machine Door and Lid Seals
The washing machine is one of the most useful contemporary conveniences. Nothing beats having clean clothing available to you while it's functioning. But when it's not, life becomes undoubtedly more challenging. Washing Machine repair service calls can save your time and help you in getting to the solution.
A few simple maintenance procedures will help maintain your washing machine in great condition. With these suggestions, your washing machine door and lid seals will last longer and you'll make fewer service visits.
Clean Your Washer
It appears as though this would occur naturally. Isn't the purpose of our washer to wash clothes? So why wouldn't the interior of the washer be clean? Unfortunately, this is not always the case.
You could notice that the washer itself smells "off" or that your clothes don't smell as fresh. If so, cleaning the door and lid seals properly is necessary inside. Any suds that haven't fully dissolved might leave a film on your clothes.
Additionally, this accumulation ends up on the washer's drum. This movie is not only dirty, but it also encourages the growth of mould and mildew.
Perform this cleaning cycle once every month. It will keep the machine fresher even if you run an empty load with mild detergent and bleach.
More Scrubbing
What do you mean, more cleaning? Maintaining cleanliness on the outside is the main task. To keep the finish intact, wipe up spills and frequently clean the remainder of the exterior. If your washer contains a dispenser for fabric softener, bleach, or detergent, you may as well clean it while you're at it.
By locating the lint filter, which may be done by consulting your owner's handbook, you can erase this error number. If you've stored it someplace, open a browser and type your washer model and "lint filter location" into the search bar.
Always Adhere to Direction
Although it might seem obvious, you'd be amazed at how many individuals ignore the settings or directions. Your washing machine's lifespan may be reduced as a result. For instance, you must use a certain kind of laundry soap for HE (high efficiency) washers if you have one.
Low water levels and a tumbling wash movement are features of high-efficiency front or top loading washers. Low sudsing HE detergents are especially developed for use in these energy-efficient washers to provide clean wash loads. Look for the best Washing Machine repair near me and book a short visit to stay away from big repairs.
Other laundry detergents might confuse the machine and result in your garments not getting properly cleaned. It might not wash the clothing correctly, stop the cycle, or rinse the garments properly.
You're only working against the machine's intended function. However, because HE machines use less soap, you can use your laundry soap bottle more frequently.
Things like particular settings are subject to the same principles. Use that setting if you are washing a big load to prevent the washer from spinning out of balance or failing to clean thoroughly.
Keep the Door Open (or tidy it up)
Leave the door of your top-loading washer open in between loads. This allows your washer ample time to dry out and completely eliminate any dampness that can result in scents.
Many front-loading washers have lights inside, or leaving them open would not be practical. If you can't, be careful to at least wipe off the rubber seal between washings to prevent the growth of mould or mildew.
Additional Care
There are a few improvements you may make to your washer. Make sure it is installed level, for instance. Unlevel ground will cause a washing machine to begin to tremble and maybe even shift out of position. This might harm not just your floor but also your washer.
A minimum of 4-5 inches should separate the washer from the wall. This makes it possible to prevent kinking or bending of the hoses indicated before.
Love Your Washing Machine
Washing machines frequently endure for years. Just be kind to your washing machine if you want to make sure it lasts a long time. Simply take care of it by keeping it clean, adhering to the directions, and it will take care of you.
Find a local washing machine repairing specialist by clicking here for additional details or assistance with a home inspection.
#washing machine repair#lg washing machine servicing#washing machine repair home service#washing machine repair service
0 notes
Text
No Lights, No Action: How to Fix a Microwave Display Not Working
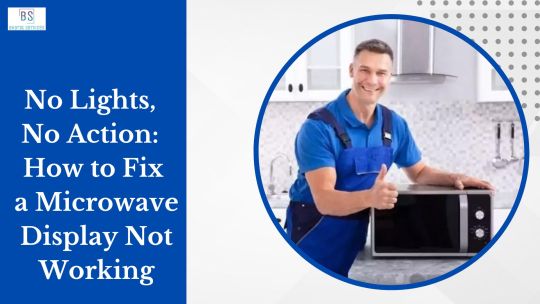
A microwave is one of the kitchen's most frequently used equipment and is used many times every day. Throughout the day, it is used to cook and heat food. In order to avoid any issues in the kitchen, it is crucial to maintain it in top shape.
However, owing to regular use, it could occasionally experience issues. One of these issues is a broken microwave display. Call a microwave repair expert in that case.
You may occasionally experience problems with the display that shows the temperature, time, etc. You might not be able to estimate the amount of time remaining to cook, etc., without the time display and other information.
There are a variety of potential causes for this, and in some circumstances, you might be able to handle the problem by yourself. The following are some potential causes and fixes for a malfunctioning microwave display.
The Primary Reason Why a Microwave Display Isn't Working
An unreliable main control board is the first potential cause of a malfunctioning microwave display. There may be missing numbers or lines if the primary control board or circuit board is malfunctioning. A defective capacitor or a missing solder are the usual culprits for this issue. You may check the appliance's internal circuit to see if there is a broken line for this.
Fix For A Faulty Main Circuit Board
Soldering it with a soldering iron is the answer if you can quickly detect the damaged line. However, it is preferable to get expert assistance or call a skilled technician for assistance if you lack knowledge or feel uneasy around circuits.
Inspect the Power Source
A bad power supply is another potential reason why the microwave display isn't working. Your microwave's display may not be working properly if the power supply to the device isn't adequate.
Verify the Monitor Fuse and the Temperature
You must also check the temperature and the monitor fuse if the microwave display isn't working. Make sure neither of them is blown away. The fuses for every kind and brand of microwave will be placed in various locations throughout the appliance.
Consult the user handbook to find the fuses. Once you've found it, remove the fuse and examine the tiny wire inside. It could be blown off if it is stained.
Contact the best microwave repair service specialist if you are unclear how to fix the display issue on your own. If the microwave display isn't working, contact the professionals to fix the problem.
Contact Best Microwave Repair Service
Many people are reluctant to perform their own microwave repairs, and occasionally with good cause. However, you can normally securely fix your microwave display by yourself if it is malfunctioning. However, in order to do the proper repairs on a problematic display, you must be able to accurately detect its symptoms.
The membrane switch and the control board are normally the two places to examine if your microwave display is playing up. The portion you really touch while the control panel receives and sends signals is the membrane switch.
If you press the buttons on your microwave display, but nothing occurs, your membrane switch most likely needs to be repaired. The mylar that makes up this membrane may not be forming the necessary connections if it has distorted over time.
Endnote
A crucial component of the microwave is the display. The display is used to verify that the commands you've typed using button presses. It indicates the power level, the remaining time, and the setting you've chosen.
It serves as the main visible clock in many homes. Few things are more unpleasant than when the display on your microwave abruptly stops working.
Please keep in mind that before starting this repair, unplug the microwave. There is an alternative if you search for microwave repair near me, then you will get the solution soon.
#microwave repair service#microwave oven repair#microwave oven service#microwave repair services#microwave
0 notes
Text
Safety First: Why Ignoring Strange Microwave Sounds Can Be Risky
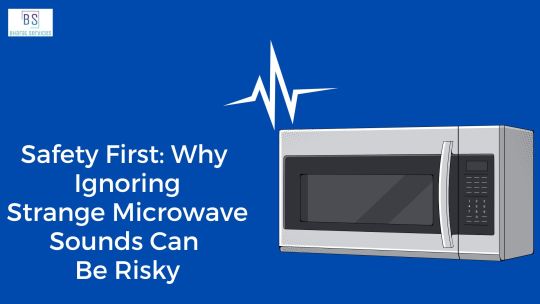
Microwaves are among the most widely used home appliances. You must take extra precautions to prevent the risks because the kitchen is where more than half of all unintentional home fires begin. Microwave repair service in case of any damage works.
Fix appliances problems right away—unless you want to burn down your house or do irreparable harm to your microwave.
When a Tiny Item Malfunctions Severely
One of the most practical appliances you own, whether you use it daily or perhaps occasionally, is your microwave.
You should take care of the issue as soon as it becomes less handy and starts acting strangely, not just because you need to heat up some leftovers or pop some popcorn, but also because it could be an indication of a more serious problem that could cause irreparable damage to your unit or even start a fire.
It may be time to replace your microwave if it is approaching the end of its seven to ten-year lifespan. It isn't worth the risk to keep an old device around, especially if it is displaying any of the aforementioned problems.
Microwaves: Are They Harmful?
Since the middle of the 1950s, homes have been using microwaves. Since then, there hasn't been any solid evidence to support the idea that they are in any way hazardous to human health when used normally.
In reality, there is little risk of harm from microwave radiation. The major risk posed by a microwave is fire brought on by abuse or malfunction. Call out the best microwave repair near me service provider to avoid risk and problems later on.
Ignoring Microwave Sounds Can Be Risky
To ensure you stay safe around microwaves, you can adhere to some important safety advice.
When malfunctioning, microwave magnetrons and diodes can emit incredibly loud noises that can make your appliance sound like it's ready to blow up. In particular, if you see your microwave sparking or smoking, it is best to cut off the power source and have it rectified before using it again. Although they can harm internal components, sparks inside the microwave aren't usually a symptom of a dangerous issue.
What Is the Sound of a Failed Microwave Magnetron?
Bad microwave magnetrons can produce a variety of sounds, and these sounds are frequently very loud. Typically, malfunctioning magnetrons emit a loud screeching or screaming sound. Depending on the problem, a magnetron may also emit a loud buzzing or humming sound.
What is a Normal Microwave's Loudness Level?
When operating, typical microwaves emit a faint buzzing sound. However, typical microwave noises ought to be undetectable and silent. If the noise annoys you or if you hear grinding, clicking, or screaming sounds, one of the components is definitely malfunctioning.
How Do I Stop the Noise My Microwave is Making?
Occasionally, turning off your microwave and cleaning it well will stop it from producing noise. The only method to stop your microwave from making noise if that doesn't work is to identify the problematic component and fix or replace it.
Occasionally, if the noise is brought on by debris or blockages obstructing the fan blades, cleaning the cooling fan can resolve the issue.
Endnote
Generally speaking, it's preferable to contact a microwave repairing qualified contractor to diagnose and repair your microwave. Using a multimeter to test the parts and replace them yourself is doable, but it can be risky if you don't know what you're doing. If your microwave is integrated, accessing it may be difficult as well.
Even after being unplugged for a while, microwave capacitors can still hold a lot of energy. In the event that you accidently touch active components, this charge may be strong enough to provide a possibly lethal electric shock. If you wish to attempt to repair your microwave yourself, it is crucial to properly discharge the capacitor before you begin.
0 notes
Text
Why Your TV Has Sound But No Picture

Will your TV only play audio and not video? Is the screen on your television black? Use these fixes to resume streaming. Or call a TV servicing expert for more.
Your TV is no longer a TV; it is instead a sound system. The visual component of television has been gone. However, there is no visual information available. It's dark. Your television isn't for listening, is it? Fear not, and implement the fixes listed below.
Incorrect Settings
You may customise a wide range of settings on your TV. Some of these will have an impact on your TV's connections and influence if you will see anything. Starting with the almost insultingly apparent checks never hurts, so let's proceed.
Gentle Reset
The simplest place to begin.
● For 60 seconds, unplug your TV. Don't simply switch it off.
● After unplugging it, press and hold the power button for 30 seconds.
● On those 60 seconds, count slowly or use a watch.
● Reconnect the cable to your TV and look for a picture. If it functions, you're done.
● Move on to the following step if not.
● Brightness Verify your device's brightness setting. A setting may occasionally become bugged.
Check the Inputs and Cables for HDMI
When there are issues with the HDMI Inputs, the visual signal may be interrupted but the audio will continue to work. The input sockets and the cables are the two primary points of failure.
First, disconnect and re-plug each HDMI wire from the TV and from the other connected device at both ends. Do this for each connected device to your TV.
Replace the cable from a specific source with a known-good cable. See if that is any assistance. Each source you have should be treated in turn. If this exchange resolves the issue, purchase and install a new cable.
Check the location of the source's plug-in on the TV and the source's settings. It is quite improbable that there is a mismatch between input and setting because you are currently receiving sound. In that case, move on to the next item.
It is advisable to use approved cables because non-certified HDMI cables might occasionally result in issues in this way.
Software Problems
Your TV can operate erratically if the software update feature is not enabled. A manual update is an additional action you can take to rule out a potential cause. You are not the one who can fix all you want, either. It is a good option to search for a nearby TV repair specialist.
Use a hard wired source or a flash drive inserted into a TV's USB port instead of WiFi-based updates due to their sporadic unreliability.
Factory Reset
The final step is a factory reset if the upgrade had no impact or wouldn't operate. Make a note of the numerous configurations you have changed before doing this because the reset will remove all of them.
If this fixes the no picture issue, your TV will have all factory default settings, therefore it will take some work to return to the previous configuration. Follow the reset instructions that come with your TV to complete it.
Hardware Problems
After checking the connections, connected devices, and software settings, let's examine the TV's functionality.
Check Cables
Sometimes the issue can be resolved by just detaching and rejoining each cable, even before you test the individual boards. The ribbon wires that connect the Main Board to a small board known as the T-Con board are crucial in this step.
● Make sure the TV is unplugged first.
● One by one, unplug and replug each cable.
● Before reinstalling the ribbon cables, you might even wish to use a pencil eraser to clean the contacts.
Be gentle and take your time. The majority of the wires will fit nicely in just one location, but it doesn't hurt to make a tiny mark next to each one as you finish the disconnect-reconnect process.
Plug the TV back in after you've finished this to check whether an image has appeared. If so, move on to the next step; otherwise, stop.
Defective LCD panel
Your LCD panel could have failed, especially if the test for bad back lights produced an empty screen. Single horizontal or vertical lines in the image on the screen are a typical indicator of panel breakdown. Another indication of panel breakdown is distorted pictures that only appear in one location on the screen.
Physical abuse is a major factor in many panel failures. Furthermore, the panels' design, which includes chips embedded in flexible plastic or affixed to glass, leaves them susceptible to irreparable failures in the peripheral devices.
If a panel is damaged, the cost and labour of repair suffer since replacing the panel is a labour-intensive and expensive process. If replacing the panel isn't feasible financially, you can attempt selling the TV's other internal parts.
Last but not least, take precautions while doing the task. Save your time and money by looking for Television repair near me.
#TV repair#Television repair near me.#TV servicing#best tv repair near me#tv repair near me#top tv repair#tv repair services
0 notes
Text
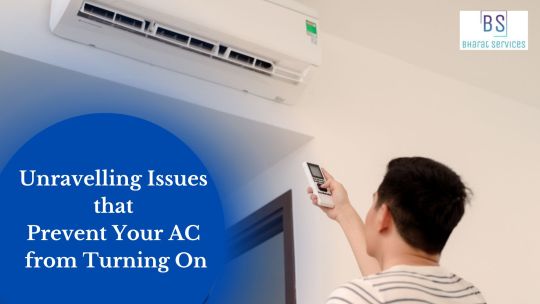
AC Repair Guide: Unravelling Issues that Prevent Your AC from Turning On.
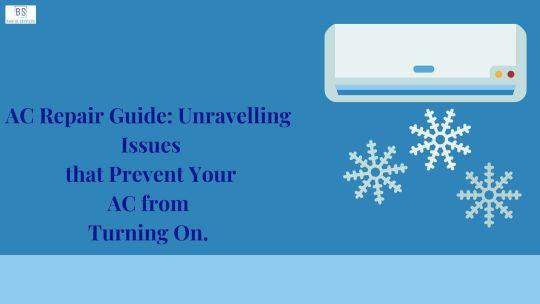
Could you imagine coming home from a long day in the scorching summer heat, only to find that your AC is not turning on? Not many things could be worse than this. However, there is a possibility that this could happen to you. But don’t worry! Because in this blog, we’ll look at causes, fixes, and preventions for an AC that’s not turning on. It could be a simple fix or a hefty problem that requires AC Repair Service – let’s find out!
Why won’t your AC Turn On?
There are several factors that could cause a problem with your AC’s startup mechanism. Let’s look at some common ones:
Faulty Thermostat.
A thermostat is a device used to monitor and regulate the temperature and functioning of your AC based on your surrounding temperatures. If your AC is connected to one, it’s important that you check if it’s functioning properly.
You may need to manually adjust temperatures to allow your AC to start cooling. However, in case your thermostat is not displaying anything – you may need to change the batteries. If this doesn’t fix your problem, you might need to change the thermostat.
Tripped Power Circuit.
Sometimes a voltage fluctuation or blackout can cause the power circuit to trip. This can be the cause behind your AC not working. To fix this, you need to reset the power circuit by simply turning on the switch that’s been turned off.
Blocked Coils and Vents.
If your AC unit is prone to dust, debris, and pet hair, then they’re likely to cause blockage of the coils and vents. This might cause your AC to not function, especially if your unit hasn’t been cleaned in a while.
To avoid this from occurring again, ensure that your unit is cleaned and maintained properly. This can be done with the help of the best AC maintenance service from professionals.
Refrigerant Leak.
The refrigerant is the liquid responsible for facilitating the cooling. If your AC doesn’t have enough refrigerant, or if there’s a leak – your unit might stop working. This problem requires the assistance of a professional as they will be to detect the leak, fix it, and then do a refill.
When should you seek AC Repair Service?
It’s ideal to seek AC Service at least once a year, ideally before summer – when the AC needs maximum efficiency. This will ensure that your unit is properly cleaned and maintained, allowing it to provide the best cooling. The experts will be able to detect potential signs of damage too, fixing things early.
#best ac maintenance#best ac repair company#ac repair service#ac maintenance#best ac repair service#best ac repair near me
0 notes
Text
Washing Machine Repair Guide: How to Handle Error Codes?
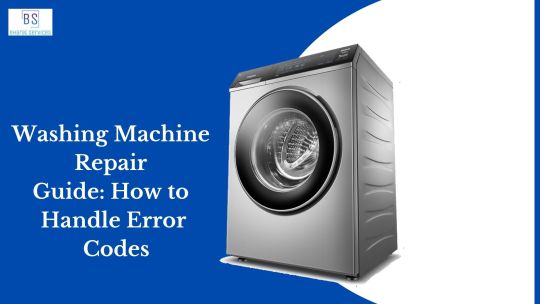
Though a broken Washing Machine is always frustrating, the addition of error detection systems in the modern models is a great help. These smart – error detection systems show an error code correlating to the problem with your unit. This makes Washing Machine Repair easy as you already know the cause, and now just need a fix for it. In this blog, let’s look at some common Washing Machine Error Codes, what they indicate and how you can fix them.
How to Handle Washing Machine Error Codes?
To fix Washing Machine Error codes – it’s crucial to first know what they mean. Let’s look at some common error codes and understand the problems indicated.
E1 or F1 – Water Inlet Error
These codes are an indication of a problem with the water inlet. This may lead to a lack of water supply to your machine causing it to not start.
You can troubleshoot this issue by checking if the water supply hose is bent, punctured, or clogged. Also, make sure that faucet that supplies water is turned on and working fine. In case this issue persists, you may need to replace the water inlet valve.
E2 or F2 – Drainage System Error
The E2 and F2 codes are a sign of an issue with the drainage system. After many wash cycles and heavy usage, it’s common for your washing machine drain to get clogged. This clogging can be caused by dirt and debris or even a foreign object like a coin or a button.
To fix this, you would have to check the drainage hose and drainage pump filter for any signs of clogging and thoroughly clean them. If your washing machine is still unable to drain properly, there might be a fault with the drain pump. In this case, it’s ideal to seek a professional washing machine service as the professional will be able to carry out effective repair or replacement, depending on the severity of the issue.
E3 or F3 - Temperature Sensor Error
If there’s an E3 or F3 error code, this means that there’s an issue with your washing machine’s temperature sensor. This sensor is responsible for regulating the water temperature throughout different wash cycles.
This is an internal and technical issue, so to fix the temperature sensor, you need to seek the help of washing machine professionals. They will be able to fix the sensor or provide effective replacement if necessary.
E4 of F4 – Door Lock Error
E4 and F4 error codes point towards an error with the door lock. The door lock mechanism is designed to ensure safety, and if it’s not engaging or working properly - your wash cycles won’t work.
This problem is often caused by a simple misalignment or loose connection, so you should check and fix these. In other cases, there might be a fault with the wiring or the entire lock mechanism – which requires professional assistance.
E5 or F5 – Motor Error
One of the most critical errors is indicated by the codes E5 and F5 – a problem with the motor or motor control board. This means that the motor, responsible for spinning the washing machine drum and completing your wash cycles – is not working.
This issue can be caused by two things - a faulty control board – which could have been burned or damaged due to a voltage fluctuation or overheating. Or secondly, an issue with the motor – including dirt accumulation, broken wiring, and other issues.
Since these are the most critical error codes and are related to the most essential parts of your washing machine, it’s crucial to contact a washing machine repair service urgently.
Ensure Smooth Wash Cycles with Washing Machine Repair Service!
With so many different types of error codes and Washing Machine issues, things can get hefty. But after understanding what these error codes and problems mean, things might be a little easier. To reduce your stress, be assured that there’s almost no washing machine problem that can’t be fixed.
However, timely repair is essential to avoid further damage and piles of dirty laundry. Hence, to avoid these and to make sure that all your problems are solved timely, you should contact the best Washing Machine Repair Service today!
#lg washing machine servicing#washingmachine repair#washing machine repair home service#washing machine repair#washing machine repair services#washing machine repair service
0 notes
Text
AC Repair Guide: Unravelling Issues that Prevent Your AC from Turning On
Could you imagine coming home from a long day in the scorching summer heat, only to find that your AC is not turning on? Not many things could be worse than this. However, there is a possibility that this could happen to you. But don’t worry! Because in this blog, we’ll look at causes, fixes, and preventions for an AC that’s not turning on. It could be a simple fix or a hefty problem that requires AC Repair Service – let’s find out!
Why won’t your AC Turn On?
There are several factors that could cause a problem with your AC’s startup mechanism. Let’s look at some common ones:
Faulty Thermostat.
A thermostat is a device used to monitor and regulate the temperature and functioning of your AC based on your surrounding temperatures. If your AC is connected to one, it’s important that you check if it’s functioning properly.
You may need to manually adjust temperatures to allow your AC to start cooling. However, in case your thermostat is not displaying anything – you may need to change the batteries. If this doesn’t fix your problem, you might need to change the thermostat.
Tripped Power Circuit.
Sometimes a voltage fluctuation or blackout can cause the power circuit to trip. This can be the cause behind your AC not working. To fix this, you need to reset the power circuit by simply turning on the switch that’s been turned off.
Blocked Coils and Vents.
If your AC unit is prone to dust, debris, and pet hair, then they’re likely to cause blockage of the coils and vents. This might cause your AC to not function, especially if your unit hasn’t been cleaned in a while.
To avoid this from occurring again, ensure that your unit is cleaned and maintained properly. This can be done with the help of the best AC maintenance service from professionals.
Refrigerant Leak.
The refrigerant is the liquid responsible for facilitating the cooling. If your AC doesn’t have enough refrigerant, or if there’s a leak – your unit might stop working. This problem requires the assistance of a professional as they will be to detect the leak, fix it, and then do a refill.
When should you seek AC Repair Service?
It’s ideal to seek AC Service at least once a year, ideally before summer – when the AC needs maximum efficiency. This will ensure that your unit is properly cleaned and maintained, allowing it to provide the best cooling. The experts will be able to detect potential signs of damage too, fixing things early.
#best ac maintenance#ac repair service#ac maintenance#best ac repair company#air conditioner services
0 notes
Text
Understanding Fridge Error Codes: What They Mean and How to Fix Them.
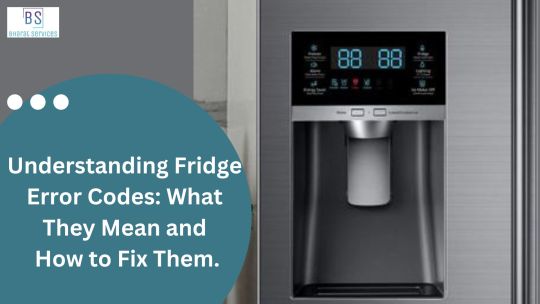
Gone are the days that required the disassembly of your refrigerator and resorting to futile trial and error methods for even the slightest problems. With the modern technology in today’s refrigerators, troubleshooting has become incredibly easy! This is because modern-day units have smart inbuilt error detection systems that quickly detect a problem and display an error code corresponding to it. These error codes are incredibly helpful in making fridge repair service easy. In this blog, let's look at some common error codes, the reason behind them, and how you can fix them.
What are Fridge Error Codes?
Most refrigerators manufactured today are equipped with digital interfaces and have effective error detection. In case any issues come up with your refrigerator, the smart system automatically displays a code on the digital display. This code is reflective of the error that has occurred, hence giving it the name error code.
Common Fridge Error Codes.
Different brands and refrigerators have their unique error codes, but generally, the common error codes all consist of letters and numbers. These codes are displayed on the digital screen to indicate errors and look like “E1”, “F1”, “40E”, “OFF”, “HH” and have many variations.
Let’s look at some examples with the above codes itself –
E1: indicates a fault with the sensor.
F1 and 40E: Both these codes indicate a fault with the ice-maker fan.
OFF or OF: This code indicates that your fridge is in cooling off or demo mode.
Now that we know what these codes are and what they look like, let’s see how they can be fixed.
Steps to Fix Refrigerator Error Codes.
The entire goal of error codes is to help make your experience easy. This makes it important to learn about the steps you can take to fix the errors.
Restart your Fridge.
Sometimes, just restarting your unit can fix your problem, so you should begin here. Simply switch off or unplug your refrigerator and wait at least 1 minute before powering it on again. This is an easy fix that might work for simple issues. However, this isn’t always going to fix things, and the code might appear again for complex issues.
Identify Any Visible Problems.
In some cases, visible problems can lead to an error code. This makes it crucial to inspect your unit for such problems including – blocked air vents, clogged coils, broken gaskets or door seals, a fluctuating power supply and even wrong temperatures.
Let’s look at the necessary adjustments you can make in such cases –
· Setting the right temperature for the fridge and freezer.
· Check the fitting of the power supply cable and the functioning of the wall socket.
· Lastly, clean the refrigerator coils and door gasket once every two to three months.
If this doesn’t fix your problem, it’s time to check the Instructions Manual.
Check the Instructions Manual.
The instructions manual of your model is designed with detail. It will help you understand the parts, functioning, usage, and even basic repair and troubleshooting for your fridge. This includes a look at error codes, what they indicate and what you can do to fix them. This makes it crucial to go through the instructions manual for your refrigerator model. If you don’t have a physical copy, you can find a digital copy on the manufacturer’s website by entering your model.
Contact A Fridge Repair Service.
As mentioned, you can try to resolve simpler issues with the help of some inspection, troubleshooting and maintenance. However, when it comes to complex issues and error codes that might indicate a big problem – a repair service is the answer. As they are equipped with the right tools and knowledge, a team of experienced repair professionals will be able to easily identify and resolve the issue from the error code. Get rid of error codes and allow your refrigerator to work efficiently with the Best Fridge Repair Service today!
#fridge repair#lg fridge repair#fridge repair services#fridge#fridge repair near me#best fridge repair service#best refrigerator repair near me
0 notes
Text
Don't Get Caught in the Heat: Troubleshooting Faulty Capacitors and Relays
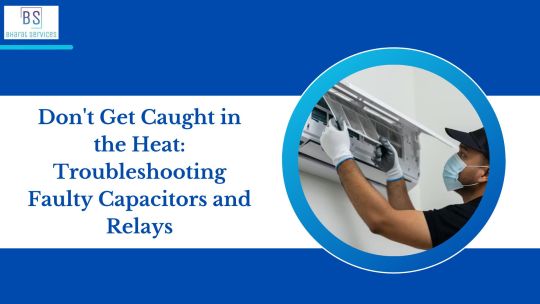
You could have a jammed relay if your air conditioner won't switch on despite the fact that you've confirmed the AC has electricity from your circuit breaker. You need to call an AC repair service expert. In the sweltering heat, a jammed relay might cause your air conditioner to malfunction abruptly. We will demonstrate how to unstick a relay on an AC unit in this article.
How Does a Relay Work in an AC Unit?
When you require chilly air, you may turn on and off your air conditioner's engine using a relay, which is a switch that manages the power flowing to it. An AC contactor or relay is used by your furnace, heat pump and central air conditioner.
The relay shuts when the air conditioner is turned on, allowing power to reach the unit.
The relay opens and breaks the circuit when the air conditioner is switched off, cutting off power to the air conditioner.
Your HVAC system's exterior unit is where you may find the relay. Depending on the type of relay and how well you've kept up with maintenance on your HVAC system, the relay plays a significant impact on the energy efficiency of your air conditioner.
The air conditioner may not turn on or may abruptly shut off if the relay becomes locked in one position because the fan and blower motor won't receive the electricity they require to function.
The major reason for electrical power issues with your HVAC system is a bad relay. Other elements, though, could be in play. For instance, the electrical control board might be malfunctioning or the blower fan could be broken. Look for the best AC repair service near me on google.
How to Unstick a Relay in Your AC
Always switch off power to the device at the circuit breaker before you begin working if you decide to take the risk of fixing your air conditioner relay yourself (which we don't advise).
Relay Cleanup
The relay contacts may become jammed if they become unclean. Dust, biological matter, and other airborne contaminants can cause relays to get filthy.
After removing the relay, use a rag and some vinegar or alcohol to carefully wipe the connections. Masking tape should be placed over the relay's wires before cleaning it to guard against damage.
Avoid covering the relay too deeply with alcohol, and completely rinse off any leftover alcohol from the relay. Before reinstalling the relay, let it completely dry.
Switch Out the Relay
You may need to replace the complete component if cleaning the relay didn't work or you find a broken thermostat wire.
You must get the precise replacement relay made for your particular machine. After receiving the replacement component, you will take out the old relay and install the new one in its place. Have your screwdriver handy afterwards since the old relay could be secured with screws.
Guidelines For Avoiding Getting Your Relay Stuck in the First Place
Use these straightforward suggestions to avoid a jammed relay in your air conditioner machine to stop a problem in its tracks.
Be Careful When Using Your Air Conditioner
Your relay will become jammed if your air conditioner is used excessively. Heat is produced while air conditioners are in use. If the relay material is exposed to too much heat, it might melt and congeal, leaving the relays trapped.
Keep The Outside Unit Tidy
You can't guarantee that no debris will get inside your outdoor unit. You may try your best to keep the space surrounding it tidy, though. Furthermore, as part of your routine HVAC maintenance schedule that you carry out twice a year or every spring and autumn, you should clean the coils in your exterior unit and replace the air filter in your HVAC system.
When You Need Air Conditioner Repair Service Specialist
A jammed relay won't automatically start functioning again. It will need to be fixed or replaced. Even though we encourage people to educate themselves about their HVAC system, if you have a stuck relay that is affecting the electricity in your house, you may want to hire a professional air conditioner repair service. Avoid subjecting oneself to a jarring or dangerous situation.
#best ac repair company#ac repair service#ac maintenance#ac#best ac repair near me#best ac repair service
0 notes
Text
The Hidden Dangers of Ignoring Appliance Issues: Why Prompt Repair is Essential

There is never an opportune moment for your kitchen equipment to fail. In fact, they always seem to break down when you need them the most. That’s why appliance repair service is always in need. Because appliance issues may create major disruptions in your everyday life, it's critical to keep an eye on them at all times.
Check Your Appliances On a Weekly Basis
At least once a week, ensure that all of your appliances are in good operating order. This allows you to immediately detect any problems and correct them before they worsen. If you wait too long to inspect your kitchen accessories, they may become useless.
By conducting some much-needed maintenance, you may avoid expensive appliance problems in the long term. Repairing old equipment is always less expensive than purchasing new ones.
Keep an eye out for any damage to your kitchen equipment' electrical wiring.
You Should Never Ignore These Problems
Any issue with your kitchen equipment should be addressed as soon as possible. Running numerous broken appliances at the same time, whether it's the fridge, dishwasher, toaster, or microwave, can pose serious safety risks. However, there are several things you should be aware of in order to avoid risk.
Gas Leaks
Gas leaks in the wrong parts of your home might create explosions. Do not use gas-leaking appliances until a professional has fixed them and given you the all-clear.
Water Leaks
Water damage or leaking is a major source of worry, particularly near electrical components. Turn off surrounding appliances and move them out of the way until the area is dry.
Electrical Issues
Repair any exposed wire as quickly as feasible. Use the appliances only once the wiring has been changed.
Never try to fix these appliance problems on your own. Instead, unplug the damaged gadgets and contact an appliance repair service expert.
We all have different gadgets that we use on a daily basis. These are the things we cannot live without. So much so that when they break or cease operating one day, we feel bereft.
Although appliances seldom break without giving us a warning sign, it's always a good idea to keep an eye on them. Many of us are guilty of disregarding appliance problems when we see that warning symbol. We don't call a professional because we don't have time, and we keep using them till they break.
Why Should You Not Ignore Appliance Problems?
Allowing your appliances to deteriorate may need a complete replacement.
It is usually preferable to maintain and repair your household appliances rather than replace them entirely. Replacements can be expensive, and it may take some time to find appliances that are identical to your current ones.
We all become accustomed to certain pieces of equipment, and switching to a different manufacturer can be challenging. Taking preventive actions will help you avoid having to spend a lot of money on brand new equipment later on. Fixing problems sooner rather than later may save you a lot of time, money, and effort in the long run.
It is critical to contact a competent technician as soon as you notice difficulties. Perhaps your cooker is taking significantly longer than normal to boil water. Perhaps the cancel button on your microwave has stopped working.
Or perhaps your refrigerator is no longer keeping your food cool. All of these are indications that something is significantly wrong with your appliances, and it's better to have these issues resolved before it's too late.
Endnote
Stop ignoring appliance malfunctions! Contact or search for the best appliance repair near me now to speak with a member of their helpful staff about having your household appliances examined to identify and address any problems.
#home appliances repair services#home appliances maintaining#home appliances repair service near me#home appliance repairing#home appliance maintenance
0 notes
Text
Signs Your Washing Machine Needs Repair: Don't Ignore These Warning Signs
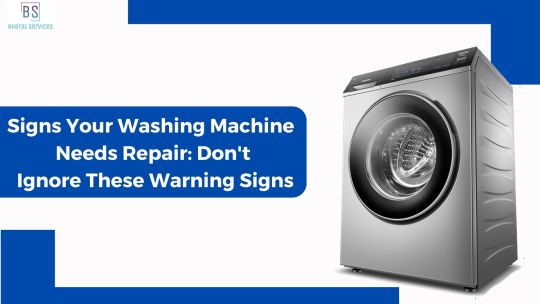
Many times we ignore some signs of the washing machine and use it thoroughly without knowing the harmful effects of avoiding them. Therefore, if your washing machine has a problem, it could disrupt your household. Look for washing machine servicing.
Fortunately, warning signals of imminent problems are frequently present, allowing you to take action before a significant defect develops.
Water Around the Machine
The most glaring indicator that your washing machine needs repair is water around the appliance. A developing pool of water may indicate that a water supply line, seal, or tub has broken. Fortunately, a skilled appliance repair specialist may find it rather easy to fix these problems.
Don't ignore the problem if you do see water surrounding the machine because doing so might cause water damage to your property in addition to allowing the problem to worsen and become a more major error.
Unclean Laundry
When your laundry doesn't come out of the washer perfectly clean, it may be really upsetting. However, it can also be a sign of a deeper appliance issue. The problem can be the result of a broken component or sensor problem.
The first thing to be sure of is that you didn't use too little detergent or overload the washing machine with clothing. If this isn't the case, you'll probably require nearby washing machine repair expert assistance to identify the problem.
Unusual Sounds
You're probably accustomed to the smooth humming and other sounds that your washing machine cycle makes. So, it is cause for concern if the appliance starts to creak or grind.
When the machine is overfilled, the tub tips out of equilibrium, which often results in thumps. Squeaking or grinding sounds, on the other hand, may be a sign that a component is broken or that pieces are being removed, which would impair performance.
Unfortunately, these problems won't go away on their own, and if you ignore them, you risk allowing a catastrophic failure in which the malfunctioning component causes irreparable harm.
The Drum with Water
Your garments should be practically dry when the load is done since they have been thoroughly rung out. Therefore, there is a problem if the clothing is drenched in water or if there is water in the drum.
Although you may wring the clothes out by hand, this problem has to be fixed, preferably before your next cycle of laundry.
No Water
On the other hand, there is a serious issue if there is no water filling the drum when you switch on the machine. Although you might be able to locate a loose connection at the machine's rear, a skilled technician will often be required to fix a sensor problem.
The washing machine must be turned off and a repair call must be made since, obviously, there must be water for it to wash.
Error Codes
Finally, a screen display is probably a feature of a newer machine. The sensors of these models enable them to conduct cleaning tasks effectively. An error code is generated by faulty sensors, and this code is displayed on the display.
Your owner's handbook could have a reset for the error code in some circumstances. A little object, like a sock, being stuck in the filter, for instance, may result in an error code. It will reset the device if you remove the obstruction and open the filter.
The owner's handbook will often advise you to get in touch with a Washing Machine repair near me to solve the code.
You can count on your home appliance repair technician's experience to help you if your washing machine is giving you problems.
#washing machine repair#washingmachine repair#washing machine repair home service#washingmachine#washing machine repair service
0 notes
Text
The Benefits of Timely Microwave Repair: Saving Money and Preventing Further Damage

Electrical appliances play a vital role in our fast-paced modern lifestyles. These appliances serve a crucial role by making our life simple and effective, if they get damaged then calling microwave repair is essential. If they experience wear and tear just like everything else, and this is when their maintenance is necessary.
Any appliance has to have prompt and efficient maintenance. However, the reality is that not everyone does this, which leads to shortened appliance lifespans. Understanding the long-term advantages of prompt appliance repair is crucial for them.
Convenience
When a household appliance fails, the majority of homeowners immediately decide it's time to buy a new item. There is a significant need to explore a selection of household appliances, choose one with the right specifications, view it in person, shop around for the best deal, and arrange for doorstep delivery.
Money Saved
The early indicators of appliance deterioration are typically found to entail little difficulty and little expenditure. However, these appliances suffer significant damages and need high costs if they are not serviced in a timely manner.
You can opt to cut costs and inconvenience by doing appliance repair as soon as possible.
Choosing expert appliance repair over buying a new appliance is frequently more economical. The cost of fixing a broken appliance is often far lower than the price of purchasing a new one.
Knowledge and Expertise
Professional home appliance repair specialists have the skills and knowledge necessary to successfully fix a variety of equipment. They receive thorough training and keep up with the most recent developments in technology.
Their comprehensive knowledge of electrical systems, appliance mechanics, and troubleshooting methods enables them to make exact diagnosis and fixes. You may avoid potential DIY repair problems and make sure that your appliances are fixed professionally and safely by relying on their knowledge.
Extended Appliance Lifetime
Your home appliances' lifespan is considerably increased by routine maintenance and prompt repairs. Minor faults left unattended might develop into more serious ones, resulting in irreparable harm and a shorter lifespan for the appliance.
Professional home appliance repair services can spot little issues and fix them before they become more serious, ensuring that your appliances continue to work effectively for many years to come. You can extend the life and advantages of your appliances by spending money on maintenance and repairs in addition to saving money on unnecessary replacements.
Safety
Due to a defective part or cable, some electrical gadgets might be a little harmful. Appliances that are properly maintained allow professionals to look for any potential issues that might endanger your life.
For instance, let's say your microwave has barely any noticeable damage. When doing a routine microwave repair, the best Microwave repair service will look for any indication of this and fix the issue before it becomes worse.
For routine cleaning and maintenance as well as appliance repair, always consult a professional. In the long term, this will unquestionably boost machine performance.
Quick and Effective Repairs
Professional home appliance repair services provide prompt and effective fixes for broken equipment. These repair specialists are equipped with the knowledge and skills necessary to identify and resolve a broad variety of problems with different appliances, including refrigerators, washing machines, ovens, dishwashers, and more.
They can swiftly locate the source of the issue and make efficient repairs, minimising the amount of downtime for your home. You can quickly get your appliances back up and running by leaving appliance repairs to the experts.
Endnote
Home appliances are a necessary component of daily life since they facilitate and expedite domestic chores. However, when these devices malfunction or fail, it might interfere with our daily activities and be inconvenient. Home appliance repair services can help in this situation. The advantages of professional home appliance repair and how it may help you save time, money, and frustration. Look for microwave repair services near me for resolving your bad conditioned microwave.
Professional experts can precisely identify the problem, swap out any damaged parts as needed, and restore the appliance's performance.
#microwave repair service#microwave oven service#microwave oven repair#microwave repair services#microwave
0 notes
Text
A Guide to Washing Machine Repair: What to do if it isn't spinning or moving properly?

After a long week, even the thought of having to manually wash leftover dirty laundry is tiring, isn’t it? It’s a no-brainer that this is due to the convenience that a washing machine brings. But in the unfortunate event that your washing machine stops spinning or moving properly, things can get frustrating. Worry not! We’re here to help you figure out what’s wrong, and what steps you can take to conduct effective Washing Machine Repair. Let’s get started with our guide.
Why is your Washing Machine not Spinning?
There are several factors that can cause your washing machine to not function and spin, including some that can be fixed easily, others might be an indication that you require washing machine servicing. Let’s look at some common causes and what steps you can take to deal with them.
Common Causes of a Stuck Washing Machine.
A Faulty Power Supply.
Many times, a damaged power cable, voltage fluctuations or insufficient power might cause your washing machine motor to stop spinning. To fix this, you can check that the washing machine is plugged in properly and that the power cable isn’t damaged. In case of voltage and power issues, try using a different power socket.
Open or Misaligned Lid.
The washing machine mechanism is designed in a way that requires the lid to be closed and interlocked properly for the washing machine to start its spin cycle. If it’s a simple problem with the lid, closing it properly or adjusting it might fix your problem.
Unbalanced and Excess Load.
An unbalanced or excessive load will put unnecessary stress on your machine’s motor. This might cause the motor to be harmed or stopped. In this case, unplug and stop the washing machine so that the motor isn’t damaged further.
Even spreading the laundry in your machine or removing some clothes might fix this problem. After doing so, plug in and try starting a spin cycle again, your problem might be fixed.
Incorrect use of Detergent.
A common yet overlooked cause of the washing machine not spinning is if your detergent use is not per the washing machine guidelines. If you accidentally put too much detergent, there might be excess bubbling and suds in your machine. This might cause it to detect an overload and not spin.
Therefore, to prevent such errors, it’s necessary to read the detergent use guidelines from your unit’s manual and ensure that you use the right type and amount of detergent for each wash cycle.
Still stuck?
These were 3 common factors behind a stuck washing machine. If your problems were solved by the above inspections and steps, you’re good to go! However, if your washing machine is stuck and the problem persists, there might be a problem with components such as the lid sensor, motor, or power supply. It’s not easily detectable, hence it’s important that you contact repair professionals.
Seek the Best Washing Machine Repair Service.
Licensed repair technicians are highly skilled and well-equipped, which allows them to quickly detect and solve any issues with your washing machine. To continue your laundry cycles with ease, it’s essential to contact a team of Washing Machine Repair professionals today.
#washingmachine repair#washing machine repair home service#washing machine repair service#washing machine repair#washingmachine
0 notes
Text
How Can I Repair Static Or Distorted Sound On My Television?

One of the most frequent issues is static or buzzing sound on TV, which affects a lot of people. Look for a TV repair service expert when the situation gets worse. Your TV's functionality is not significantly impacted by buzzing. However, you should be concerned if the TV is continuously loudly buzzing.
The buzzing noise is mostly caused by the static effect on television speakers. The development of a ground loop on the TV circuit, however, is frequently more prone. In addition, poor power supply, bad cable connections, and hardware component failure are to blame.
How to Fix Buzzing or Static Sound on TV?
Unless there is a significant hardware problem, a TV's static/buzzing sound can typically be rectified without too much trouble. You should be aware that continuous TV viewing might result in the overheating of internal components like transformers, which may be the cause of a buzzing noise, before trying any more repairs. Please give your TV some time to standby in order to solve the issue.
Even some expensive TVs include cooling fans, which may buzz if dust and other debris accumulate. Therefore, you should consider cleaning such fans if you wish to reduce the buzzing sound.
Fix Speaker Problems With The Help Of Best Tv Repair Near Me Option
Static noise is often generated by your TV's speakers. There is a possibility that either the speaker has malfunctioned or that the cable connecting your TV's main board to the speakers has worn out.
To check if the issue is coming from the speakers, first lower the volume down to the lowest level or mute the TV. Check to determine whether the buzzing is still audible. The speakers are likely to blame if the buzzing ceases.
In such a scenario, you could try connecting and using the external speakers. Alternatively, if you wish to fix the built-in speakers, seek best tv repair near me expert assistance.
Check Your Cable Connections and TV Channels
The station you are watching might also make a buzzing noise. Most frequently, a cable provider issue is to fault for this. After determining whether the buzzing sound affects all TV channels or simply one, notify the cable company of the problem.
The same thing may occur if the coaxial, HDMI, or RCA cables that connect your TVs to your source device break out. Please make sure the connection is reliable and secure. To determine whether the wires are broken, a fresh cable can be obtained and utilised.
Identify Source Device Issues
Static sound on the TV might also be brought on by the source device you are using for streaming. To isolate the TV, please unplug all connected source devices, including set-top boxes, DVD players, game consoles, and other devices, then check to see whether the problem is still present.
If there is no buzzing, the source device is most likely damaged. You have two options for fixing the problem: either switch to the next source or have the current source device replaced.
Examine the Interference and Brightness Levels
The buzzing sound emanating from the TV may potentially be the result of increased brightness levels. As the brightness is raised, the power consumption of the backlight abruptly rises. The buzzing sound is eventually made when the capacitors on the backlight inverter board start to consume too much power.
As a consequence, suitably change the brightness level on your TV. If the buzzing persists even after you have decreased the brightness, however, there can be other explanations.
Be sure that all the safety precautions can be taken by your end. Also take care to not do the task which you have no proper knowledge of. So, if possible, bring the TV to a shop for expert repair or book home repair by searching for the right TV repair near me.
#lg led tv repair#tv repair near me#top tv repair#tv repair services#led tv repair service#best tv repair near me
0 notes
Text
Why Does My Fridge Have Excessive Frosting? Understanding the Root Causes

Have you ever opened your refrigerator and questioned why the rear wall is slick with moisture? Condensation is what you're seeing, and it's perfectly natural and typically safe. Your Refrigerator needs a repair.
Ice accumulation outside of the freezer unit is not typical in the majority of contemporary refrigerators. You should act quickly to remove any large chunks of ice that are developing on the wall of your refrigerator.
Continue reading to learn more about ice accumulation in the refrigerator and solutions.
Why Does My Fridge Have Ice Buildup?
There is always a potential that moisture will build up on the interior walls of your refrigerator, particularly at the rear. This is because cold air doesn't contain as much moisture as warm air does.
More moisture is removed from the air as it gets colder. The surfaces of your refrigerator are then covered in that moisture. Since the rear of your refrigerator usually has the coldest air, moisture generally collects there first.
But if you notice ice forming on the interior of the refrigerator, it may be a sign that something isn't right. Normal moisture is beginning to freeze, which may cause issues with the unit's ability to regulate temperature. Additionally, it can cause the appliance to malfunction.
How to Hand-Defrost a Refrigerator?
Several factors can cause ice to develop. These may occasionally be one-time or transient reasons, such as climatic conditions or how you stocked the refrigerator. If you've been opening and closing the door more frequently than usual, ice may have accumulated.
If you notice ice accumulating, you might wish to defrost the refrigerator and then monitor it to see if the problem reappears. Recurring ice would be a sign of a more serious issue.
Because every appliance is different, always refer to the manufacturer's instructions for more detailed advice on what to do if your appliance has ice accumulation.
Pro Tip
If you've already gone through the trouble of emptying your refrigerator, take advantage of the opportunity to thoroughly clean it. So that when you get it going again, the interior is also clean and gleaming.
Guidelines for Lessening Ice Buildup in the Fridge
You don't want to have to do manual defrosting too frequently. Whether you have a full-size refrigerator or a minifridge with ice accumulation, here are some things you can do:
● Close the doors as much as you can. Every time you open the fridge door, warm, humid air is let inside. This can make your refrigerator work harder and cause more condensation.
● To keep the doors closed, make sure your refrigerator is level.
● Verify the gaskets and hinges. If new components are required, order them to make sure the doors can close tightly and remain sealed.
● To avoid moisture in the refrigerator, allow hot dishes to cool before storing them.
● To lessen the moisture in the main area, store goods that are high in water content, such as fruits and vegetables, in the crisper with humidity control.
Signs You Might Need a Best Refrigerator Repair Near Me Professional
It's possible that you only need to conduct some normal DIY maintenance if your refrigerator has water or even ice. Ensure that everyone in your home adheres to the above-mentioned excellent fridge practises.
However, ice formation might occasionally be a sign of a more serious problem. It's possible that the appliance itself has to be fixed by the best refrigerator repair professional near me. In other situations, you might want an electrician to make sure the power is running properly through your kitchen. You should call a repairman if ice formation is a persistent problem.
Having a plan in place allows you to rest easy knowing that covered breakdowns may be fixed by calling the 24-hour repair service. Check out the plans that are offered in your area.
0 notes
Text
Step by Step Process to Fix Vertical Lines on TV

Modern living would not be the same without smart TVs, which provide a smooth method to access a range of entertainment including streaming services, cable TV, and video games. They give you an easy and handy method to watch your favourite content by bringing the internet and a variety of applications right to your TV.
Smart TVs, like all other technologies, can experience a variety of challenges, from human mistakes to technological difficulties. Therefore, there are some times you must give a call to the right TV repair service expert to do the task correctly.
Why Does Your TV Screen Show Vertical Lines?
The occurrence of vertical lines on the screen is one of the frequent issues experienced by users of Smart TVs. Several factors, including faulty technology, excessive use, or even TV damage, may be to blame for this.
We'll go deep into this topic in this post and offer you a clear explanation of why vertical lines arise and how to fix them.
Here are a few potential causes of vertical lines on a Smart TV to start.
● Vertical lines may appear on the screen as a result of loose cable connections, such as those in the HDMI or video cables. Make sure the connections are firmly attached by checking them.
● Vertical lines may develop on the screen as a result of overheating. Ensure that the area where your TV is located is well-ventilated and that there is adequate room around it for air to flow.
● Faulty LCD panel: If the vertical lines continue even after you have checked the cable connections, it may be due to a faulty LCD panel. This is a frequent problem that can only be resolved by an expert repair service.
● Vertical lines on the screen can also be brought on by software problems. To check whether it fixes the problem, try upgrading your TV's firmware or putting it back to its factory defaults.
What Should You Do If the Lines on Your Smart TV are Vertical?
Understanding the nature of the issue is essential to figuring out the reason for vertical lines or ghosting on your itel TV. You can also consult with the television repair service expert in this case. Here are some possible problems and the most likely fixes for them-
Moving or Wavy Lines
If you see lines that sway, move, or appear wavy, there may be a loose cable connection. In this situation, reseating your wires and making sure they are firmly attached would be the best course of action.
Lines That Are Straight or Stationary
If the lines are straight or stationary, the TV could have an internal issue. You might need to contact a professional repair provider in this situation.
Several Pictures One on Top of the Other
Multiple pictures stacking on top of one another is known as ghosting, and it can be brought on by either a faulty cable connection or defective internal components. If the problem is a result of a loose connection, reseating the wires will fix it; however, if the problem is inside, expert repair may be necessary.
Vertical Lines
A faulty cable connection is typically indicated by vertical lines. Simply reseat the cables and make sure they are firmly attached to correct this.
Let me now provide you a few potential fixes that could assist in resolving the problem-
Inspect the Cable Connections
If the vertical lines only show on a few channels or when using a certain device, there may be a problem with the cable connections. To make sure the wires are firmly linked, disconnect them first, then reconnect them.
Reset the TV
Resetting your TV might occasionally fix small software issues that result in vertical lines. For information on how to restore your TV to factory settings, consult the user manual.
Look for Interference
Interference from other electrical equipment might occasionally cause vertical lines to emerge. To test if the lines go away, try disconnecting other devices like gaming consoles or cable boxes.
Update the TV Software
If the vertical lines continue, you might want to update the TV's software. For details on how to update the software, see the TV's settings or the manufacturer's website. If the problem isn’t solved, search for the best tv repair near me services option on google. You might get some wonderful experts there to assist you.
Have It Fixed
If none of these fixes work, there may be a hardware issue that has to be fixed. To get your TV fixed, get in touch with a manufacturer-approved service facility.
To identify the root of the problem and guarantee that the TV is fixed properly, it is preferable to have the TV inspected by a professional if the vertical lines still appear despite trying these fixes.
#lg led tv repair#tv repair near me#tv repair services#top tv repair#best tv repair near me#led tv repair service
0 notes
Text
The Effects of Humidity on Air Conditioning Performance: Tips for Optimal Indoor Comfort

Indoor comfort can be significantly lowered by high humidity. It feels hotter the more moisture there is in the air. The summer is often when humidity levels are maximum.
Additionally, you could find yourself continuously changing the thermostat to be cool since the humidity makes you feel warmer. As a result of doing this more frequently, your home's cooling costs will rise as the cooling system works harder to keep your house cool. Therefore, you must contact the best AC repair service.
Fortunately, a dehumidifier lowers interior humidity and facilitates the cooling of your City-area house by your air conditioner.
How Humidity Affects the Performance of Your AC?
In reality, most air conditioners don't produce cool air. They take heat and moisture out of your house instead. When the humidity is high, it takes more energy for the AC to get rid of all the extra moisture.
If the AC isn't equipped with enough cooling power, it won't be able to completely drain the moisture, which will impair interior comfort.
In essence, high humidity makes it very difficult for the AC to have a cooling effect. To keep the house cold, the AC must run nonstop. Due to the excess moisture in the air, it won't feel cool even when it is cool.
This significantly increases system wear and tear, which may necessitate costly repairs and replacements. Always look for the best AC maintenance expert that will not increase your costing later on.
If you want to determine whether your house has excessive humidity levels, search for the following symptoms:
● Fragile air
● Foggy windows
● A musty smell
How to Prevent High Humidity?
Using a dehumidifier is among the simplest methods to avoid becoming overheated and manage high humidity levels. Your house will feel colder as a result of the device's removal of moisture from the air.
Your home will be cooler since the AC won't have to work as hard, which will increase cooling effectiveness and save cooling costs. An existing HVAC system may frequently be supplemented with a dehumidifier.
You may discuss the addition of a dehumidifier to your current cooling system by searching one of the best AC repair services near me.
Most individuals are aware that high humidity throughout the summer can make them feel much hotter. It should not be a surprise that it significantly affects how well air conditioning systems work.
Most people are unaware that humidity also has an impact on heating systems. It is harder said than done to achieve ideal indoor comfort when the humidity in a home is excessively high or low.
The greatest HVAC systems available today have humidifiers and dehumidifiers to regulate relative humidity levels.
Tips for Optimal Indoor Comfort
Heat and humidity can have an impact on the outdoor unit or condenser because the heavier, moisture air can carry more dirt, dust, and other debris. This material can accumulate in the coils and fins of the unit. Long and inconsistent run times might potentially cause the physical unit to wear down too quickly.
How then should you maintain your outdoor gear? Self-cleaning the outside unit using a garden hose and perhaps a coil cleaner has two advantages for the way the system functions.
First, clearing away dirt and debris makes the system operate more effectively, which might even result in decreased utility costs.
The air that flows through the condenser coils is also temporarily cooled by misting, which enables it to absorb more heat and chill your house more effectively.
The impact on your unit is comparable to how a cool wind feels while you are perspiring.
Schedule Routine AC Maintenance
Last but not least, routine maintenance is advised to make sure that any problem that can develop in the system as a result of excessive indoor humidity is promptly addressed. If nothing is done, the system might suffer significant harm and need expensive repairs.
For further guidance on coping with high humidity levels, contact an AC maintenance expert.
Endnote
In conclusion, excessive humidity levels have a detrimental impact on air conditioner performance and increase the frequency of maintenance. You shouldn't overlook the issue as doing so might result in expensive AC repairs.
For expert assistance and repairs for your air conditioner, call an AC repair expert.
#ac repair service#best ac maintenance#AC repair near me#best ac repair service#Air conditioner services
0 notes