
aniamajewska
Anna Luiza Majewska HND2C Photography
235 posts
Don't wanna be here? Send us removal request.
Last Seen Blogs

solaris-reigns
So Many Fandoms, So Little Time

patch-ie
good grief

cyberghost-vpn-crack-xe
🏅 CyberGhost VPN PORTABLE Crack PORTABLE Crack

marketing1136
Untitled
Text
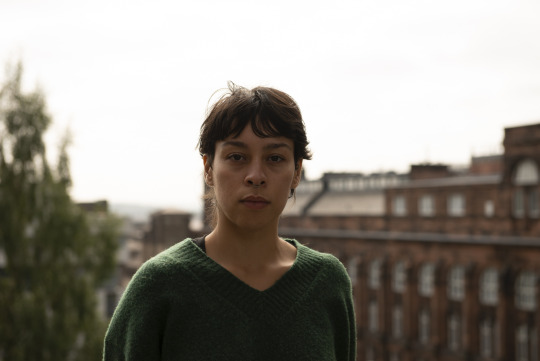
Dystopian fashion
Editorial fashion collaboration project. Theme - dystopian fashion.
youtube
4 notes
·
View notes
Text
Into the Dark
Personal project for Graded Unit
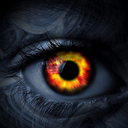
Project "Into the Dark" is self-portraiture series of images, that I created for my Graded Unit. Inspired by the works of amazing photographer Brooke Shaden and based on real experiences, not only personal, I wanted to create a story that shows the path that someone is going through in life. Everyone has some ups and downs, but the point is to keep going, not giving up. I would like to raise awareness that, despite everything, we should have hope in ourselves and not be afraid to try to change something, or ask for help if we need it. It is not a shame. The most important thing is that people should get know that they are not alone. Loneliness is dangerous and leads into many disorders. People get depressed, seek solace in alcohol or drugs, they cannot find motivation, and lose their meaning of life. In addition, after the traumas we experience as children, depression or anxiety often has an impact on our adult lives. When someone is in doubt and have no self-confidence, it is very important that they get the right support. It is also important that we do not belong to anyone and we do not have to accept a fate that does not suit us. We should fight for ourselves and follow the dreams.
youtube
0 notes
Text
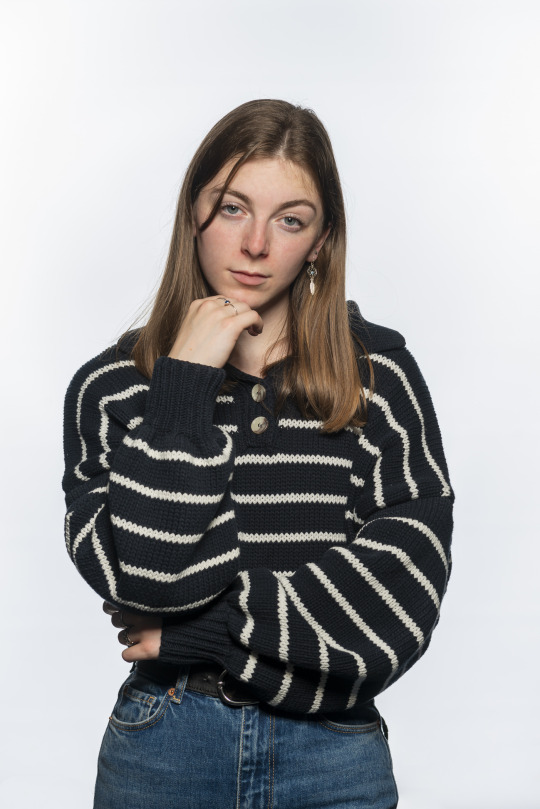
Week 3 - studio lighting exercises

Lighting experimentation
Canon EOS 6D MarkII, ISO100, f/6.3, 1/125s. 85mm
Low key, loop lighting technique. Black background lit with the lowest power and strobe pointed ground. Key light set at 45º above the model. I used snoot light modifier so the light was more focused, not diffused. Image was edited in Lightroom were I did basic correction. Then I opened it in Photoshop for detailed retouch and got back to Lightroom and adjusted colours.
Clean white
Nikon D800, lens 24-70mm at 70mm, f/7.1 at 1/125s. ISO100. Back lighting 1.5 stop brighter than the key light. Model further away from the background and I used two black screens on both sides of the model to reduce the flare. Key light with beauty dish and fill light with soft box. Lightroom basic edition and I opened image in Photoshop for skin retouch using clone stamp tool and heal brush. It was not exercise for white background, so I didn't make it pure white. I used select subject tool to create a mask to cut off model and place on new background.

Background
I found background that would go well with model. I was looking for stripes pattern. Image taken at the same focal length as the portrait 70mm and at the same level. I focused on a couple steps in front of the fence, so it would be like a model was standing there and fence looks soft, while model is sharp. I adjusted colours for more warm tones. I think that look really good. Natural light completes my composition.
1 note
·
View note
Text
Week 2 - flash on location
I used speed light flash off the camera few times in the past but quite often I use it on the camera when I shooting events. I had some problems with settings but they were sorted shortly. We had a task to try different settings for flash off the camera so we could see the difference between fill light, full flash and overpowered flash. The weather wasn’t great on that day in the morning, so we stayed in college campus and we tried to find bright background for our subject. I shoot Maria and Lee in the front of big window using my camera Nikon D800 and college lens 105mm and my speed light flash Nikon SB900 with umbrella. The other issue was the reflection on the glass and this something I need to figure out how to avoid it if I shoot against the window again.

In the afternoon class we went outdoor for location shooting with flash. During the break I found the article about Nikon speed light flash off the camera to make sure all settings are correct on mine.
https://photographylife.com/beginners-guide-to-nikon-creative-lighting-system?fbclid=IwAR2eepJ4UUY3NZC4El-KLFY7oFH6NB7obg01sfA3m4Swo9oyZXVQ71kzWLo


Outdoor shoot using 2 flash units off the camera. 1st flash in the front of Maria on her right side, 2nd flash on the back, that gives nice touch of light on her face and shoulder on the left. Image was quickly optimised in Lightroom. Camera settings f/32, ISO 100, 1/125s, 1st flash in TTL mode with umbrella, 2nd in manual mode at 1/16 of the power.

Dramatic portrait of Lee. 2 flash units off camera. f/32, ISO 100, 1/125s. 1st flash unit in TTL mode, 2nd flash unit - rim light, in manual mode 1/16 of the power. 1st flash unit was moved closer to the subject and used directly without diffuser.
Taking into account the camera settings in the photo with Maria, I should get a similar effect in terms of the sky in the background as in the photo with Lee. However, there were unexpected problems that the flash didn't want to flash every time I pressed the shutter button even though I didn't shoot bursts so I have to figure out why.
2 notes
·
View notes
Text
Week 1 - studio resources
I did a little search in the internet about corporate head shot to learn more about it. I found out that the best camera settings for that kind of photography should be: lowest possible ISO for the best image quality like ISO100, aperture between f/4 and f/5.6 because it creates nice depth of field keeping eyes and entire face in focus while ears and background are little softer. Shutter speed set at 1/125s is fast enough to shoot handheld and time that shutter remains open allows strobes light to reach the sensor and fill the frame. If faster shutter speed, a part of the frame will be dark. You should set the lighting to keep preferred camera settings. If the lighting is too bright, you can use ND filter to cut off the light instead of changing the aperture to smaller one.
Think of settings before you do the head shot:
- do the test shot for clean white background and shoot silhouette.
- set key light at 45º above the subject head
- place reflector on the other side as fill light
- set backlight (rim light) to cut off the subject from the background
- check if ambient light doesn’t affect your exposure
- use a grey card for correct white balance
- use floor markers, stickers for positioning your subject instead of moving lighting, ask your subject to move step back or step right or left depends were your key light is positioned.
Things to think about when shooting:
- position your subject quickly and make them feel comfortable
- speak to your subject and use your body to direct the subject, so they can mirror your movements
- make sure the subject has straight spine
- shoulders at level and flat
- face towards the camera and head pulled out of the chest and shoulders a little bit
- shoot landscape to keep shoulders in the frame
- use single auto focus, centre and re-compose the frame, turn all other auto focus sensors off
- watch the chin if it does not point towards the floor or up to the ceiling
- eyes in level and straight towards the camera
- the head in level and straight
- encourage subject to give you different expression so you could have selection of serious and happy looks to create some personality
- give your subject a choice what head shot they like, write the number of the image and your subject name on a piece of paper and take a shoot of the subject with this information in the front of them, so you will know which shoot did they choose and what you will edit.
Editing head shot:
- process in Adobe Lightroom
- find the image with grey card and target in to adjust the white balance
- copy white balance settings and paste it to the rest of the photos
- find chosen images and mark them with stars
- work on selected images, make sure skin tones look good, adjust exposure and anything you think you should do basically
- click lens correction to fix any distortions
- open image in Photoshop.
Photoshop:
- create new layer solid white and duplicate the background
- use the brush in 100% and make sure the entire of the background is filled with white
- create level layer and hold on “alt” and drag highlights until you see silhouette
- go back to layers and bring the true skin tones back
- use healing brush or patch tool to remove only things that appeared on the skin recently, basic retouch
- sharpen the image selectively, e.g eyes areas, lips
- lightly brighten the eyes using dodge and burn tools
- create curves layers and use it to add some more contrast
- save image as jpg and give it maximum quality.
0 notes
Text
Week 1 - studio and location practice portrait shoot - part 2
LOCATION
My group was lucky to have afternoon class at location shooting because the weather was better than in the morning. I took a few shoots indoor in the college in one location and rest of the photos was taken outdoor. I used led panel to lit the subject and mainly college gear Canon 5D and 85mm lens.
Location 1
Canon camera settings: ISO100, f/4 at 1/125s

Location 2
Canon camera settings: ISO100, f/8 at 1/250s

I changed shutter speed unnecessarily. I should leave it at 1/125s and reduce the aperture only.
Location 3
Canon camera settings: ISO100, f/5.6 at 1/125s

Location 4
Canon camera settings: ISO100, f/5.6 at 1/125s

Location 5
Nikon D800, 24-70mm at 70mm, ISO100, f/5.6 at 1/125s

Location 6
Nikon D800, 24-70mm at 70mm, f/5.6 at 1/125s was overexposed. I changed shutter speed of one stop to 1/250s, but the sky in the background was still too bright while the subject appeared too dark when I started to increase the shutter speed. Led panel was in full power but it was not enough to fill the shadow on Maria’s face.

I asked Maria to move a bit, so I could have the building in the background.

Nikon D800, 24-70mm at 70mm, f/5.6 at 1/250s
Location 7
Nikon D800, 24-70mm at 70mm, ISO100, f/5.6 at 1/400s
Conclusions
Led panels don’t have enough power to lit the subject in a very bright day and I regret I didn’t take reflector because I think it would do a better job. 85mm lens is great portrait lens better for head-shoot but using 24-70mm lens at 70mm is also a good option. Always check the battery level before go outdoor shooting with college gear and take spare ones.
1 note
·
View note
Text
Week 1 - studio and location practice portrait shoot - part 1
STUDIO
The first week in college, we had the task to take portrait photos of colleagues from our group in 6 different prepared studio setups, as well as find 6 locations and take pictures of them there as well. It was our first class in the second class with new friends. We could refresh how cool it is to work with studio lighting and get to know each other a little. There are edited photographs of Maria and Rebecca that I took in the studio.
Station 6
Station 6

Station 6

Station 6
Station 6

Station 4
Station 4

Station 2
Station 1

Station 3
Among the setups prepared in the studio, I like the one in the corner the most. I didn’t have a chance to take some shoots in the setup number 5 with speed-light flashes.
There are behind the camera shoots of the stations and lighting setups.
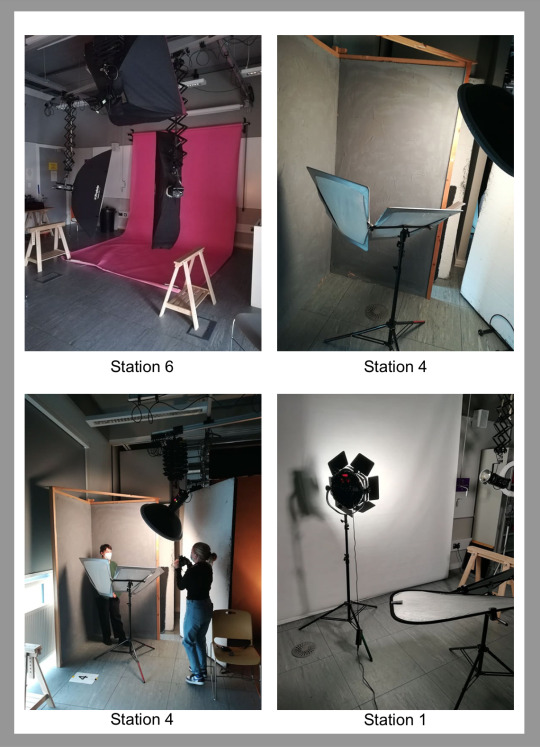
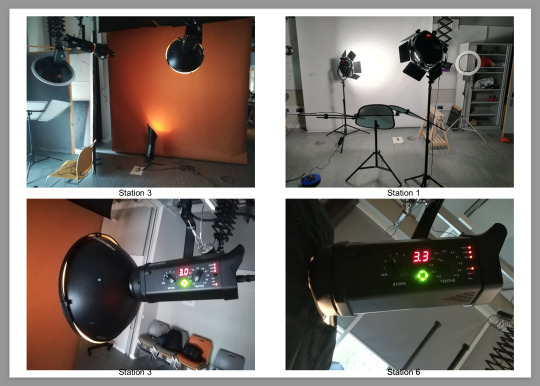

I worked on images in Lightroom at first for basic adjustments. Shoots I did at station 6 were edited in Lightroom and I tried some colour grading to see how it affects the background and skin tones. Image taken at station 4 has only basic correction and customised white balance settings, while the photos taken at stations 1, 2 and 3 after basic Lightroom processing went further to Photoshop, where I created a few layers to improve the background.


Conclusions
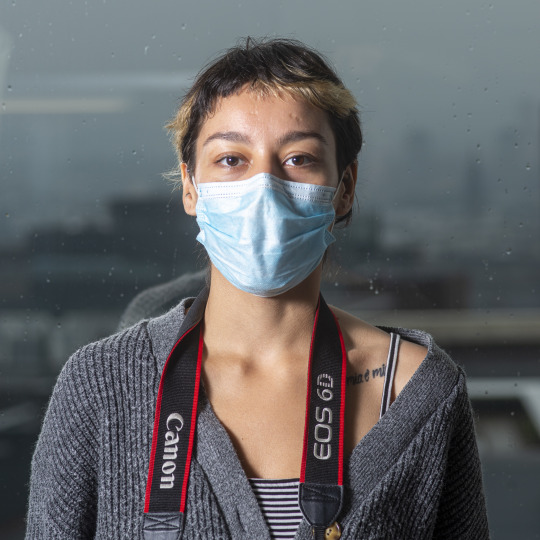
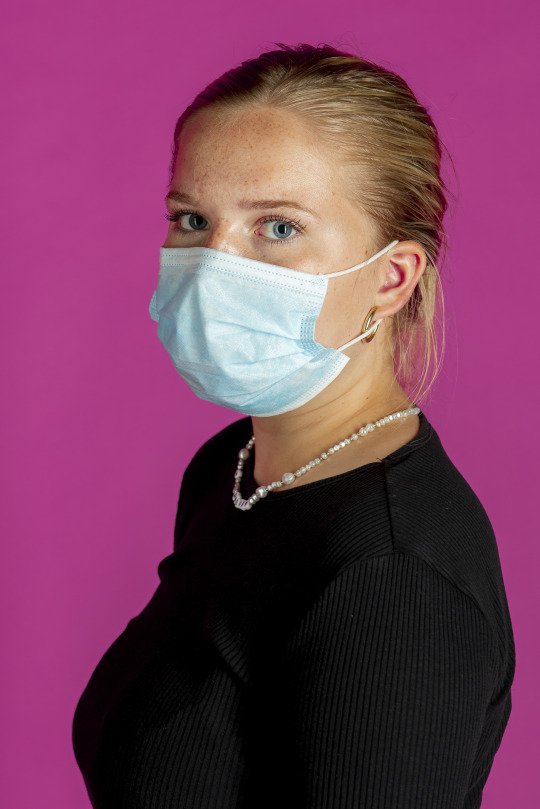
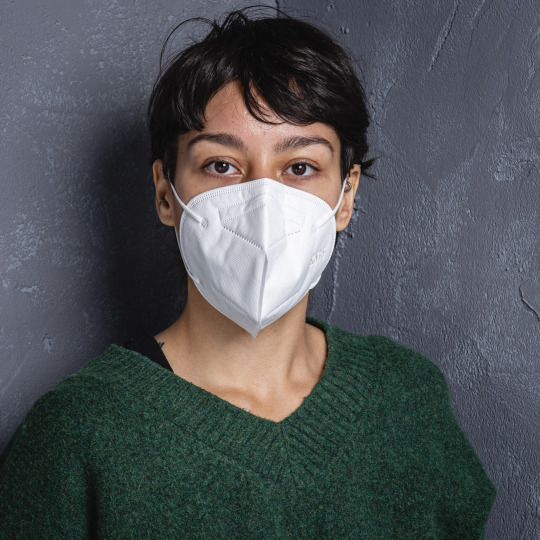
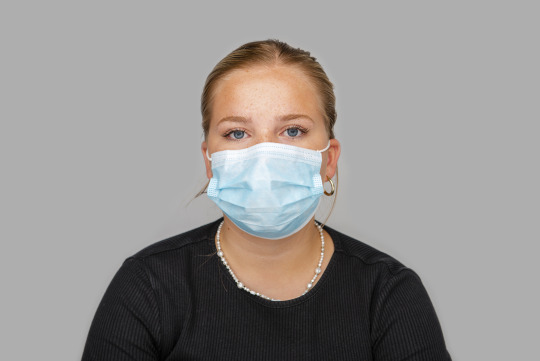
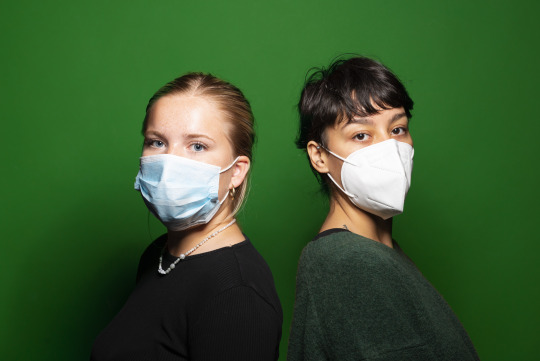
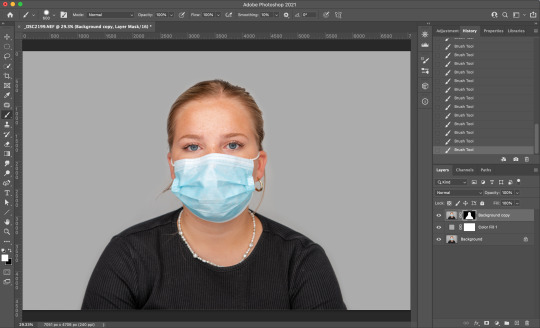
I’m quite happy with these shots, but there are a few things that I could improve when doing same shoots again, e.g the one in the corner. I should ask Maria to stand as much away from the background to avoid any shadows behind her. Camera settings and lightening worked well for me. I really regret that due to covid 19 restriction applied in the college we had to wear mask at all times.
LOCATION
To be completed in next post.
3 notes
·
View notes
Link
17 June 2021
Unseen - final works presentation.
1 note
·
View note
Text
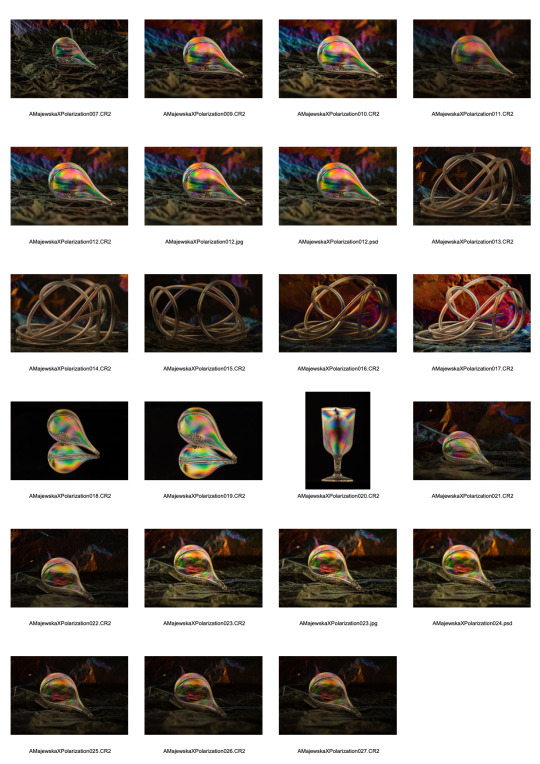
Unseen - production
15 June 2021
Contact sheets of images created in the studio.
Macro:


Infrared:

Highspeed ink splashes:

Cross Polarization:
0 notes
Text
Moving Image - evaluation
14 June 2021
The Moving Image project was for me the most interesting project of the year. This was to recreate an existing advertisement or make your own version of this advertisement. I will be very honest if I say that I was waiting for this brief, because it was a great challenge for me and something completely new, which I did not do before, and which was in my plans for a long time to get deeper into this topic. I had the opportunity to get acquainted with a little moving image before while working on the Stop Motion brief. However, shooting a video is something completely different and more demanding. When I started discovering what the video-making technique is, it caught my attention completely. I sat for hours on end, spending whole nights doing research. I wanted to find out as much as possible and as soon as possible.
The exercises we got were very useful as they made it easier for me to work on doing research. Thanks to this, I knew exactly what to look for and what to write about. I could take a closer look at how the most interesting and iconic films known all over the world were created. What camera movements were used, what are they called, the same completely new for me nomenclature of shots and transitions between shots.
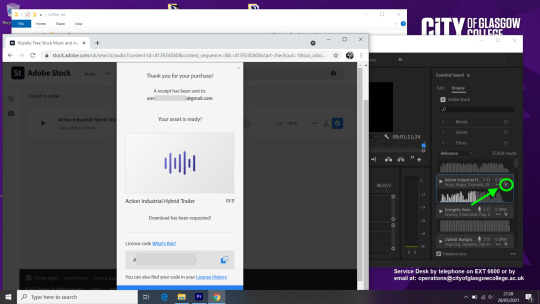
When I found the advert that was my inspiration to create my version, I was delighted. My inspiration was the advertisement of Nescafe espresso from Polish TV from 10 years ago. Nor was I looking for anything that I couldn't do, as I don't have any image stabilization equipment other than a tripod. So, I wanted to do something that would allow me to get the best results by using a few camera movements on the tripod. I carefully planned all the shots, made a storyboard based on professional standards. I created a scene imitating the kitchen in my living room because there is not enough space in my kitchen for such shots. I set up lights with soft boxes and used a golden reflector. Overall, it took me less than 3 hours to complete all the shots, because I didn't even have to recharge the batteries in the camera. Earlier, I just practiced the camera movements to make them come out as smoothly as possible, because my telephoto lens is extremely sensitive to the slightest vibration. Once I had mastered these movements, I started taking shots. And that same evening, I made post-production in Premiere Pro and I listened a lot of audio to find the one that would perfectly match my video and I licensed it from Adobe Audio Stock to use across the web. This professional program is amazing, and I was so excited to discover the features it has.
I didn't have any particular problems while working on this project and my strength was super extensive research, knowledge of techniques, camera movements and camera settings, which allowed me to finish the ad well before the deadline.
I was so happy that it went so quickly and so well that I am really proud of my work. And I really want to deal with such production and post-production in the future. At the moment, I do not know if there is anything I would like to improve if I had to do these shots again. Maybe this is a shot where my "actor" is pouring coffee, I could make it from a higher angle so that you could see the coffee in the cup. Overall, I am very happy with the final effect, and I am glad that I fully met the requirements of the brief.
0 notes
Text
Moving Image - existing ad and my video inspired by this ad
Inspirational ad:
youtube
My ad:
youtube
1 note
·
View note
Text
Moving image - post production
9 June 2021
I have my moving image already done and here are the post production process screenshots and description.
I looked through all the shots I made for moving image and chose the best of them. I renamed selected files and converted them to mp4 in iMovie on my MacBook just in case the college laptop won’t see them. I copied files to external drive and connected drive via usb cable to the college laptop and copied files to desktop folder for moving image. Then I opened Premier Pro video software and uploaded my files there.


When I upload files into Premier Pro library in project panel I started pre-view each clip for editing, cut in and cut out and once I was happy with the selection I dragged it into timeline, without audio, because I wanted to upload music track and add it in the end to the final video. I placed all clips in an order so the transition between the clips was nice and smooth and creates the story following my storyboard.

I didn’t have to make too much colour grading for the shots. I only made some slight adjustments to one or two clips so they match better the overall colour tone I wanted to gain.


I listened a lot of audios available in Premiere Pro music library, to find the one that match the best my video. I was looking for something powerful, rock, dramatic, energetic and inspiring music, so I filtered the stock and I found one that matches just perfect. I applied for licensing this audio so I can use it anywhere across the website even for commercial use. I saved file as the brief required as mp4 with audio and H.264 codec, 1920 x 1080p.(Full HD). My ad duration is 64 seconds.


0 notes
Text
Moving Image - production
9 June 2021
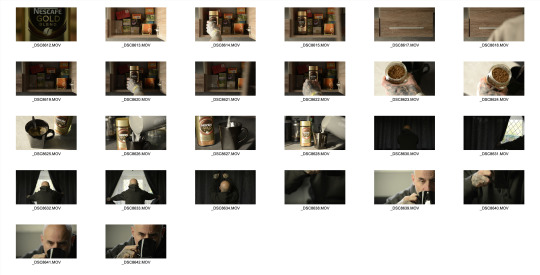
Shots contact sheets:


Behind the camera shots:
Camera assistants, focus puller and second camera assistant, my cute crew:

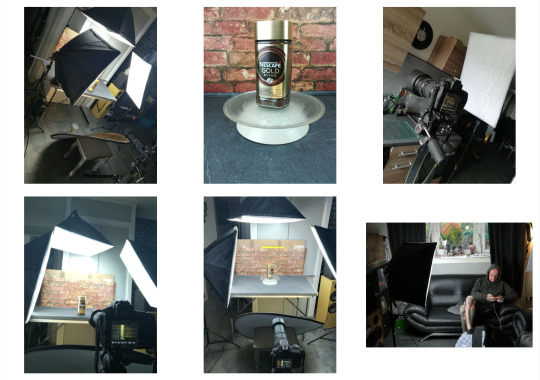
Camera - Nikon D800, lens for product shots extreme macro - Tamron 70mm-300mm @300mm macro f/5.6 on Manfrotto tripod, shutter speed 1/50s, so it was the double of the frame rate I was using for my movie (24fps). I tried to keep ISO low and mainly I was using ISO200 up to 400. I had 3 soft box lamps and gold reflector as the lighting for my kitchen setup. For the shots done in the real kitchen I used Nikon lens 24-70mm because this lens has shorter focal distance and wide angle. I used natural light in combination of soft box I used as fill light. When I was doing the final shot I used daylight that come through the window as a backlit and I placed one soft box light on right side of Rafal at 45º slightly above his head to create more cinematic look on his face, the Rembrandt lighting.
0 notes
Text
Structure - evaluation
9 June 2021
Final Images

The “Structure” brief, following the name, was an architecture photography project. I had to find an interesting object and take at least five photos, one of which was to be taken with a wide lens to show the entire building, in two photos I had to present the perspective control, and the other three could be more creative and show fragments of the building or interesting details, for example.
Architecture photography is widely known both in art and in commercial work. A very interesting field of photography that I could take a closer look. Even before my studies, I liked to photograph buildings, especially abandoned, old ruins. Somewhere in my head I had a sense of aesthetics and symmetry, which I always tried to capture when composing a photo. Now, when I was about to shoot a project on a topic I know a little bit, it was very nice. I really like to spend my time calmly and not to rush anywhere, so I can fully focus on my work and spend as much time as I need. I don't like when my thoughts are overwhelmed with tons of other things to do in a short time. It completely distracts me. Nevertheless, working on this project was very enjoyable. Planning and research were very important.
First, I chose the V&A Museum in Dundee. I looked at photos on the street on google maps and planned a photo trip based on a few days of following the weather forecast and waiting for my husband's day off, because I did not want to go there alone. The museum was closed that day so I couldn't go in, and I didn't get a permission to use a tripod or a monopod inside or outside the building, so I thought it was a bit of nonsense. I took the photos handheld trying to be as creative as possible in terms of point of view and composition. I wanted to take photos in the evening and use a tripod, but the fear that someone might have some objections, I chose a different time of the day than I actually wanted. I was thinking about going back there.
Unfortunately, I had to waste too much time traveling and I preferred to spend this time on further research for another project. I decided to find another structure somewhere in Glasgow and I spotted Hilton Hotel when driving via M8 motorway. Thought I would go and make photos of this building. I did a quick google maps search for street view pictures and checked the weather. I took photos in the evening before sunset, but the sun went down very quickly, and I didn't get all the photos I wanted but went back there the next day and finished shooting. I chose mid-afternoon as the building has a north face and I was hoping to catch some light then. I didn't use long exposure to create my photos and I regret deeply. I tried to, but it was too bright and unfortunately, I don't have an ND filter that would allow me to shoot long exposure during the day. Now I know that it is worth investing in such glass. I think the effect would be much better. I'm not keen of night photography because of my general health and my body gets cold quickly.
On this project, I was very inspired by Lesley MacGregor, who I met when she was a guest at my college. I immediately liked her person and her individual approach to work as well as the sense of aesthetics and minimalism. The next photographers I found and had the opportunity to learn more about their work while doing my research were Danica O. Kus, Kevin Saint Gray and Julia Anna Gospodarou or Jeanette Hägglund. I draw inspiration from all of them when it comes to an artistic and often abstract approach to architectural photography. The extremely sophisticated points of view and the use of a long exposure time made a great impression on me. As already mentioned, I regret that I did not use this technique myself. I will definitely use it in my next project. I also really liked the photos of Marchand and Meffre, who co-create a series of documentary photos about architecture, often photographing historic, abandoned buildings, such as old theatres in North America. Kris Provoost and Andrew Prokos, Keith Hunter and David Gutierrez specialize in more commercial architectural photography, primarily urban structures and their interiors, designed to be beautiful and functional at the same time. Looking at all these galleries, I couldn't just go to the next ones without looking at all the photos in sequence, so that's why it took a long time to do my research. If something interests and inspires me, it fully absorbs my attention and I enjoy it.
As always, my favourite part of the work, besides taking photos, is post-production. I usually used upright auto-correction of perspective distortion in camera raw, but with these shots, that alone wasn't enough, and I had to learn about other techniques for controlling perspective. I have found that the free transform tool in Photoshop is very good and quite effective, while being easy to use and fast. One of the tasks of this project was to show how the perspective can be controlled. This is another skill in Photoshop that I have acquired, and I am very happy about it. The other thing is working with colours. This was also one of the reasons that I decided to change the object. Hilton Hotel has many windows and glass elements of the facades that could reflect lights and colours of the sky. I thought it may be more interesting and challenging to work with colours matching in post-production. I’m perfectionist and I love to see my images nice and clean, without any distraction in the frame. I put a lot of attention to clean images from dust spots or some stains mainly using clone stamp tool.
While working on the project, I didn't encounter any particular problems, except that I couldn't use the tripod in Dundee. But I found out, did a web research about the rights and permission that photographers have in a public area. I found out after fact, that I could actually legally use the tripod in a public space, so the lesson learned. A thing that I wasn't aware of in the beginning when I was planning the shots was Sun tracking. At the first time when I was photographing the building, I was there a bit too late and I didn’t catch the light before it disappeared behind the other buildings. I got back there few more times to get the best shots I could. Although I knew where the sun would be, I was not 100% sure that the sky would be a nice clear blue. Twice I didn't have good photos because there were clouds, I was hoping for a glimpse. I've been watching the weather for several days. And once I was early in the morning, but it was foggy, and when it went down, the sun already started to rise and unfortunately couldn’t lit the front of the building nicely because it is surrounded by other tall buildings. I decided to shoot between 6 pm-9pm but I went back there the next day between 8:30 pm-10pm to be sure I wouldn't miss a nice sunset. Maybe the sky looked nice, but the building didn't look good for me. I find myself good with manual camera settings and using a tripod in unusual adjustments to get creative viewpoint. I used low ISO and great depth of field, set aperture at f/22 and I used self-timer of 5 seconds delay on shutter release to avoid camera shake when pressing the shutter button. One image was taken at f/11 and shutter speed 1/125 because I couldn’t use the tripod from this particular point of view, as I was standing on the footbridge over the M8 and the fence was too high for my tripod, so took the image handheld and overhead supporting camera with the fence top barrier.
I have certainly learned a lot from working on this project including how early architecture photographers like Berenice Abbott or William Henry Fox Talbot, Edward Steichen and Julius Shulman have approached to the subject. Now, perspective control methods are not much different than the old ones. Modern cameras function the same way with tilt and shift lenses that do their job perfectly. In addition, working with digital cameras and modern lenses is much faster and easier when it comes to traveling. As I have already mentioned about, photoshop has tools helpful in perspective control and it is a solution for people who do not have specialised lenses for photographing architecture.
I am quite happy with my photos. I think that I successfully managed to meet the requirements of the brief. I finished it ahead of deadline. My weakness was the rush which caused stress that prevented me from focusing my attention on good planning at the first time. But in fact, it was a good experience for me and I have drawn conclusions on time and I managed to reshoot. I learned how to use sun tracking application and I gained new experience related to navigation. I ordered ND filter for my lens and I will definitely use it in the future works. I believe that both my photos and the work I put into the whole process from pre-production to the final presentations are quite good in overall.
0 notes