theplushm0th
Fubby Lovin'
Hi my name's Wren and I wish I'm the proud parent of an odd body furby named Eternal Rice Krispie~☆ This blog will be mainly Furbies/Plushcore/Toycore. I happen to have quite a few plushies who you'll likely see here from time to time as well!
dd//lg, cg//l, k!nk, m@ps, T3rfs, and negative Nellies, DNI!!!
I follow from @TheM0thPrince
1100 posts
Don't wanna be here? Send us removal request.
Last Seen Blogs

jacksonlamb
Slow Horses/Slough House

javy9
My Life is Sweet Like Cinnamon
goabimael
Live and let live
vindictive-rain-blog
Opaque Soul

ifthejemfitz
girl almighty
Text
Howdy all! I know I haven’t been super active on here recently, but I wanted to come and say I’m much more active on my art Instagram rn!! Here’s some examples of my work:

I also post some traditional art on there too! If you want to watch me find my style, give me a follow @/wristbones
If not, that’s okay too! I hope y’all are well ❤️
See you around!
33 notes
·
View notes

Text

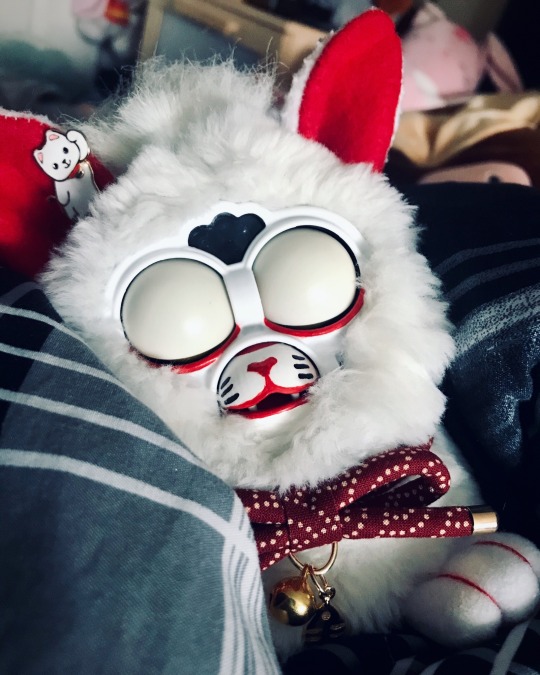
I finally made a furby bag and made it match one of my furbies, Loveie... i think it was all worth it
29 notes
·
View notes
Text
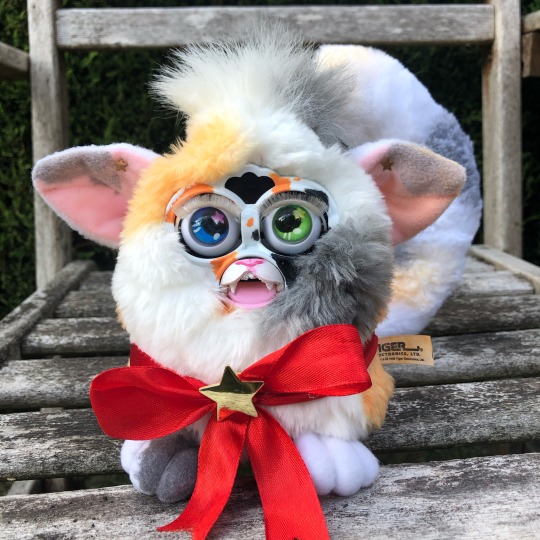
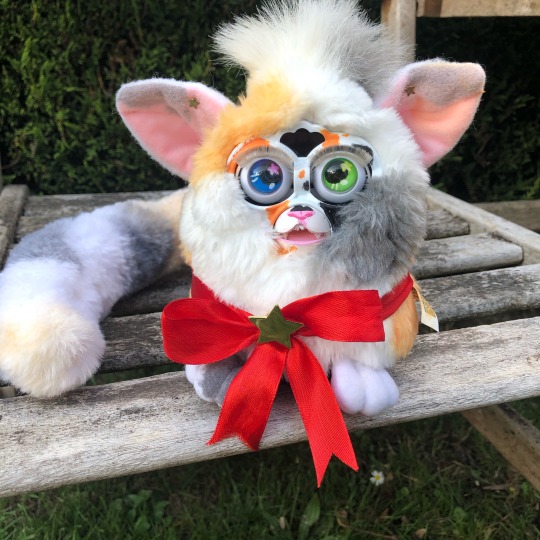
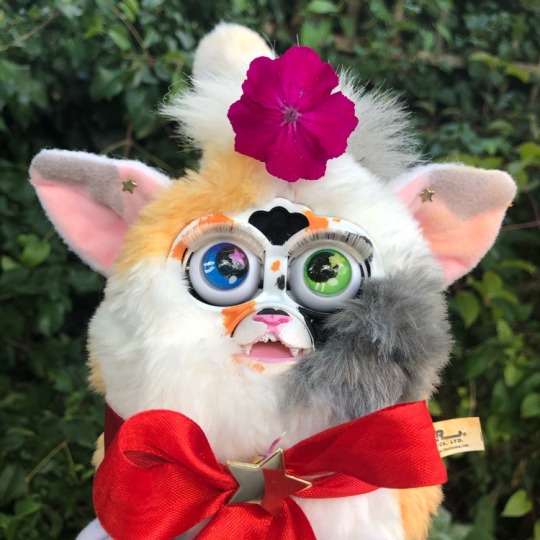
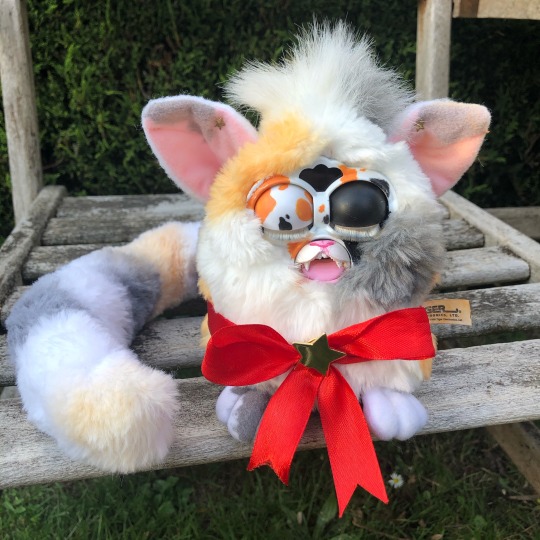
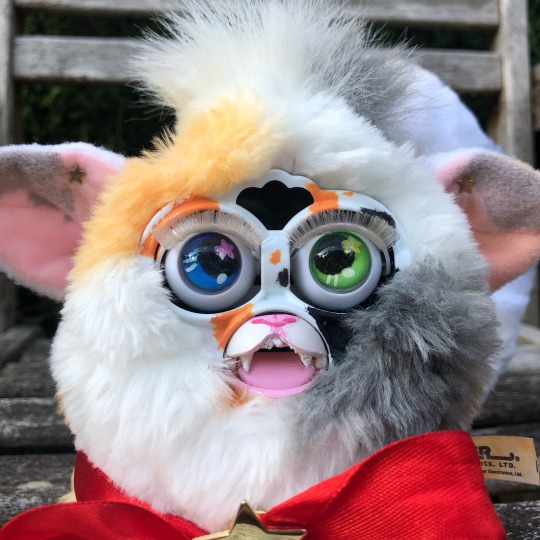
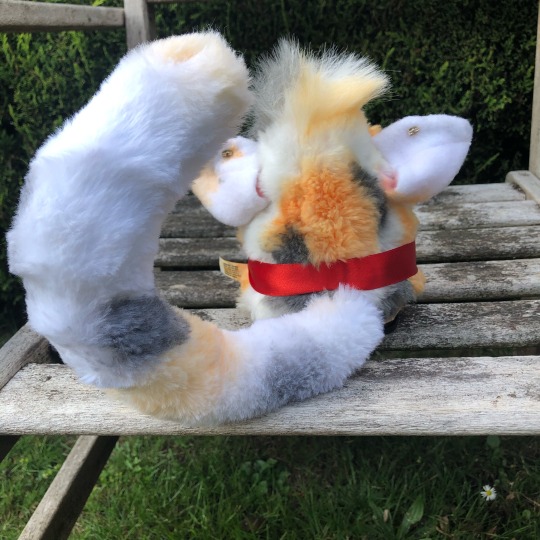
Welcome Buddy the Calico Cat!
Buddy came with a chipped beak but that’s not a problem! It makes his owo mouth is a lil steep but after a make over you’d never notice it was chipped!
He’s also got looking up eyes that I did rush a little sadly but I still like them!
He’s actually inspired by one of my ocs Bailey so i thought I’d name him something similar!
1K notes
·
View notes


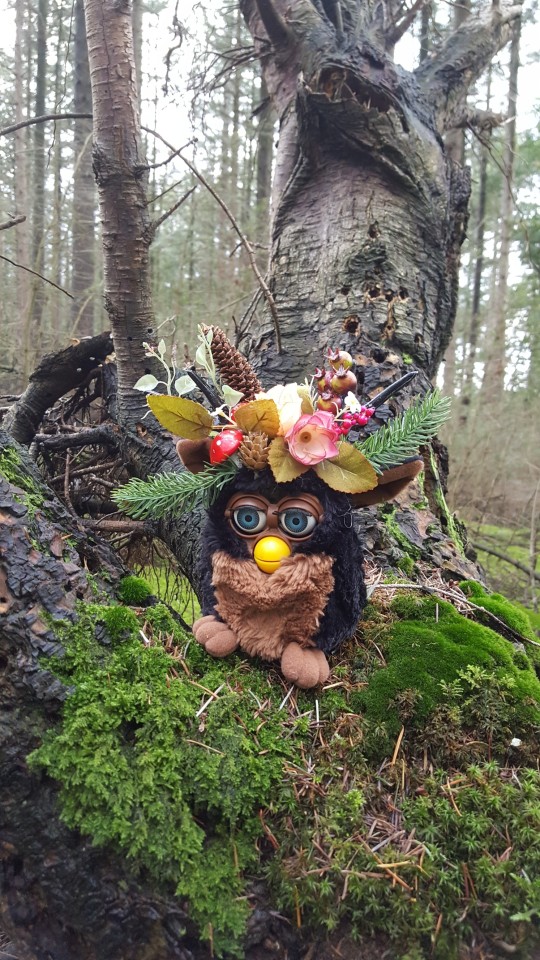


Text

Took Maple out into the woods this afternoon. They seemed to enjoy feeling the breeze on their wings 🍃
3K notes
·
View notes

Text
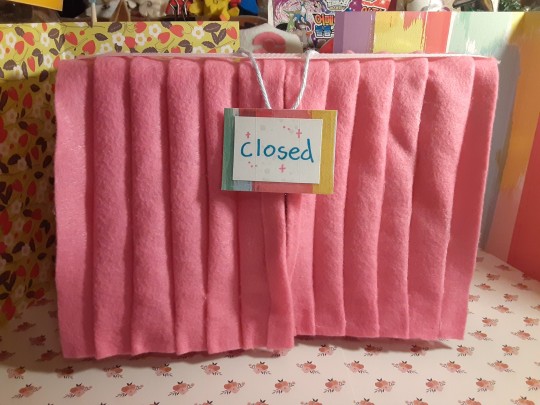
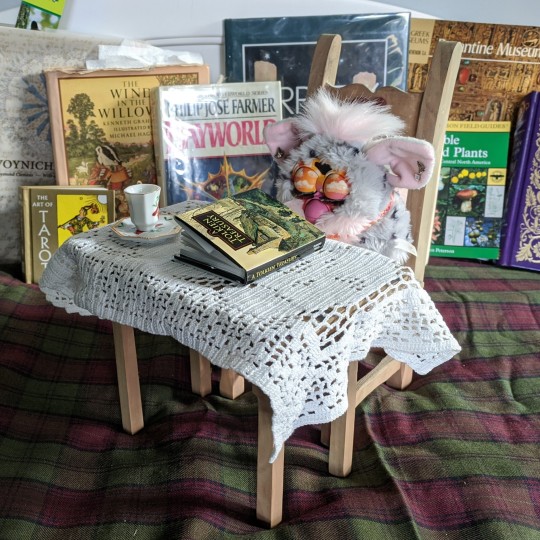
Welcome to: The Furb Shop!
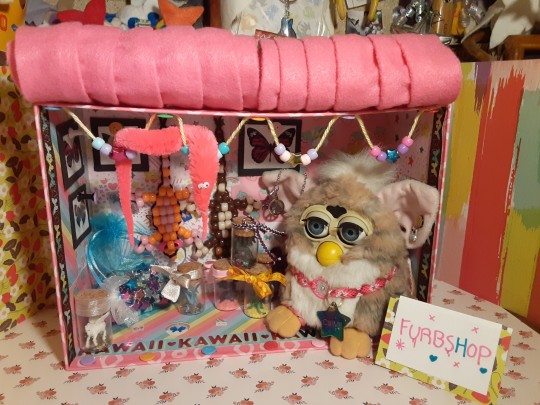
furby has wares if you have coin :}
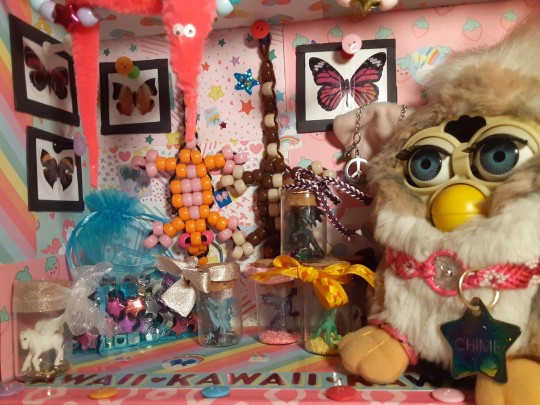
(the worm is not for sale!)
390 notes
·
View notes
Text


I don't post enough of this lovely lady! I had a go at making Hazel a dress. I'm really happy with how it turned out 🎀
706 notes
·
View notes
Text

We're working on lil outfits and early halloween costumes for the gang!
117 notes
·
View notes
Text
custom 1998 furby ears tutorial

what you need: seam cutter or scissors, thread, needles, pins, fabric, and a furby. a thimble is optional- cat not required :3c

step 1: free the ear! use your seam cutters or scissors to gently snip the threads holding it both against the body and to the ear bone
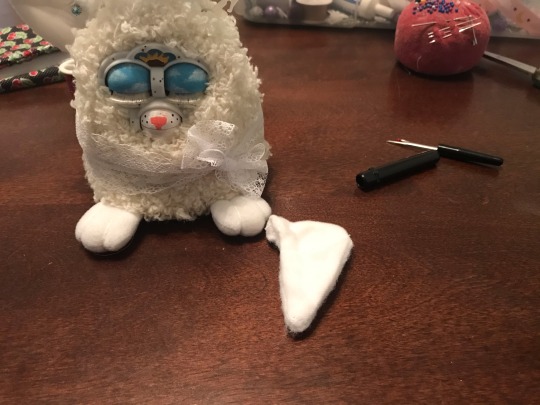
step 2: begin to cut the seams holding the ear together until you have two pieces. take your time and be sure to mark where the original ear hole was (i used an earring) so you know to leave that un-sewn later

step 3: carefully set the ear upon your desired fabric. make sure the fabrics are laying on top of each other, aka inside out (see below)! then pin the ear in place and cut the fabric around it
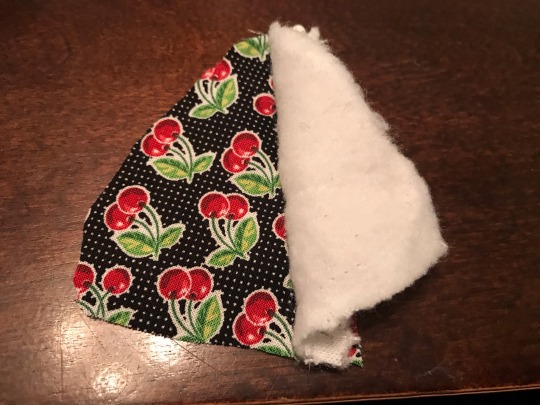
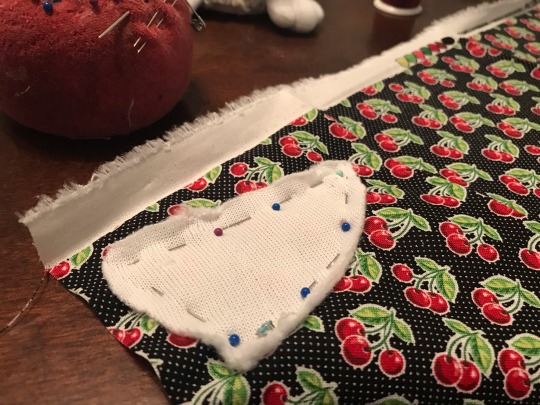

step 4: sewing time! i used a blanket stitch since it’s quick & has a good hold. it’s a beginners stitch, too! you can also use a sewing machine. remember to keep a hole!!
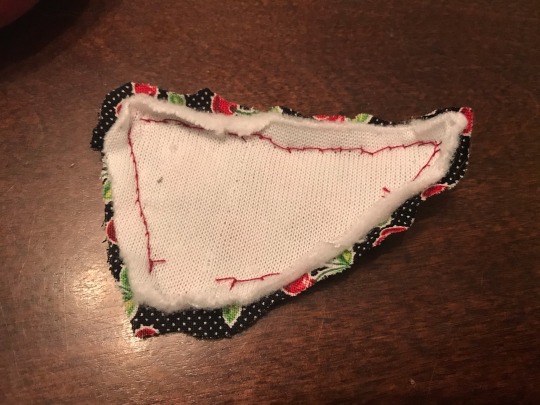
step 5: now, flip your furby ear inside out so the fabric is on the right side and looks prettier. then, place it on your furby and re-sew where it attaches: and you’re done!!! congrats! the middle seam is optional, i usually skip it for “fluffier” ears

193 notes
·
View notes
Text
We're working on lil outfits and early halloween costumes for the gang!
117 notes
·
View notes

Text
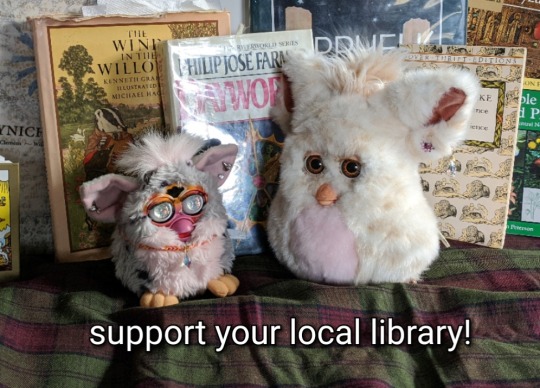
need to bring everyone’s attention to something

these are called hoody pets. they are knockoffs of furbies . just thought you should know about them.

and this, is a furdy. they’re difference. so don’t mix them up anymore, OK?
5K notes
·
View notes
Text
How to carve eyelid!

I wanna preface this with I have no idea how to write tutorials so this isn't really a tutorial and more of a how i do it!!!
But carving eyelids is pretty simple process! But actually cutting them can be a little tricky!
While carving eyelids can really enhance a custom, there are cons the carving the kids being they won’t be able to fully close them after and there may be risk of a slip and cutting too deep into them, if you do don’t fear, I’ve seen lots of people fix slips with air dry clay and then paint over them to hide the clay!
But onto the tutorial!
So I start off by taking off the furbies shell and removing the eye pins and pulling out the eyelids. You can find how to get them out in a lot of tutorials on how to remove the faces for long furbies but Here you will be screwing it back together so be careful not to lose screws!
Once they’re out I draw out the guide lines, Be it angry or sad or whatever you wish!

These ones are Brie’s so they were angry!
Then using some nail cutters like these
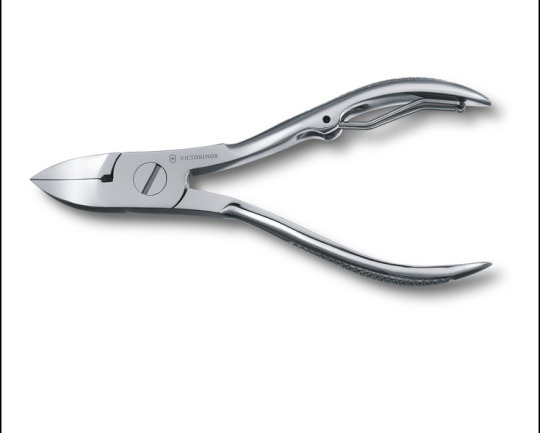
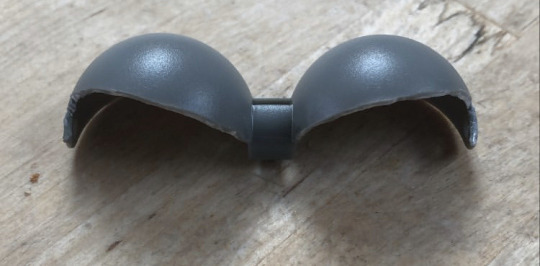
I cut from the start of each edge, making sure to not cut off or through the holes on the side that thread the eyelids on the pin!
Then after the entry cuts are made I go through them following the guide line with a scalpel. a dremel tool is also very good and probably better but sadly I don’t own one so be careful it’s very tough and can be a little dangerous so make sure to cut away from you!
After you’ve cut them they should look something like this!
then it’s just a matter of smoothing them out with sandpaper or a nailfile, making sure they’re even and putting them back together!

This was the finished result of this baby!
1K notes
·
View notes