#timelapse psd
Text
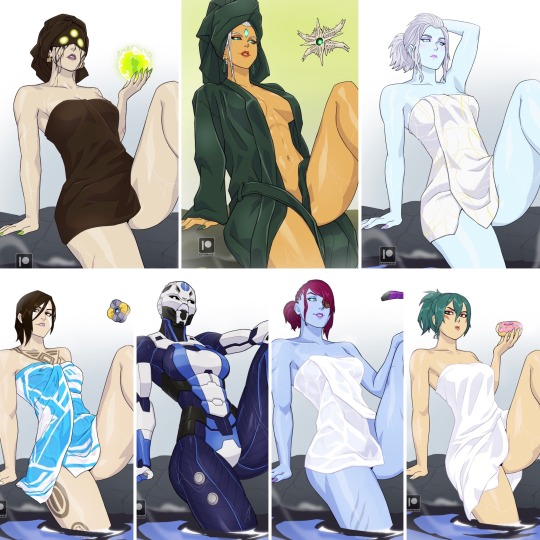
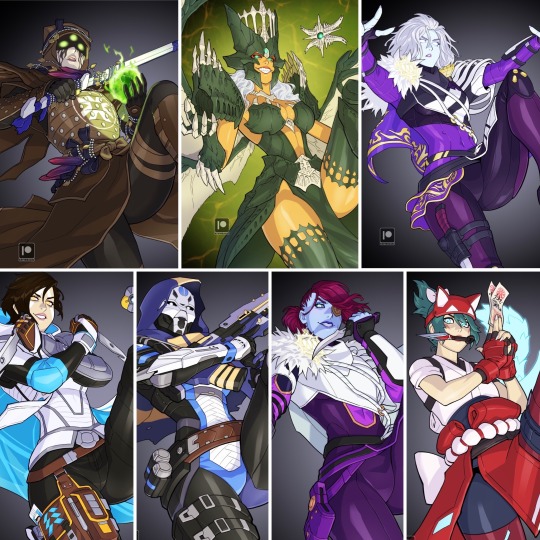
November Set’s Hot Springs theme available in patreon til December 31st 🫠🫠🫠
PATREON LINK
Ikora tier: High res images
Cayde tier: high res images, psd files, timelapse videos and implied 🌶 images
More preview 👀 💦
#destinythegame#destiny2#fanart#psd#timelapse#hot spring#mara sov#petra venj#savathun#eris morn#ana bray#elsie bray#kiriko#overwatch
84 notes
·
View notes
Text

Marika's Shadow
brushes, psd, step by steps, video timelapse -> patreon.com/alexineskiba
3K notes
·
View notes
Text
No because theres already a case of an actual artist being accused of doing AI art because their art is "familiar to the AI art style."

Theres already people who have gotten the AI to learn correct hand anatomy (albeit a bit wonky, but it's 5 fingers on two hands now.).
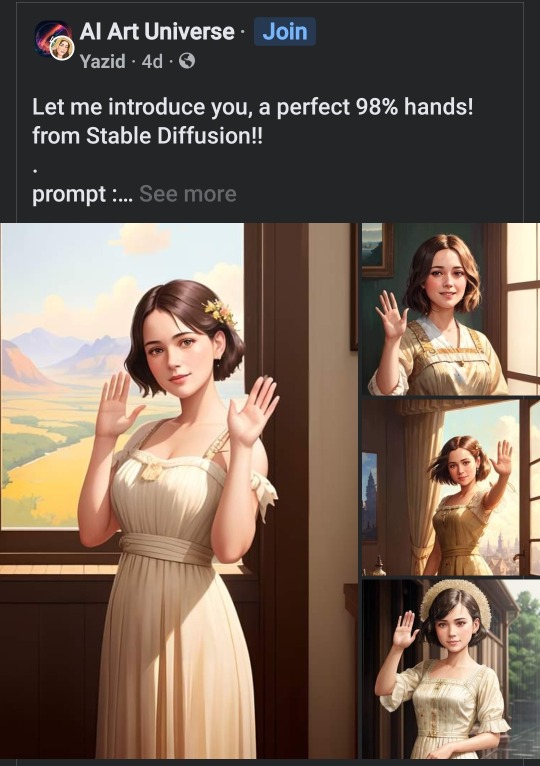
Literally what the fuck. This is the scariest shit. People now are teasing it to "hold objects" and "do complicated hand gestures" . My partner you and I both know in months time they will. This fucking sucks. It feels like theres no hope to stop this shit anymore aside from clients and art customers to FUCKING STOP AND LOOK CLOSER AT THE ART.
Like, please if you are commissioning from an artist, ask for like a psd. Or a .clip file. You cant even ask for a "sketch" because theres already programs able to simulate art progress, sketch to render. What the everloving tit shit.
Edit: I've misspoke and am mistaken- dont give the open files willy nilly, i forgot people are assholes who can rip off actual artists. Timelapses are better, as well as progress shots (preferrably with the program frame). I thinm a good way as well to identify is to look close at the brushstroke (hard, Ik but ai genersted images have a sort of weird sharp quality to them)

25K notes
·
View notes
Text

Shadowheart <3
Timelapse video and PSD file are available on my Patreon www.patreon.com/aizelkonart
2K notes
·
View notes
Text

This month you will find this illustrations in the April reward.
The rewards include a long timelapse, .psd (with layers) and high resolution version of the artworks.
Your support helps me to stay an independant artist. Thank you so much, it means everything to me!
814 notes
·
View notes
Link
Una nueva portada que nunca fue: Man-Bat. Video del proceso archivo en alta y PSD listos para descargar
0 notes
Text
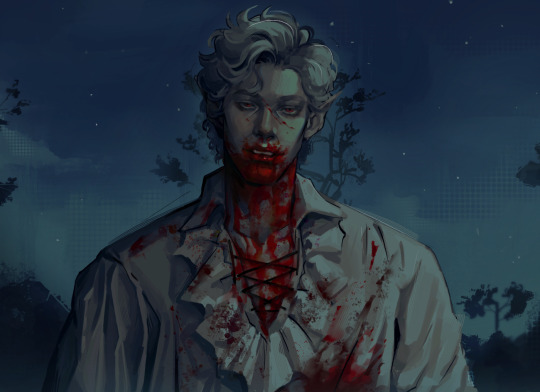
Night Prowler 🩸
HD wallpaper timelapse and PSD file is available on my Patreon!
#digital art#digital illustration#artists on tumblr#fanart#bg3#bg3 fanart#baldurs gate 3#astarion#myart#art
1K notes
·
View notes
Text


🐇 Pekomami x Rabbit Hole💗
Full-res, additional NSFW variations, step process, timelapse videos and PSD files of my works available at:
Patreon > patreon.com/Zasshu96
FANBOX > zssh96.fanbox.cc/
165 notes
·
View notes
Text


Cat designs for $50 each!
Each purchase contains the original .psd file and a timelapse!
#dont worry you dont have to keep the names i gave them i just needed a way to distinguish them#adopts#adoptables#designs for sale#feline#designs
159 notes
·
View notes
Text
Miku Is Yours
#for the low fee of 2$/month thats like 50 cents each#sometimes less#also theres timelapses and psds and I work vewwy hard okay ;^;#also a rare bit of exclusive content but not rly lol#anyhow
1 note
·
View note
Text

Minthara
sketches, psd, step by step and video timelapse on | PATREON |
5K notes
·
View notes
Text
Patreon reward!
Full res, psd and timelapse available at my patreon!

684 notes
·
View notes
Text
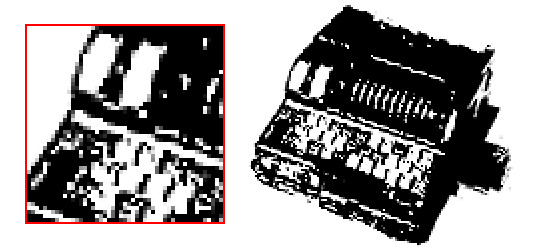
Tidbit: The "Threshold" Effect of Desaturated Objects Due to Increased Contrast
If you've ever asked how to replicate an effect like this...
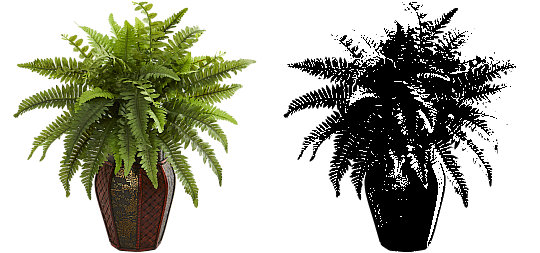
...it's likely someone told you to apply the threshold filter, which converts any light colors to pure white, and any dark colors to pure black. And it's perfectly fine to do so. It's simple, straightforward, efficient. But I take issue with the assertion that it's definitively the only conceivable way Hussie did it when the evidence points to the contrary. Scrutinize the following examples under a microscope:
Did you see it? The singular detail that distinguishes these images from ones that have been thresholded? Congratulations if you noticed that these contain not only black and white pixels, but GRAY pixels as well! A threshold filter's conversion is binary; a pixel is either black, or it is white. No in-between. The presence of these gray values rules out its use, then.
One thing is clear, at least: these images are black and white in the traditional sense of the term, i.e. "grayscale", even if it's in drastic form. They've been stripped of any color, hue, chroma. Completely desaturated, in other words.
So from this observation, we can reason that they were converted to be grayscale at some point in the process of editing.
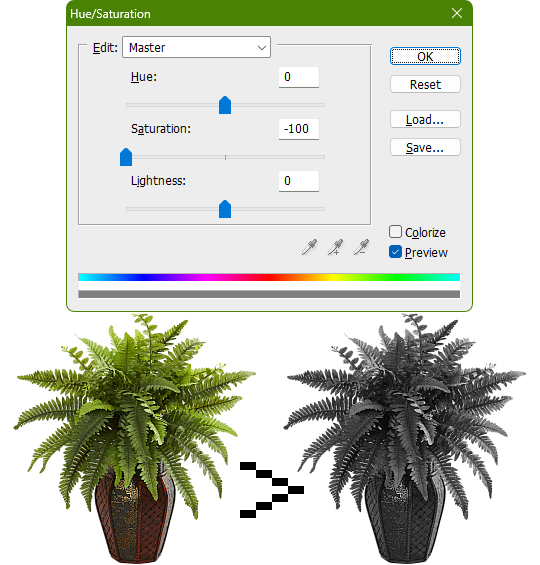
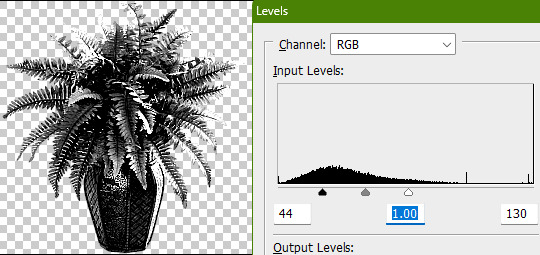
Of course, this is still lacking in the pure black and pure white departments. If only there was a way to adjust the intensity levels and push them both to their extremes... oh wait, THERE IS! Using the Levels adjustment tool!
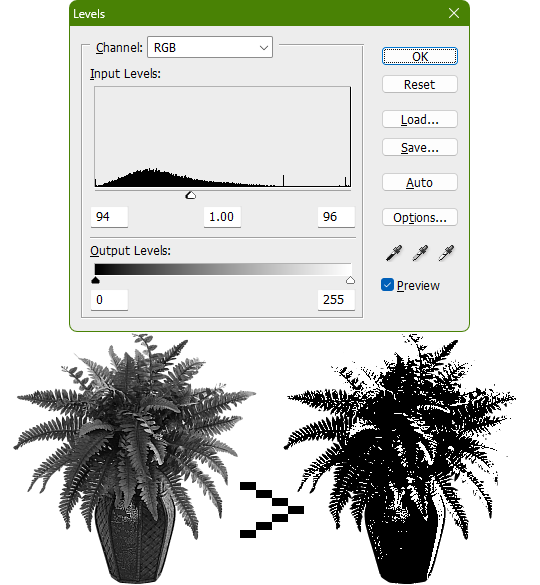
Pushing the black input levels slider to the right makes all dark colors turn darker, and conversely, pushing the white input levels slider to the left makes any light colors turn lighter. This is a great way of increasing the contrast and adjusting the brightness. Speaking of which, the Brightness/Contrast adjustment tool in Photoshop with "Use Legacy" enabled also accomplishes a nearly identical effect.
This timelapse demonstrates how the Brightness/Contrast adjustment is basically equivalent to using the Levels one when used this way
I say nearly identical because raising the contrast all the way to 100% with Brightness/Contrast makes it actually identical with the Threshold adjustment tool. The black and white input levels sliders can't fully join in the middle because of the gray input level slider occupying the space, hence why there are some stray gray pixels even when pushing them to their limits.
Well, there could be several reasons explaining why there could be gray pixels other than the contrast not being high enough to clip them, but I'll spare you another needlessly complicated and overly technical rambling on how I can tell it's most definitely the Levels adjustment tool always.
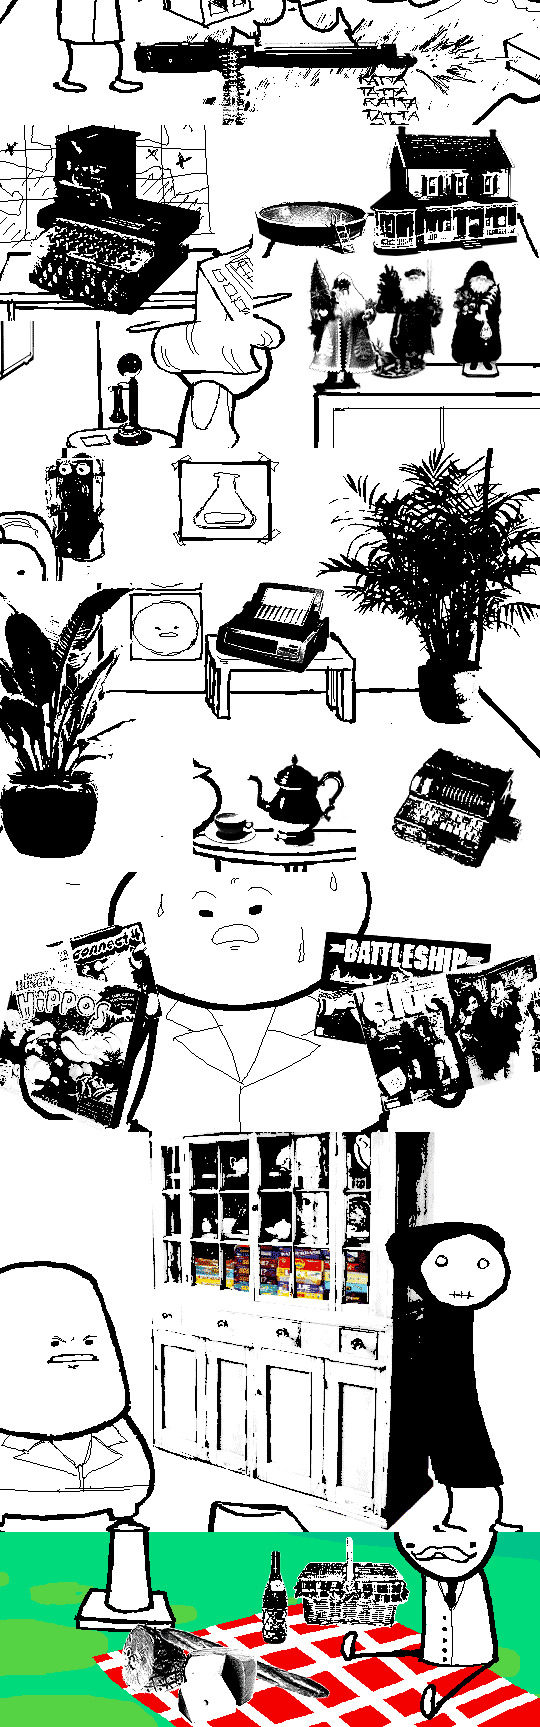
This post is getting a little long, so I'll stop here and elaborate a little more on pertinent things under the read more link, like semi-opaque pixels, scaling down, sharpening, and the gamma slider. Also here's the potted plant PSD if you wanna check it out I guess.
ADDENDUM
Semi-opaque pixels
When separating objects from a background, it's usually easiest to do so with a magic wand selection tool, which selects regions of similar colors. There's an option to make the selection anti-aliased, smoothing the edges of whatever you've cropped. Unchecking it will make the pixels hard and jagged. The wine bottle and picnic basket are a good example of each, respectively.
If you've already cropped out something with anti-aliasing enabled, there's still a way to sharpen the edges after the fact. Duplicating the layer multiple times will increase the semi-transparent pixels' opacity. Do it enough times and they'll eventually become completely opaque. An analogy would be stacking multiple panes of tinted glass on top of each other. Stack enough of them and you wouldn't be able to see through anymore.

These semi-opaque black pixels would appear gray on a white background, and so would semi-opaque white pixels on a black one. That's the reason for the gray pixels around the edges on some of these examples.

Scaling down/Sharpening
Suppose you've already gone ahead and went through the whole rigamarole of editing the object to be black and white before deciding firmly on the size of it in your composition, and now you think it could be a little smaller. You could always resize it and scale it down, but with the interpolation method set to none/nearest-neighbor, it's going to look kind of shit, and with it set to something else like bilinear or bicubic, the anti-aliasing is going to make it a bit blurry (introducing these gray values). You could increase the contrast again, or you could use the Sharpen filter to do it.
Not to suggest that this particular example was scaled down after editing, it's just the one that looks closest to it since I'm too lazy to make one.

Sharpening repeatedly will bump up the contrast, plus Photoshop's Sharpen filter has the added benefit of hardening any semi-opaque pixels as well, making the edges sharper.
GIMP's Sharpen filter doesn't do that latter part, unfortunately, but if the layer has an opaque white background, it'll do the same.
Gamma slider
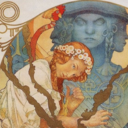
This effect might not be so obvious, but really take a good look at these board games:
Actually, maybe this Problem Sleuth bonus panel shows what I mean better:

The dark values are cranked up very high, and so are the light values a bit, but there's an inordinate amount of midrange values that are on the lighter side than what would be normal. That's because of the midtones input levels slider, the gray slider, the gamma slider, whatever.

I'm toot tired to explain any more than that, so make of that what you will. The end.
346 notes
·
View notes
Text
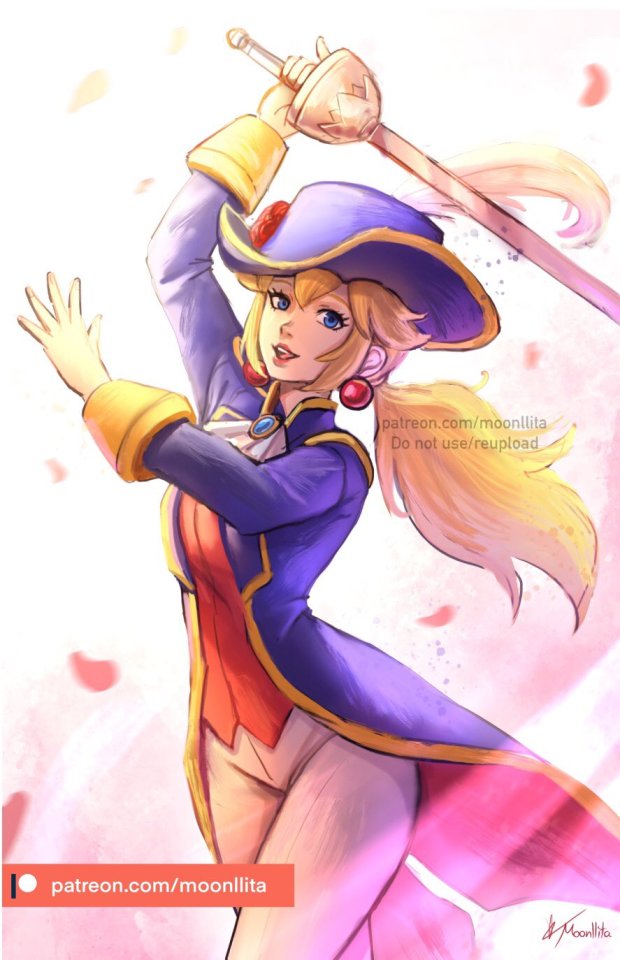
The princess doesn’t need to be saved!
You can download the full high res, timelapse video and psd on my Patreon!
#peach#princess peach#princess peach showtime#nintendo#nintendo fanart#fanart#drawing#art#draw#illustration#video game
399 notes
·
View notes
Photo

⭐Choco!Toro + Friends ⭐
⭐Choco!Toro + Friends ⭐
Quick doodle of the girls
PSDs + Timelapse on sub⭐
105 notes
·
View notes
Text
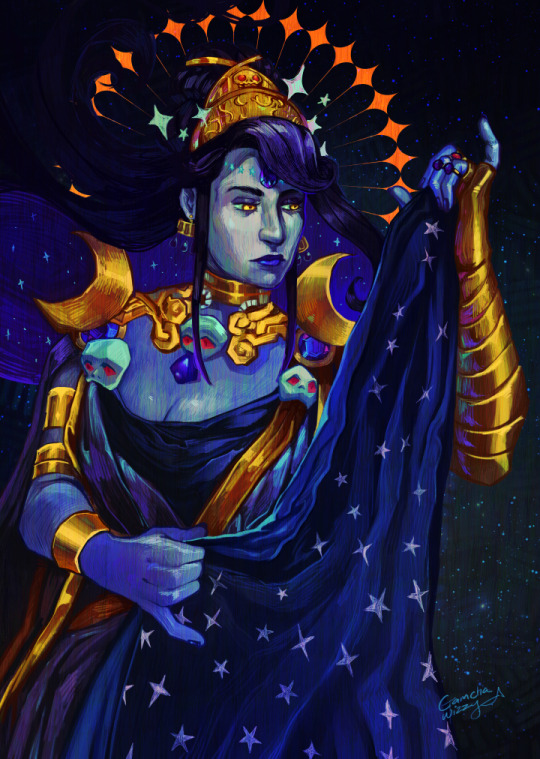
Mother Nyx 🌙
HD, PSD, Timelapse available to my p⭐tr⭕ns.
For 3-7 d⭕ll⭐rs a month, you have access to WIPs, sneak peeks, personal sketches, HD work, timelapses, PSDs, polls, and more! Everything goes to supporting my family 🥰
patreon . com/posts/mother-nyx-hd-69741627
1K notes
·
View notes
Last Seen Blogs
harpsicalbiobug
Harpsichordical

yesterdayiwasadog
Yesterday I was a dog

dhp117
Untitled

snaczy
Snaczy

bigrod42
Untitled