#photoshop resource
Text


PSD PACK #1 — period dramas
in this folder, there's ten psds created for the shows: reign and the tudors but they should work across any period drama with dark or yellow/green lighting <3 just remember to always adjust the curves (and channel mixer if necessary) to suit the lighting of the scene
a lot of these are pretty basic colourings, and some are pretty similar but these are the ones that i use the most often!
#dailypsd#psdresources#completeresources#allresources#psd pack#psd colouring#photoshop resource#gif psd#01#ps help#useratz#usershreyu#userzil#usershri#usermery#userbloomingwarrior#niniblr#usercats#userfaiths#usermare#userbess
286 notes
·
View notes
Text


˙ ˖ ✶ ANAHILATION COLORING PSD #001 — what do you green !!
i make all of my resources for free and always will, but if you’d like to leave a tip my ko-fi is ANAHILATION. enjoy!!
feel free to edit however you like for personal use. please do not redistribute, claim as your own, or sell to others.
credit is not necessary, but always appreciated! a like & reblog if you’re using is the cherry on top. and also feel free to mention me, i’d love to see what you come up with!
my askbox is always open for any questions or suggestions on resources.
i'm now offering commissions! head to my blog for more details.
head to the source link to download on google drive!!
59 notes
·
View notes
Text

⠀⠀⠀⠀ 𝗉𝗇𝗀 𝗉𝖺𝖼𝗄 ⠀⠀♡ 𝐦𝐞𝐧𝐬𝐰𝐞𝐚𝐫 𝒃𝒚 𝒅𝒐𝒍𝒍𝒆𝒄𝒊𝒕𝒕𝒂;
in this png pack you will find #70 pngs of pants, shoes, trousers, coats, accessories and other menswear items (which can be used for any wardrobe, regardless of gender) for all your roleplaying and editing purposes. these were all cropped & edited by yours truly, so please do not copy, redistribute or claim as your own. likes and reblogs are greatly appreciated. enjoy!
download ⠀⠀♡
22 notes
·
View notes
Text
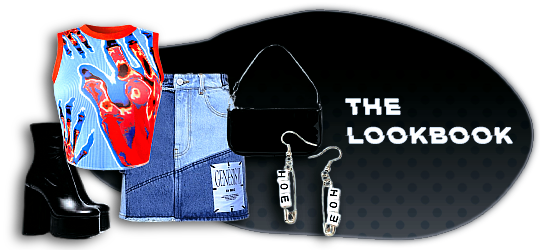
◟ ⋆ THE LOOKBOOK ! › hola ! this is a combination of all my women clothing png packs taken from various sources & tumblr posts . there are 1000+ PNGS / 6 SEPERATE FOLDERS in total to use in any project . i’ve used these in creating OOTDs & plugging them into already made outfit templates you can find online . they even make cute simple dash icons . you may edit however you like as there no coloring ps included . don’t hesitate to contact me if you have any issues . if you have found this useful in anyway , please like and reblog !!
GOOGLE DRIVE HERE .
#rpc#rph#rpt#png#transparent png#png pack#dailyresources#supportcontentcreators#resource#dash icons#icons#photoshop resource
967 notes
·
View notes
Text
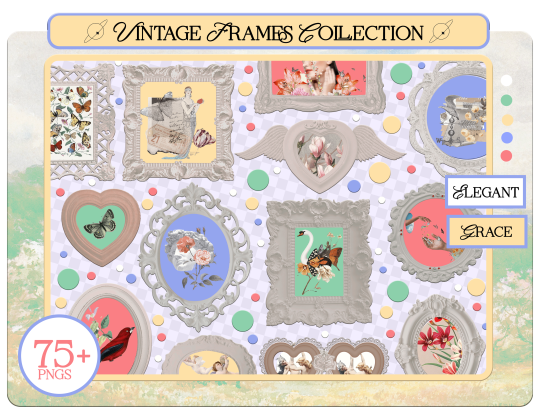
FREE PACK OF 75+ VINTAGE FRAMES
WATCH + COMMENT + FAVORITE IF YOU DOWNLOAD 🫶
DOWNLOAD HERE : 📂📂📂
#rp resources#kpop#frames#vintage#vintageframes#psd#freepsd#pngpack#png#render#aesthetic#resources#photoshop resource#psd coloring#vintage png#aesthetic png
44 notes
·
View notes
Text

DOWNLOAD HERE: DA | DRIVE
psd coloring 48 - cosmicoloring
All the layers can be adjusted if necessary
Credits are not needed, but appreciated. You can reblog or like this post to help me get to more people
Feel free to request a coloring in my ask or leave a question
10 notes
·
View notes
Photo

| NIAMH CLUB | png. halloween
PNGs found by Demis.
Description: this are halloween pngs created by freepik artists. Give credits to them and like the original post to support the artists. Open with photopea or illustrator to chage the background.
Download: (xx)
These pngs are founded by us, created by freepik. The download link will send you to the original page created by the original artist. Do not forget to support the original artist by giving credits and liking their post. Reblog and like it to help our blog to grown.
Patch 1.0 - NIAMHWEEN | Design by Demis. Group: TOMORROW X TOGETHER
19 notes
·
View notes
Text
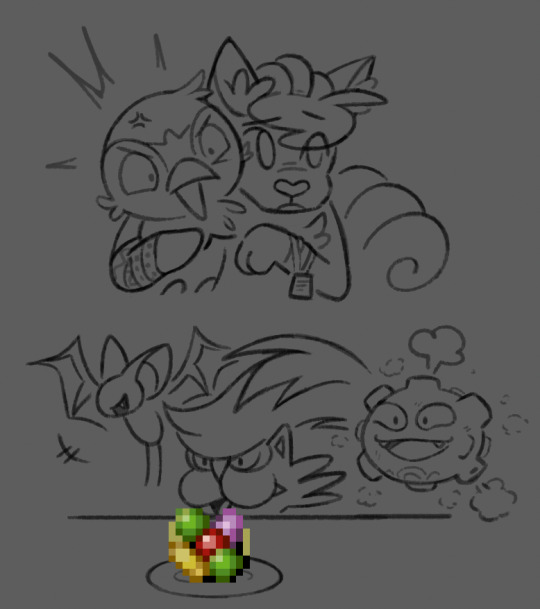
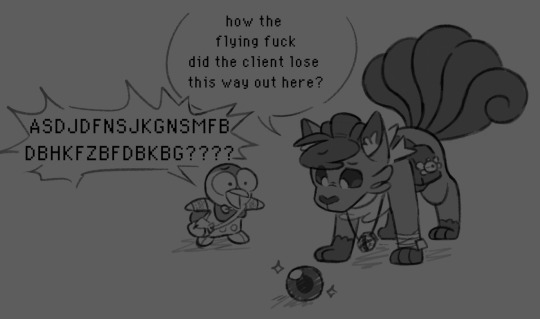
some silly stuff with my explorers team lol, sapphire’s human lingo occasionally rubs off on bubbles, who doesn’t grasp the weight of some of the words, and it gives her whiplash every single time
#pokemon#pokémon#mystery dungeon#explorers of sky#pkmn#pmd#eos#piplup#vulpix#sapphire (explorers)#bubbles (explorers)#myart#bubbles is the purest soul sapphire has ever known#sorry if these jokes have been made before#also i didn’t rip that food sprite from anywhere#i couldn’t find it on spriters resource (probably didnt search hard enough) so i made it from scratch in photoshop with a blurry ass#youtube video screenshot as my reference#it wasn’t a super convoluted method#but it definitely wasn’t the usual method of making pixel art lmao
1K notes
·
View notes
Text
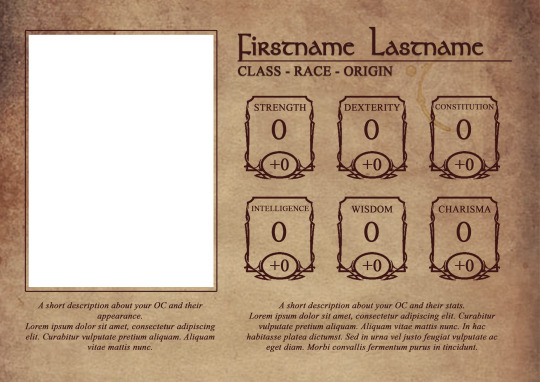

Baldur's Gate 3 OC Template
Fonts used: Stonehenge
Features: A place to put a picture of your OC, plus the ability to describe their appearance. Show off their stats and describe your reasoning behind them! Tell your OC's backstory and give some info, and show off their relationships to their companions.
Customizable! Everything is titled and grouped accordingly so things can be moved or changed. The borders are separated from any image and the color can be changed if you want to.
Edit to your liking but do not claim as your own.
Do not distribute as your own creation.
Please credit me and link back to this post if you can!
Mention me if you use this, I’d love to see your OCs!
Likes/Reblogs are appreciated
DOWNLOAD
#Euryalex templates#Baldur's Gate 3#OC psd#template#OC template#OC edit#Photoshop#resources#RP template#Character PSD#sorry if it looks bad#aphantasia came into my house and robbed me :(
1K notes
·
View notes
Text
Cat Tutorial + Brush Set by devinellekurtz
#digital tutorial#cat#cats#brush packs#procreate brushes#clip studio paint brushes#photoshop brushes#art reference#art tutorial#art help#art resources
4K notes
·
View notes
Text
So you just joined Tumblr?
Tumblr basics + Fandoms/Gifmaking
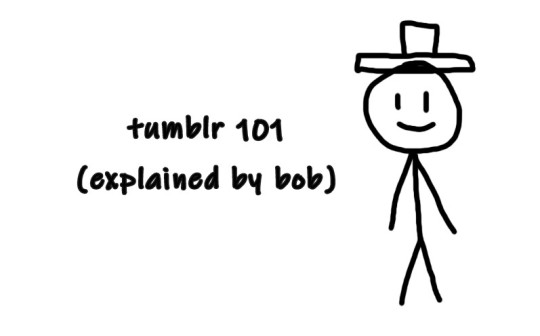
Congratulations, you just landed at Tumblr! This hellsite (affectionate) can seem intimidating and complicated at first, but once you grasp the basics of it it’ll quickly turn into your own personal little hut in the forest. Tumblr is a website where you and only you curate your dashboard, you’ll see the content that you seek on your own. In this post, I’ll explain the basics of Tumblr and the basics of how fandoms function here with the help of Bob. Okay, let’s get started.
1. Blog customization
The first thing you should do as soon as you land on Tumblr is add a profile picture and header before you interact with people. You want to be distinguishable from bots and therefore avoid getting blocked. You can also add anything to your bio, there's no character limit. Some folks add their name and pronouns, but there are no rules about that. There are also no rules about profile pictures. It can be a picture of you, a picture of your dog, a picture of a rock, or a picture of your favorite character. If you plan on staying on the fandom side, you might notice that a lot of fandom blogs have colorful-looking icons (a cutout of a character on a colorful background), for these icons and also headers I suggest checking out source blogs that make those icons. For starters, @iconheadersource is a goldmine where you definitely going to find something that’d suit you and your blog.
Tumblr on mobile and Tumblr on desktop are two different creatures when it comes to customization. On the desktop, you can customize your blog with coding (HTML + JS). Now Bob will demonstrate to us some examples of blogs on desktop.


If you want to customize your desktop blog, I suggest checking out @phantomcodes and @glenthemes for the codes.
Tutorial on how to install themes
Using javascript on Tumblr pages
2. Search Engine
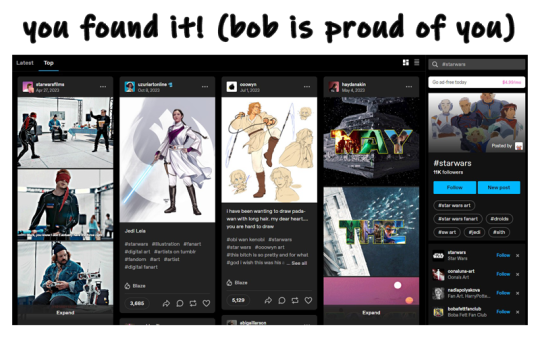
Nice! You've made your blog look pretty! Now, let's shift our focus to the search engine and ways to discover content. As mentioned earlier, you curate your dashboard by looking for things you enjoy and like. Search using hashtags or the names of your interests (TV shows, movies, birds, music, etc.) to find your piece of cake. For instance, folks who create posts about TV shows you like use tags to ensure their posts reach others interested in the same thing. So, let's go ahead and search for something right now.

Once you search for that specific tag, you are redirected to the corresponding tag page. Here, you can see that posts are sorted by "Latest" or "Top" (indicating posts with the most notes). On the right side, you will find related tags and blogs which are frequently using the searched tag. By following the tag, both the tag itself and the posts tagged with it will automatically appear on your dashboard in the "Your tags" section. You have the option to filter tags according to your preferences. In the settings, you can choose to block specific tags if you prefer not to see content related to some particular topics.
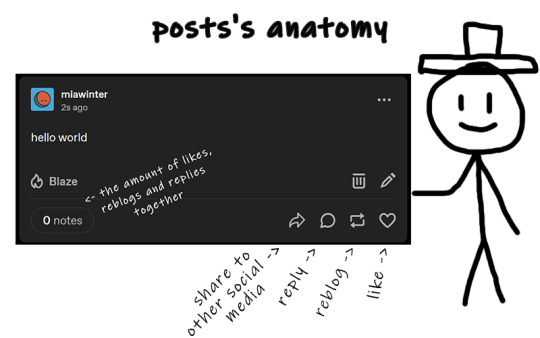
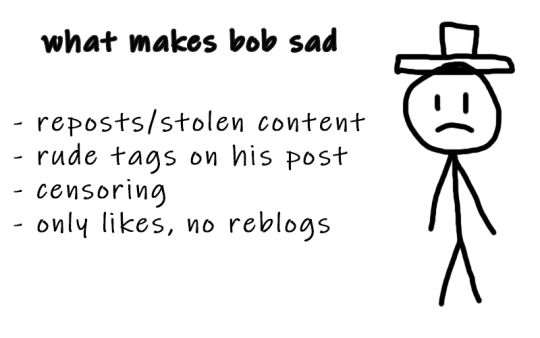
The only method for sharing posts and content on this website is through reblogging. On Tumblr, reposting others' content, including art, gifs, and fics, is not accepted. Reposting means downloading art, gifs, etc., creating your own post, and then sharing it. And that's a big no-no, strongly discouraged. Your likes essentially function as bookmarks, and you have the option to set them to be private. When you save something, it doesn't appear on your friends' dashboards.
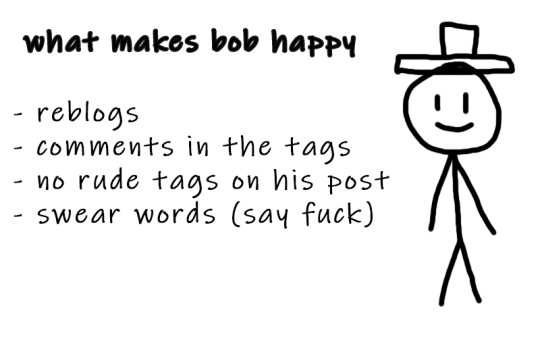
We don't censor things here, and I advise you not to do so too. If you need to mention a word that might be potentially triggering or could be flagged on another social media, feel free to say it. Many users have specific topics and tags filtered out, so if you use variations like "K!tKat" instead of "KitKat" in the tags, it can bypass the tag filter, potentially causing more harm as people will see content that triggers them. And remember to always tag posts that have flickering or flashing!!!
If you want to organize your reblogs or make comments on a reblog, use the tags section and not the comments section itself. This is called "#add tags." Feel free to type whatever you want, but keep in mind that the original poster receives notifications when someone reblogs their post and adds tags. Yes, all tags are visible to us.
Okay, so let's quickly recap this information with the help of our dear friend, Bob.
3. Social interactions
So let's move on to one of the crucial topics - how to make friends on Tumblr? Personally, I don't think there's one particular formula for that. Sometimes you just see a funny bloke posting about something as random as desert rain frogs, grab them, and go "You're my friend now" and that's how you become mutuals.
However, there are other, more common ways to become friends with someone. You can start by reblogging someone's post, adding tags to the reblog, and then following the person. Create your own posts, tag them to ensure they reach the folks who are interested in the same things as you, and participate in fandom events and challenges if you're into that. Interact with people you want to befriend, message them, send them asks. You will eventually find your crowd. You'll also find swifties, and fans of supernatural who never moved on from that destiel love confession four years ago, they also can be your friends, at some point, you will become friends and chill with each other. Be open to new interests to make sure your dashboard is not dull and boring.
Tumblr doesn't have the supposed hierarchy, and you don't have to listen to anyone who tells you otherwise, you curate your own experience and blocking is pretty normalized here. Notes and followers (which are private for everyone) don't really matter, stick to your beliefs and your vibe and you'll be fine. We're all equal losers here.
4. Fandom / Gifmaking
Fandoms play a significant role on Tumblr, they're closely tied with gifmaking. As a fellow creature of fandom, I'm adding this part because we don't gatekeep - more gifmakers and fandom enthusiasts mean a better fandom experience. As I mentioned earlier, everything has its tag, making it easy to find your favorite TV show fandom by searching for the tag. This is also how you can connect with people who share an interest in that specific TV show. Upon entering the tag, you'll stumble upon numerous moving pictures – these are GIFs. People create GIFs of everything, from their "blorbo" (the term for favorite character) to beloved ships and favorite moments. There are also plenty of creative GIFs with different coloring and complicated effects. And the best part? You can do it too!
There are a lot of ways to make GIFs. Some people use Photoshop, and some use Photopea which is an excellent accessible option. I'll be linking posts for Photoshop under this text. For Photopea tutorials and guides, please check out @photopeablr.
I've been making GIFs for three years at this point, and those are the tutorials I used when I was just starting out:
how to make a gif:
comprehensive guide 101
basic gif making tutorial + mvp player installation
gifmaking for beginners
how to install MVP player on a PC
film downloading & screen-capping tips
correct photoset dimensions
coloring
how to fix orange-washed characters
how to: coloring east & southeast asian celebs
channel mixer
colored background
color manipulation
vibrant coloring
how to brighten dark scenes
color isolation
effects
glitch effect
blending
crossfade transition
gradient effect in the text
gradient text
red colour accent on the b&w gifs
how to add a gif in a template
blurring gif backgrounds
using templates
text
text tutorial 1
font resources
understanding fonts and typefaces
split text
subtitles
other
icon tutorial
gif headers
For more tutorials, inspirations, and resources - please check out @usergif. It's a good source blog for all gifmakers.
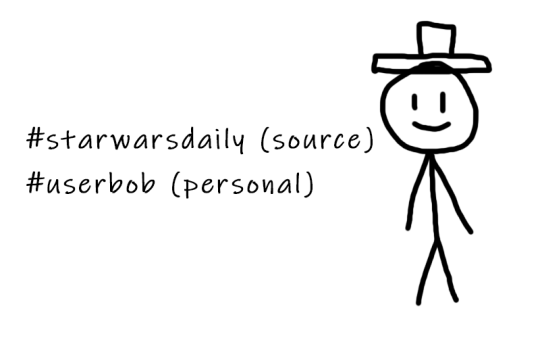
Wait but what's a source blog? These are blogs that center around a specific theme, creating content for a particular topic. They are managed by multiple editors, these blogs track their own tags to reblog content related to the theme. They can be source blogs dedicated to gifmaking (just like @usergif), a TV show, a movie, a character, a celebrity, a sports team, or literally anything else. Typically, these blogs incorporate terms like "network," "source," "central," "creators," "hub," or "daily" in their usernames, making them easily distinguishable from regular personal blogs. Examples of source blogs that come to my mind right now are @dailyanakin, @heartstoppercentral, and @nancywheelercentral.
Let's also talk about tracking tags, which are often included in blogs's bios, whether they're from source blogs or solo gifmakers. You can add these tags to your posts when creating a gifset related to a specific source blog or something you know a particular gifmaker would appreciate. Basically, the gifmaker can search their tracking tag, much like a regular Tumblr tag, and view the most recent sets in which someone used their tag.
The last thing I want to talk about are usernames, and main and side blogs. On Tumblr, we have two types of blogs: the main blog and the side blog. The main blog is the initial blog created when you sign up for your account. This blog has full functionality and all features, allowing you to follow other blogs, like posts, and send asks to other blogs. In addition to the main blog, you can create side blogs on your account. Side blogs lack some of the features of main blogs; you can't like posts, follow other blogs, or send asks from a side blog. They have slightly different functionality – a side blog can be password-protected, have multiple users, and allow you to send direct messages to people. Other users can follow your side blog, and you can receive asks from them.
Many people use side blogs as URL holders. For instance, when a new TV show is announced, someone might be the quickest to save all canonical character names. You can then message that empty side blog to inquire if they're willing to trade that specific URL or if it's available for a giveaway. Canonical URLs are often challenging to obtain, so many people add letters in between or at the end or use symbols like "-", and they also mix names and surnames of different characters.
5. The End
Okay, so we've just covered how Tumblr works, how fandoms operate, and how to get into gifmaking. I hope this guide by me and Bob has been helpful to you. If you have any questions, feel free to send them to my ask box or simply ask Bob. I hope you enjoy your stay here, and that your experience with this website will be a positive one.

#tumblr#welcome to tumblr#tumblr etiquette#how to tumblr#fandom community#fandom culture#photoshop tutorial#gif tutorial#gif resources#kas.txt#mine
472 notes
·
View notes
Text
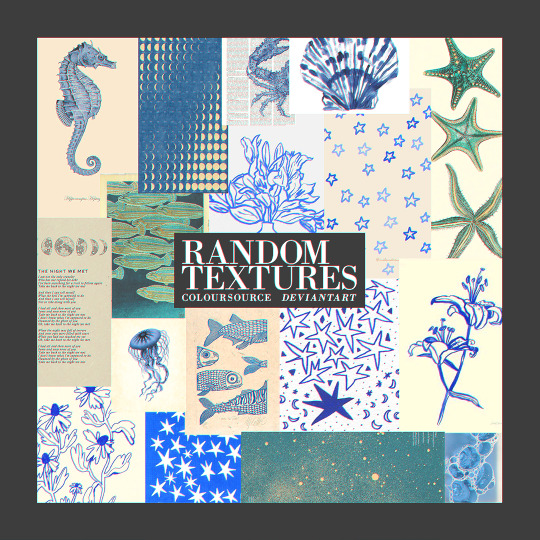
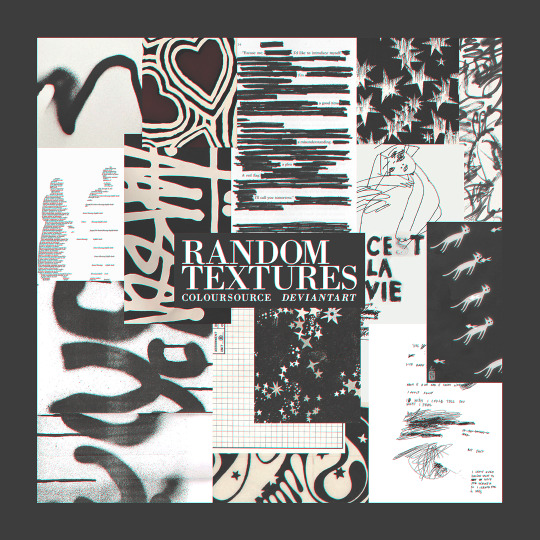
— RANDOM TEXTURES
ENG.RULES: a. add to favorites and comment (please be kind) if you download; b. please contact us in case of errors/failures in the download; c. don't including in other packs or transfers. PT.REGRAS: a. adicione aos favoritos e comente (seja gentil) se baixar; b. entre em contato no caso de erros/falhas no download; c. não inclua em outros packs ou repasse — download ↺
#psd#psd coloring#effect#moodboards#aesthetic#kpop#png#collage#capas#capa de fanfic#free#resources#photoshop#photopea#pack#packs#coloursource#brushes#actions#moodboard#icons
387 notes
·
View notes
Text
˙ ˖ ✶ ANAHILATION COLORING PSD #002 — luckiest charm !!
i make all of my resources for free and always will, but if you’d like to leave a tip my ko-fi is ANAHILATION. enjoy!!
feel free to edit however you like for personal use. please do not redistribute, claim as your own, or sell to others.
credit is not necessary, but always appreciated! a like & reblog if you’re using is the cherry on top. and also feel free to mention me, i’d love to see what you come up with!
my askbox is always open for any questions or suggestions on resources.
i'm now offering commissions! head to my blog for more details.
head to the source link to download on google drive!!
18 notes
·
View notes
Text

TEXTURE PACK – by cavalierfou
This pack comprises 18 simple textures.
I made all of these from scratch. You do not have to credit me when using them but please do not steal, redistribute them or claim them as your own.
Please consider liking or reblogging this post if you use this resource.
I hope you enjoy them! ♡ DOWNLOAD HERE
#textures#texture pack#vintage texture#grunge texture#free textures#photoshop textures#photoshop resources
911 notes
·
View notes
Text
𝐆𝐋𝐈𝐓𝐓𝐄𝐑 *

◟ ⋆ GLITTER STICKERS ! › hola ! this is a collection of glitter stickers png pack taken from various sources & etsy posts . there are 26 PNGS / 100+ STICKERS in total to use in any project . i’ve used these in adding that little final touch to any template and they even make cute simple dash icons . you may edit however you like as there is no coloring ps included . don’t hesitate to contact me if you have any issues . if you have found this useful in anyway , please like and reblog !!
GOOGLE DRIVE HERE .
#RPT#rpc#rph#resource#dailyresource#dailypsd#png#transparent png#ps resource#icons#png pack#Photoshop Resource
413 notes
·
View notes
Text

✨ Simple Gif Colouring for Beginners ✨
I wrote up my basic gif colouring process for a friend recently, but a couple of people here mentioned they'd also find it helpful! so, as requested, this is a beginner-friendly walkthrough of the way I colour my gifs :) it's aimed at brand new gif makers with no prior experience with photoshop or photo editing.
when I first started gif making I found colouring and photoshop in general suuuper daunting, so I've tried to simplify everything here as much as possible. hopefully this will be relatively easy to follow and not too intimidating!
a couple of things to begin with:
I'm only talking about colouring here - this is not a full gif making tutorial. I've linked to some of my favourites of those here!
I personally like to make bright, 'clean' looking gifs with vibrant but natural colours, so that is the style of colouring this tutorial is geared towards. most of gif colouring is subjective and about personal taste - the only thing that I'd say is possible to get wrong is skin tones, which I talk about a lot in this guide.
as I mostly gif Thai dramas, most of the advice is geared towards colouring for East Asian/South East Asian skin tones - but the techniques should be fairly universally applicable (and here are some tutorials that talk about gif colouring for other skin tones).
I'm not an expert! I'm not claiming this is the best or the only way to colour gifs - it's just how I do it.
this post is very image-heavy. if the images aren't loading (or the gifs are running slowly or cutting/looping weirdly), then try viewing the post in its own tab (rather than on the your dash or someone's blog) and refreshing the page.
okay, full walkthrough beneath the cut!
contents:
1. intro
a. natural gif colouring goals
b. very very basic colour theory
2. super simple colouring (the essentials)
a. curves
b. selective colour (and skin tone correction)
c. hue/saturation
d. saving and reusing colouring
e. another simple colouring example
3. other adjustment layers
a. brightness/contrast
b. levels
c. vibrance
d. colour balance
e. channel mixer
4. troubleshooting
a. curves
b. saturation
5. fin!
1. intro
the colouring part of gif making can be super overwhelming, especially if (like me when I first started!) you're completely new to photoshop and/or have no experience with colour theory or photo/video editing.
if you're opening photoshop and making gifs for the first time, I highly recommend getting used to making a few basic, uncoloured gifs to begin with. just to practice, rather than post anywhere (though you can always come back and colour them later if you want) - but it'll make the rest of the process much easier if you're already beginning to get used to working in timeline mode of photoshop. give yourself a bit of time to practice and get a feel for things like how many frames you tend to like in a gif, where you like to crop them for the best loop, what kind of aspect ratio you like etc* - so that you're not trying to navigate all of that for the first time on top of everything else!
* frames: for me between 60-90 frames is ideal, but 40-120 frames is the absolute min-max I'd personally use in a normal gifset
loops: for the smoothest loops, try to avoid cutting someone off mid-movement or mid-word if possible.
aspect ratio: for full-size (540px) gifs, I tend to go for either 8:5 (slightly 'skinnier' gifs), 7:5, or 5:4 (particularly big, thick gifs lmao)
✨ natural gif colouring goals
part of what can be so daunting about starting gif making is not knowing where to start or what you want to achieve. this is definitely something that gets easier with practice - the more gifs you make, the more you'll get a feel for what kind of look you like and the more instinctively you'll know how to get there. it also helps to see if any gif makers you like have made "before and after colouring" posts - these can help with getting a sense of the kinds of changes made through gif colouring. here's one I made!
in general, I like to make my gifs bright and 'clean' looking, with vibrant but natural colours. these are the things I'm usually hoping to achieve with colouring:
brighten dark scenes
remove muddy, yellowish lighting or filters
saturate colours
correct any skin lightening filters or overexposure
make lighting and colours as consistent as possible between gifs within a single gifset, especially gifsets featuring gifs from multiple scenes/episodes/videos
this guide is focusing on natural colouring, but of course there are many cool ways to make stylised/unnaturally coloured gifs. imo you'll need to master these basics first, but if you want to learn how to do things like change the background colour of gifs or use gradients or other cool effects, then @usergif's resource directory has loads of super helpful tutorials!
✨ very very basic colour theory
[disclaimer! I don't know shit about fuck. I do not study light or art. this is just an explanation that makes sense to me exclusively for the purposes of gif making.]
the primary colours for light/digital screens are red, blue, and green. having all three colours in equal measures neutralises them (represented by the white section in the middle of the diagram).

so to neutralise a colour within a gif, you need to add more of the colour(s) that are lacking.
in practice this usually means: the scene you want to gif is very yellow! yellow is made of red and green light, so to neutralise it you need to add more blue into your gif.
it can also mean the reverse: if you desaturate the yellow tones in a gif, it will look much more blue.
looking at the colour balance sliders on photoshop can make it easier to visualise:

so making a gif more red also means making it less cyan.
removing green from a gif means adding magenta.
taking yellow out of a gif will make it more blue.
tl;dr:
neutralise yellows by adding blue (and vice versa)
neutralise reds by adding cyan (and vice versa)
neutralise green by adding magenta (and vice versa)
2. super simple colouring (the essentials)
starting with a nice sharpened gif in photoshop in timeline mode. (these are the sharpening settings I use!)
some scenes are much harder to colour than others - it helps to start out practising with scenes that are bright/well-lit and that don't have harsh unnaturally coloured lights/filters on. scenes with a lot of brown/orange also tend to be harder.
I usually save a base copy of my gif before I start colouring just in case I end up hating it, or find out later that it doesn't quite fit right into a set and need to redo it etc.
so here is my base gif!

it's an okay gif, but it has a bit of a yellow tint to it that I want to reduce.
colouring is easiest to do in adjustment layers, which can be found under layer -> new adjustment layer - or for me they are here:

there are lots of different types of adjustment layers that do lots of different things - but for me the absolute essentials for colouring are curves, selective colour, and hue/saturation.
I also use brightness/contrast, levels, exposure, vibrance, colour balance, and channel mixer sometimes, depending on the gif - but I use curves, selective colour, and hue/saturation on every single gif.

✨ curves layer
the first thing I always do is a curves layer. when you first open one it will look like this:

first I usually click the ‘auto’ button, just to see what happens. sometimes it makes a big difference (it usually brightens the gif a lot) - but on this gif it didn’t do much.
if it had made the gif look nicer then I would have kept it and added a second curves layer on top to do the rest of these steps.
the next step is selecting the white and black points with the little eyedropper tools.
the bottom eyedropper lets you pick a white point for the gif. click somewhere super light on the gif to see what happens - for this gif, I clicked on the lampshade on the left. if it looks weird, I just undo it and try somewhere else - it usually takes a few goes to find something that looks good.
here's what that did to the gif:

then I pick the top eyedropper and use it to pick a black point by clicking somewhere really dark, again playing around until I find a black point that looks good.
here's what the gif looks like after picking the white and black points:

this can take some experimenting, but you can make super easy drastic changes to your gif just with this. in this case, the curves layer took out a lot of that yellowy tint.
and this is what the curves graph looks like now:

you can click and drag those lines to make further changes if you want - I usually leave them alone though. the colours of the lines indicate which colours have been changed in the gif - for example, you can see from that steep blue line on the graph that blue has been added to neutralise those yellows.
next I usually do another curves layer and just press the ‘auto’ button again to see what happens. usually it brightens the gif a bit more, which I like.
‼️if nothing is working: usually with a bit of fucking about a curves layer works well - but sometimes you can’t find a good white and black point anywhere, and instead your gif turns wacky colours and nothing looks good. this happens more often with very heavily colour tinted scenes :( the troubleshooting section at the end goes over some options, including starting with a levels layer instead.
✨ selective colour (and skin tone correction)
skin tones are made up of a mixture of yellow and red.
removing yellow (or adding blue or red) to a gif will make the skin-tones too red - and removing red (or adding cyan or yellow) to a gif will make the skin-tones too yellow.
adding blue to this gif with the curves layer took out the yellowy tint, which I wanted - but it also took the yellows out of Kim's skin tone, which I don’t want. so I need to put yellow back into the skin tones specifically - without putting it back into the rest of the gif.
selective colour layers let you select an individual colour and adjust the levels of other colours within that colour. you can change how yellow the green shades are, or how much cyan is in the blues, for example.
I need to add yellow back into the red tones to correct the skin tones on this gif. this is the case for most gifs in my experience - the vast majority of the time, unless a scene is very heavily tinted in another colour, a curves layer will add blue/remove yellow.
in the 'colors' dropdown, select the 'reds' section and drag the 'yellow' slider higher - this will add more yellow into just the red shades within the gif.

the amount of yellow you need to add back into the reds depends on how much yellow was taken out of the gif initially - I just play around with the slider until it looks right. if you're not sure, it helps to have some neutrally-coloured (not white-washed!) reference photos of the people in your gif to compare to.
here's the result. Kim's skin is a lot less pink toned and much more natural looking:

✨ hue/saturation
this adjustment layer lets you adjust the hue and saturation of the gif as a whole, and also of each colour individually.

I don't use the hue or lightness sliders unless I'm trying to do something more complicated with the colouring.
clicking the dropdown menu that says 'master' lets you edit the saturation of each colour individually. this is useful if your gif is still super tinted in one colour.
I thought the yellows on this gif were still slightly too bright, so I switched to the yellow channel and desaturated them slightly. (remember if you do this then you need to go back to selective colour and add more yellow into the red skin tones to balance out the desaturation!)
then I increased the 'master' saturation of all the colours to +5:
I usually find the right amount of saturation is somewhere between +5 and +12, but it depends on the gif.
‼️if the gif feels undersaturated, but the saturation slider isn't helping/is making the colours worse, try a vibrance layer instead.
done!

✨ saving and reusing colouring
you can copy and paste adjustment layers between gifs to make your colouring even across each of your gifs for one scene - so if you're making a set of multiple gifs of the same scene, or you think you might want to gif the same scene again in the future, you can save it as a psd so you can reuse the colouring again later.
each gif's colouring will then still need tweaking - different cameras/angles/shots of the same scene can still start out with slightly different colouring.
I recommend uploading the gifs as a draft post on tumblr so you can see what they all look like next to each other and catch any inconsistencies.
✨ another one! (speedrun!)

HI KEN!
the white point for the curves layer was in the window behind them.
the curves layer removes the muddy yellow tint, but again it makes their skin tones (especially Ken's) very red toned, which is adjusted by the selective colour layer.
3. other adjustment layers
imo many many gifs can be coloured really nicely with just those three adjustment layers, but some need different adjustments.
✨ brightness/contrast

pretty self explanatory!
I personally usually avoid using the 'brightness' slider because I rarely like the effect - I only tend to use the 'contrast' one.
the 'auto' button is sometimes useful though, especially if you’re struggling with the curves layer.
✨ levels

levels alters the white and black points of the gif, like curves - but unlike curves it doesn't also alter other colours.
use the sliders beneath the graph to alter how dark/light the gif is. you can slide the black slider further to the right to make the blacks darker, and the white slider to the left to make the whites lighter.
levels is a good place to start if your curves layer isn't working.
(I'm going to hit the image limit for this post lol so here are some screenshots of a table I made to demonstrate this rather than actual gifs. sorry!)


on both sides, I dragged the sliders up to where the big jumps are on the graph - this is usually a good place to start!
✨ vibrance
vibrance... makes the colours more vibrant. it's more subtle than saturation.
it's really helpful for gifs that feel grey. sometimes adjusting saturation just makes the greys kind of weirdly tinted, but a vibrance layer can fix that.

vibrance is much more subtle!
✨ colour balance

colour balance affects the overall balance of colours within a gif.
it's good for scenes with heavy tints.
I tend to stick to the 'midtones' dropdown, but you can also alter the colour balance within the shadows and highlights if you want.


✨ channel mixer
I avoided channel mixer for such a long time because it scared me. but it's great for scenes that are very heavily tinted in one colour.
basically, it works with the levels of red, green, and blue within a gif. you select an output colour and then play around with the levels of the colour you selected within each other colour.
kind of the reverse of selective colour?

so in the 'blue' channel, the levels of blue are at 100%, and the levels of red and green are at 0% - but you can impact how much blue is in the reds and greens and blues.
this tutorial explains it well - but imo the best way to get to grips with channel mixer is just to play around with it a bit (sorry)
(when I made this guide for my friend, I also made a slightly more complicated gif colouring walk-through that included using channel mixer. there isn't space to include it within this post, but if anyone is interested I could always upload it as an 'intermediate' gif colouring tutorial - lmk!)
4. troubleshooting
‼️curves
usually with a bit of fucking about a curves layer works well - but sometimes you can’t find a good white and black point anywhere, and instead your gif turns wacky colours and nothing looks good. this happens more often with very heavily colour tinted scenes :(
for example, with this base gif:

using many of the brightest points as a white point turn it wacky colours, like this:

yikes :(
some options for these cases:
try brightening the gif first with the 'auto' button on the curves layer or with a levels layer. having a brighter gif to start with can give you better options for picking a white point.
try finding an alternate, whiter/brighter white point. look for places the light reflects - on this gif, using the light on Porsche's cheekbone works well as the white point. it also helps to find places that would be white if the scene wasn't tinted - the lightest part of a white shirt is often a good place to start, for example.
skip the curves layer, and instead use a levels layer to alter your white/black points, and colour balance or channel mixer to balance the colours.
‼️over/undersaturation
if your gif (especially the skintones) is looking a little washed out or lifeless, it might be undersaturated. boost that saturation - or if that's not working, try a vibrance layer.
oversaturation is often easiest to spot in the mouths and ears of any people in a gif. if the mouths are looking unnaturally, vibrantly red, then you've gone too far with the saturation.
5. fin!
and done! I hope this was coherent helpful to somebody.
if there's anything that I've missed or that doesn't make sense pls feel free to shoot me an ask or a message and I'll do my best to help! I've also collated a bunch of additional reading/resources below.
happy gifmaking 🥰
✨ some links!
photoshop basics by @selenapastel
gifmaking for beginners by @hayaosmiyazaki
gifmaking guide for beginners by @saw-x
dreamy's gif tutorial by @scoupsy-remade (includes instructions on how to blur out burned-on subtitles or annoying video graphics)
beginner's guide to channel mixer by @aubrey-plaza
how to fix orange-washed characters by aubrey-plaza
colour correcting and fixing dark scenes by @kylos
does resampling matter? by usergif
how to put multiple gifs on one canvas by @fictionalheroine
watermarking using actions by @wonwooridul
resource directory by @usergif
#i got a couple of asks about this so i figured i'd type it up as a post#it's been sitting in my drafts for a while now though i'm so sorry omg.#i had to replace my laptop and it took me a while to get round to downloading photoshop on the new one#but i hope this is helpful!!#gif making#tutorial#photoshop tutorial#colouring tutorial#coloring tutorial#gif colouring#gif coloring#photoshop resources#gif tutorial#gif resources#userbunn#uservik#darcey.txt#darcey.gif#usergif
313 notes
·
View notes
Last Seen Blogs