#gshade tutorial
Text
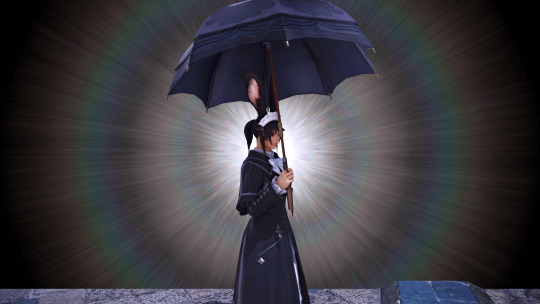
GShade Guide: Transparent shots with Chromakey
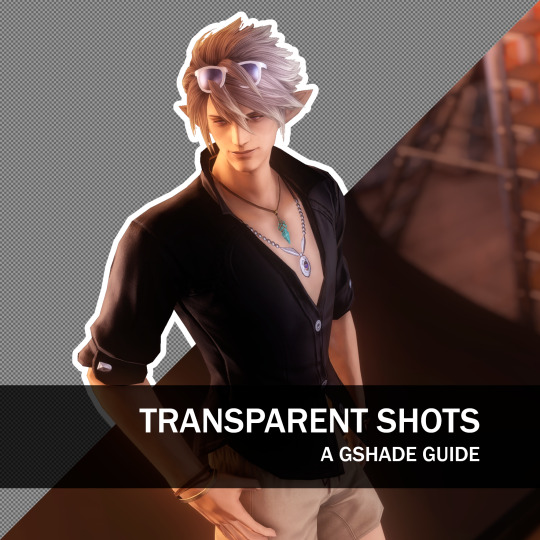
Want a nice cut-out picture? transparent chromakey shots are here to save the day!
You can achieve this with a combination of two features in gshade: ChromaKey, a technique that generates a greenscreen effect:

and Clear Alpha Channel, a setting at the very bottom of the Home tab:

Ready? So here's the step-by-step: first, make sure Chromakey.fx is placed right after FFRestoreUI.fx. Also, check if the Keying Color is set to Alpha Transparency.

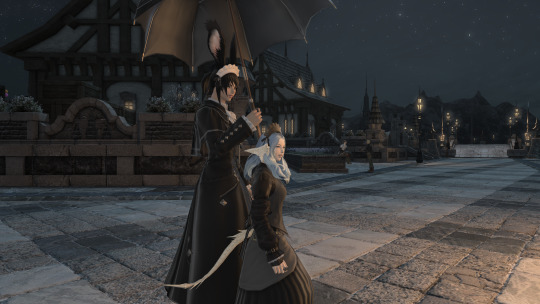
Next, set up your scene and position your subject with some clearance around it for the chromakey effect.
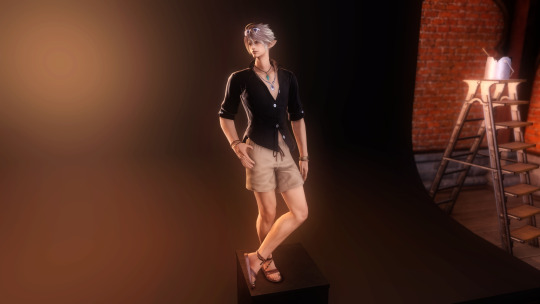
Now, make sure the Clear Alpha Channel setting is disabled, and enable the Chromakey.fx filter. After that, adjust its distance in the Definitions panel, like this:
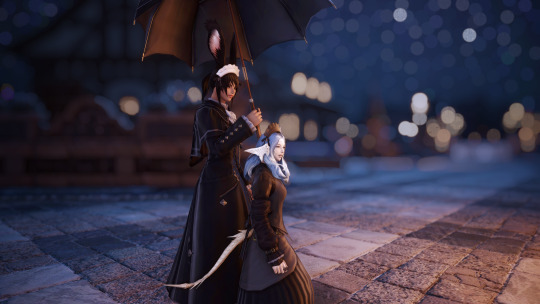
You want to cover as much as possible of the background without cutting into the subject itself. While the only thing you'll see in-game is a black background, the final screenshot will actually replace it with proper transparency!

(Important: make sure to re-enable the Clear Alpha Channel setting after taking your shots, otherwise you may end up with a bunch of fully transparent pictures!)
Chromakeyed, transparent images can be used in several different situations! For example, I often use it to create tutorial slides:
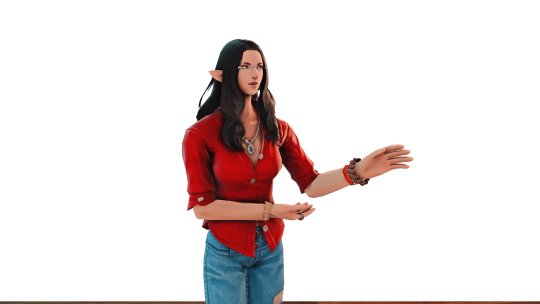

What about reference cards for art commissions?

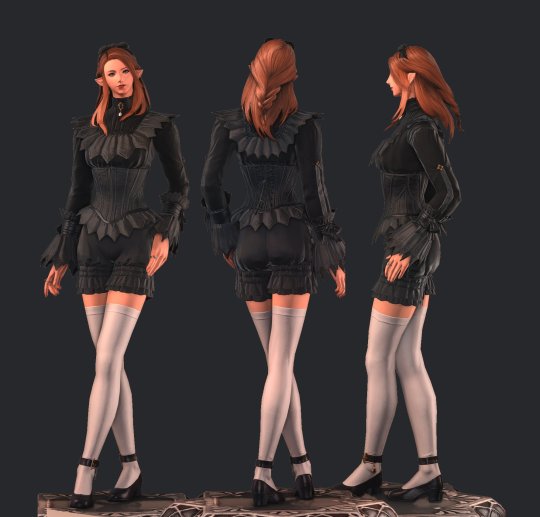
Or maybe stickers with your friends. Or Discord emotes. Or whatever strikes your fancy. The sky's the limit!

599 notes
·
View notes
Text
GShade Installation Guide (Sims 4)
because I am unhinged and hate watching tutorials/reading instructions I wanted to make a quick guide on how I installed gshade! this guide is gonna assume you already removed reshade but if you haven’t yet please go and do that and backup your presets into a folder somewhere!! this is the video I watched for that
Install Gshade from their website >here< and run the .exe
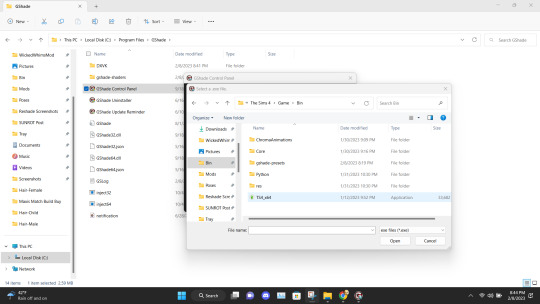
Follow the wizard setup and select the game you want to install gshade on, in this case it’s the Sims 4 (usually in the Origin Games folder).
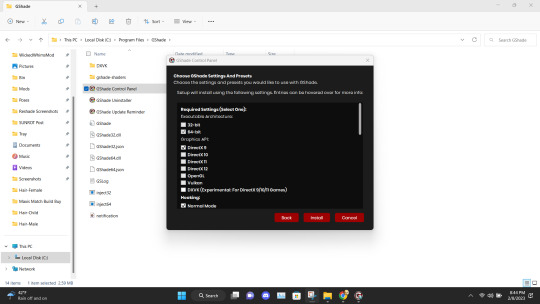
You will be prompted to input some settings:
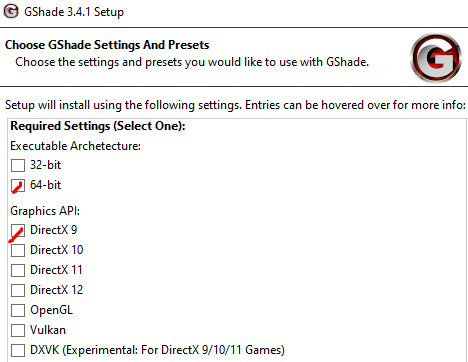
You will then be asked to select a hooking, I selected Normal Mode for this, and my gshade is working fine so I don’t know the benefits of the others ✌️
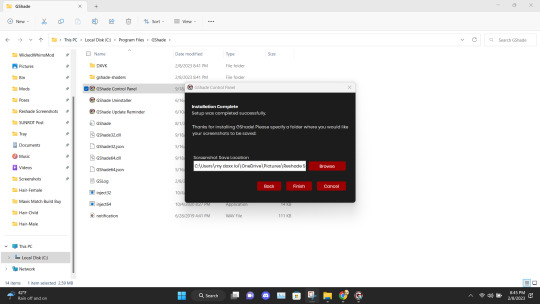
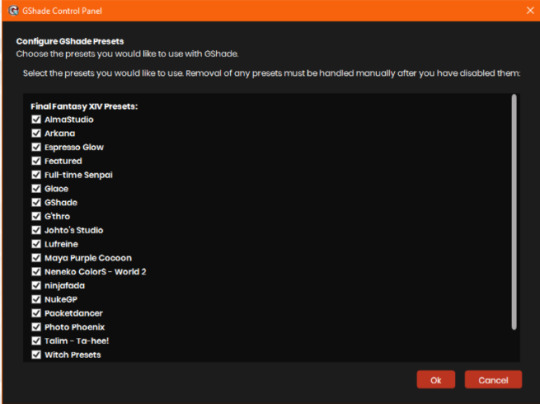
I left all the other options as is and decided to not use the Final Fantasy presets that come with gshade. But if you want to use them you can.
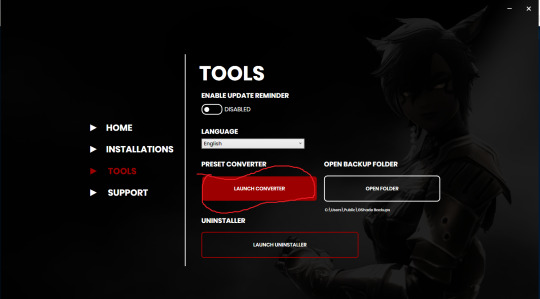
Open up Gshade Control Panel on your desktop and click ‘TOOLS’. This is how to convert your reshade presets to gshade presets. Launch the converter and select the folder where you stored your presets.
Don’t worry as gshade will create a backup for you, but now the presets in that folder will be gshade compatible.
Move these presets into your game by The Sims 4> Game> Bin> gshade-presets> Custom (If you’re familiar with reshade you will find this easily)
And there you have it you have Gshade! Open up your game and see if it works if not then I have no idea why as this is the exact steps I took sorry! One thing I urge you to do though is after removing reshade open sims to MAKE SURE that you actually did remove it sucessfully, as you don’t want to have both. Gshade so far has been quicker and easier for me to use, it only just lagged a bit the first time I loaded my preset and set it up, but since then it’s been fine. ✌️
- my Ko-Fi btw if anyone wanted to help me out I’d really appreciate it! 😘 mwah!
#tutorials#gshade tutorial#sims 4#the sims 4#btw I am completely computer iliteraite so if you're having troubles I probably can't help you#if you're confused about any steps in the tutorial though I can probably help with that
913 notes
·
View notes
Text
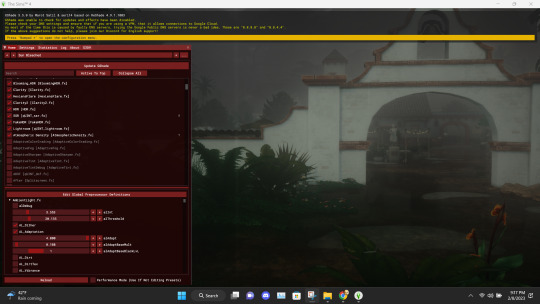
GSHADE 3.5.0 Cracked Tutorial Feb.2023
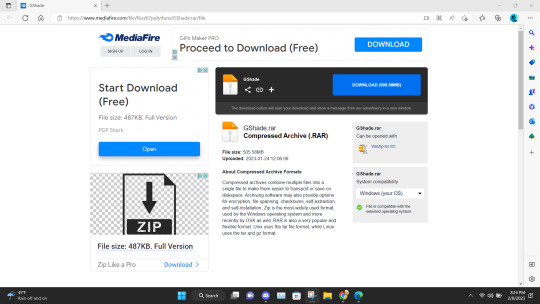
‼️Update:3/2023‼️ Due to gshade somehow being online again! You can still install the program with this tutorial but to avoid the update to version 4.2 notification keeping you from proceeding-Download the program from mediafire and then turn your pc to airplane mode and continue the process below! Note that when you turn your internet back on that your going to get the notification still ignore it. That what I’m doing.
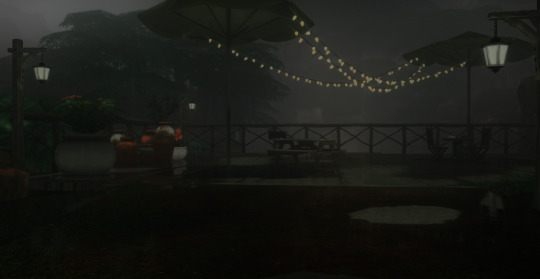
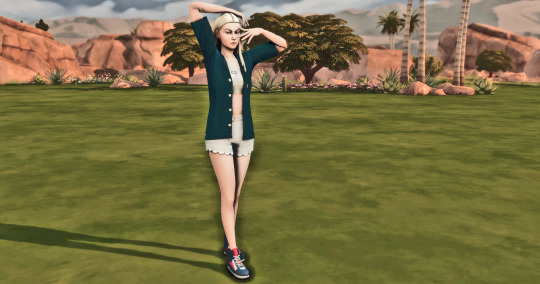
Alright with the recent events regarding the development team of GShade figuratively going under and the current version of this program available being far from perfect. It would be lovely to back to a version of GShade that doesn't have malware, the changes that disabled the depth of field effects, and the removal of some older shaders. So here's a tutorial on how to install 3.5.0 of GShade. It's the version that we as a collective switched to all those months back, when GShade popped off in the community. Also the version I used to take this picture and got from @toskasimz who sent me the files. She's the reason why I have my pretty pictures back. It took a long time to get my preset to look like this and the modern versions of Gshade and Reshade don't have the shaders for this anymore. The suggested skill level for this is basic knowledge of how to install Reshade/Gshade and knowledge of where to find the game Bin file and Program Files on your pc.
Note: This version is before the code that shut down your PC, if you manipulated the code of the program, was introduced. Use at your own risk. I personally have no issue with using it. I'm using my laptop I do school work on and I have no money to buy a new one so that's my assessment on how safe it is.
To start download this media fire file. It's a Rar file. Unzip it.
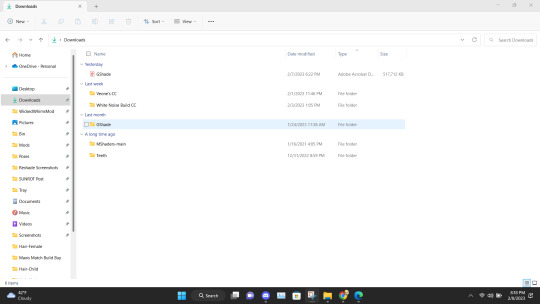
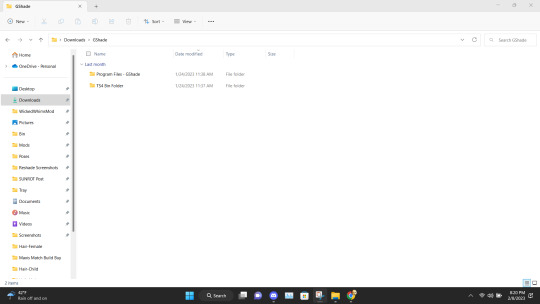
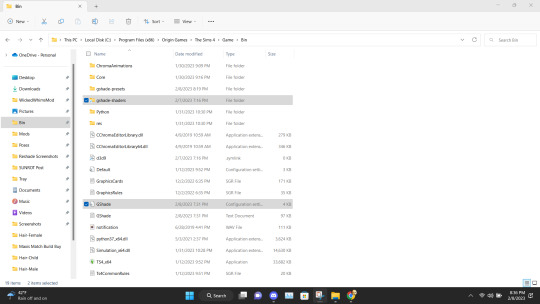
In the unzipped version of this file, you should have a folder that's highlighted below called GShade.
Inside that file are two folders. Program Files-G-Shade and TS4 Bin Folder. These folder names correspond with where the contents of these will go on your pc.
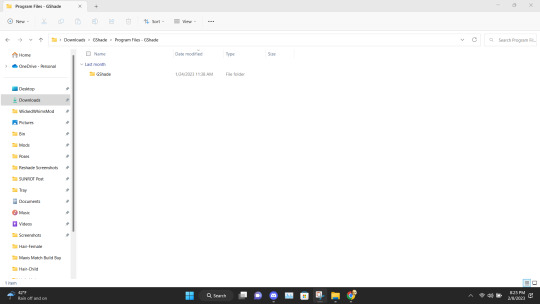
Alright inside the folders you should have the following content in the Program Files-G-Shade
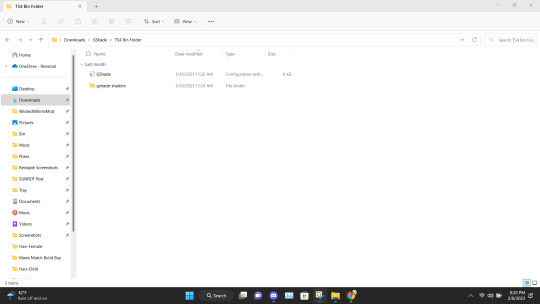
Inside the TS4 Bin Folder, you should have the following contents inside it.
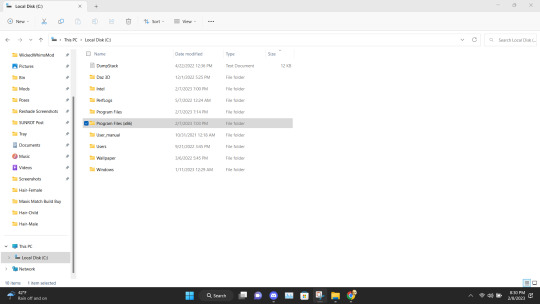
Place the GShade folder from the Program Files-G-Shade into your computer's Program(x86) file. This may have a different name based on your computer.
Next Place the contents of the TS4 Bin Folder which should be the G-Shade configuration file and the folder of GShade-Shaders into your Bin folder. (note I have gshade installed already so you won't have the extra files before installation.)
Now go back to the Program(x86) file on your PC and go into the G-shade folder.
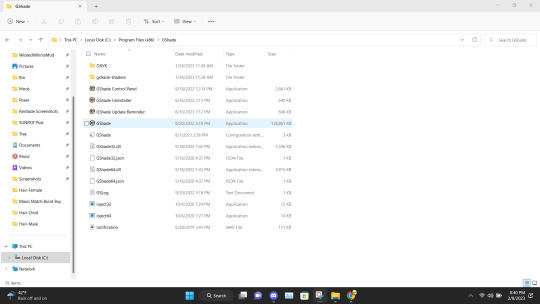
Double Click to run the program.
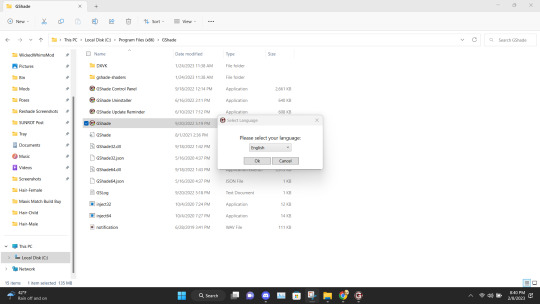
This is where you gonna need to pull your Reshade/Gshade knowledge. You just install the program as normal to the game. I will say I don't know if this will work with other games.
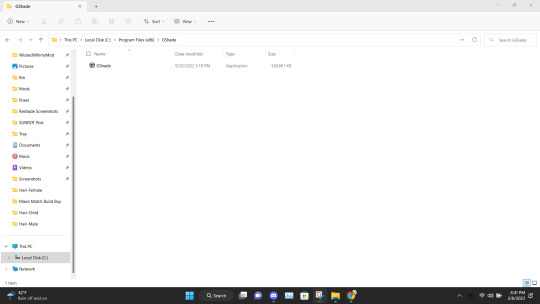
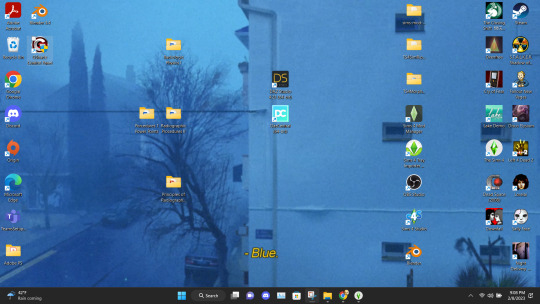
Alright, this is what you should be left with after installing G-Shade. Everything transferred to the Program Files with the exception of this folder. Leave it be and go to the Program Files file on your pc.
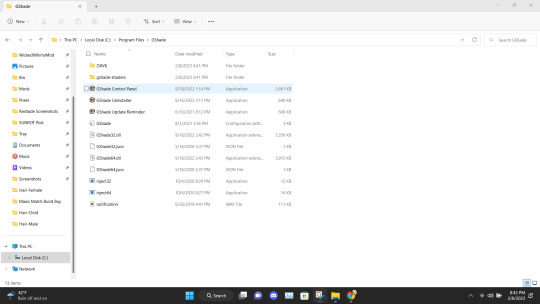
Once in the Program Files folder double click the GShade Control Panel.
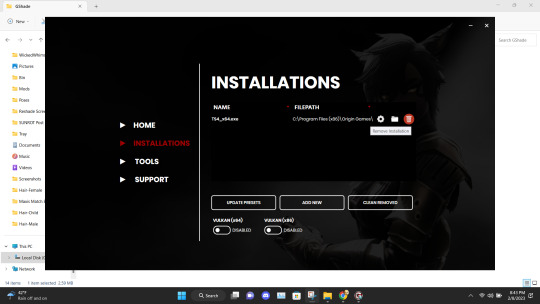
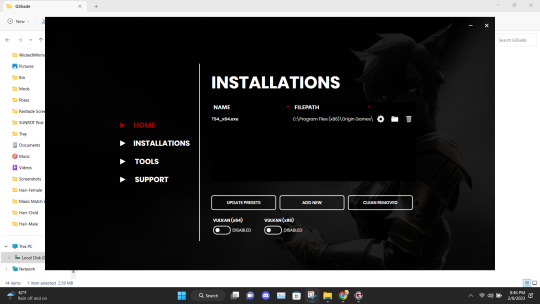
You should get the following screen Go to the Installations tab. Delete this file path. This is a very important step. It's not gonna work if you don't reinstall the program. Delete it and click Add New.
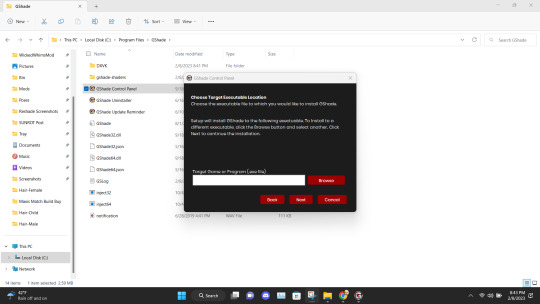
Install the program as viewed above. Click Next and set up your screenshot folder.
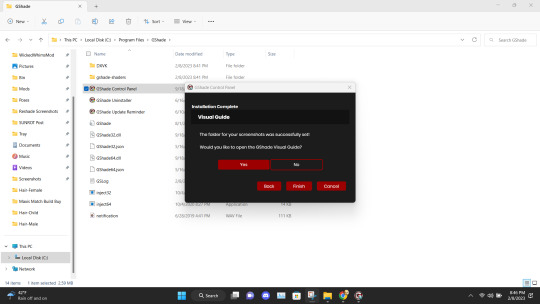
Click No on viewing the guild. You should have a control panel on your desktop. You can go in a convert you reshade presets if needed.
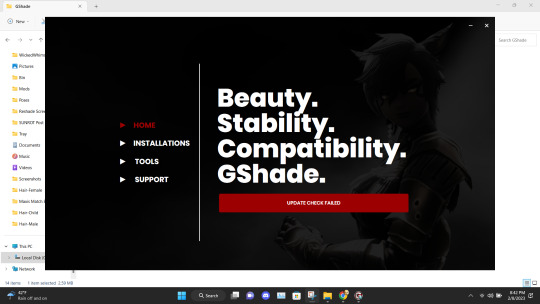
Alright if everything was done correctly open your game. It'll take a moment to load and when it does you greeted with the following screen on start-up.
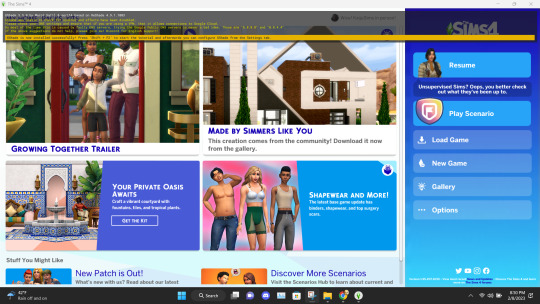
Ignore the yellow text on the top. It says that your effects are disabled because it's not online. It works I could be misinterpreting what "effect" means but my shader work so I'm not complaining.
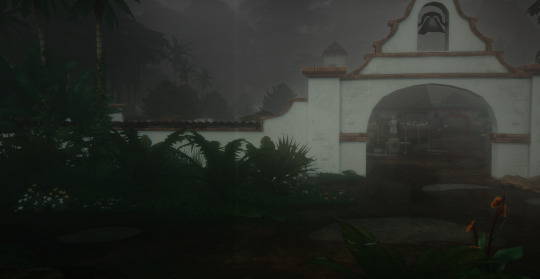
And there you go. Installed, and works perfectly. Don't update it. I don't know what it'll do. I have not tried. I will upload an edited version of my preset later this week or tonight. I have to tweak the color of the fog and make a decent post. Enjoy! I am open to helping under this post and in dms!
#if something you download thats for cosmetic reasons can shut down your PC that's not a normal function the program is free and basically#reshade it one of the same developers#gshade#sims 4#gshade help#ts4#simblr#tutorials
2K notes
·
View notes
Text
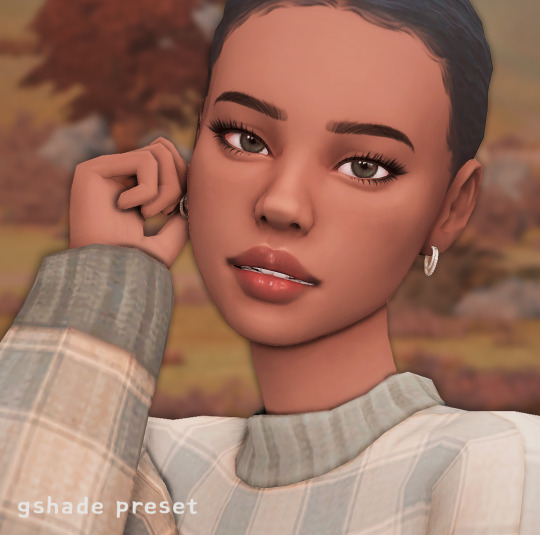
cinnamon bear: aesthetic gshade preset
~ ver video
~ gshade tutorial ~ descargar gshade
download
#the sims 4#los sims 4#the sims#los sims#sims#sims 4#simmer#simblr#youtube#ts4 simblr#ts4#sims 4 gameplay#ts4 gameplay#the sims 4 reshade#sims 4 gshade#sims 4 preset#gshade#sims 4 tutorial#sims 4 tumblr#content creator#sims 4 gshade preset#sims 4 lets play#tianaberrie#tianaberrie reshade#tianaberrie gshade#gshade preset
613 notes
·
View notes
Photo
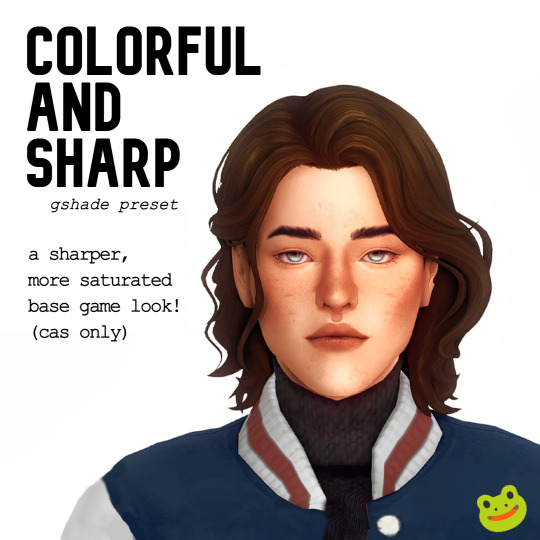


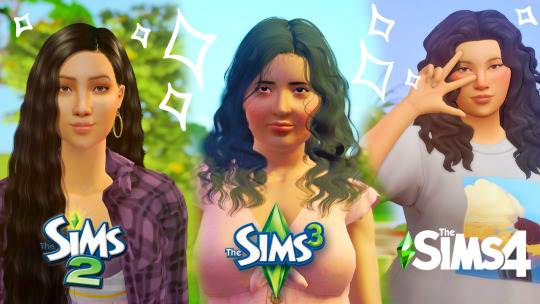
colourful and sharp - cas preset
this is the preset ive been using all year - it doesn’t change any colours in game, or the lighting! it’s subtle (though not exactly minimal).
requires gshade (no idea if it works with reshade)
tutorial for gshade here
hotkey ‘4′ for cinematic DOF
turn off edge smoothing for MXAO to work
not gameplay friendly
try turning off sharpening if your computer is struggling
to make the saturation a little less intense, turn off colorfulness
download | sfs
#its a bit boring if you don't use a lot of cc that adds texture like i do 😅 middle sim is maxis just so show that#sims 4#ts4#gshade preset#reshade preset#sims 4 preset#ts4cc#custom content#my cc#i know nothing about gshade so if this isn't working check the tutorials dont ask me#there might be a way to make it run lighter but idk how and it works for me so...
176 notes
·
View notes
Photo

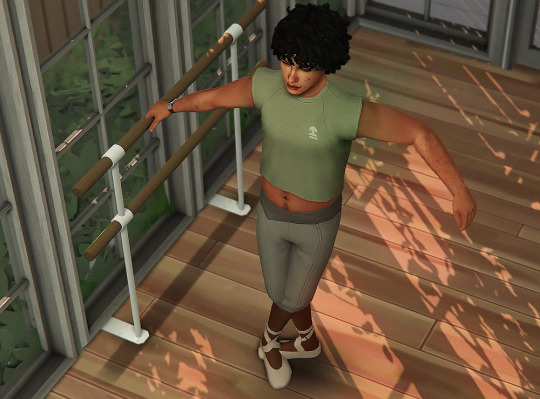


semi-annual myers household post
#i think this is the first time y'all are seeing teen wyatt!! i used to be so good w/ gameplay posts but having to switch saves was.. a lot#ive still been playing it's very enjoyable to just play a random household posting the myers became too structured if tht makes sense#anyways working on making a tutorial on how to make ur own re/gshade presets so that'll be done in like 6mths realistically lol#might just do a time skip following wyatt maybe but i might play vi in college first she doesn't want kids#ts4 gameplay#s4mm#the sims 4#myers#s
127 notes
·
View notes
Note
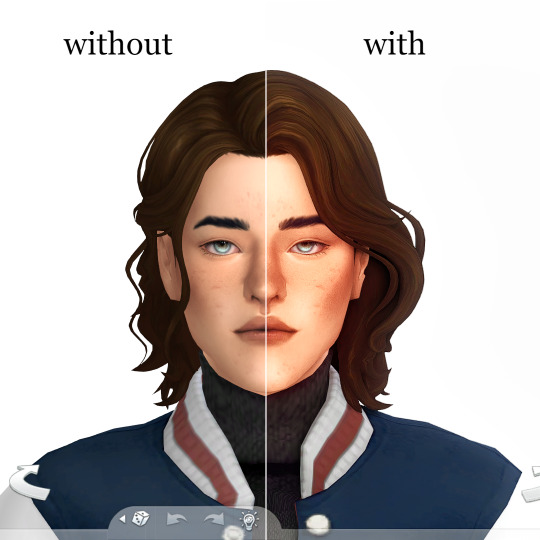
I love your posts. I wanted to ask how do you do edit your photos. To get the , say reached level 10, like you just posted. How do you do that. Also your pictures are so lovely. So crisp. Love them.
Hi thank you so much! I answered some of it here, but I play with the highest graphics settings & also use this graphics overhaul by @hazelminesims. I use this indoor lighting mod & this (with sunblind for outdoors). I occasionally will use photoshop to change the level/contrast/lighting but tbh gshade does the heavy lifting in that department. Hope this helps! 🤎
12 notes
·
View notes
Text
are you tired of reshade and the way it bullies you? WELL ITS TIME TO MEET MISS GSHADE! If you want a hassle-free way of giving your games a lil more life~ is time to check out this gshade tutorial ♥
✨check out the new girl in town here✨
#ts4#the sims 3#the sims 4#ts3#the sims 2#ts2#gshade tutorial sims 4#gshade tutorial sims 3#gshade tutorial sims 2#girl gamer#sims youtuber#youtube sims
239 notes
·
View notes
Text


NEW RESHADE PRESET
FELIX BY FEFYLA
DOWNLOAD ON MY BLOG:
#the sims 4#the sims#gaming#life simulation games#reshade#sims 4#sims 4 reshade#reshade preset#sims 4 mods#mods#sims 4 custom content#sims 4 mod tutorial#sims 4 reshade mod#sims 4 lighting mod#sims#preset#how to#reshade mod tutorial#sims 4 reshade preset#sims 4 how to#the sims 4 mods#make the sims 4 prettier#reshade presets sims 4#sims 4 aesthetic#aesthetic#shiipty#shiipty reshade#shiipty gshade#misslollypop#misslollypopsims
4 notes
·
View notes
Note
can you share how you got gshade to work in ts3? i can't get it to run and i dont know why D:
Hi ☺
I honestly kinda just followed the instructions. But I'll show more or less what I did under read more. Please note that I am not an expert at the installation or tutorials!
FIRST COLLECT ALL YOUR RESHADE PRESETS AND PUT THEM IN A FOLDER IN YOUR DESKTOP for later use :) !
I used the windows installer, put my setting to English.
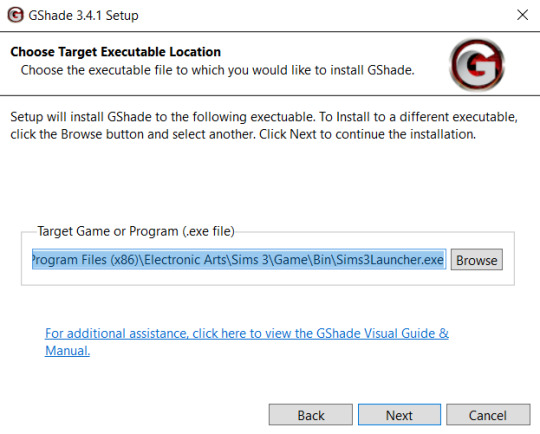
When it asks you to choose a target executable location, you want to choose the .exe file of the sims 3. In the picture below you can see which one I chose Sims3Launcher.exe AND later on I add TS3.exe. For now choose only one of the two, we can add the other one later on.
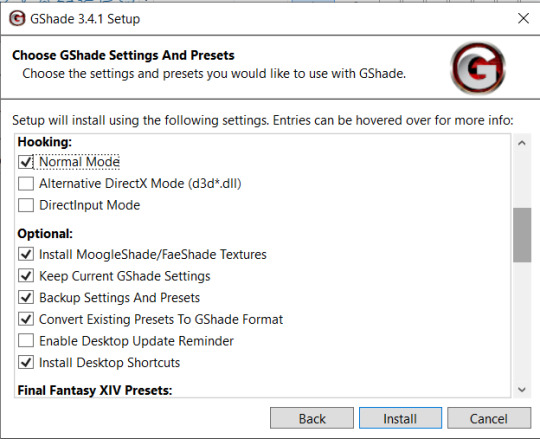
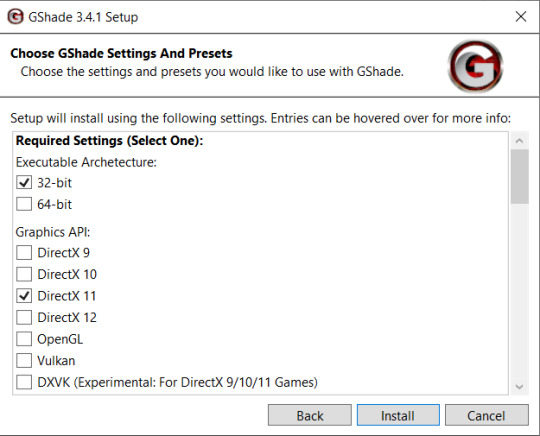
Then it's going to ask you to select what setting you prefer. Below are the ones I put. I also selected all the Final fantasy presets as well!
Then I clicked install and waiting for the installation to be complete and clicked next. The next step is to choose where you want your screenshots to be saved. I used the Bin folder like previous reshade settings had it, but this is personal preference.

AND WITH THIS INSTALLATION SHOULD BE DONE!!
Now to be on the safe side, lets open up the Gshade Control panel, and click the Installations tab to the left side of the panel.
You will notice I have 2 .exe files in the installations, if I'm being honest I don't know which one is the correct one so I kept both.

Click the setting tool and select all the presets or just the ones you like and then click ok. To add another .exe file click ADD NEW. It's going to take you back to the installation screen where you need to click UPDATE PRESETS button next to the ADD NEW button.
Now I had to convert my old reshade presets into gshade presets. So I gathered all my old reshade preset in one folder. Then in the gshade control panel, I went into the Tools tab on the left side of the screen. I clicked LAUNCH CONVERTER.
Then you look for where you saved all your Resahde presets so it can convert them :)
After this you should be able to load your game and gshade with no problems. If the loading bar below doesn't show, we did something wrong 😓
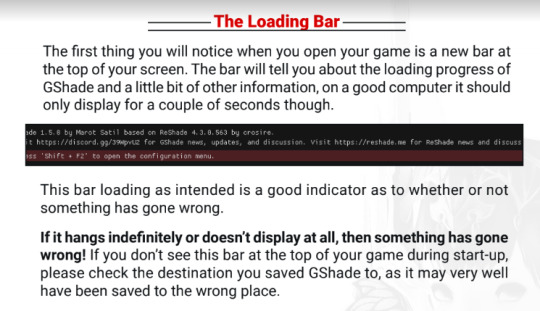
If the loading bar above doesn't show, we did something wrong 😓
Try pressing shift + f2 to see if the gshade interface show up, if it doesn't we might have missed a step!
73 notes
·
View notes
Text
GShade guide: External Textures 101

External textures open up an amazing world of possibilities: think superimposed visual effects, or custom stickers (like logos or decoration)!
So grab a coffee and let’s learn how to use them for a simple but powerful purpose: custom backgrounds!
But first, what’s a texture? In short, a texture is simply an image, like a .jpg or .png file, that you can load and use within the 3D space for different purposes. In broader 3D terms, it means the 'skin' you wrap a 3D model's wireframe surface around.
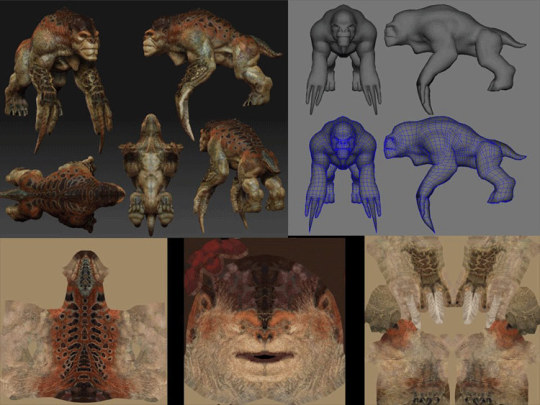
(You can learn more about the broader meaning of texture mapping with this handy video.)
Now, back to GShade - we can’t replace in-game textures, but we can add new elements to the 3d space within the game and apply custom textures. So here's the step-by-step:
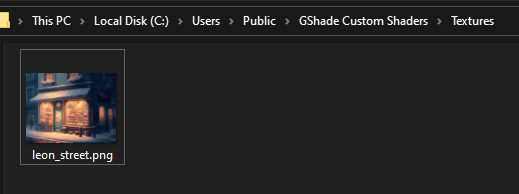
1 - Locate the Custom Textures folder
Tap the Windows key to open the Windows prompt, type the following line, and press Enter:
%SystemDrive%\Users\Public\GShade Custom Shaders\Textures
This will open an Explorer window listing all the custom textures available for GShade to use.
Now, the good stuff™: you can install new textures simply by copying new files into this folder!
2 - Load and Show a Custom Texture
Open GShade, locate a shader named Stagedepth, and enable it:
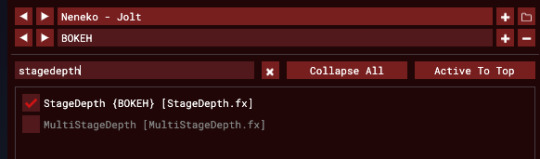
(Leave the number of StageDepths to 1, that's enough for now.)
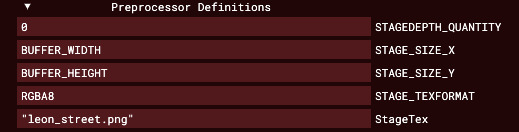
Now look out for a little widget called Preprocessor Definitions, and expand it.
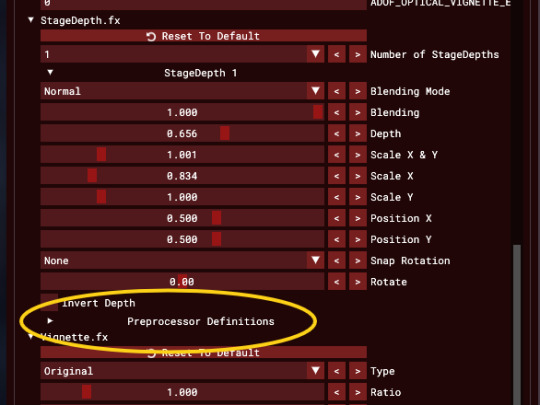
We need to inform 3 parameters:
StageTex (the name of the texture we want to use)
STAGE_SIZE_X (the width, in pixels, of the image we’re loading, or the BUFFER_WIDTH keyword for full-screen width), and
STAGE_SIZE_Y (same, but for height, or BUFFER_HEIGHT).
For now, let’s use one of the textures installed by default. Locate and enable StageDepth, and use this value (and make sure to use double-quotes around the texture name):
StageTex: "LensSprite.png"
And hopefully, you'll see something like this:
Now play with the shader’s sliders, especially the 'Depth' value since it allows you to determine how close or far the texture will be placed. (Remember, you can always right-click on a GShade control to open up a context menu with the ‘reset to Default’ option.)


If you got to this point - congratulations! You just loaded your first custom texture into GShade. I’m proud of you!
Time to put your safety goggles on - we’ll use Depth to project the texture away, and use in-game scene set-up to match the injected background composition. Here's the image I'll use, generated with MidJourney:

Since we can’t modify the texture itself, we need to make sure our scene setup matches aspects of the injected background like color and contrast. (It can be modified by GShade filters, though, so you can apply effect like Blur by placing StageDepth closer to the top of the filter list):
First, the scene setup...
Now, enable a preset - in this case, Neneko Jolt:
Enable StageDepth and specify the custom texture in StageTex, so it automatically loads...

...and place StageDepth before the ADOF filter, so its bokeh effect applies to the texture as well:


...and presto! Now you have a beautifully merged custom background.

This opens up a lot of composition possibilities; looking forward to seeing your attempts with external textures!
204 notes
·
View notes
Text
Simmers on Mac interested in using GShade, listen up!
It appears after much researching that the only way to get GShade on Mac for The Sims is to play the game through Crossover.
If you’ve ever heard of Wine (the program, not the drink lol), this program is very similar!
Unfortunately it’s a paid program but there is absolutely NO way to find it for free online, none at all 😉
I haven’t tried it out myself, but based on what I’ve read, you’ll probably need a .exe of TS4 or a .exe of Origin.
This process is very similar to how Linux users play TS4, so you can look up tutorials and apply that information to get it running.
I wish we could use the native version of TS4, but that’s something we’ll have to wait for, I guess.
Here’s the link I was sent via the GShade discord server if you want more information:
https://github.com/seathasky/gshade_cx_mac
And here’s the information about running The Sims 4 through Crossover:
https://www.codeweavers.com/compatibility/crossover/the-sims-4
#ts4#the sims 4#gshade#gshade mac#sims 4 gshade#sims 4 mac#mac crossover#sims 4 tutorial#idk what else to tag this but pls share this around if you can#I know many ppl like me were bummed to find out we couldn’t use reshade#but now there’s a possibility we could have something similar#provided running it through crossover instead of natively works
40 notes
·
View notes
Text
ughhhhhh i had freetime and was gonna play some sims but only just remembered i never dealt with the fallout of the gshade nonsense last week and ughhhhh
#my brain is too sleepy to read tutorials on how to install reshade#gosh how i hope someone in the ffxiv community comes up with an also easy to install version of reshade to replace gshade soon 😩#i think ill just uninstall i guess for the time being ughhhhh#annoying#sims stuff#mal speaks#tdl
2 notes
·
View notes
Text
'mist' reshade preset + tutorial
mostraré como descargar e instalar reshade en los sims 4, incluyendo mi nuevo reshade preset 'mist' e incluyo todos los links de descarga..
· ver video aquí
━━━━━━━━━━━━━━━━━━━━━━━━━━━━━━
sigueme en mis redes sociales
#the sims 4#los sims 4#the sims#los sims#sims#sims 4#simmer#simblr#youtube#ts4 simblr#ts4#sims 4 gameplay#ts4 gameplay#the sims 4 reshade#sims 4 gshade#sims 4 preset#gshade#sims 4 tutorial#sims 4 tumblr#sims 4 gshade preset#sims 4 lets play#tianaberrie#tianaberrie reshade#tianaberrie gshade#sims 4 reshade#ts4 reshade#reshade preset#reshade#reshade tutorial#mist reshade
277 notes
·
View notes
Text
on one hand yes google sucks now enshitiffication yada yada but on the other hand if you can't figure how to make google work enough to get you a tutorial on how to do something in the sims im not playing tech support for you in a tiktok comment section
#this is incredibly specific to the comments that i get on tiktok#like. if you google 'how to download cc' a youtube video made by a real person is the first result#if you cant figure out how to navigate google to a tutorial on gshade how am i expected to explain it to you#reason number 1 i don't make tutorials on anything. i dont wantt to be tech support to stupid people
6 notes
·
View notes
Note
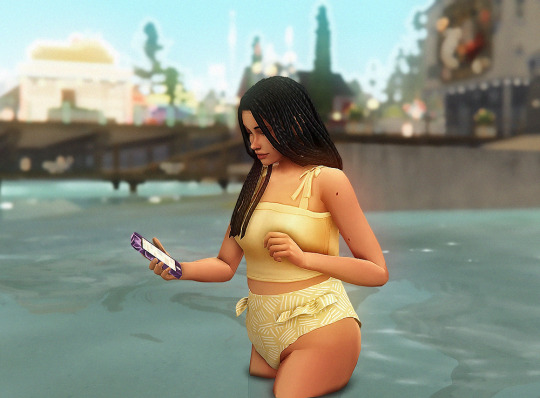
how do u get ur screenies to look gooddddddd
you really think they look good? 🥺 i guess it’s mostly luck cause i personally have no idea what i'm doing lol i just use gshade (currently using this preset) then i crop and edit them on photoshop using psd actions and my game graphics in on ultra. i don’t know if this is the answer you wanted but i hope i could help somehow!
#if you don't know how to use gshade oshinsims has a really good tutorial on youtube#and if you don't have photoshop i have i link if you're interested :)#replies
7 notes
·
View notes
Last Seen Blogs

youngk-s
👁👁

aireservstcharles
Aire Serv of St. Charles

higgsangel
Higgs

hadesknockedupintheunderworld
I Just Be Posting

filez34
a rather feral creature