#flavorful
Text

this is probably how my gf sees me i bet
70 notes
·
View notes
Text
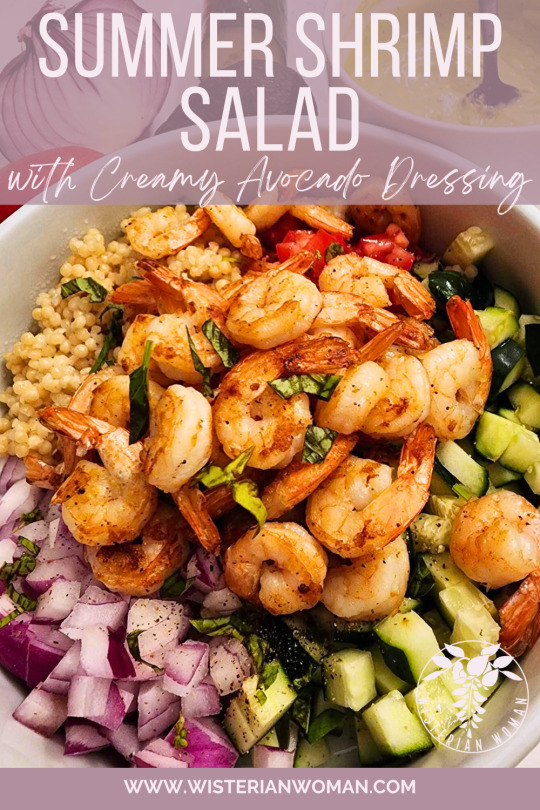
Summer Shrimp Salad with Creamy Avocado Dressing
The delicious Summer Shrimp Salad with Creamy Avocado Dressing is a refreshing and satisfying dish that bursts with flavors. This salad combines perfectly cooked shrimp, couscous, and a medley of fresh vegetables, creating a harmonious, delicious dish.
The delicious Summer Shrimp Salad with Creamy Avocado Dressing is a refreshing and satisfying dish that bursts with flavors. This salad combines perfectly cooked shrimp, tender grains, and a medley of fresh vegetables, creating a harmonious blend of textures and tastes.
The star of this salad is the creamy avocado dressing. Made with ripe avocado, tangy Greek yogurt, zesty lemon juice, and…
View On WordPress
#eat the rainbow#fitness journey#flavorful#Food#food blog#grain bowl#healthy habits#healthy recipes#Mediterranean food#Mediterranean recipes#Mediterranean salad#protein recipes#Recipes#shrimp#shrimp recipes#shrimp salad#summer recipes#summer salad
55 notes
·
View notes
Photo

Swift & Co, 1947
#Swift's#ad#1947#vintage#mid-century#advertisement#illustration#premium franks#hot dogs#pure pork sausage#dinner quality meat#Brookfield#midcentury#frankfurters#sanitary#flavorful#table ready#meats#advertising#Archie Andrews#NBC#mid century#Swifts
100 notes
·
View notes
Text


[Finish with a little breadcrumbs. Here we go. We are whole. Home-cooked food. Tender, flavorful, deep, balanced, all of it.]
#s21e02 seriously saucy#guy fieri#guyfieri#diners drive-ins and dives#little breadcrumbs#home-cooked food#tender#flavorful
7 notes
·
View notes
Note
Prey who are really cute and excited to be eaten like "eeee I'm in a stomach!!" Which their pred adores
That’s so cute. I’m sure if Pinterest exists in this hypothetical world then the prey would have a stomach insides board. Gotta live for the tumesthetic (uh title is a work in progress). The prey probably leaves notes for the pred that are like ‘Could you eat me pretty please, thank you :)’. I imagine the prey kicking their feet in the air and giggling while they’re inside.

#vore blog#sfw vore#v.ore#vore writing#safe vore#soft vore#non fatal vore#vore idea#so cute I’m gonna cry#thank you#om nom nom#flavorful
17 notes
·
View notes
Text
"You are so flavorful with the fragrance of roses on your neck, I could just stand next to you all day every day.. you smell so good, just damn."

Here are some roses that I have seen and taken pics of, they are beautiful and red like your lips.. but they could never quite attain the beauty of you - eUë
#red roses#roses#red#flowers#flower#flavorful#your fragrance#fragrance#next to you#next to me#you smell good#your smell#smells good#smells great#smellsamazing#mine#thoughts#feelings#i love you#spilled ink#spilled thoughts#spilled words#love quotes#love#love quote life quotes#love quote for her#quoteoftheday#romance#romantic#fell in love
48 notes
·
View notes
Text
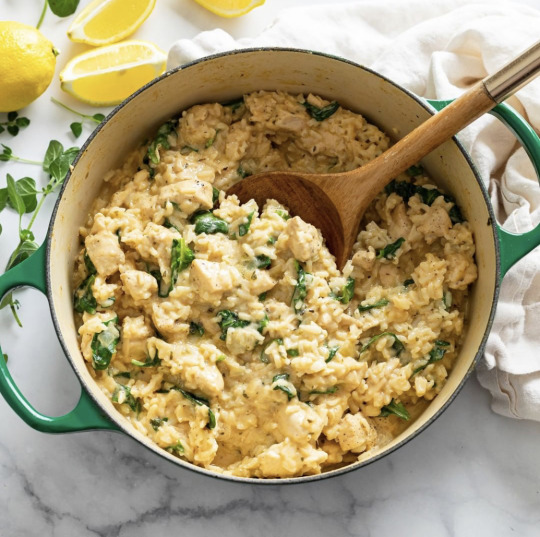
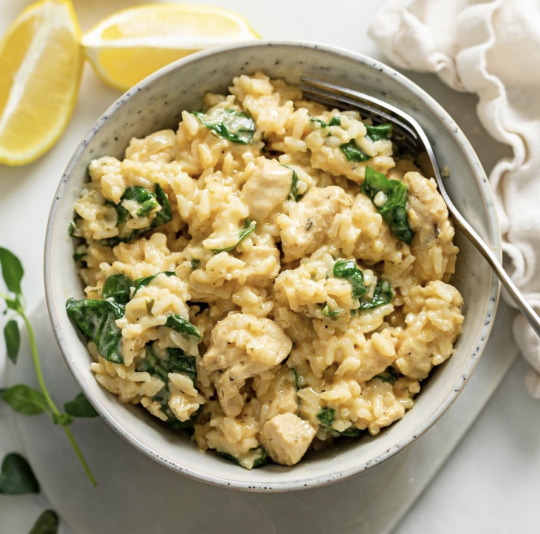
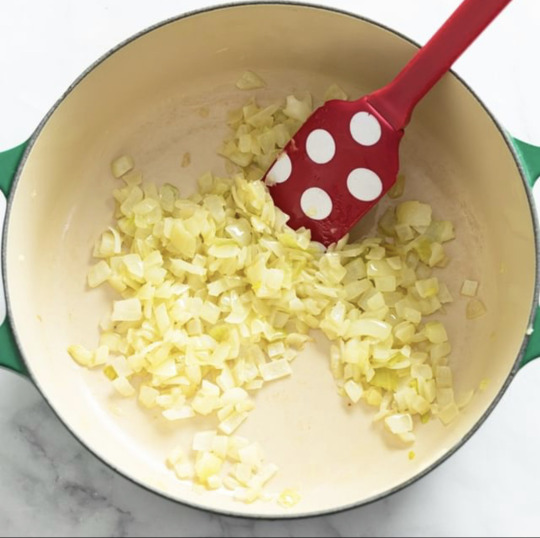
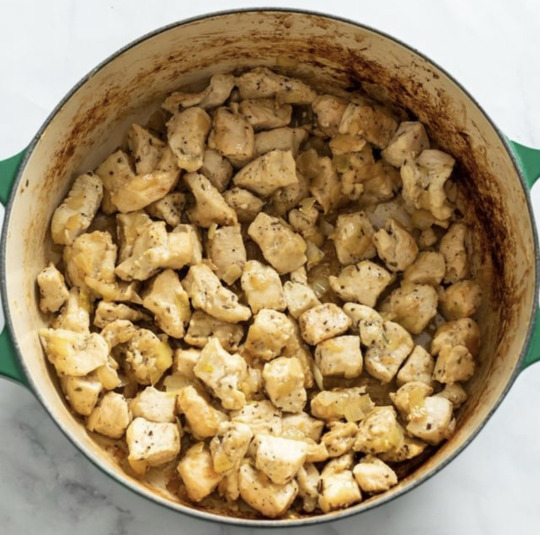

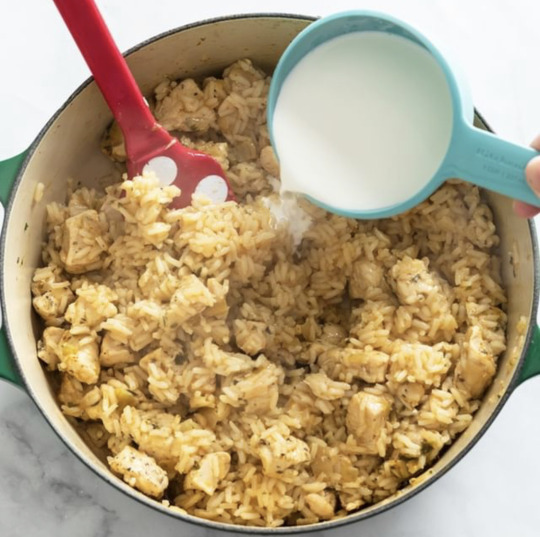
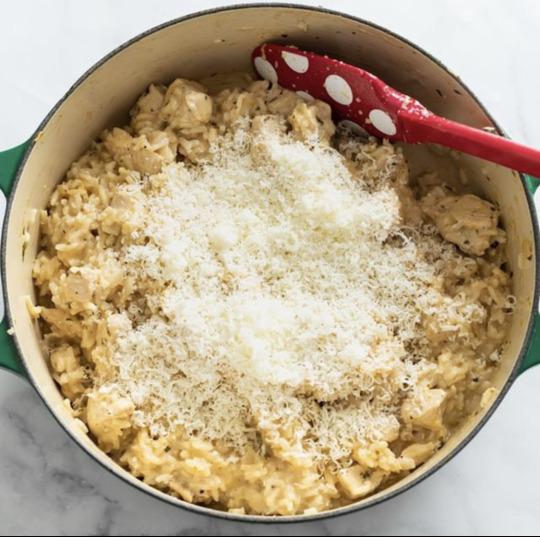

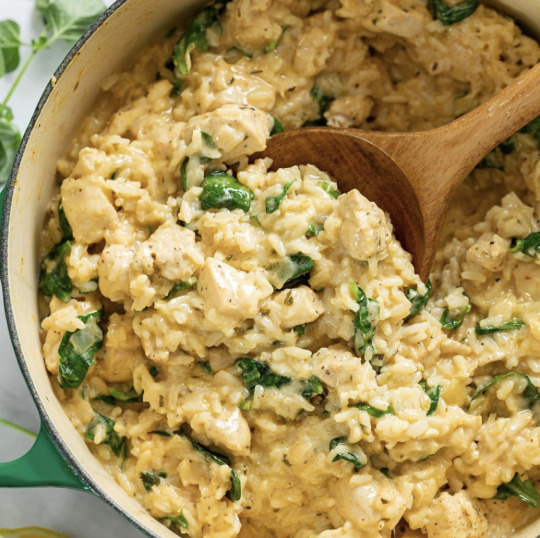
chicken and rice (one pot!) via the cozy cook
the cozy cook Instagram
#chicken and rice#garlic#butter#onion#one pot#recipes#the cozy cook#italian seasoning#chicken broth#white wine#cooking#dinner#lunch#easy recipes#food#creamy#Parmesan#flavorful#spinach#lemon#comfort food#parsley#mustard powder#oregano#paprika#cayenne pepper#curated
98 notes
·
View notes
Text
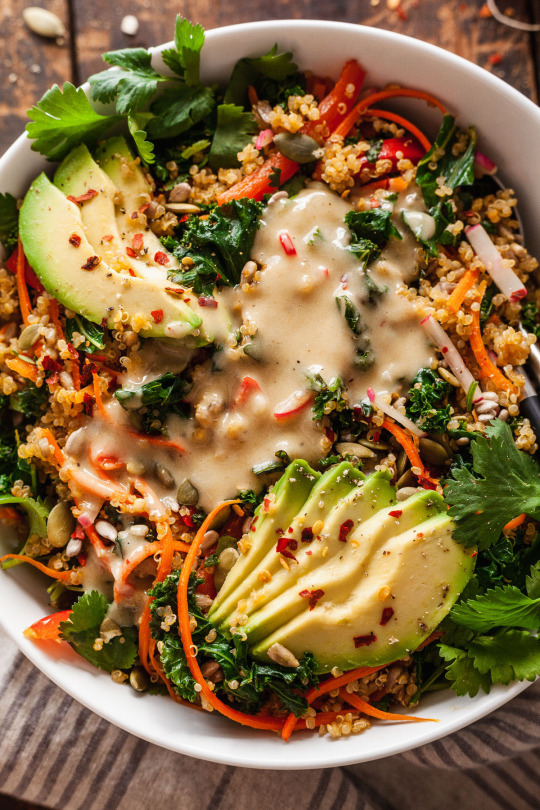
Warm Kale & Quinoa Salad
Ingredients
Serves: 4 Grocery List Serves: 6
Kale and Quinoa Salad
▢1 bunch kale, ribs removed, chopped
▢Coarse kosher salt
▢1 teaspoon olive oil
▢2 cup cooked quinoa
▢3 carrots, julienned
▢1 red bell pepper, julienned
▢¼ cup sunflower seeds
▢¼ cup pepitas / can sub with pumpkin seeds
▢4 radish, julienned
▢½ cup fresh cilantro, chopped
▢1 avocado, sliced (optional)
Lemon Tahini Dressing
▢⅓ cup olive oil
▢⅓ cup lemon juice
▢2 tablespoons tahini
▢2 teaspoons maple syrup
▢1 clove garlic, pressed
▢½ teaspoon ground cumin
▢¼ teaspoon coarse kosher salt
▢¼ teaspoon freshly ground black pepper
▢¼ teaspoon crushed red pepper flakes
Instructions
Make the dressing
In a small bowl or jar, whisk together dressing ingredients until smooth. Taste and adjust seasonings.
Make the salad
Sprinkle kale with salt and drizzle with 1 teaspoon olive oil. Using your hands, massage until dark.⠀
Heat 1 teaspoon olive oil in a large skillet over medium heat. Add the kale, cooked quinoa, carrot, red bell pepper, and sunflower seeds. Cook, stirring frequently, for 5 minutes until the kale is slightly wilted. Remove from the heat and add the pepitas, radishes, and cilantro. Stir to combine.
Toss salad with half the dressing and serve drizzled with additional dressing, sliced avocado, a sprinkling of freshly cracked black pepper, and crushed red pepper flakes if desired.
Notes:
I made a grocery list below that accommodates my family of 6 and a grocery trip to a bulk food store where you can attain some of the ingredients in the exact measurements that you need to keep this healthy recipe affordable. If you like the recipe to serve four, then shop for the ingredient list above. Ignore the strikethroughs as it indicates what I already personally have. ♥
Produce:
1.5 bunches kale: $4.50 (1.5 bunches)
4.5 carrots: $1.80 (4.5 carrots)
1.5 red bell peppers: $1.50 (1.5 peppers)
6 radishes: $1.50 (6 radishes)
¾ cup fresh cilantro: $1.50 (1 bunch)
2 avocados (optional): $3.00 (2 avocados)
Grains and Seeds:
3 cups cooked quinoa: $3.00 (3 cups)
⅜ cup sunflower seeds: $1.50 (⅜ cup)
⅜ cup pepitas: $0.90 (⅜ cup)
Condiments:
½ cup + 1 tablespoon olive oil: $3.00 (½ cup + 1 tablespoon)
½ cup lemon juice: $1.50 (½ cup)
3 tablespoons tahini: $1.50 (3 tablespoons)
3 teaspoons maple syrup: $0.45 (3 teaspoons)
1.5 cloves garlic: $0.45 (1.5 cloves)
¾ teaspoon ground cumin: $0.30 (¾ teaspoon)
⅜ teaspoon crushed red pepper flakes: $0.15 (⅜ teaspoon)
Coarse kosher salt: $0.30 (to taste)
Freshly ground black pepper: $0.30 (to taste)
Total: Total Cost (rounded up): $27.85
2 notes
·
View notes
Photo
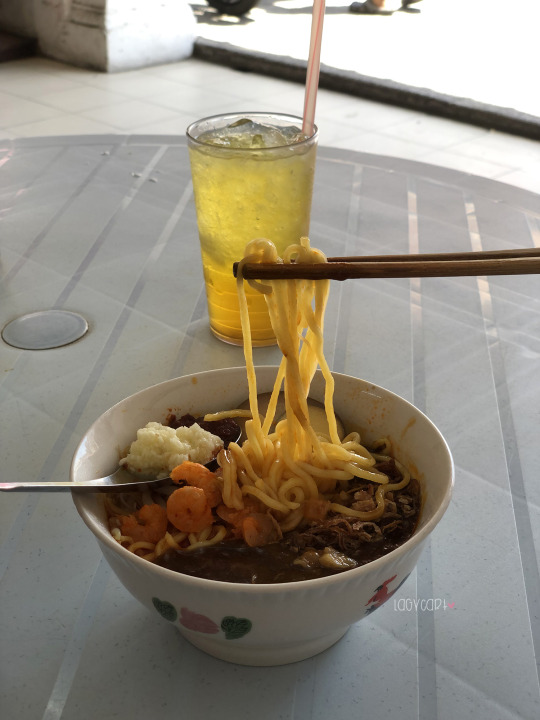
green house hokkien mee 青屋蝦麵, georgetown, penang.
it’s one of the popular spot to get penang hokkien mee or prawn mee. they have many kinds of noodles to choose from and two kinds of broth - prawn broth and the thick broth. also quite a lot of addons available to customize your bowl of noodles. i like to mix both the broth to get the best of both worlds.
the prawn broth is very fragrant with nice prawn smell, and the thick broth adds texture which make it so appetizing and yummy. we also ordered lobak as appetizer which taste great too. this would be one of the original hawker food that still taste as good as i remembered.
#food#green house hokkien mee#青屋蝦麵#georgetown#penang#prawn mee#hokkien mee#hawker food#customize#broth#shrimp#prawn#flavorful#add ons#chili#spicy#so good#appetizing#yummy#satisfying#popular#famous#lobak#snack#appetizer#original#authentic taste#worth trying
11 notes
·
View notes
Text
Spicy Potato Onion Paratha
**Spicy Potato Onion Paratha Recipe with Minced Garlic and Ground Pepper***Parathas are a beloved Indian flatbread, and when stuffed with a spicy potato and onion filling, they become a delightful and hearty dish. This recipe adds a twist with the inclusion of minced garlic and ground pepper, elevating the flavors to a whole new level. Let’s get started!*
**Ingredients:**– 2 cups whole wheat…

View On WordPress
#Aromatic#chutney#Comfort food#Cooking#coriander leaves#delicious#Easy#Flavorful#Garam Masala#ghee#Ground Pepper#Homemade#Indian Cuisine#Instructions#Minced Garlic#Potato Onion Paratha#Quick#Recipe#Spices#Spicy#stuffed paratha#Vegetarian#Whole Wheat Flour
4 notes
·
View notes
Text

Wonderful Things That May or May Not Be Wonderful!!!
Cake. One of the most prominent desserts in all of dessert-dom. It has the hallmarks of any wonderful food. It can be shared, it is quite delicious, and it comes in many varieties. Pound , red velvet, German chocolate, devil's food, angel's food, black forest, bananas foster, cup, cheese (even though that's more of a pie). So many ways to eat cake. Sadly, compared to other desserts, many cakes I have tasted can be overwhelmingly sweet and cloying, making them less desirable than other desserts with nuance in my opinion. However, with a little bit of know-how, cake can live up to the hype and more and all the bad cakes in the world cannot detract from those times when you taste something truly special that warms your soul with that moist, flavorful dough. Something that can truly be called wonderful.
#wonderful#food#dessert#cake#pound#red velvet#german chocolate#devil's food cake#angel's food#black forest#bananas foster#cupcake#cheesecake#moist#flavorful#sugary sweet#sharing#yummy
8 notes
·
View notes
Text
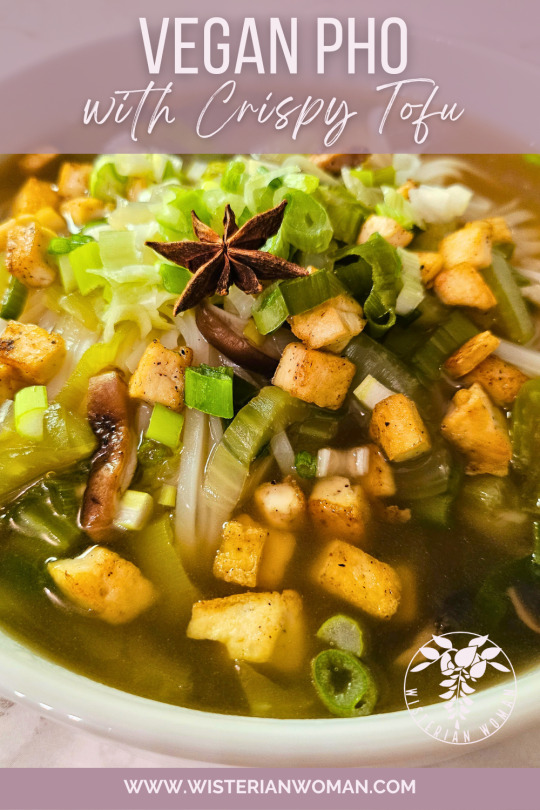
Vegan Pho with Crispy Tofu
Perfect for a cozy weeknight dinner or gathering with friends, this aromatic Vegan Pho infused with star anise and ginger envelops tender rice noodles and an assortment of fresh vegetables.
Perfect for a cozy weeknight dinner or gathering with friends, this aromatic Vegan Pho infused with star anise and ginger envelops tender rice noodles and an assortment of fresh vegetables.
Cravings have a way of leading us down unexpected culinary paths, don’t they? As I found myself yearning for something entirely outside my usual palate, a distant memory surfaced – the tantalizing aroma of…
View On WordPress
#Asian-inspired#comfort food#Crispy tofu#Dairy-free#Easy vegan recipe#flavorful#Food#food blog#Fresh vegetables#Garlic#Ginger#Gluten-free#healthy dinner#healthy recipes#Homemade pho#Meat-free pho#Meatless meal#Meatless Monday#Noodle soup#Nutritious meal#Pho recipe#Plant-based pho#Plant-based protein#Quick dinner idea#Recipes#Rice noodles#Star anise#Tofu recipe#Vegan comfort food#Vegan Pho
2 notes
·
View notes
Text
How to Grow Microgreens at Home
Introduction
Growing your own microgreens is a rewarding experience that can provide you with a consistent supply of fresh, flavorful, and nutrient-dense greens. Not only are microgreens easy to grow at home, but they are also a cost-effective way to ensure that you have access to healthy produce year-round.
Microgreens are the young seedlings of vegetables and herbs that are harvested when they are just a few inches tall. They are packed with vitamins, minerals, and antioxidants that can help boost your immune system, improve digestion, and reduce inflammation. Plus, they add a burst of flavor and color to salads, sandwiches, smoothies, and other dishes.
Starting your own microgreens garden is an excellent way to incorporate more fresh produce into your diet while also reducing your carbon footprint. By growing your own greens at home, you can avoid the environmental costs associated with transporting food long distances and packaging it in plastic.
In addition to being environmentally friendly and nutritious, growing microgreens is also an enjoyable hobby that can be done indoors or outdoors. Whether you have limited space or live in an apartment without access to a garden plot, you can still enjoy the benefits of gardening by starting a microgreens garden on your windowsill or balcony.
In this blog post, we will provide you with step-by-step instructions on how to start your own microgreens garden. We will cover everything from choosing the right container and growing medium to selecting seeds and harvesting your microgreens. By following our guide, you'll be able to grow fresh greens in as little as 7-14 days! So let's get started on creating your very own homegrown microgreens garden.
Choosing the Right Container and Growing Medium
When it comes to growing microgreens, choosing the right container and growing medium is crucial for the success of your garden. The container should be at least 2 inches deep and have drainage holes to prevent water-logging. You can use a variety of containers such as plastic or wooden trays, shallow pots, or even recycled containers like egg cartons or yogurt cups.
The growing medium you choose should be lightweight, sterile, and have good water retention. This is important because microgreens have delicate roots that need oxygen to grow properly. Some good options for growing mediums include peat moss, coconut coir, or vermiculite.
Peat moss is a popular choice for many gardeners because it is readily available and affordable. It has excellent water retention properties and provides good aeration for the roots. However, peat moss is not a sustainable resource and can contribute to environmental degradation.
Coconut coir is an eco-friendly alternative to peat moss that is made from the fibers of coconut husks. It has similar properties to peat moss but is more sustainable and renewable. Coconut coir also has natural anti-fungal properties that help prevent diseases in your microgreens.
Vermiculite is another option for a growing medium that has good water retention properties. It is made from expanded mica minerals and provides good aeration for the roots. However, vermiculite can be expensive compared to other options and may not be readily available in all areas.
In addition to these growing mediums, you can also mix them together to create your own custom blend that suits your needs. For example, mixing equal parts of peat moss and vermiculite creates a well-balanced growing medium that provides both good water retention and aeration.
Selecting the Seeds
When it comes to selecting the right seeds for your microgreens garden, there are a few things to consider. First and foremost, it's important to choose seeds that are specifically labeled for microgreens. These seeds have been selected and treated with care to ensure that they will grow into healthy, flavorful greens that are perfect for eating.
Some popular options for microgreen seeds include arugula, broccoli, radish, and sunflower. Each of these varieties offers its own unique flavor profile and nutritional benefits. Arugula has a spicy taste that pairs well with salads and sandwiches, while broccoli microgreens are packed with vitamins A and C. Radish microgreens add a peppery kick to any dish, and sunflower microgreens have a nutty flavor that is perfect for snacking.
In addition to choosing the right type of seed, it's also important to consider the quantity of seeds you'll need for your container. As a general rule of thumb, you should aim to use about 1-2 tablespoons of seeds per container, depending on the size of the container. It's important not to overcrowd the seeds in your container as this can lead to poor growth and even mold.
By carefully selecting the right type and quantity of seeds for your microgreens garden, you can ensure a bountiful harvest of fresh, nutrient-dense greens that are perfect for incorporating into your favorite meals.
Sowing the Seeds and Watering Them
Once you have chosen your container and growing medium, it's time to sow the seeds. The first step is to sprinkle the seeds evenly over the growing medium. Make sure that you don't overcrowd the container as this can lead to poor germination and growth.
Next, gently press the seeds into the growing medium, but be careful not to bury them too deep. Microgreens need light to germinate, so if you cover them too much, they may not sprout.
After sowing the seeds, it's important to water them properly. You can use a spray bottle or watering can to gently water the seeds. Be careful not to over-water them as this can cause fungal growth and rotting of the seeds.
Keep an eye on the moisture level of your growing medium and make sure it stays moist but not waterlogged. Over-watering can also cause problems with mold growth and root rot.
It's important to note that different types of microgreens have different requirements when it comes to seed spacing and depth, so be sure to check the instructions for your specific variety.
By following these simple steps for sowing and watering your microgreen seeds, you'll be well on your way to a bountiful harvest of fresh greens in no time!
Covering the Container and Placing It in a Warm, Dark Area
After sowing your microgreen seeds, it's time to cover the container and place it in a warm, dark area. By doing this, you'll be creating a mini greenhouse that will help retain moisture and promote germination. There are several options for covering your container. You can use a lid if your container has one or plastic wrap if it doesn't. Ensure that whatever you use is transparent to allow light to penetrate through.
Once covered, place the container in a warm and dark location such as a closet or cabinet. The ideal temperature range for most microgreens is between 60-75°F (15-24°C), so ensure that the room you choose falls within this range. Keep an eye on the seeds daily and mist them with water as needed to keep them moist. Be careful not to overwater them as this could cause mold growth.
It's worth noting that some microgreens require different conditions during germination stages. For example, some seeds like sunflower require more light than others while others like cilantro prefer cooler temperatures around 50°F (10°C). Therefore, before starting your garden, research the specific requirements of the seeds you plan to grow.
After a few days, depending on the variety of microgreens you're growing, you should start seeing sprouts emerge from the soil. At this point, it's time to uncover your container and move it into a sunny spot where they can receive adequate sunlight for photosynthesis. It's important to note that different varieties of microgreens require varying amounts of sunlight exposure; therefore, research each type before exposing them directly under sunlight.
Harvesting Your Microgreens
Harvesting your microgreens is an exciting and rewarding experience. Most microgreens will be ready to harvest in about 7-14 days, depending on the variety you choose. You can tell when they are ready by their height, which should be around 1-2 inches tall, and the development of their first set of true leaves.
When it comes time to harvest your microgreens, use scissors or a sharp knife to cut them just above the soil line. Be sure to rinse them gently with water and pat them dry before using them in your favorite recipes.
Growing your own microgreens is an easy and fun way to get fresh and healthy greens at home. By following our step-by-step guide, you can enjoy a steady supply of nutrient-dense greens that are perfect for salads, sandwiches, smoothies, and more. Not only will you save money by growing your own produce, but you'll also have the satisfaction of knowing exactly where your food comes from. So why not start your own microgreens garden today?
#Microgreens#young#tender#tiny#edible#seedlings#nutrient-rich#greens#sprouts#miniature#flavorful#vibrant#culinary#garnish#salad#health#home garden#microgreen#sustainable#sustainability#ecofriendly#ecology#ecosystem#environment#climate#climate change#greenthumb#vegetable#vegetables#veggies
4 notes
·
View notes
Text
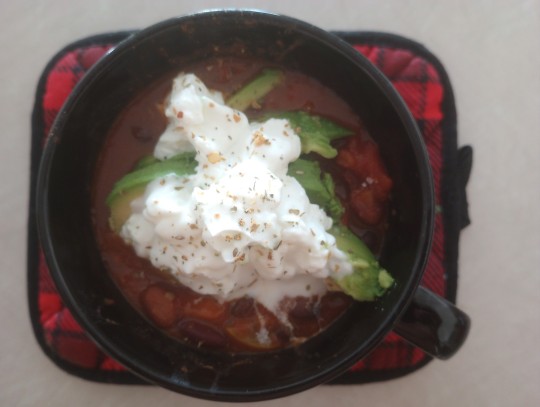
My veggie chili came out niiiice, topped with some Greek yogurt and avocados.
#veggies#chili#homemade#meatless#hearty#delicious#tasty#mmm food#foodie#vegan#home cooking#veggie chili#flavorful
11 notes
·
View notes
Text
"Oooh, you look like a mocha.. I could just drink you in and get high on your taste."
You got that flavor that I love - eUë
#mocha#coffee#taste me#taste my lips#drink me#high on you#addicted to you#addicted#addicted to love#addiction#sweet addiction#perfect flavor#flavorful#i want you#i crave you#i adore you#life#life quotes#quotes#text#spilled ink#spilled thoughts#spilled words#love quotes#love#love quote life quotes#love quote for her#quoteoftheday#romance#romantic
16 notes
·
View notes


Last Seen Blogs


rimurutempestslime
Rimuru Tempest

f10werfae
.。*゚+.*.。flower+..。*゚+

lnthedudess
LN_TheDudess

hawkeissleeping
Hawke