#Text animation
Text
How I did it in After Effects under the cut.
(instagram)
Used path animation for morphing, so I don't really know what I can add to that. Maybe I should record my screen while doing that.
Anyway that cool retro TV effect can be achieved by stacking these effects on Adjustment layer over the whole project:
Posterize time - 12;
Roughen Edges - Border - 2; Edge Sharpness 5; Fractal Influence 1; Scale - 100; Complexity 2;
Turbulent Displace - Amount 2; Size 100; Complexity 1;
Turbulent Displace 2 - Amount 30; Size 2; Complexity 2;
Gaussian Blur - Blurriness 8;
Sharpen - Amount 100;
Quick Chromatic Aberration 3 (free plugin) - Distort Aberrate 1% (Under 'Stylistic');
Noise HLS Auto - Grain; Lightness 5%; Grain size 2;
Animated changing colors by adding Gradient Ramp effect on the letter.
I also used wiggle(12,2) expression on the letters Position so it would kind of jitter around as things do in old TV tapes.
Oh, and of course some moving texture over the top (under Adjustment layer).
#art#drawing#illustration#artists on tumblr#artwork#animation#2d#2d animation#2d art#motion graphics tutorial#motion design#motion graphics#typography#text animation#type animation#typography design#typography art#typography animation#learning animation#2d artwork#retro aesthetic#retro style#mograph#digital animation#artists#digital art#digital illustration#digital drawing#digital painting
9 notes
·
View notes
Text
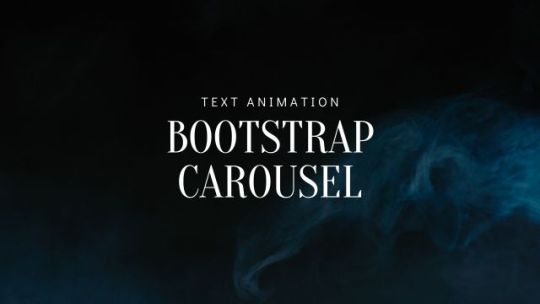
Text effect on Bootstrap Slider
#bootstrap slider with text animation#bootstrap carousel#bootstrap snippets#html css#codingflicks#text animation#learn to code#html#css#webdesign#frontend#frontenddevelopment
4 notes
·
View notes
Video
youtube
Animated Text Tricks in Canva: Canva Tip to create text animation
#youtube#Canva#canva design#Canva tutorial#Canva tips#Canva design tutorial#Canva design tips#animation#text animation#Canva new feature#Canva update#tutorial#Canva hacks#Canva text animation#canva aniamtion#youtube video
3 notes
·
View notes
Text
Create Realistic Typing Animations With Human Replay
Human Replay is an open-source, JavaScript-powered web app that allows you to record and playback text input on a webpage.
Type your desired text, and you’ll receive a piece of JavaScript code that replays your typing animation when added to your webpage.
How to use it:
1. Go to the Human Replay app and Type something in the text field.
2. Click the Generate code button.
3. The app will then…

View On WordPress
3 notes
·
View notes
Text
If you're not on cohost yet you're missing out on my best posts.
I really feel like the tumblr wizard community would have fun on there.
Transphobia is explicitly banned, and meat's on the menu - it picks up where tumblr falls off. It's a good website and the devs are working hard to listen to their users and make things work. They make update posts constantly, being transparent about what's new and what's upcoming. They're just - good. I really like it there.
#rats#wizards#cohost#css#animation#css animation#text animation#moving text#spinning text#not sure if this counts as flashing/strobing video or not?#a couple of thise rats are going pretty fast#pls let me know if i should tag it#the system speaks
27 notes
·
View notes
Text

#we bawl fr#these are so cute and fun#textanim#text animation#pink#cute aesthetic#meme#funny#text#sparkles
3 notes
·
View notes
Text
#kashitij vivan institute#photoshop#image#googel#large images#background change#text animation#trim path#after effects#reffrence#timeline
4 notes
·
View notes
Video
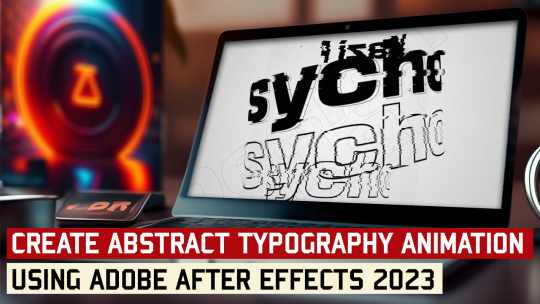
HOW TO CREATE ABSTRACT TYPOGRAPHY ANIMATION USING ADOBE AFTER EFFECTS.
Read the full article: https://designerdollar8.blogspot.com/2023/05/how-to-create-abstract-typography.html
!INTRODUCTION:
Abstract typography animation is a great way to add some creativity and visual interest to your projects. With Adobe After Effects, you can create stunning typography animations that grab your viewers' attention and convey your message effectively. In this tutorial, we will show you how to create an abstract typography animation using various built-in effects and presets in Adobe After Effects.
STEP 1: SET UP THE PROJECT
The first step is to set up the project in Adobe After Effects. Create a new composition, and set the size and frame rate according to your project requirements. Import your footage or image, and add it to the composition. Now, create a new text layer, and add your text. Choose a font that suits your project and adjust the size and color of the text as needed.
STEP 2: ADD EFFECTS TO THE TEXT
Once you have your text in place, it's time to start adding effects. In this tutorial, we will use the CC Cylinder effect to create a 3D look for the text. Apply the effect to the text layer, and adjust the settings to your liking. You can also use the Curves effect to adjust the color and contrast of the text.
STEP 3: ANIMATE THE TEXT
With the effects in place, it's time to animate the text. In this tutorial, we will use the 3D effect to create depth and motion. Enable the 3D layer option for the text layer, and adjust the position, rotation, and scale of the text as needed. You can also use the Optics Compensation effect to adjust the perspective and distortion of the text.
STEP 4: ADD A BACKGROUND
To add more depth and interest to your animation, you can add a background layer. In this tutorial, we will use a gradient background, created using the Gradient Ramp effect. Apply the effect to a new solid layer, and adjust the colors and position of the gradient to your liking.
STEP 5: ADD MOTION TILE
To create a seamless loop, we will use the Motion Tile effect. Apply the effect to the text layer, and adjust the settings to your liking. This effect will create multiple tiles of your text layer, which will seamlessly loop to create an infinite animation.
STEP 6: FINE-TUNE THE ANIMATION
Now that you have all the effects and animations in place, it's time to fine-tune the animation. Adjust the timing, duration, and position of the text and background layers to create a cohesive and engaging animation. You can also add additional effects or transitions to enhance the animation further.
STEP 7: EXPORT THE ANIMATION
Once you are satisfied with the animation, it's time to export it. Choose the appropriate export settings for your project and render the animation.
You can now use the final animation in your projects and presentations.
#blog#article#blogging#blogpost#post#animation#text#text animation#typography motion graphics#motion graphics#motion tile#after effects
2 notes
·
View notes
Text
I’m actually really proud of this ok
#my art#twitch artist#twitch assets#digital art#digital artist#bubble tea#outer space#sunset#spacecore#cozy streamer#loading screen#motion graphics#animator#digital animation#digital animator#text animation#illustration art#digital illustration#illustration#twitch starting soon screen#artist#artwork#galaxy#taking commisions#commissions#commissions open#artists on tumblr#streamer#art stream
13 notes
·
View notes
Photo
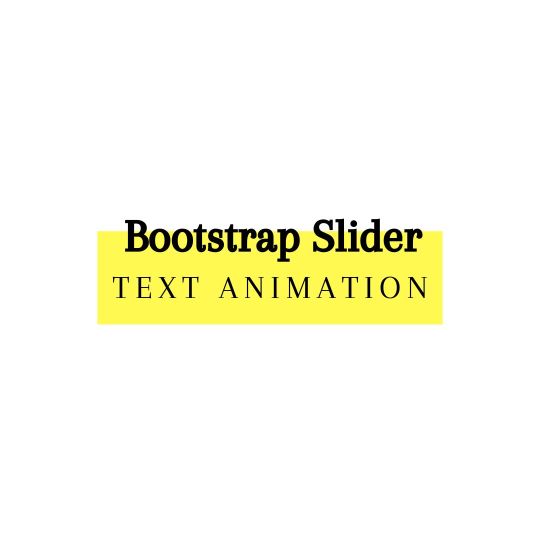
Bootstrap slider with text animation
Get Code from divinectorweb website
#bootstrap snippets#bootstrap header#bootstrap slider text animation#text animation#animation#bootstrap#learn css#learn to code#html css#bootstrap slider#bootstrap carousel#divinectorweb
3 notes
·
View notes
Text
No. 11 in my Animated Alphabet series - K.
#art#drawing#artists on tumblr#animation#illustration#2d animation#artwork#motion design#2d art#2d#typography#letters#alphabet#animated alphabet#path animation#text animation#digital animation#after effects#mograph#motion lovers#motion graphics#perfect loop#looping gif#animated gif
6 notes
·
View notes
Text
CSS Text Hover Animation
#text animation#css text animation#text effects#css text effects#css tutorial#css hover animation#html css#frontend#css#html#css3
2 notes
·
View notes
Text
Kinetic typography
The entire sequence is fine using Nodebox 3 and few elements were coded.
Typography -01/365
@adobe
@behance
@netflix
#typography#artwork#digital illustration#stranger things#netflix#animated gif#text animation#graphic design#motion#motion graphics#art#nodebox display multiple geometeries#commisions open
6 notes
·
View notes
Text
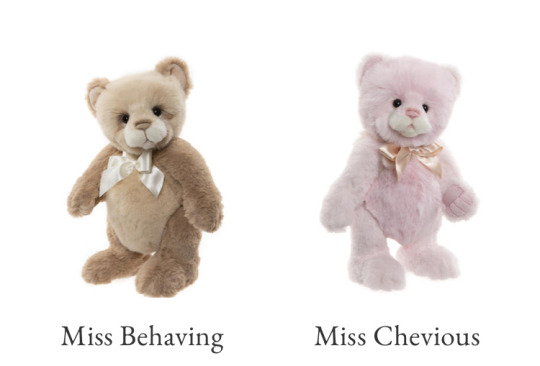
me and who
#plushie text#charlie bears#plush#plushies#kidcore#stuffed animals#stuffed animal#toycore#toys#plushcore#kiddiecore#plushblr
29K notes
·
View notes
Text

oh uh. scuse me. just a lil snail crossing your dash
182K notes
·
View notes
Last Seen Blogs

qianalanger
Translation

joels-shitty-puns
You know what I'm in the mood for?

waltangina
Hello! Ako si Walt!

lesleylycan
Lesley Lycan
avengersassemblesposts
Marvel Posts ♡