#OOAK anime doll
Text
A(nother) Feudal Fairy Tale: Behind the Scenes
Welcome to the behind the scenes footage of creating my Azone Pure Neemo Character Kagome Higurashi! To see the photo gallery, click here!

Step one: Make sure the outfit can be made. Because this will all be in vain if that can’t be done. Once again, I consulted my dear friend Elenpriv and asked if she could make a second Kagome uniform (she’d made the one for the Barbie body) for a Blythe body (Azone Pure Neemo doll bodies are identical to Blythe, or at least very close). She said yes! WOO!
Side note: Azone has made several outfits for their dolls, including a lot of sailor style school uniforms. They’re perfect - but none of them are green! There is a dark blue/navy one, a black one, I think a red one... all kinds of options, but not a green one. Dang it! LOL
Anyway, next up was finding the perfect doll candidate. I didn’t want to use one of the actual character dolls because, well, they’re already a character from another series lol. So my first step was looking at all the 1/6 scale dolls with black hair. Creating a doll without a reroot was ideal.
There were several options to choose from, but even though they had black hair, there were some other issues.
For one, Kagome’s face is more “pointed” than round. I felt this particular face/head shape was too round.
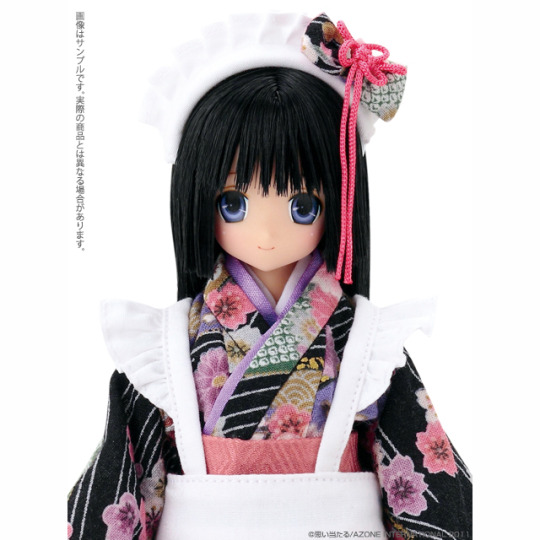
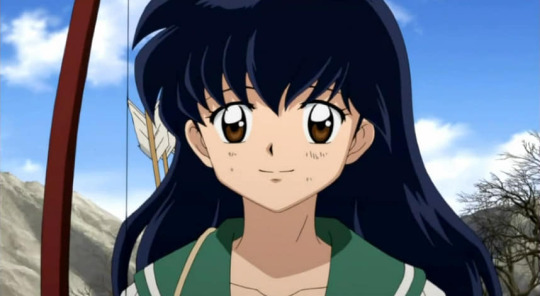
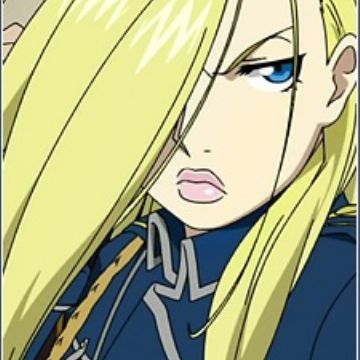
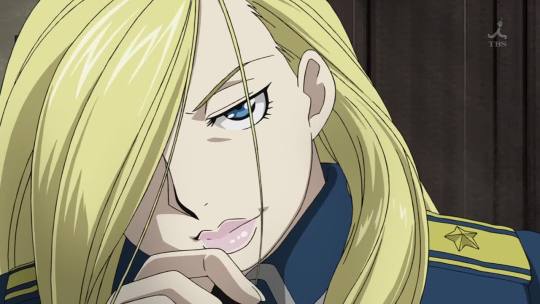
I did start with her, but the slightly smaller mouth just didn’t say Kagome to me lol, especially when I kept looking at these pictures for reference:

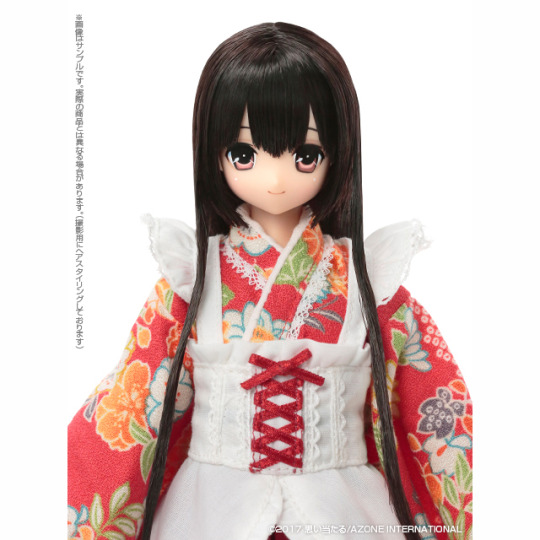
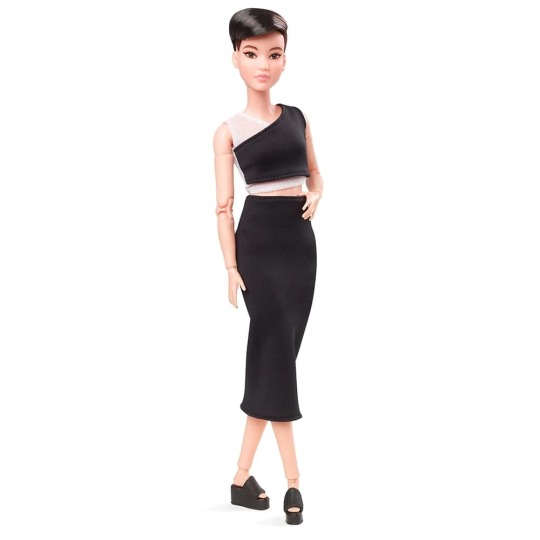
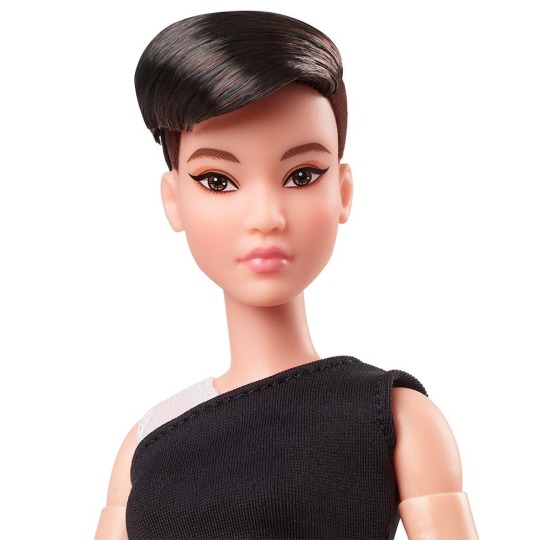
So on to the next candidate! This one is nice, she has a nice face shape and a wider mouth:

I like her, but... her eyes don’t go quite high enough, I don’t think. And I need a template, since I can’t draw to save my life, so I wasn’t going to remove the eyes and start from scratch. She also has a side part, and try as I might, I couldn’t get the bangs to shape properly to hide it. I kept her on the back burner just in case, though. I looked into a couple of other ones like these two:
But they both have dark brown hair, not black. And the second one has too round of a face as well.
I went back to my original choice and attempted to style the hair. Well, one thing about Azone dolls - their hair is saran. That means it doesn’t work with heat very well, and it’s hard to style (or dye, apparently). At least, that’s been my experience. Nylon hair works much better, and is much more heat-resistant.
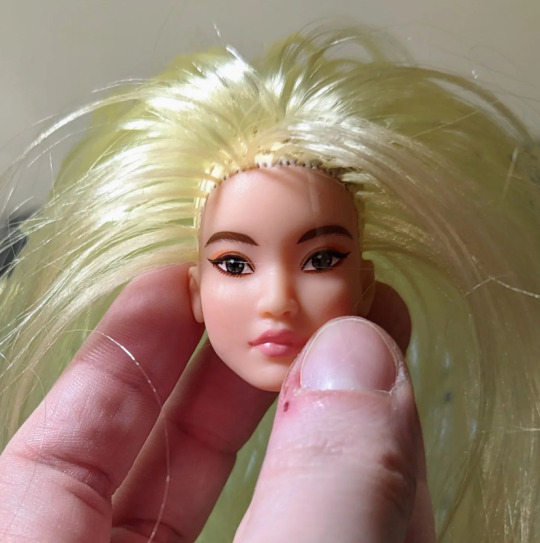
So at this point, I figured I’d have no choice but to do a reroot. Luckily for me, I’d already done a complete reroot with Olivier Mira Armstrong. So this would be my second one!
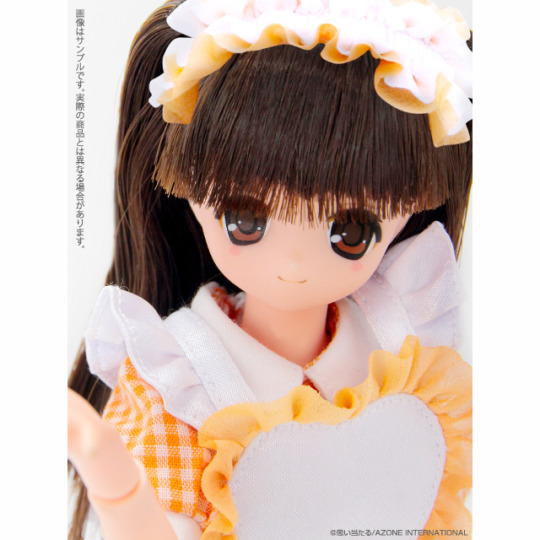
But I still needed a doll. As I looked at option number 3 more, I absolutely loved her face. The shape was right, and she had the wider smile. All of these dolls would have the same issue of needing their eyes repainted due to how their irises are compared to Kagome, so I wasn’t even looking at that.
Well, I didn’t want to buy one of these dolls (they’re designed for collectors, so they’re not just cheap play line ones you can get off a shelf - plus they’re all from Japan, which raises the price tag) just to “tear up.” So I looked in my stash and discovered I had two of one doll, and it happened to be the one with that face! So here’s the winner:
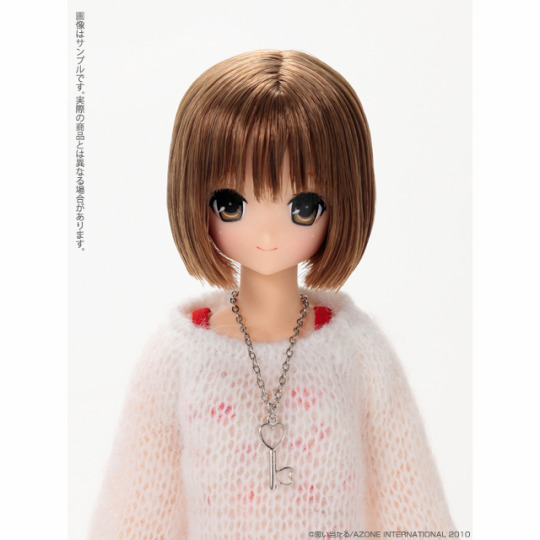
Her hair is actually the same color as mine in real life lol. That’s super hard to find... but not with Azone! They’ve designed several with that hair color, to which I say hallelujah. I’ve seen maybe two Barbies with that hair color. Come on, Mattel, get with it!
Anyway, the first step was to make sure I could pull off the reroot. I’d repainted Kagome’s face before (plus Sango’s, which is pretty much the same except for pink eyeshadow as well), so you’d think I’d be an expert at that. (More on that later).
I cut the hair off and then used small needle nose pliers to pull out the rest. Azone doll heads, it seems, don’t have glue on the inside - the hairs were all kind of weaved together inside the head. And there was one large piece where the part was that kind of held it all together, so I was left with a larger hole than I liked when I got all the hair out. But I did use some Loc-Tite to close it, just to be safe, and it seemed to be okay.

Next I painted the scalp black to match the hair she’d be getting. Of course, I forgot to use acetone to remove the original paint, and then I forgot to seal the black paint. So during the reroot process, it kept chipping away. Oops. I’m still new at this lol. Fortunately, you can’t see any of that with the final product.
So, during this rerooting process, I kept reminding myself of how I had to go back and add more hair to Olivier a few times because I’d made it too thin. So this time I went all out, even though most rerooters say you don’t have to plug every single hole (even though the factory did)... there’s a head in here somewhere LOL.
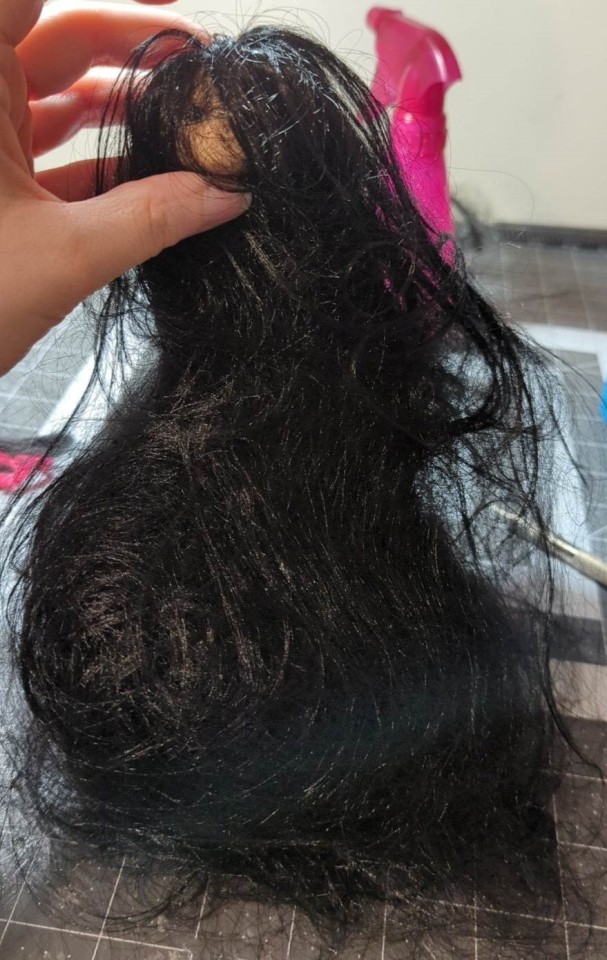
Once I was finished with all that hair, it was time for the boil wash. It never fails - whenever I do this, loose hairs that didn’t get plugged always come out. I need to figure out a method to prevent that, as well as prevent the hair from becoming a big stringy mess during the reroot process.
Of course, I probably should have taken a batch of hair and cut it so it didn’t wind up this long because I knew I’d have to cut it anyway:

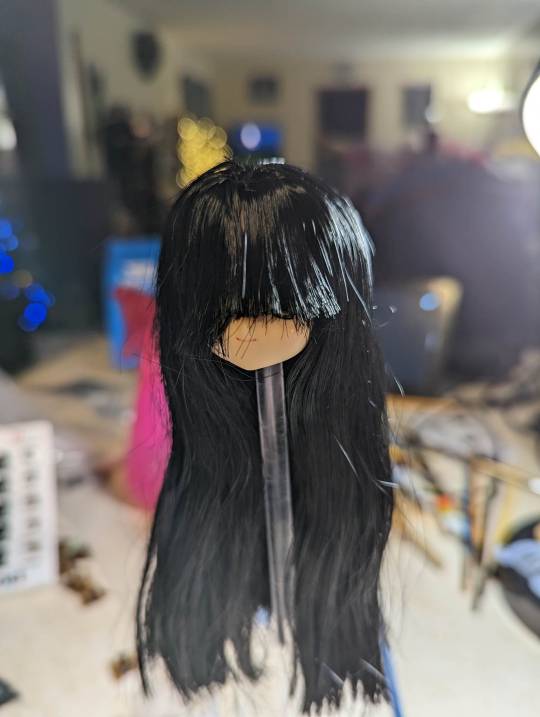
Anyway, once the boil wash was done, it was time to do the bangs. Bangs have always been tricky for me. I don’t know how I managed to give my Anastasia Steele bangs without much of an issue... but perhaps it was because I used the method in this video, which I repeated for Kagome. I got them cut into shape (and again, they have such an odd shape compared to other characters - they’re almost triangular whereas all the other girls have straight bangs), then used the method in the video to get them to lay flat. When the face was done, I used some of my Volks doll hair spray to help the bangs stay in place.
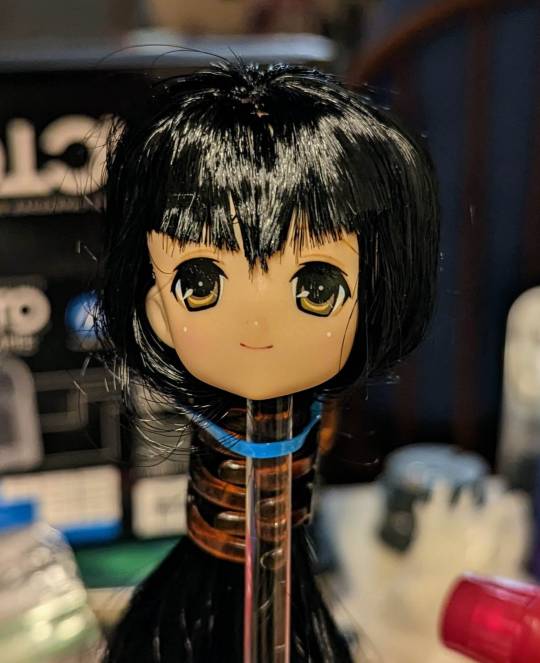
Speaking of the face, that came next (I cut the hair first to make it easier to work with, with the intention of styling it later). Another difference between Azone dolls and other dolls I’ve worked with (particularly Barbie and Disney Store) - their eyes are stickers. Maybe other dolls are too now, but these particular stickers come off very easily if you rub them with a toothpick. Which I tend to do quite often when painting doll faces/eyes because inevitably some paint will stray from the brush and go where I don’t want it.
But I did use this to my advantage because the doll I chose had eyes with lashes that were pointing outward a little too far to match Kagome’s shape. So I used my toothpick to remove them, giving the eyes a more rounded appearance.
My original goal was to just draw over the eyes already in place, essentially changing the color from light brown/gold to dark brown. Well, Azone doll eyes have large pupils and smaller irises, and the white parts are smaller yet. The Inuyasha art style is different, with a large white part going from the top to the center of the eye, surrounded by a little bit of black and an almost horseshoe shape made up of two different shades of the iris color. Yeah, I studied that a lot. :D Plus, in many instances, Kagome’s eyes don’t look perfectly round, but more oval/oblong. But I did have to work with the shape of the sculpt/eye socket of the doll, so I tried to give her the appearance of having the “taller” eyes with the shape of the iris. And then there was the fun issue of getting those eyes even and the same size! I literally painted over the entire original eye with white paint, then went back in with the blacks and browns. I did discover that watercolor pencils will color on acrylic paint, so that helped me sketch out the design and go over it with paint again. It took some time, but finally, the face was ready! Mod Podge sealer applied!


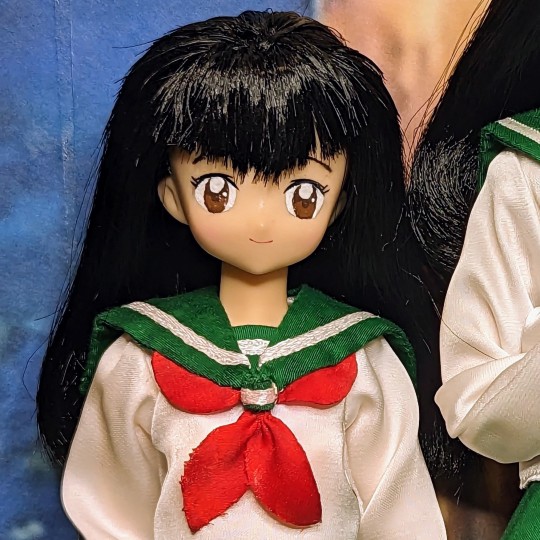
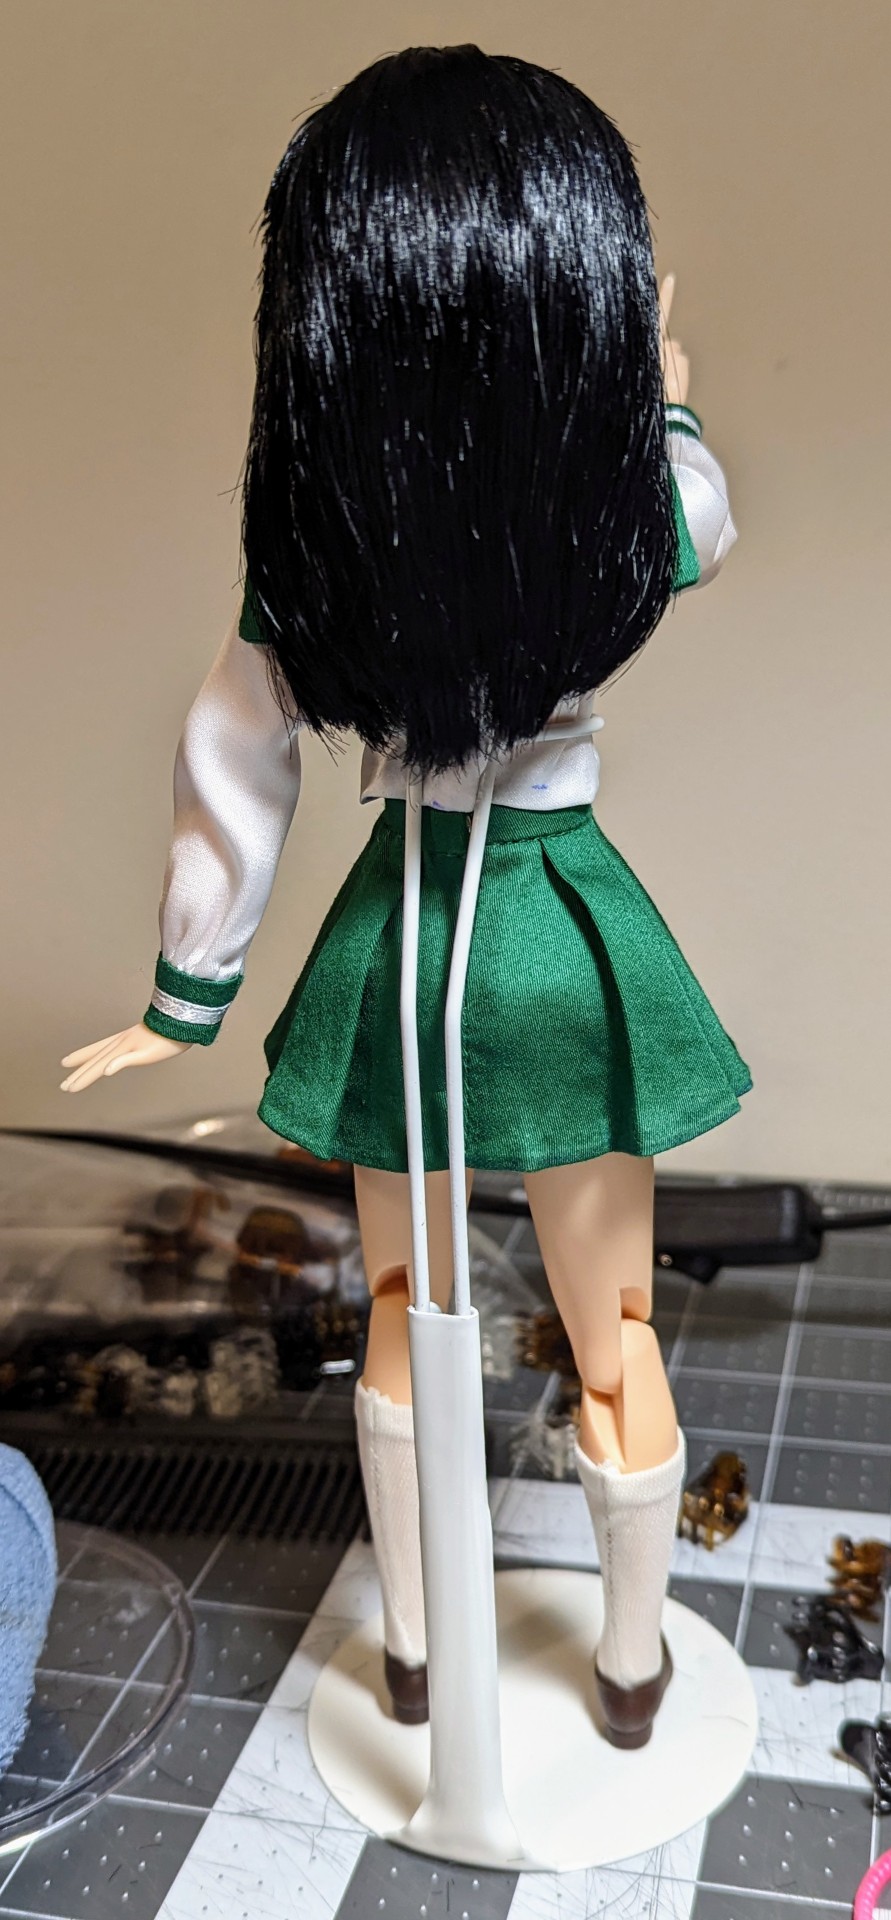
The next step was styling the hair. You’d think I’d have it down by now, but noooo. Kagome has the most complicated hair of all the Inuyasha girls, I think. Sango and Kikyo have simple hairstyles and straight bangs. Kagome has triangular shaped hair all the way around. It ends at a point in the back, as do the bangs. Sigh.
So I got the hair trimmed into the proper shape using a layering method, which made her look like she stuck her finger in a light socket in the process. :D Once I was satisfied with the shape/length, I attached the head back onto the body, which already had the uniform on. Success!
Except...
The hair looked too thick, and a few people confirmed this when I showed it to them. Yeah, I was so worried about not having to add more hair later that I actually added too much.


It was also too long at this point as well. So then I was frantically trying to figure out how to salvage the situation without completely starting over. Some people suggested using a razor to thin it out. Yeah, I think they meant a straight razor like a barber uses, because my Dollar Shave Club razor didn’t work very well...

Then someone suggested shearing scissors. I’d previously purchased a hair styling set with two types of scissors (one of which was shearing) and combs. I’d never used those scissors before, because I didn’t know how the heck they worked. So I dug them out and used a practice doll to see what they did. And they did what I needed them to! Instead of cutting the length of the hair, it just cuts pieces to thin it out.
So I took these shearing scissors to the hair and made it a lot less bulky. Then I used my curling iron (and a spray bottle to get the hair completely soaked to be safe) to help shape the hair in the back. Of course, that’s easier said than done... there’s that pointy shape at the end, but the primary view will be from the front, so I had to be wary of that as well. And I didn’t want to cut too much, either. Kagome’s hair is most often seen above the waist, about mid-back under her green collar. It’s definitely shorter than Inuyasha’s. I was afraid I’d cut it too short when I applied the curling iron, but I took some of the curl out a bit and it seems to be okay now. Whew! I really didn’t want to have to redo all that... why didn’t I just send the head off to be rerooted professionally? Because I hate the post office and don’t trust them not to lose the head, and these dolls are, again, meant for adult collectors, so they’re not cheap. No way was I risking losing it. Plus, I wanted more practice anyway, and it did save me money. A professional reroot is worth it, but for this doll, I wanted to do it all by myself (except the uniform because no way can I do that lol).

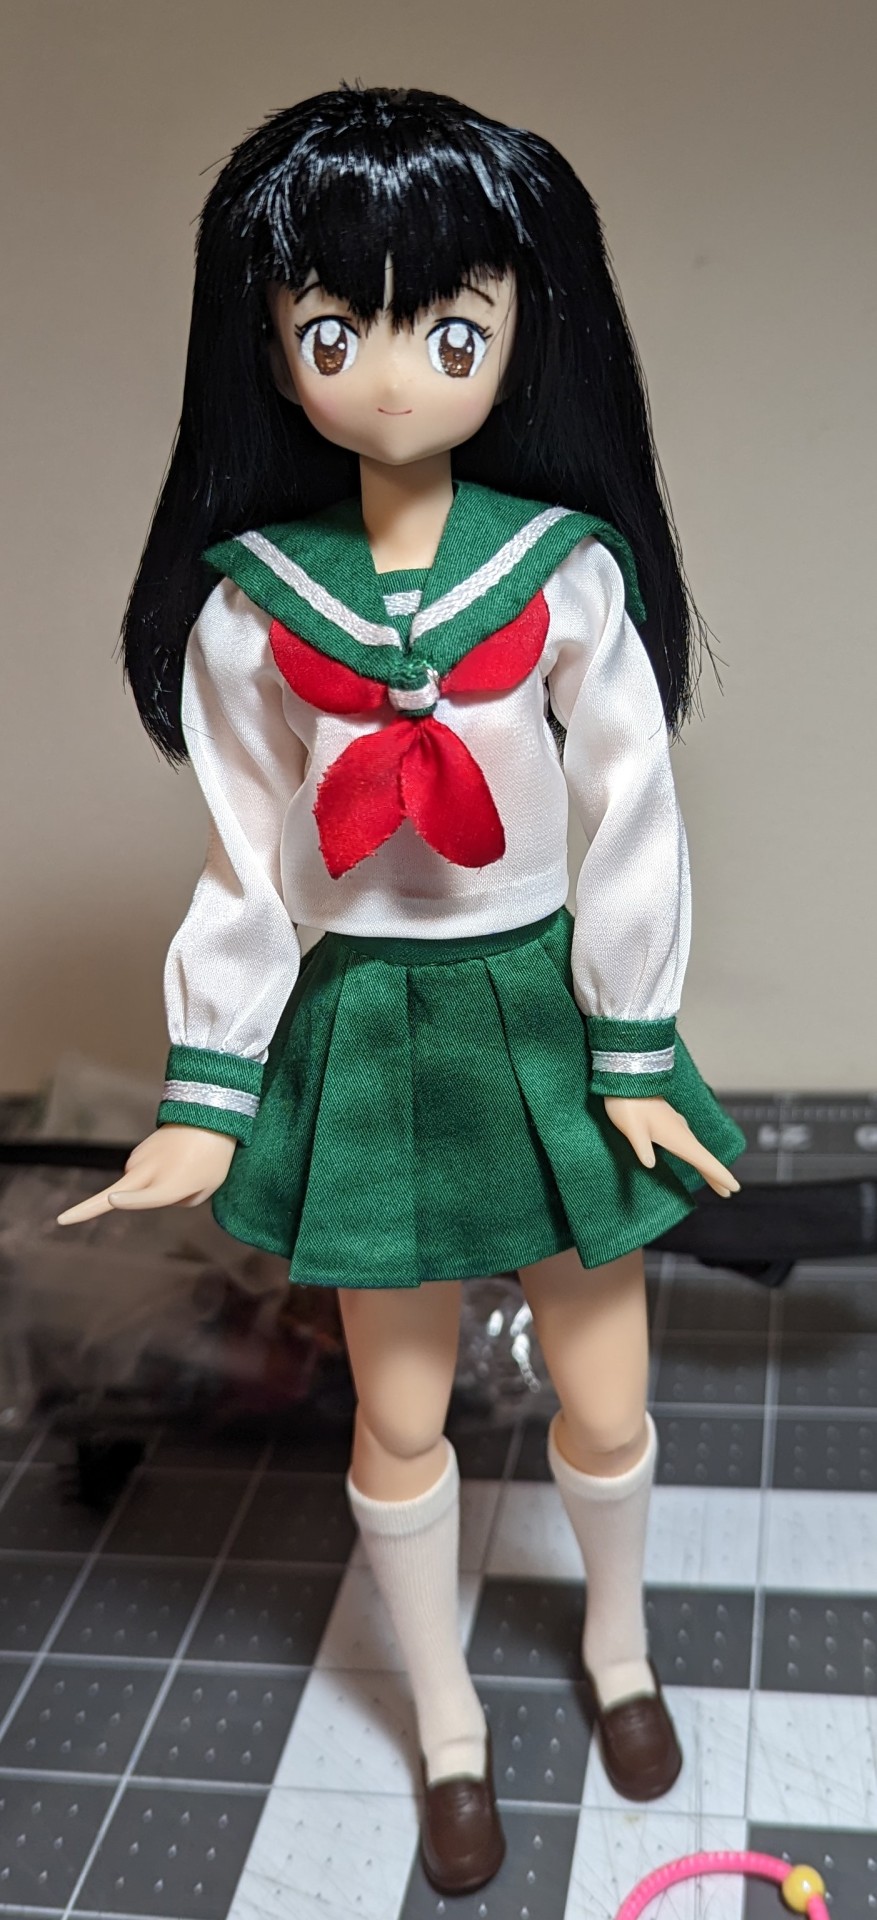
So, finally, after playing with the hair a bit, I added some of the Volks spray and mousse (used to prevent flyaway strands), and she was ready! Woo!!!

But she wasn’t done yet! She still needs her accessories. :D She’ll be sharing her backpack and bike with my Barbie size Kagome, but I wanted to give her a bow for sure and maybe even some better arrows. Well, what luck - hubby got me a 3D printer for Christmas! And I managed to find a 3D print file for Kagome’s bow, arrows, and quiver on Etsy! These were cosplay size, but the seller was able to size them down for 1/6 scale for me. (The seller has since closed her shop, so I can’t post the link here, unfortunately.) Those little arrows were super delicate, but they look better than my first batch! Well, the arrow heads do, anyway. My first batch was the perfect size all the way except the arrowheads, which I attempted to replicate out of Crayola Model Magic. And it didn’t look good lol. So now I’ll probably try to print some more heads and glue them to the Barbie ones so they look better.
But first, let’s get the Azone one done, shall we? Because these were all 3D printed, they were one solid color and needed to be painted. Well, that was easy. I’d kept notes of all the colors and color combinations I’d used for my other dolls, so I just dug those out again and got to work. I glued some thin twine around the quiver like before, as well as a strap to go over Kagome’s shoulder. The bow string is made of black thread.

(Notice how she has her finger pointing to guard her aim! See - interchangeable hands!!!)
I painted one arrow head to look like a sacred arrow. :D We attempted to print probably six or eight arrows, but some of them fell apart because they’re just so fragile. The heads survived, though, so they’ll be good experiments for the Barbie arrows lol.
So, remember how I said Azone dolls are meant to have their hands changed? Yeah, that made for some awesome posing. Kagome can actually properly hold her bow and arrows now! (Okay, the Barbie can too, but removing those hands requires heat and more muscle since they’re not designed to be removed like that.)
I’d originally planned to give Kagome a 26cm Obitsu body. The Inuyasha doll is about 30cm, so 26cm would be about right for Kagome if we’re going in terms of actual height. The Barbie is technically a bit tall, but I’m still satisfied with her. Plus she has the proper skin tone to match the Inuyasha doll. The Azone dolls have two skin tones - flesh and white. Both are much more pale than the Inuyasha doll, so she’d wind up looking more like Kikyo in the long run. Same with Obitsu bodies.
Anyway, why didn’t I go with the Obitsu body? Well, all would have been fine if the shoes had fit. :D Obitsu feet are wider/larger than Azone, despite the bodies being almost identical in height. So with her socks on, the shoes would not go on the Obitsu feet. So back to the original Azone body! But hey, she’s a “true” Azone Pure Neemo Character Series doll now - all the character dolls have either Pure Neemo Flection (this one) or Emotion (more articulation but significantly smaller/thinner) bodies, so this makes her accurate to the series. And she’s not really meant to go with the Inuyasha doll, honestly; she’s my interpretation of another doll line that I love. And many of those dolls only have character made from the series, not all of them. There are a few exceptions like K-ON! and Love! Live! Sunshine! But mostly, it’s just one character like Nezuko and Asuna.
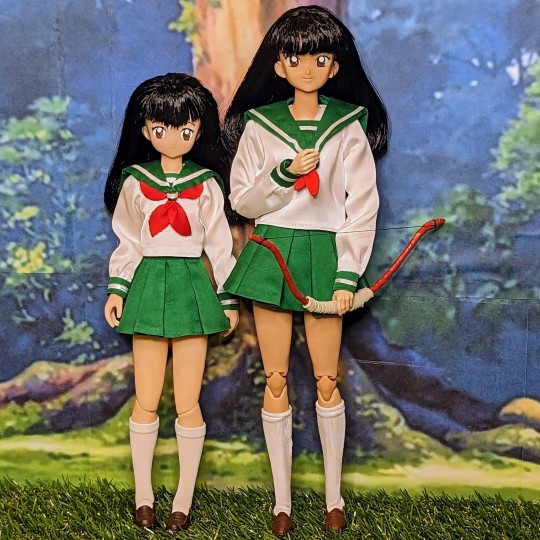
Size comparison to the 12″ collector doll and the Barbie size Kagome I made to go with him:

So for that reason as well, I am not going to make more Azone dolls lol. Or at least, I don’t plan to... we know how that goes LOL. But for right now, I’m content with my Azone Kagome! She may not be perfect, but I’m proud of myself for doing everything completely on my own (except the uniform). It makes her even more special!
#My Plastic Life#doll photography#Azone International#Azone#azonejp#Azone Pure Neemo#Azone Pure Neemo Character#custom doll#OOAK doll#custom anime doll#OOAK anime doll#anime doll#Inuyasha#Kagome#Kagome Higurashi#one sixth scale#myfroggystufffanpics#TenderWolf#anime#manga
21 notes
·
View notes
Text
Dorra Dump
#room guardian#room guardians#art doll#art dolls#ooak art doll#roomguardian#poseable art doll#art#dorra#dorras#stop motion puppet#stop motion#animation#animator
4K notes
·
View notes
Text
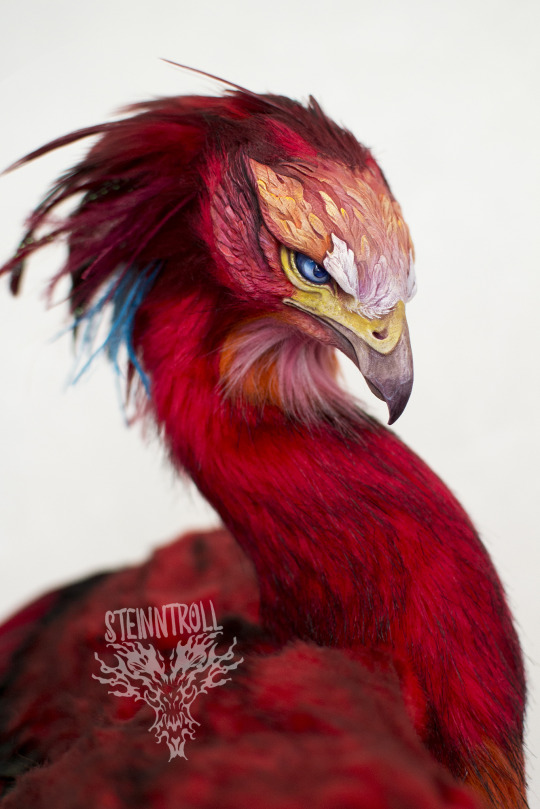
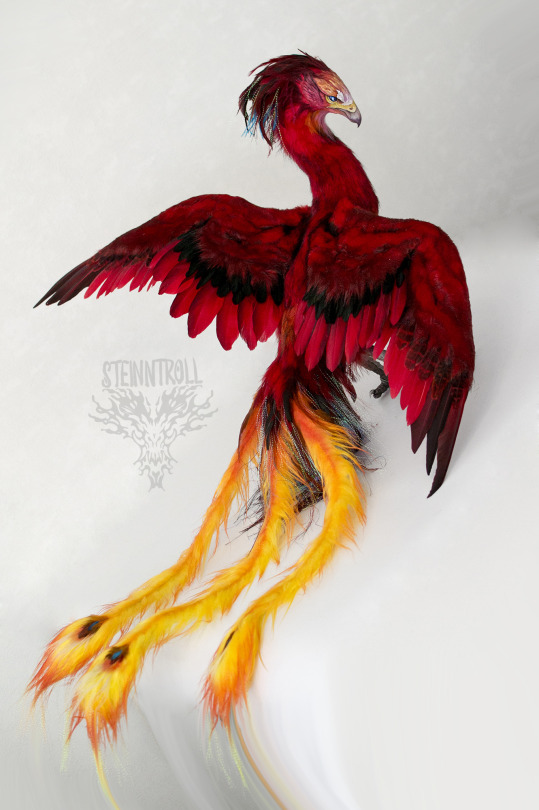
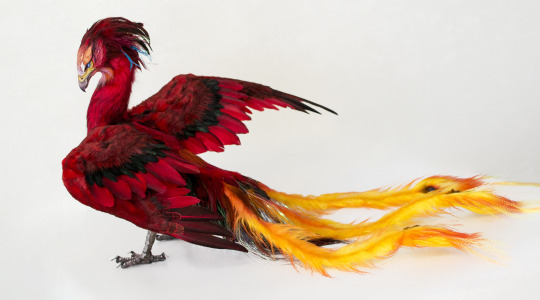
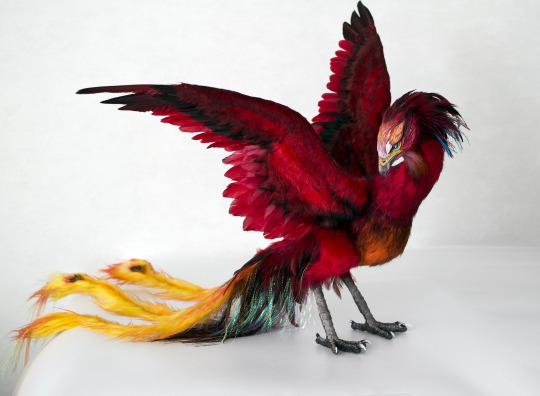
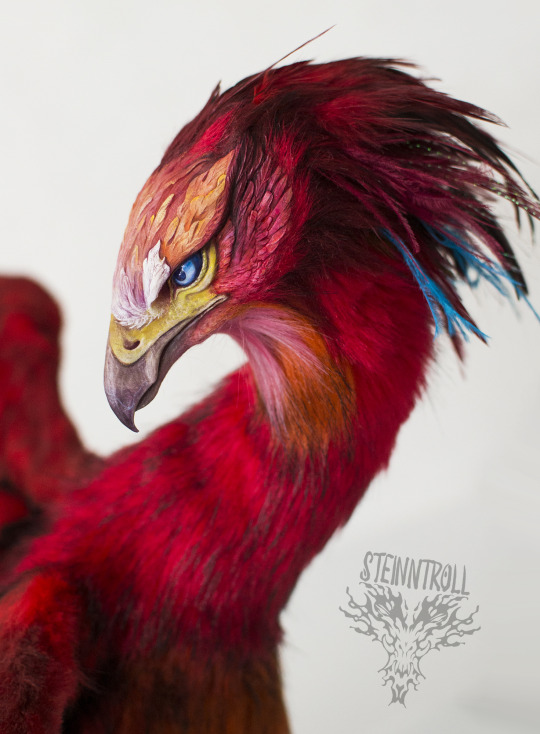


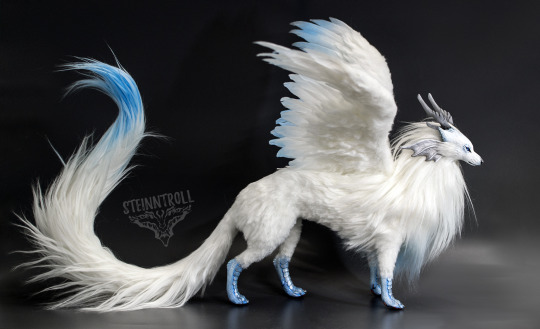
Phoenix fantasy art doll
Sold
Resin, fabric fur, wire+plastic armature, feathers, primer, acrylic paint, varnish. Posable neck has plastic ball-and-socket armature inside and can be posed. Tail and wings are also posable and contain wire armature inside.
Size: 100 cm total length from beak to tip of tail
#phoenix#bird art#art doll#phoenix art#crafts#hand made#animal art#fantasy creature#art toy#bird doll#ooak doll#doll artist#red bird#creature design
933 notes
·
View notes
Text


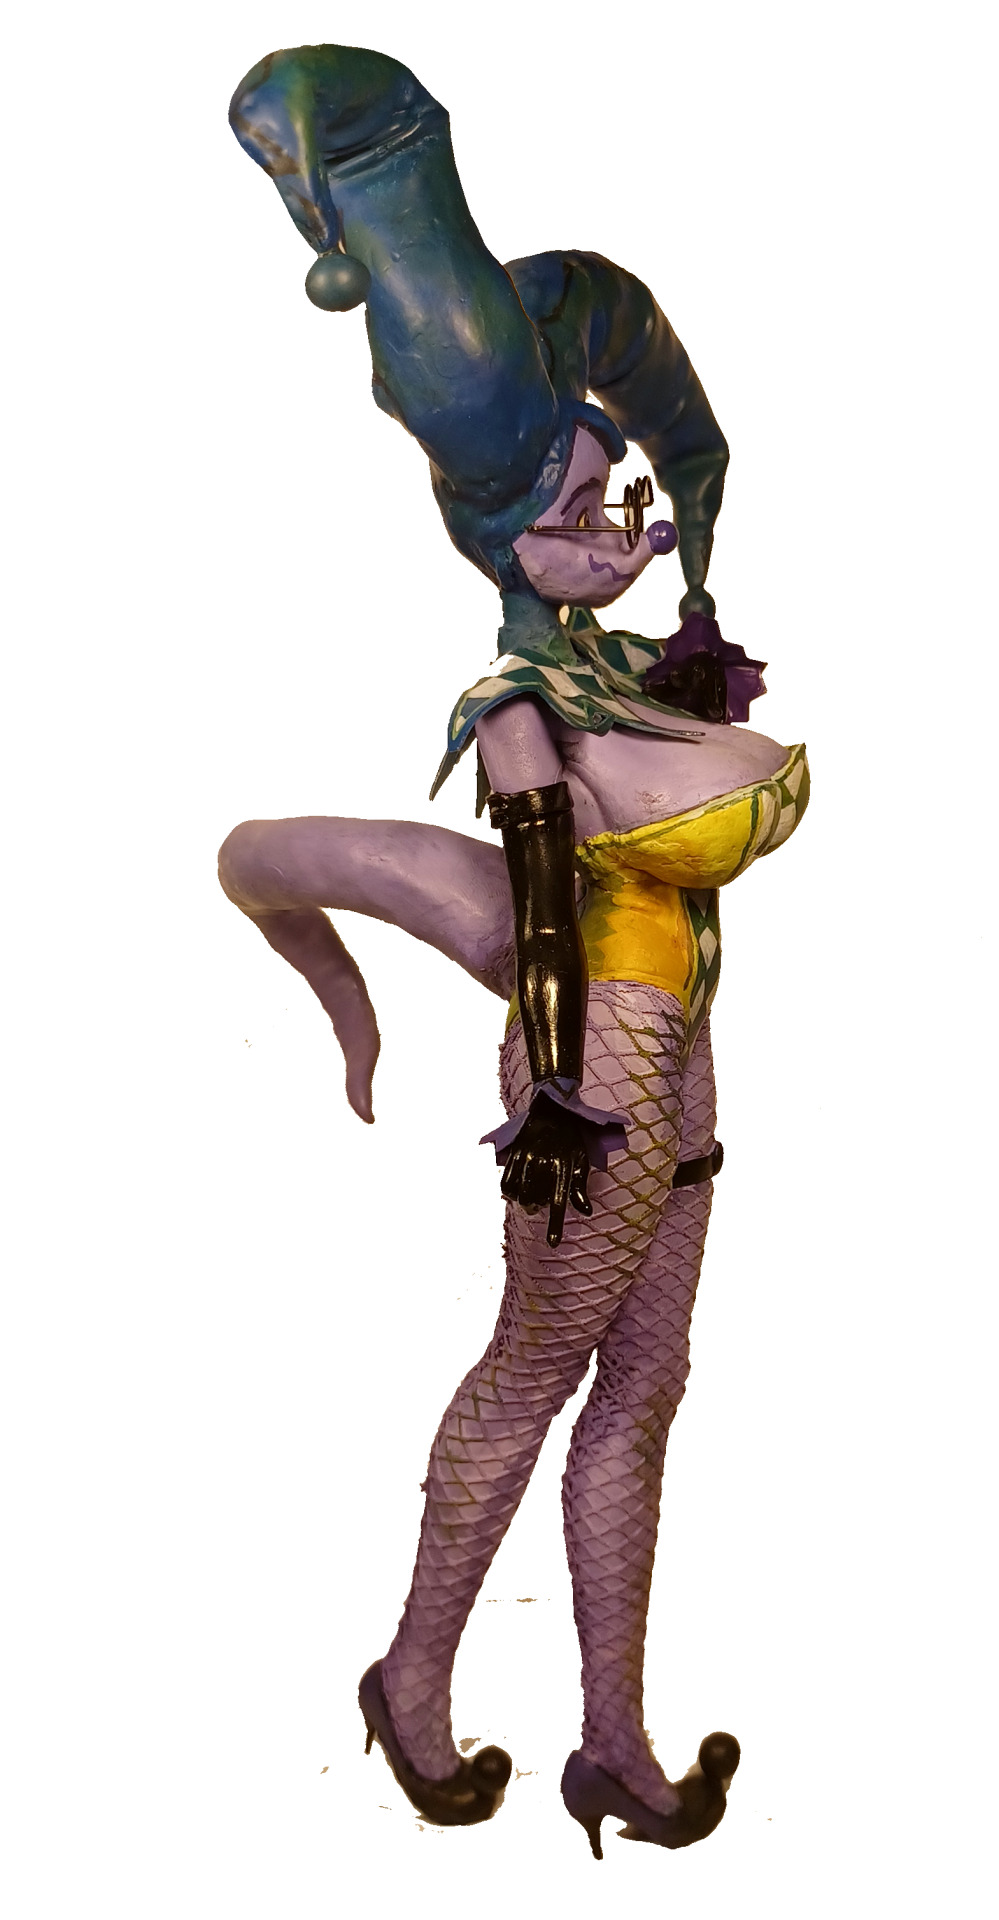
ingredients: hotglue, airdryclay, hopes n dreams.
i wanna make a better photoshoot of her.. but i feel this represents her pretty well, in all her glory
#anime figure#custom figure#customized doll#ooak doll#ooak custom#anime ooak#diy figure#lesbian artist#bennizone-art#bennizone-oc#bennizone-oc-JESTER
2K notes
·
View notes
Text


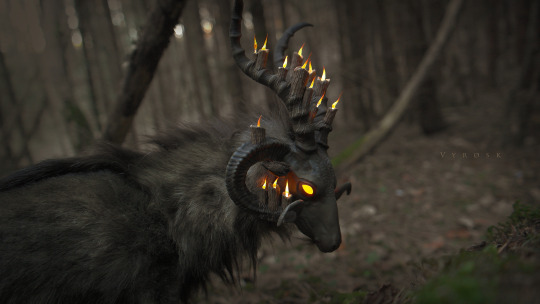
Hellgoat -Project II Infos:
fully posable with LED in eyes and candles which imitate a flickering effect
#artdoll#artdolls#doll ooak#ooakartdoll#ooak artdolls#art dolls#ooak#ooakcustom#animalsculpture#art#artist on tumblr#faux taxidermy#handmade#goat#animal art#doll#animal artdoll#fantasy#fantasy art#realistic toy#ooakartist#posable art doll#posableartdoll#dollmaker#dollartist#animalart#oneofakind
5K notes
·
View notes
Text
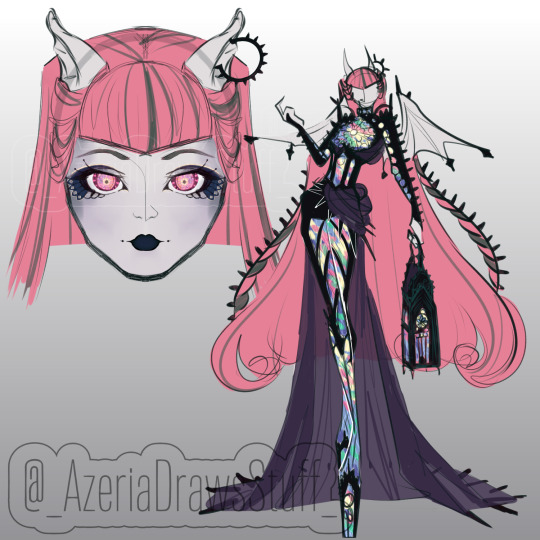
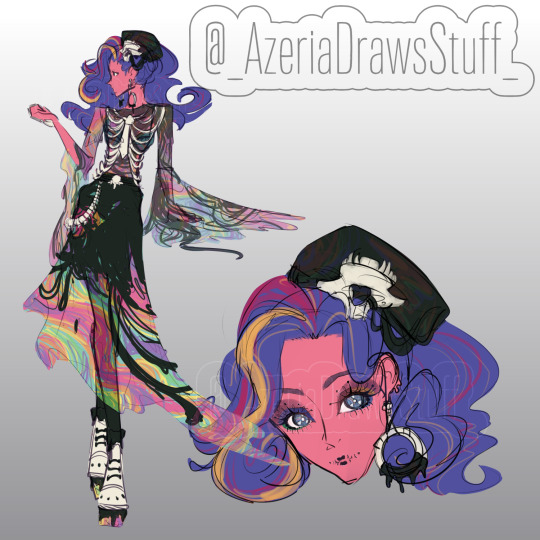
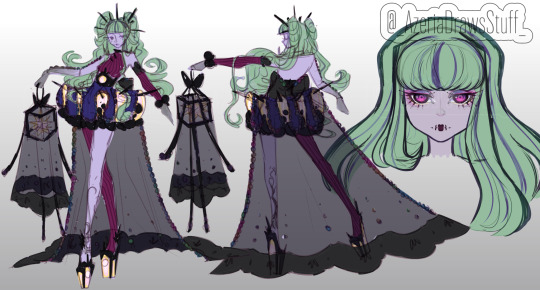
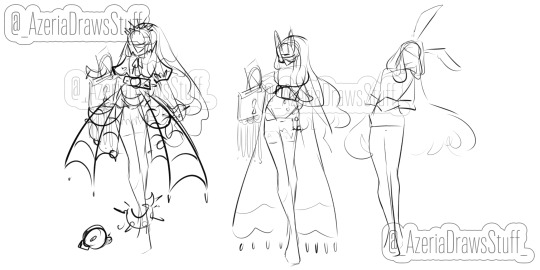
OOAK concepts
Fang Vote Gothic Rochelle Goyle
Oil Spill Gooliope Jellington
Monster High
#anime#character design#fanart#art#concept art#illustration#oc#character concept#monster high#rochelle goyle#gooliope jellington#shriekwrecked#redesign#what fang vote should’ve been#ooak doll#fashion design#fashion sketch
325 notes
·
View notes
Text
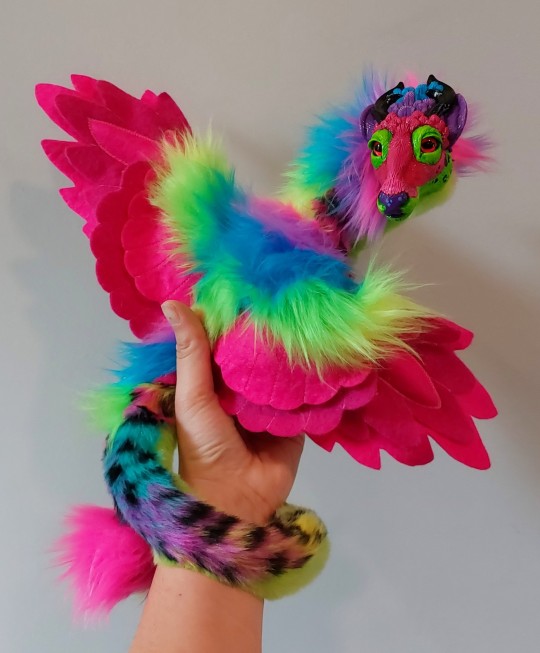
Big fan of subtle, restrained colour pallettes. 😎
#wormsandbones#homemade horrors#art doll#peryton#neoncore#neon#plushie#plush#handmade#ooak#rainbow#she's gay#anime north
538 notes
·
View notes
Text
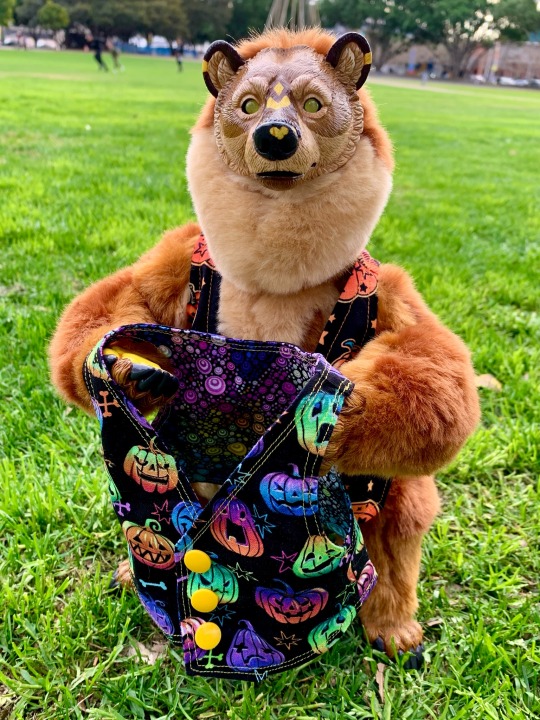


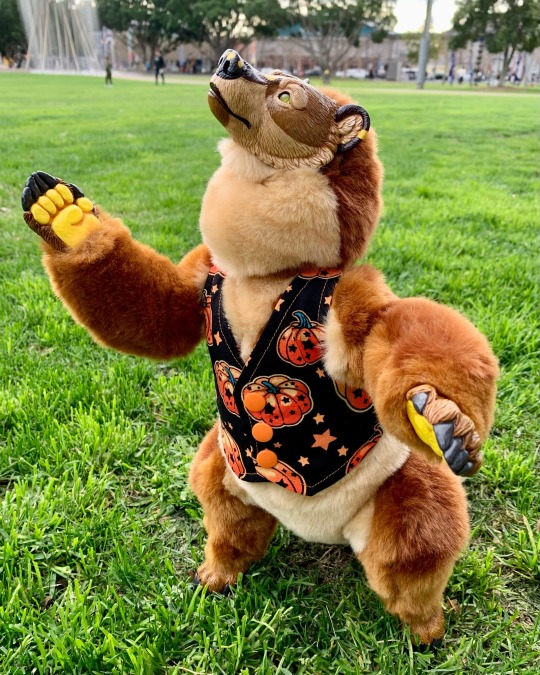
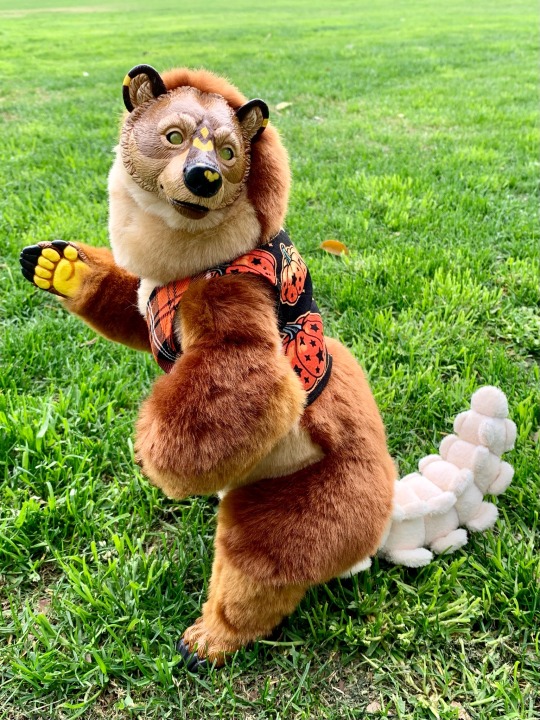
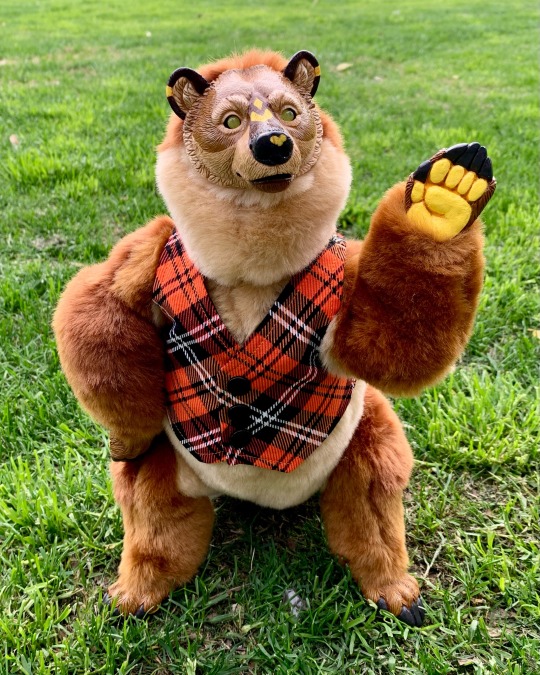
Miwak wanted to show off his 2 new vests. Both vests are completely reversible to allow for 4 different style!
(doll & vest pattern by @homemadehorrors)
#craft#crafts#maker#miwak#art doll#art#halloween dolls#ooak doll#doll clothes#vest#sewing#stitching#animals#bear#bear doll#halloween bear#skelebear
331 notes
·
View notes
Text


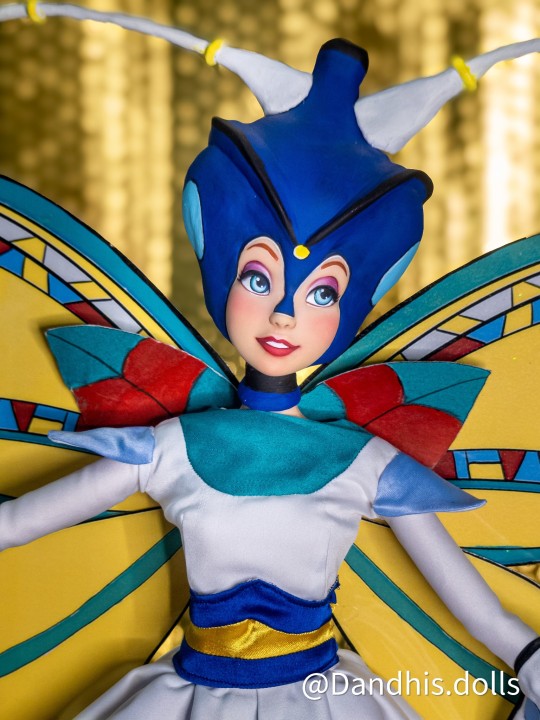


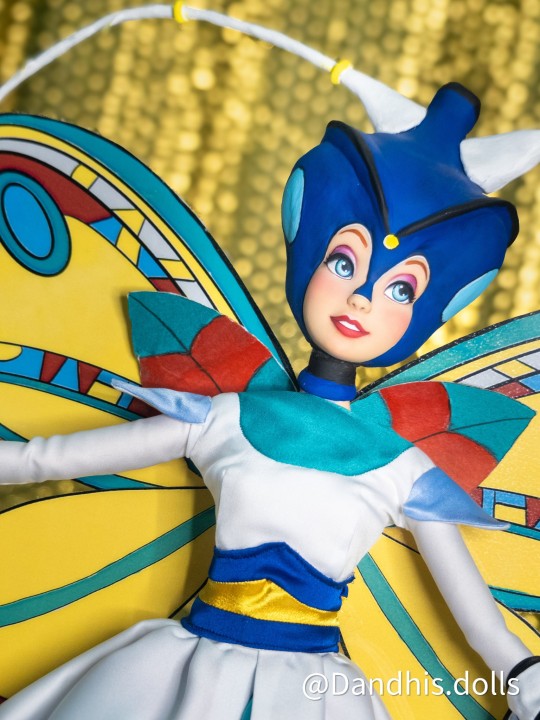
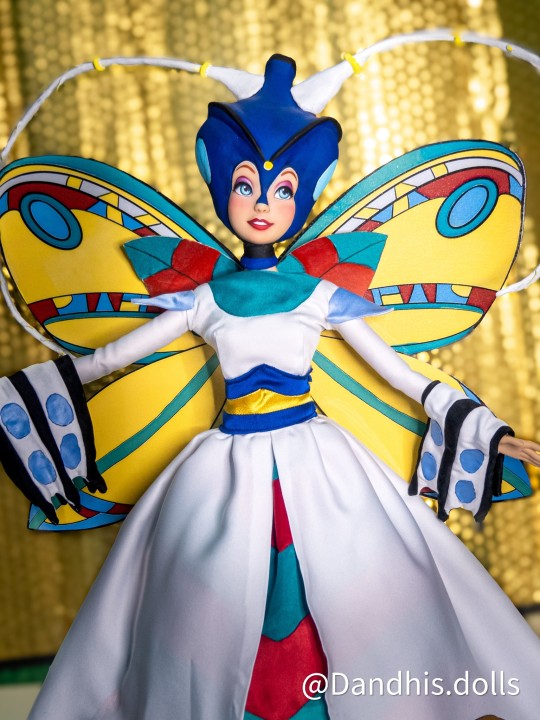

"I'm not your toots, and I don't even look like a beetle!"
Now you do 🫠🦋
Here's the second 17" Thumbelina, Beetle ball edition! Her dress was an adventure, so many pieces, so many directions, so many pins poking my fingers 😵💫 In the end though, I think she's my favourite of the bunch, she's massive, colorful and so so pretty, I'm obsessed ✨
#dollrepaint#dollcustom#customdoll#dolls#artdoll#ooak#repaint#ooakdoll#disney#disneydolls#non disney#nondisney#thumbelina#don bluth#doll photography#doll clothes#art doll#doll#cartoon#animation#doll customization#custom doll#doll custom#custom dolls#ooak doll
88 notes
·
View notes
Text
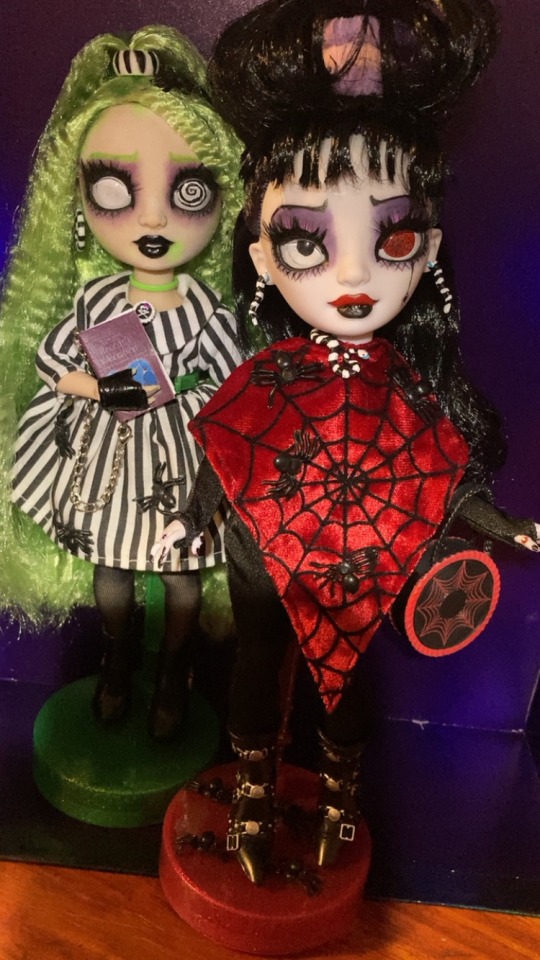
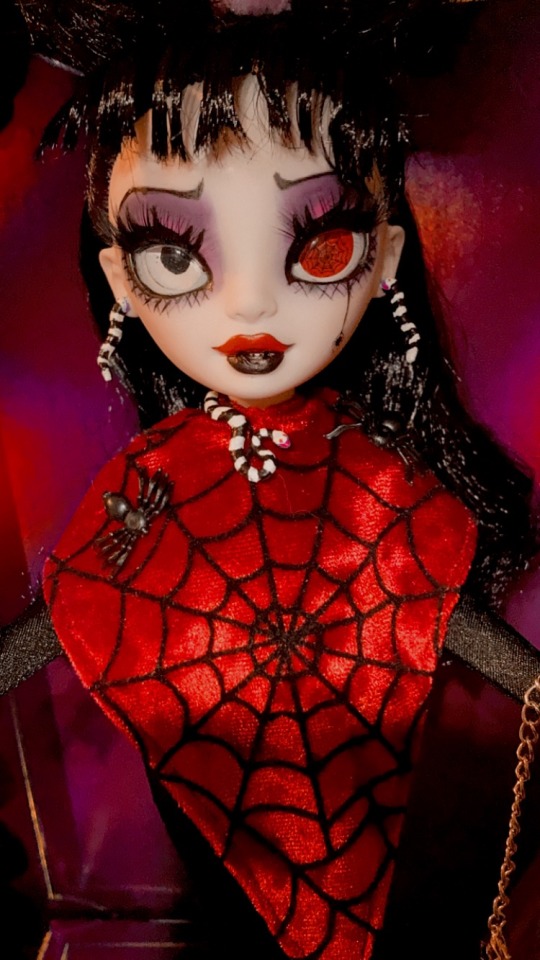
though i know i should be wary
still i venture some place scary
ghostly hauntings i turn loose
BEETLEJUICE! BEETLEJUICE!
B E E T L E J U I C E!!!!
im so so happy with how my Lydia turned out inspired by the animated show, one of my favorite cartoons
her base doll was veronica storm from shadow high
#beetlejuice#beetlejuice the animated series#lydia deetz#goth#rainbow high#ooak doll#beetlejuice doll
175 notes
·
View notes
Text
Behind the Scenes: Olivier Mira Armstrong
WARNING: VERY LONG POST AHEAD!
This was definitely a journey for me! This project was completely new territory for me because A) this is a character/series I’m not familiar with, and B) I’d be attempting a FULL reroot all by myself. I’d wanted to practice, and my friend and I both decided it would be a good opportunity to do so. If I failed, I did have a rerooter friend who I knew could fix my mistakes.
But the first step was making sure the outfits could be made. Without them, this entire project would be in vain. I’d need an outfit for both dolls, though Alex will be posed wearing only his pants with his shirt and jacket suspended in the air like in this scene:

So anyway, that was the first step. I contacted my favorite seamstress, Elenpriv, and asked if this was something she could do. The doll I’d planned to use was a Made to Move petite Barbie, and the guy has slightly different measurements than a traditional Ken, but since the pants were all that really mattered, it should be okay. Anyway, Elenpriv said the outfits were totally doable!!! YES!
So the next step was finding the doll to use. I knew what body I wanted - the petite Made to Move Barbie because Olivier is pretty short compared to her brother. My friend informed me that Olivier’s typical face is a “resting bitch face” LOL. Unlike my Inuyasha dolls, this series of characters has noses and mouths that are more pronounced than just lines. That actually made finding a candidate easier.
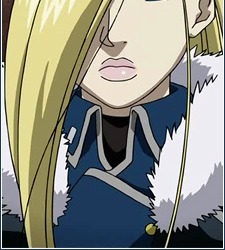
Out of total coincidence, the doll I ended up using had the petite Made to Move body AND the perfect face! She wasn’t smiling and had short hair that could easily be removed for a reroot:


For the record, I’m not a fan of the flocked doll hair. LOL Anyway, that’s beside the point. Her face sculpt looked perfect, so I knew we had our candidate! And the outfits were a go!
So next up was choosing the proper hair color. I got my hair and the rerooting kit (I’d had some in the past but I got more just in case lol) from TheDollPlanetHair on Etsy. My friend helped me choose the color, and we went with Lemon Blonde. Or was it Lemon Drop? I got both because screens make it hard to tell colors, but in person they look almost identical LOL.
So then I got to work! I’ll spare the details of the rerooting process, except for the fact that, this being my first time doing it, it was certainly a learning curve. I’d watched several videos of people doing reroots, and no one ever plugged every single factory-made hole. So I didn’t, either. I also had to make my own holes (glad I had that extra tool to help with that!) because the flocked areas didn’t have any underneath.
Well, I got that part done, and after the boil wash, it looked way too thin. And because I was afraid the hair could come out during that boil wash, I’d already glued it inside the head. So then I had to go back and add more hair because there were totally bald spots. I did that about two more times in total before (and yes, I added glue inside each time prior to a boil wash) before I was satisfied with the thickness. I was worried it would look completely uneven, but fortunately it seemed to be okay!
Once that was done, I pulled the hair back into a ponytail so I could begin working on the face. I didn’t want to do the face first only to realize I majorly messed up the reroot lol. For the face, the only thing that needed altered was the eyes. I wanted to just paint over the original factory paint, but the eyes were too small for that. Anime eyes, you know? I also wanted to try to use watercolor pencils like I’ve seen so many customizers do. I bought some Mr. Super Clear, a protective breathing mask, and Prismatic watercolor pencils. I started with a practice doll to make sure I knew what I was doing. I sprayed her face with the MSC, then began using the pencils... and the colors just didn’t shine through. At least, not over the original factory paint. I didn’t want to remove that because I can’t draw to save my life. I need a base to trace over. But alas, it wasn’t working. I’m guessing because I didn’t use acetone to remove the original factory paint, which everyone else does prior to spraying the MSC. But no way was I going to take off the original factory paint and start from scratch. So I used my Miroku method and just extended the eyes how they needed to be. I did discover that the watercolor pencils will draw over the top of acrylic paint, so that helped. I had more control with them than a paint brush. I was also able to use a regular pencil for light drawing that I could go over later with paint.
This took some time, and of course there are two eyes, and it never failed - they would never look even lol. Something was always wacky in at least one of them, and I, being a perfectionist with a hint of OCD, was going nuts. But then I remembered that one eye is always covered. So if it’s a little off, it won’t matter too much. Hopefully. So I did the best I could, getting the shapes to match as closely as possible, adding in the two different shades of blue to the iris, then that tiny black dot in the middle and the white light dot, eyelashes, and the unique eyebrows, and I was finally satisfied enough to begin the next step.
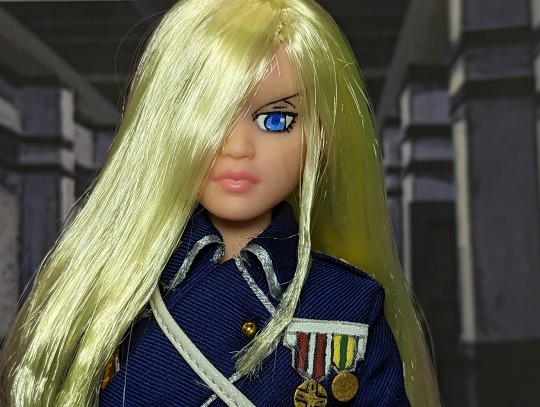
That next step was cutting and styling the hair. Olivier has a relatively simple hairstyle. It kind of ends in a curled point, and there is one batch that’s always covering her right eye and draped across her chest. There is an even smaller strand next to her left eye ending at pretty much the same length as the batch. So I sprayed the hair and got it completely soaked, then took my curling iron to the back side to give it a little curl, then curled the batch and strand just a little bit. I think it works!

Once that was finished, it was time for the tops of the boots. I used the same Barbie boots I used for Sango and painted them black, but Olivier’s boots have tongues on the tops of them.
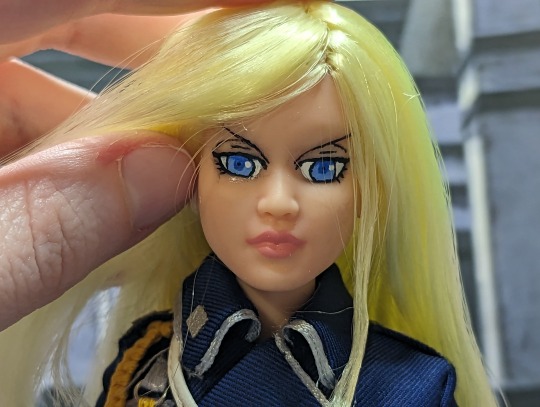
I had the outfits already at this point, and I’d already put Olivier’s on her so I could make sure everything fit okay. Of course, it was perfect! And the details are absolutely incredible. Elenpriv is truly the best!!! Just look at this detail!


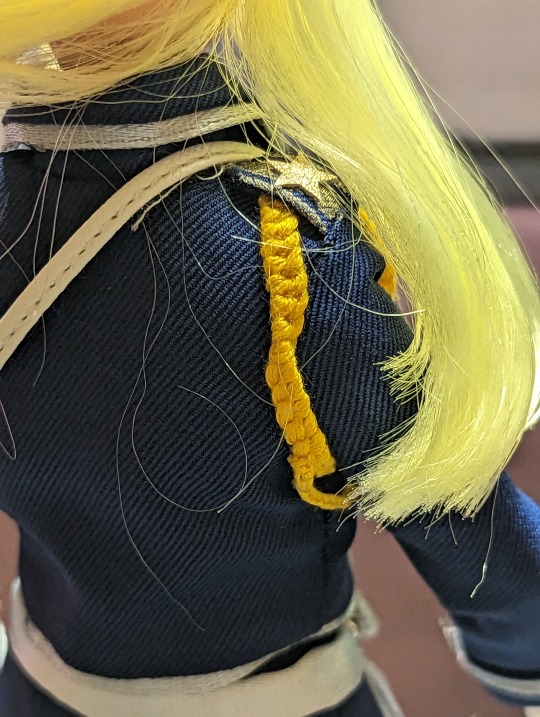
The gold rope, the stars on the shoulder pads, the buttons - everything is there, and perfect!!! Her services are worth every penny!
Back to the boots. I’m a fan of nothing being permanent with doll stuff in case A) I change my mind later and B) a better method comes along later so I can easily modify an already existing design. So, remembering how I made Sango’s armor completely out of cardstock, bias tape, and paint, I used that trusty method once again. I sketched out a design on black cardstock, cut and glued a few layers together, then covered them with bias tape and painted the whole thing black. I left a little triangular shaped wedge at the bottom to slide in between the boot and the pant legs. Not perfect, but no way am I gluing anything to that uniform!!!


After that came the medals! I forgot to even mention them to Elenpriv, so that was on me. But I had some ideas on how I could pull them off. My first thought was to attempt to use my new Cricut I’d gotten for Christmas to do it, but I didn’t even know where to begin. And I wanted to make sure to have this project done because in a week or two I’d be dropping it off to my friend’s neighbor, who was staying at her second home in Kansas temporarily, and she would take it back to her. So I took some measurements of the area the medals would go based on this picture:
That’s also a nice picture with a straight-forward view of the medals. So I made them in a few different sizes in Photoshop, printed them out, and then held them against the doll to determine the best candidate. After choosing one, I literally measured every centimeter tick of each piece of those medals I’d printed, determining the length/height/width of each individual color, plus the coin part. I sketched the design out on bias tape, and then I used acrylic paint to bring the colors to life.
Why didn’t I just use what I’d printed? Because A) it was on cardstock, so the details weren’t nearly as sharp, and B) if I’d used photo paper, the entire thing would be way too shiny/unrealistic. So this had to be done by hand.
For the coins, I immediately thought of a hole punch. At least that way I’d get perfect circles! So I took my gold paint and covered a spare area of cardstock in it, then used two different hole punch sizes to create the medals (yes, one is bigger than the other). To add thickness, I stacked and glued two of each size together, then painted the edges gold since that part was white after cutting them out. Then I used a pencil to sketch out the cross design, then lightly went over it with black paint. I love my tiny paint brushes!!!
To attach them to the ribbons, I glued a mini strip to the back of them, then glued that to the back of the cardstock behind the ribbons. I felt that would be easier than trying to glue those tiny edges of the coins and ribbons together. I’m really proud of how these medals turned out.

To attach them to the uniform, I just used some double-sided tape. Because, again, NO glue on that uniform!!!
And with that, the doll was DONE! It was definitely quite a process, especially since I’m not familiar with this show or character, but I’m pleased with how it all turned out! My friend informed me not to share this until after the intended recipient had the dolls in her possession, and now she does. And she approves! YES!!!
#My Plastic Life#Barbie#Barbie photography#doll photography#Barbie doll photography#OOAK Barbie#OOAK doll#custom doll#custom Barbie#anime doll#OOAK anime doll#custom anime doll#FMA Brotherhood#Fullmetal Alchemist Brotherhood#Olivier Mira Armstrong#one sixth scale#TenderWolf
33 notes
·
View notes
Photo
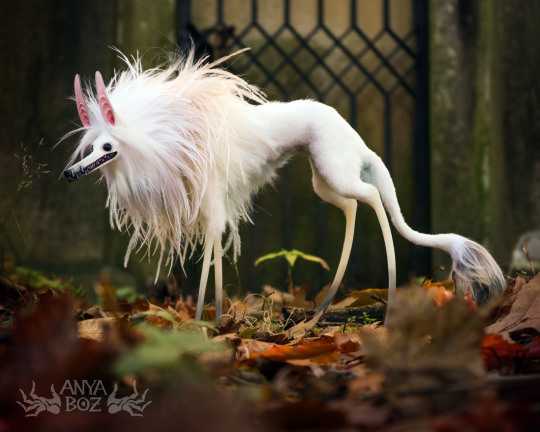
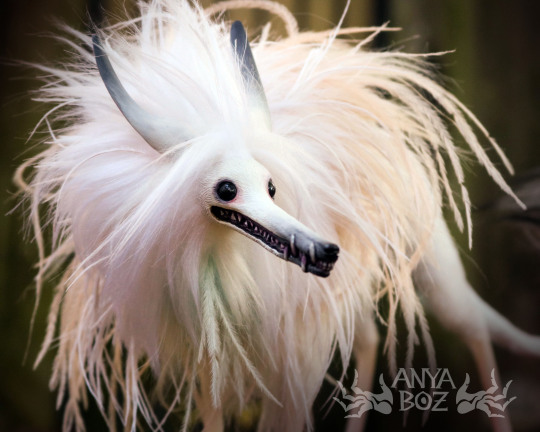
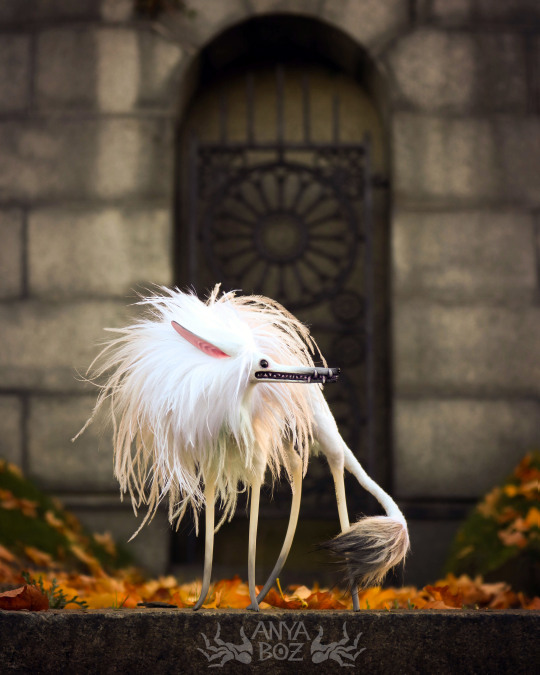
Who is that white specter who greets me with hollow black eyes and toothy grin? Do not fear dear wanderer, those sharp teeth tear only roots, and those dark eyes see only shadows. The dorra is not concerned with the living.
Ghost Dorra Room Guardian
Available this Sunday Nov 13 at 12 pm EST in my shop!
See how it's made on my Patreon.
#dorra#ghost dorra#room guardian#room guardians#spoopy#spooky#art doll#art dolls#ooak art doll#ooak#ooak doll#creature design#dnd monster#dnd#faux taxidermy#art#creepy#ghost#animal#weird#creepy cute#poseable art doll#monster#wolf
13K notes
·
View notes
Photo

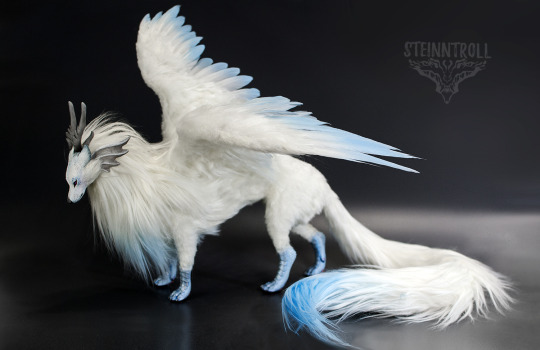


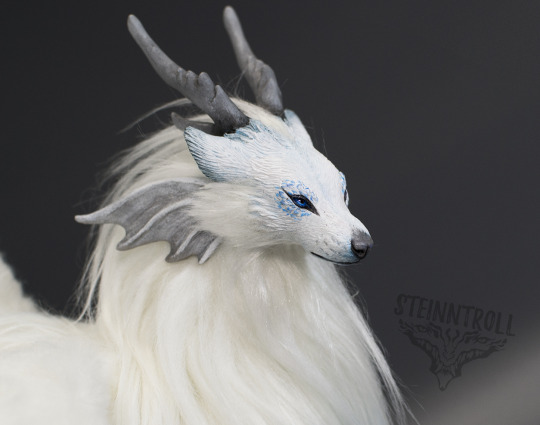
INSTAGRAM | MY SHOP |
Wolfdragon art doll
Commission
Super sculpey, faux fur, feathers, wire+plastic armature, fabric leather, primer, acrylic paint, varnish. Posable neck has plastic ball-and-socket armature inside and can be posed. Tail and wings are also posable and have wire armature inside. Legs and lumbar also contain wire armature inside, so you can carefully and slightly move it to find perfect balance if you keep the doll on uneven surface.
Size: Doll is around 25cm tall and 70cm length
#art doll#fantasy creature#white wolf#dragon doll#poseable art doll#ooak#craft#traditional art#dragon wolf#winged wolf#figure#poseable doll#animal art
871 notes
·
View notes
Text

i painted her!! i gif'd her!!! she's out of this world!!!!!!
#anime figure#custom figure#customized doll#ooak doll#ooak custom#anime ooak#diy figure#lesbian artist#clowncore#jestercore#bennizone-art#bennizone-oc#bennizone-oc-JESTER
623 notes
·
View notes
Text
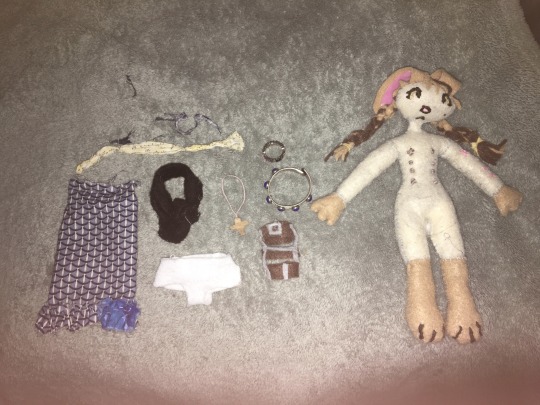
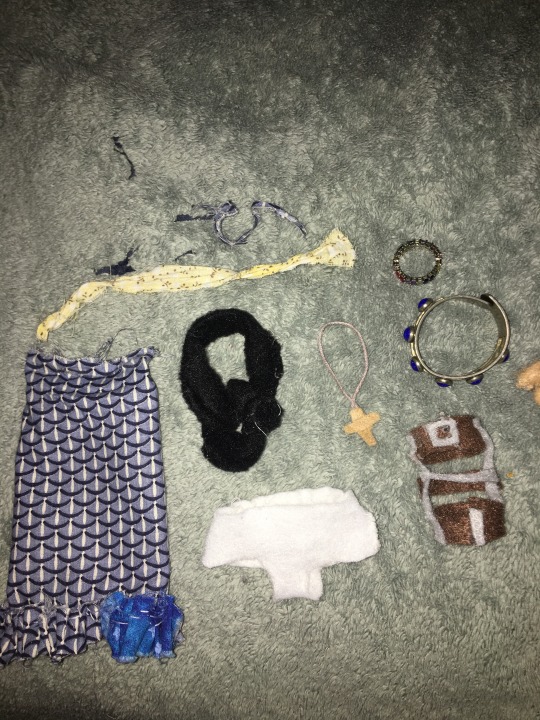

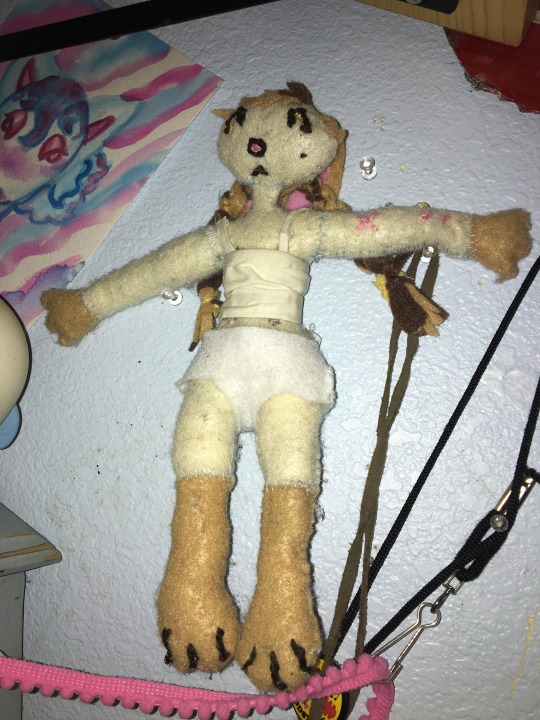
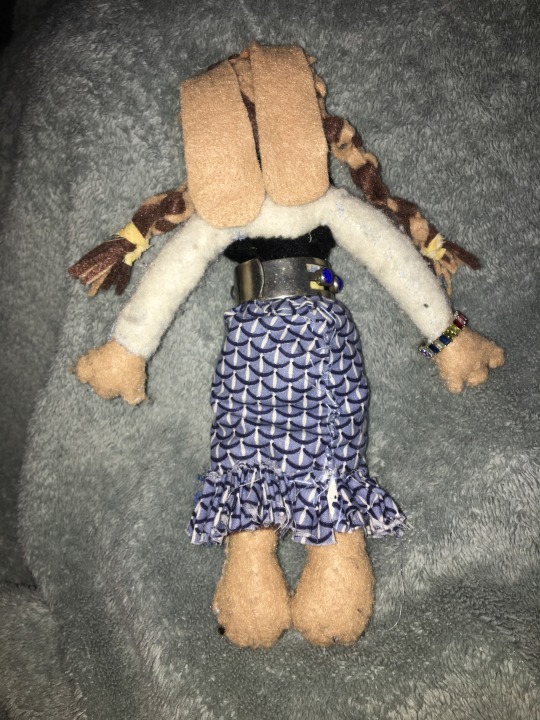
wynnie "freddie" "big ears" zamora in the FLESH!!! (felt)
#.art#wynnifred (oc)#she has a cane along with her leg brace also!#i also sewed and embroidered a mini traditional mexican blouse for her but i lost it 😭 ill try to find it and take a pic of her in it#oc tag#doll making tag#oc art#plushie#ooak plush#ooak doll#custom doll#ooakartdoll#ooak custom#furry plush#furry art#sewing#plushies#handmade plush#stuffed animal
106 notes
·
View notes
Text
Twyla - Monster High
(OOAK Concept)
#anime#character design#fanart#concept art#art#oc#character concept#monster high#twyla boogieman#ooak doll#she badly needs a new face just trust me
86 notes
·
View notes
Last Seen Blogs
coolkitty443
wren

dai-yanna
(~ ̄▽ ̄)~

sofiariva
Sofia Riva

alisa4bbc
White submissive sissy Alisa
lilrougeofficial-blog
Lil Rouge