#Delicious recipes made with avocado oil
Text
If you have celiac or otherwise can't eat wheat, btw, and you like bread, I highly recommend investing in a breadmaker. Even the best store-bought gluten-free bread does not hold a candle to the stuff that comes out of our breadmaker, and it's cheaper per slice even when we buy bread mix in single-loaf bags.
This is our breadmaker. Evie got it on sale, but it is an investment. I'm not going to pretend it isn't a chunk of change up front. There are cheaper ones, but the reason I like this one and think it's worth the money:
It has two smaller paddles, where our older bread maker that my mom got us and got destroyed by getting construction dust in it had one big paddle in the middle. This leaves a big hole in the middle of the finished loaf, which makes the bread much less useful for, like, sandwiches.
Zojirushi is not as well-known a brand in the US, but it's a Brand Name in Japan for good reason. Evie's had our Zojirushi rice cooker for over a decade & we had to replace the inner bowl once bc someone used metal utensils in it and scratched the non-stick coating. We expect to use this machine for at least a decade.
You can program your own cycles, which we found really useful. Evie built a custom cycle that removed the punch-down sections (gluten-free bread tends not to rise as much) and that made our perfect loaf.
A lot of bread machines produce very tall, square loaves, which are awkward to slice, store, and make sandwiches with. This produces loaves that make good sandwiches and toast, and the French toast slices don't crowd the pan.
The top heating element on this gives a really amazingly browned top crust that we definitely didn't get on our old machine.

It's so pretty.
So how is it cheaper in the long run if the machine costs $300+? A little like this:
We use Pamela's Bread Mix bc it's really consistent and easy - you need the bread mix, water, yeast, 3 egg whites, and oil. (We use avocado oil and find it best and most consistent, but regular vegetable oil works!) We buy Pamela's in bulk, and without any subscription discounts or whatever, the $48 pack of 3 bags makes about 11.5 loaves. With the cost of yeast and eggs and stuff, it ends up costing about $4.50 a loaf. (If you buy your yeast in larger bags & store it in an airtight container, you can create less waste and it's also cheaper.)
By comparison, a loaf of Franz GF Bread costs $7-8, and Canyon Bakehouse usually runs about the same.
However, that's not an apples to apples comparison because the Franz loaf is an 18 oz. loaf, whereas our breadmaker makes a 2 lb. loaf. Assuming even the lower-end cost for getting a Franz loaf at the store, an equivalent amount of bread would cost $12.42, and it's not nearly as good.
(Yes, gluten-free bread is fucking expensive. That's part of why I'm writing this post in the first place.)
Anyway, assuming you eat 2 lbs. of bread a week in your house - a breadmaker loaf, basically, to make the math simple - you'll end up spending $7.92 less on bread every week. That means that even at the most expensive cost for the Zojirushi, if you buy it at its highest price (don't do that! wait for a sale!) it'll take 50 weeks - about a year - before the breadmaker pays for itself. If you manage to get it on a 25% off sale (which we did), it pays for itself in about 9 months.
Nine months, I must stress, in which you are eating much more delicious bread.
We tend to go through a couple of loaves a week because toast, sandwiches, and melts are great food for people with low spoons.
Evie and I perfected the Pamela's mix recipe for this particular machine - I'll get it typed up when I'm downstairs next, along with the quasi-babka recipe. (Really, it's like a marble cake and babka and bread had a baby, and it's a family favorite.)
Bread good. The end.
#my peasant roots let me show you them#homemaking#queer homemaking#food#food cw#affiliate links#i may make a few pennies from these links#and use them to buy books
1K notes
·
View notes
Text
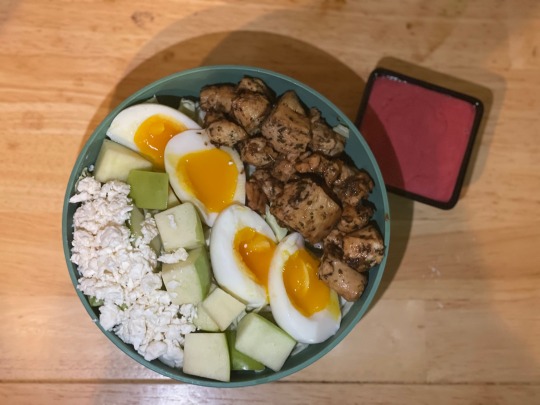
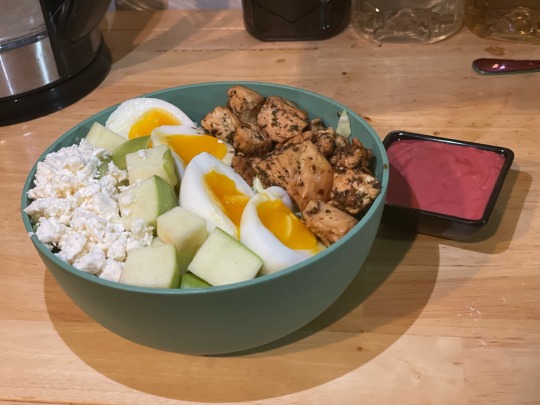
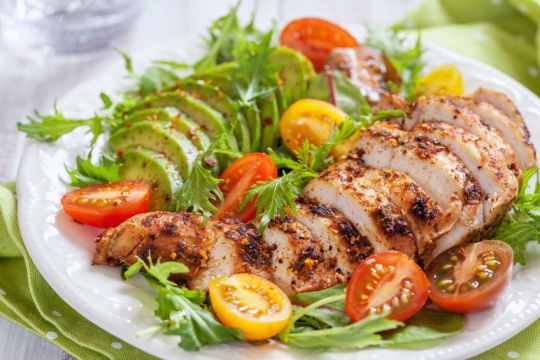
Dinner Recipe: Chicken Salad

TIME: ★★★★
PRICE: ★★★★
EASE: ★★★★
CLEANUP: ★★★★
I love homemade chicken salad. A lot. Despite my mayo aversion which I will address later.
This is one of those recipes that fires on all cylinders. It's so quick to make once you have the cooked chicken- only about 10 minutes. You can use pre-cooked chicken or just cook your own chicken breast (it takes about 15-20 minutes for me.)
Other than that, it's literally just mixing everything in a bowl. You don't have to separate everything into little bowls like I did here. I just did that so you could see the ingredients. 1 bowl (+ whatever you cooked your chicken in.) Bam. Easy cleanup.


It's great on bread (we like croissants when we're feeling fancy,) and just like... putting a big spoonful on some greens? Delicious. And even 1 big chicken breast makes TONS of leftovers.
Tips:
-Chill the chicken salad after mixing if you've just cooked the chicken breast. It's way better cold.
-You could totally add apples or dried cranberries- things like that. It adds nice, sweet pops of flavor!
-I've made this with almonds, walnuts, and pecans. It's all great.
-I never make this with tarragon. Nothing against tarragon, I just ALWAYS forget to get it.
-My spouse loves eating this as a dip with corn chips. I don't get it, but he swears by it, so maybe you'll like it!
-
A brief aside about Mayo:
OKAY HEAR ME OUT
I do not like mayonnaise. I've always had problems with it. But I love this dish. HERE are the things I do to bypass my mayo squick:
-I get avocado oil mayo. I KNOW it's effectively the same thing, but it tricks my dumb stupid brain.
-I cut the mayo with greek yogurt or sour cream. YMMV but you can play around with it based on what flavor you like.
-I just use a little less mayo/binder.
Ultimate Chicken Salad (Downshiftology)
23 notes
·
View notes
Text
Green Leafy Croutons
The title's clickbait, it's just salad and bread. But with a ✨twist✨.
TW: raw chicken, knives, eggs, human blood
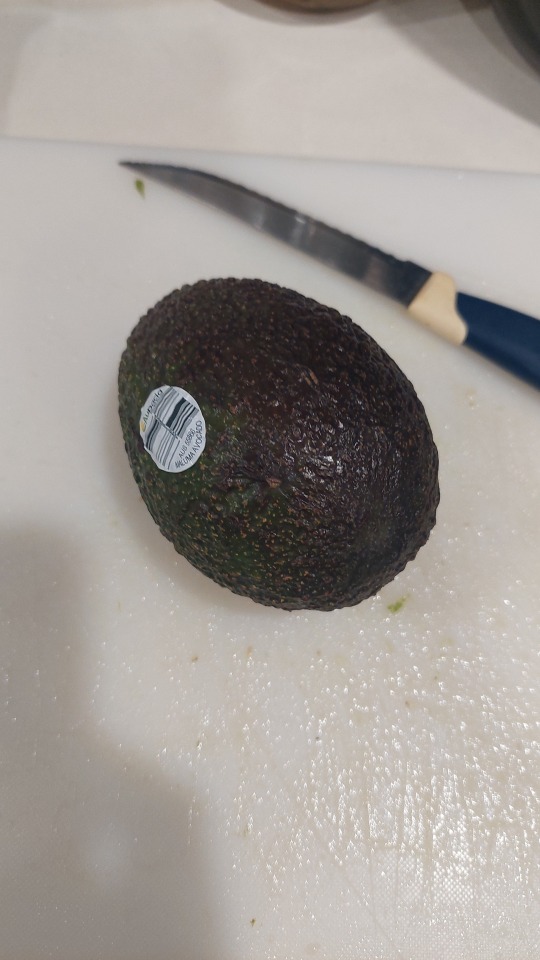
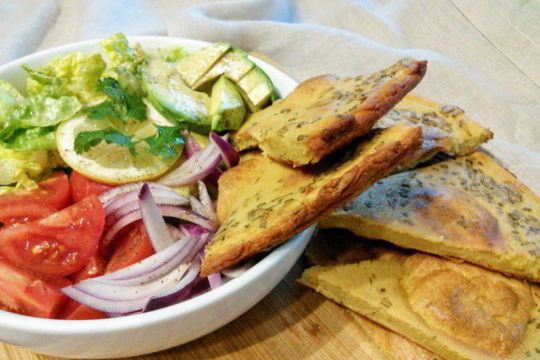
I'm gonna try out the recipe i had mentioned in chapter 2 of Break Down. My parents put this rule that me and the oldest sibling after me have to cook lunch and dinner ourselves on the weekends so after much toiling, i remembered that i had a recipe in one of my fics. So I decided to try it out. Except, i'm gonna change up some ingredients cuz they're not available and turn this into a salad with a side of toasted bread rather than a legit sandwich.
Here's the extract from the fic:
He was flashed back to a morning when Alfred was on a vacation and Jason and Tim were alone in the manor with Bruce. Since Bruce couldn’t cook to save his life, it was up to Jason and Tim to make breakfast. Alfred had said that he trusted Jason with his kitchen before he left. Tim hadn’t known what that meant, but he soon found out when Jason set out ingredients and started ordering Tim around on what to do. Within a short while, three halloumi cheese, salad, avocado, salami, and rye bread sandwiches with cream cheese and scrambled eggs were sitting on the table. It was Jason’s own recipe. And it was delicious.
So, Tim grabbed the ingredients from what he could remember and brought them back to Dick’s apartment. Setting them out, he got to work. He cooked the halloumi on the pan, chopped the tomatoes, parsley, and onions, mashed the avocado, cracked the eggs and mixed them with salt and a bit of chili. After the cheese was a light brown color, he set them aside on a plate and warmed the bread on the pan with the heat off. With all the mis en place done, he started assembling the sandwiches.
Dick, somehow, slept through the whole thing. Either he was knocked out, or he was really tired. Tim was slightly relieved that he wasn’t awake though. It meant that he had some more time to ponder things alone with no distractions.
He ate his sandwich and chewed in contempt, recalling the memory of when he made this with Jason.
I'm making this in bulk for like around 6 ppl with various different likes and dislikes btw so keep that in mind. Now let's move on to the mis en place!
Ingredients:

Tomatoes
Onions
Lettuce/parsely
Chicken
Halloumi cheese/Bri cheese
Bread
Avocado
Cream cheese (optional)
Chili
Salt
Pepper
Lemon
Oil
Ginger garlic paste/chopped garlic
That's all I can think of for now. A note on measurements: don't ask me. Heck if i know. As Jason said, "The thing about original recipes is that you measure things with your heart. You have a meeting with your soul then take it to your brain and let your hands do the work." Wise words indeed. I admire the person who came up with them.
On with the cooking!

A note on the chicken: Am I totally winging the cutting the chicken part while having 0% real experience in cutting chicken before? Totally.

Alr i asked my parents and my dad said to cut it into long french fry-like strips cuz that's what salads have and-

Yeah that's totally french fry-like
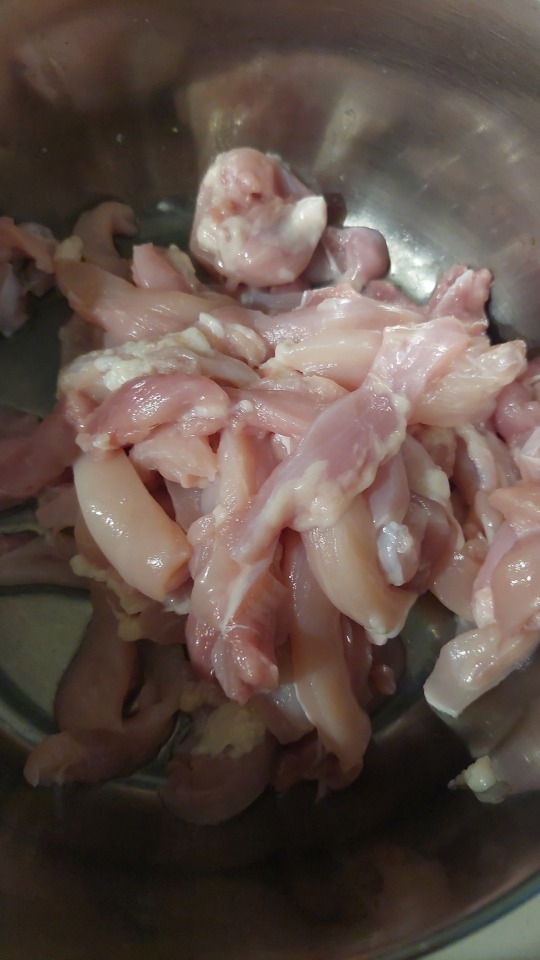
Anyway, we're done

Oil in pan and heat up ft. my messy stove that hasn't been cleaned for 30172496 years.
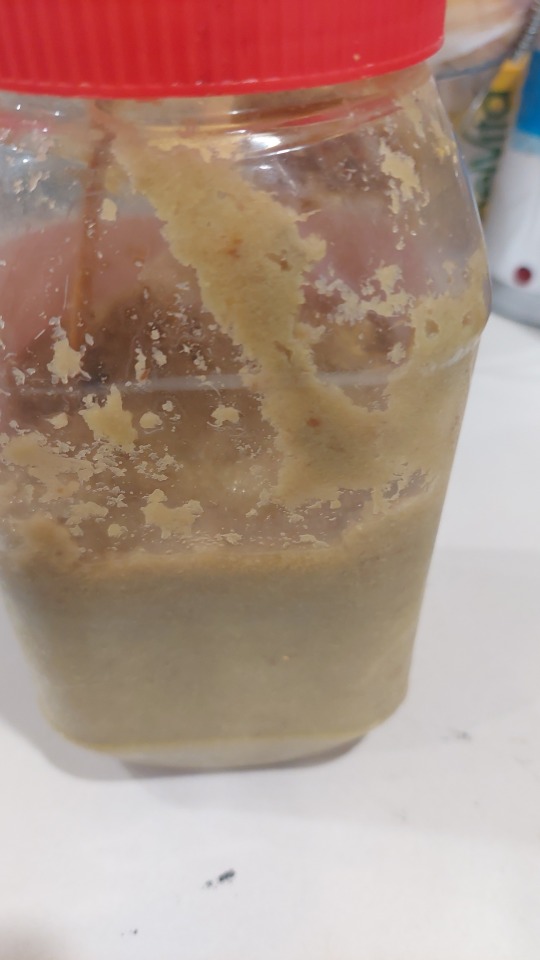
Ginger garlic paste. If you dont have that, then chopped garlic.
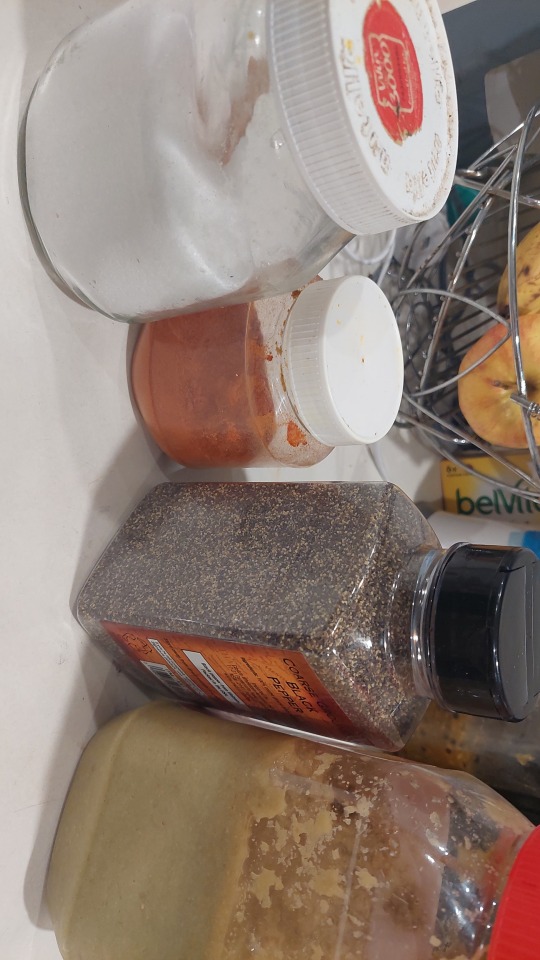
Salt, chili, black pepper, ginger garlic paste
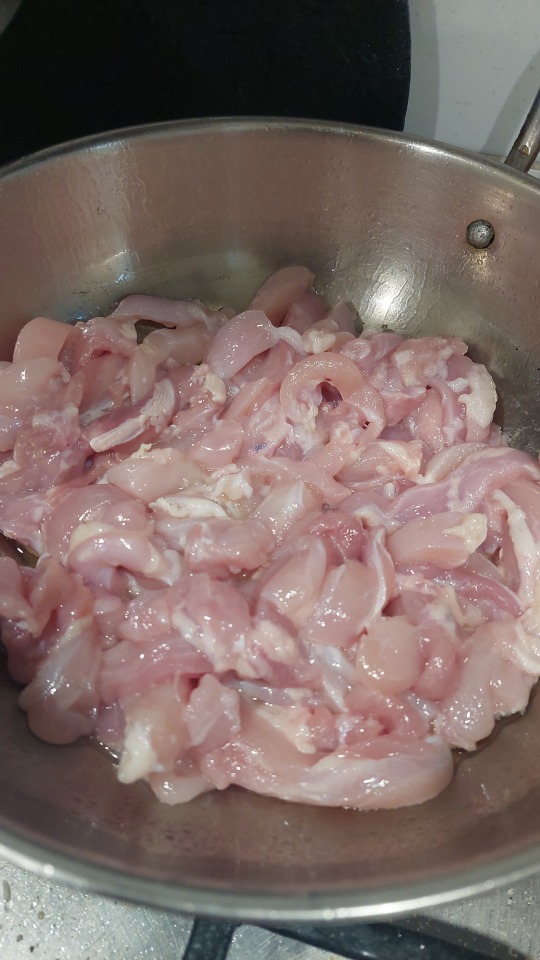
Put chicken in pan. Careful of oil splashes. That shit be flying.
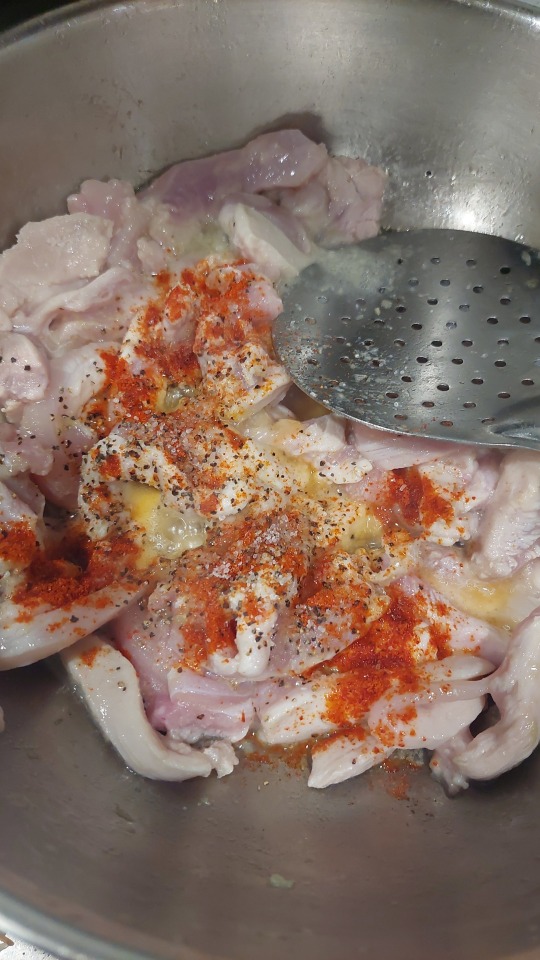
Now add the stuff i told you before. Some GG paste, some black pepper, some salt, some chili. My desi instincts are telling me to put more chili. Oops.
Now you mix-
Wait.
Hold up.

*narrows eyes* This be looking a little too WHITE. Imma add more chili.
Might add more pepper and salt along with it.
Now you mix again and-
It still be looking a little white but eh. It'll sort itself out later. Hopefully.
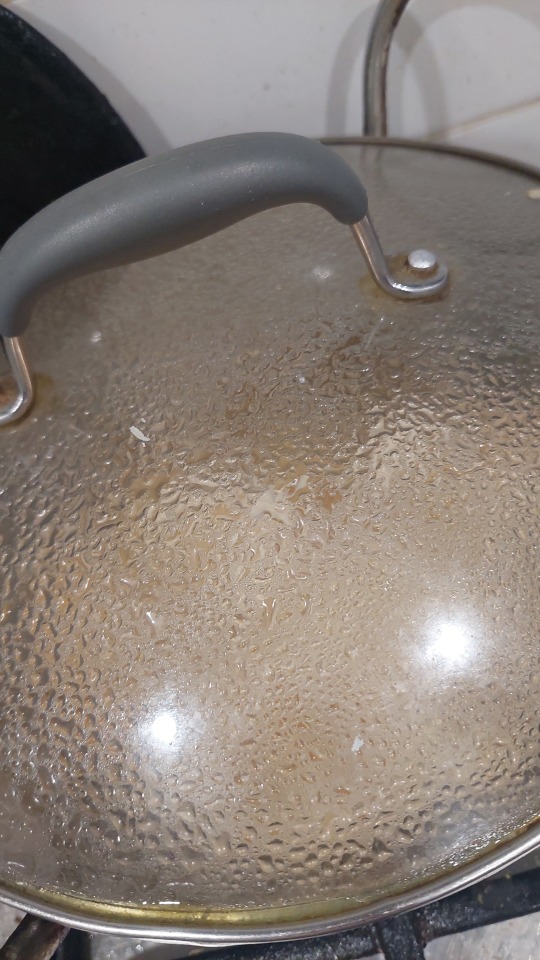
Now put a lid on it and put it on low flame and wait till the water evaporates.
Till then, you can clear up the mess you made while in your hurry to get stuff. I need to pray Maghrib. But you can get started on the next step (if indeed you are following along and actually making this with me. If you're here for entertainment, that's cool too, you cna have the leftovers /j)
Alright, I'm back. I checked on the chicken and eyvfrbkead it's still WHITE. It's the water and ik the spices will absorb into the meat eventually, but i couldn't smell it all that strongly... so i added more salt and chili.
If the chicken ends up making my family visit the hospital to get a tongue and throat transplant, then it's not my fault. It's its own fault for not looking like the color of my skin.
Moving on! (Unlike your criminal past- jk jk. I swear it's a joke)

Time for choppy choppy.
I like to use a cerated knife. Don't ask my why. I just do. It's easier for me.
You then dice the tomatoes into small cubes. But i... did not.
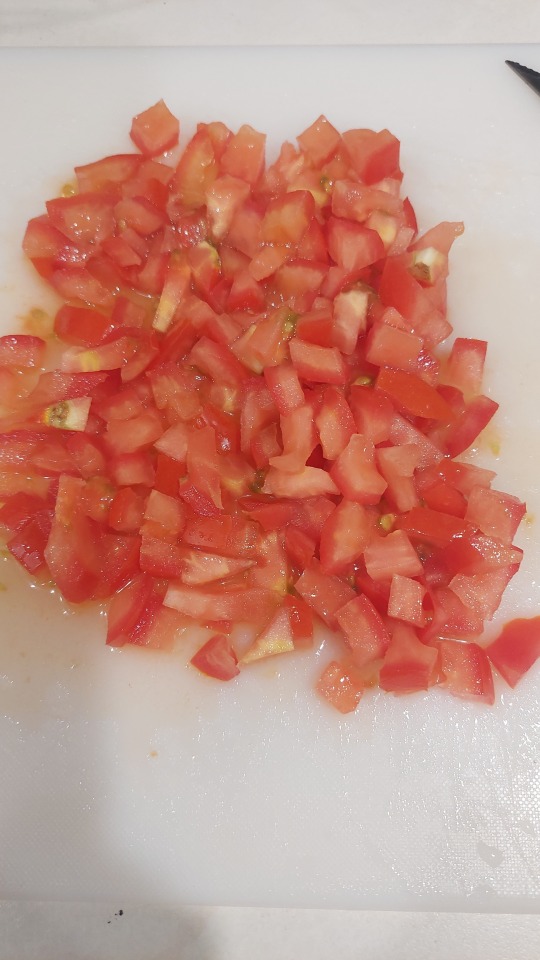
Despite my height, i cannot chop tomatoes into short pieces. I cannot cop tomatoes period. Why? Because i don't usually cook.
Alright, i do cook but only occasionally cuz being a high school student and the oldest daughter in an ambitious and studious desi family means that you don't have time for a lot of things and therefor you become a dissapointment.
At least I know how to make biryani ¯\_(ツ)_/¯
Time to stir and check on the chicen!
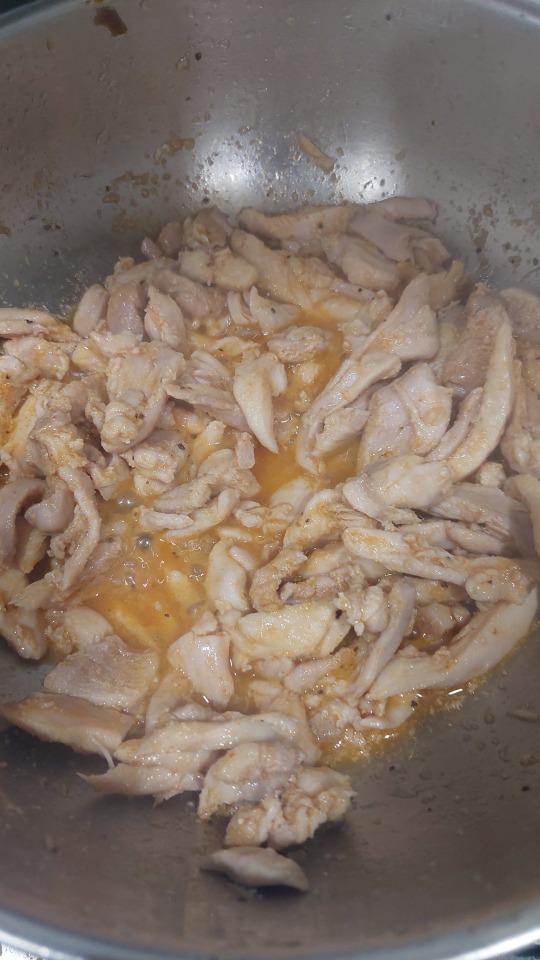
Look... i dont know whether that's good or bad, but i'm just gonna let it be for now.
Now... time for the most dangerous part of the recipe.

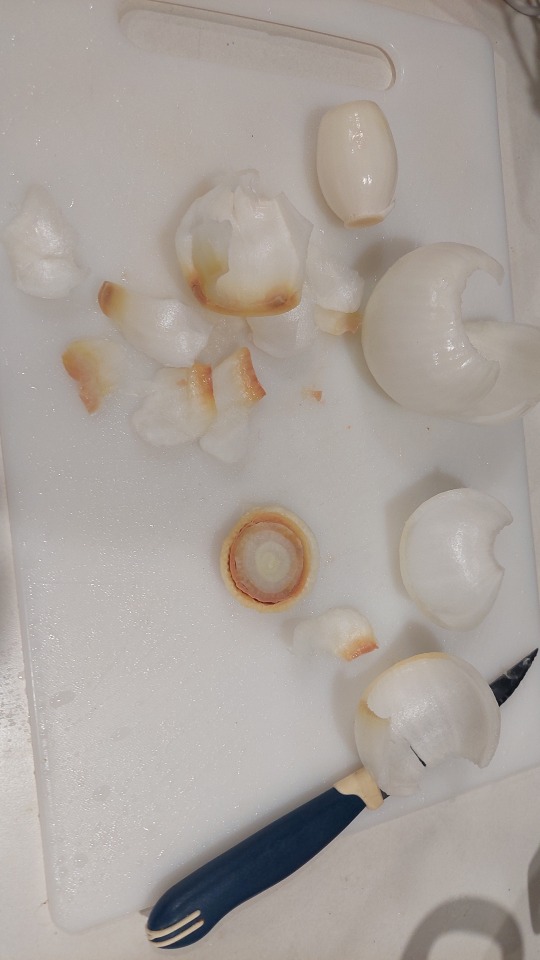
Onions.
I've peeled the onion and my eyes are already burning with the pain and sorrow of a million ogres.
Is it just me or is this onion be looking a little fishy?
I just checked the chicken again and a bit of it got stuck at the bottom oopsie. A reminder to stir your chicken, kids. May your chicken be forever stirred.
My chicken's looking like this:

And it's looking rightfully white on the inside (like me) so i'm just gonna switch off the stove and put the lid back on and let it cook on the switched off stove.
Back to onions! *sobs*

I don't need much onion so this will do. Excuse me while i go cool-dry my eyes.
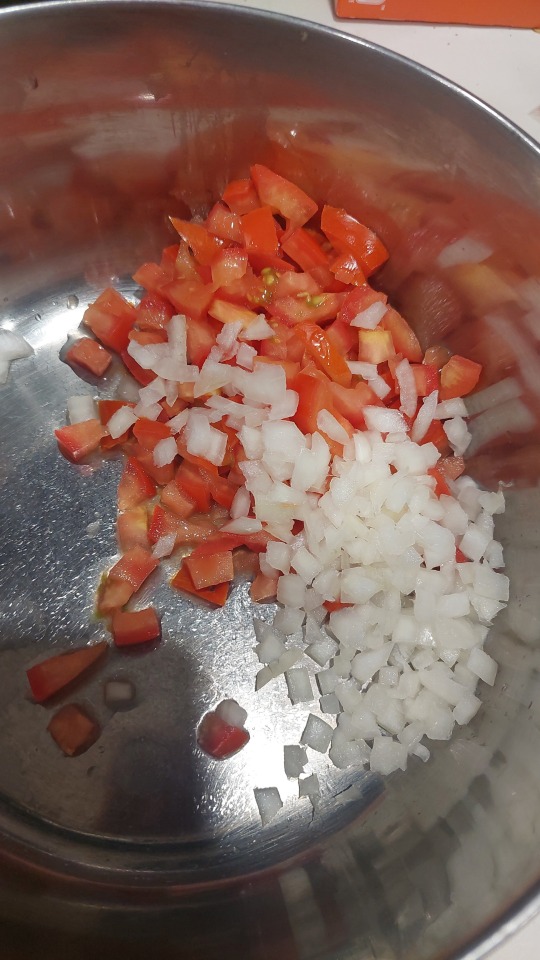
Hmmm... i might need more tomatoes...
Oh well, i'll figure it out later!
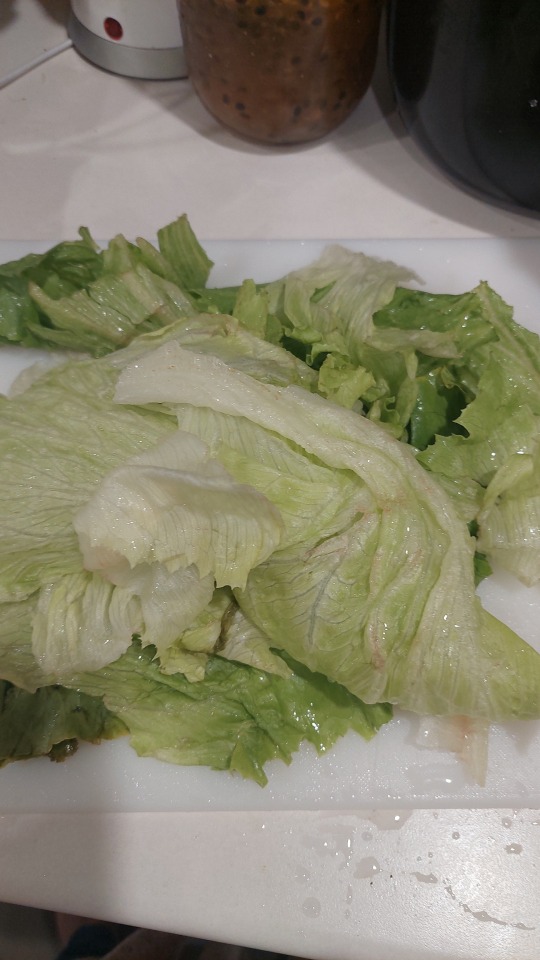
Green leafy
You can use parsely too but my mom said that our family doesnt like the taste of parsely so i'm using lettuce instead.
I freaking love green leafy. Look at that lustrous green.
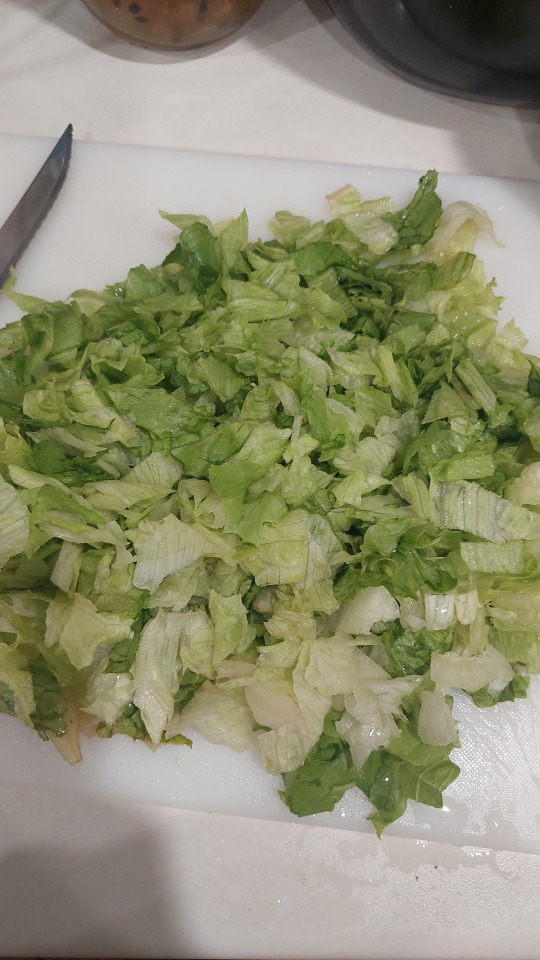
Aaaaaaaaand now you chopchopchopchopchop-
FUCK- I CUT MYSELF
NEED TO GET THE BLOOD AWAY FROM THE GREENSSSS.
FUCKFUCKFUCKFUCKFUCKFUCK-
Surprisingly, it doesn't hurt that much.

Look at that little poozer.
My dad told me to put my hand up and let it dry before i put a band aid on so i'm gonna have to pause for a while. I'm so glad the chicken was done before this. Take care of yourselves, guys. Don't be me.
Now to reread the chapter while I wait.

My dad put a band aid now! I went around and showed the cut to my whole family. My li'l sisters were like "show me show me!" cuz those gremlins don't like being left out. My mom started scolding me (lightly) about being careful. My dad was the total opposite, telling me to put my hand up, get the band aid, etc. Anyways, back to chopping.
Doneeee! It was a little hard with the band aid on, but i did it! We did it, we did it, we did it. Yay! Lo hicimos. We did it! And good news, the lettuce is cannibal-free.
Fre shavacado.
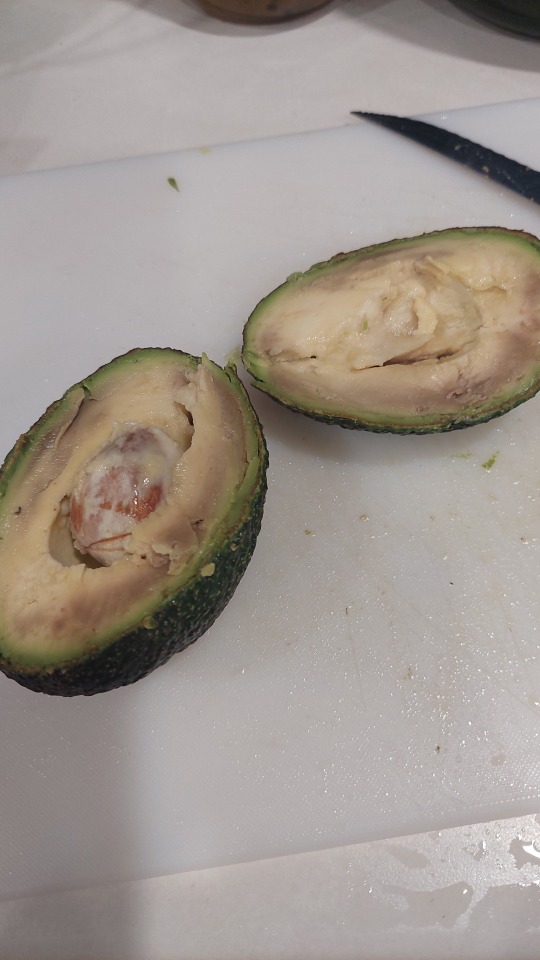
My mom cut it for me ^_^
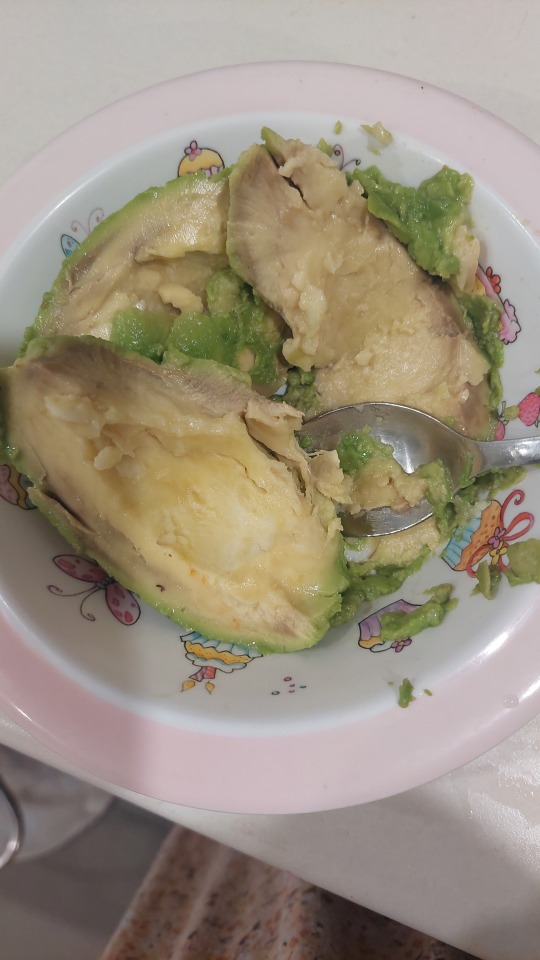
Time to serial-kill.

We serial-killed the heck out of that one, guys. Good job. I'm proud of you.
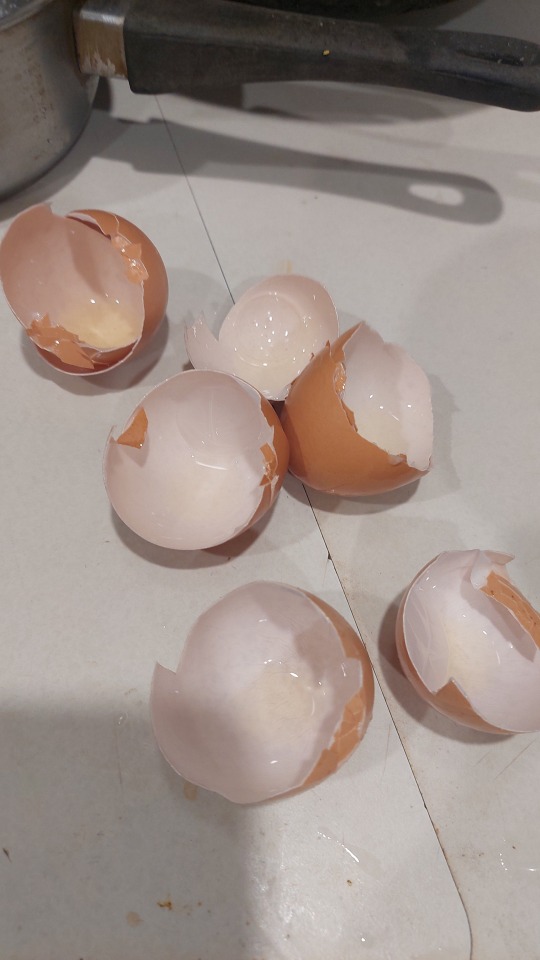
Time to break some humpty-dumpties (humpty-dumptys?)
We're gonna use the same pan (kadai) we used for the chicken because we hate washing dishes.
QUICK! MIX BEFORE YOU MESS IT UP! MIX MIX MIX MIX MIXMIXMIXMIXMIXMIX
I'm gonna have to leave you on a cliffhanger here cuz i'm allowed only 30 images on a post :(
Catch ya in part 2!
Part 2
Break Down ch: 2
#quotidian convos#cooking#recipes#healthy recipes#ig this counts as healthy#tw: injury#tis but a scratch#part 1#green leafy#green leafy croutons#green leafy croutons part 1#break down#break down: chapter 2#fanfic writer#fanfic writer tries cooking#jason todd#tim drake#quo did stuff
14 notes
·
View notes
Note
not prev anon but omg that dish sounds AMAZING i need to make it right now! do u mind dropping the kale salad recipe too so i can experience the same delicious meal 🫶
yess of course! it's super easy all i did was massage a large handful of kale in some olive oil, then added chopped cucumber quarters, diced avocado, sweetcorn, dried cranberries, walnuts halves and some pine nuts that i toasted in a hot pan. you can leave it at that but i also made a quick dressing which was just equal parts tahini and olive oil (maybe a half tbsp each) stirred together with a dash of lemon juice, a squeeze of honey and some cracked black pepper 💗
#this is my staple salad recipe i often soft boil an egg and pop it on top for a quick and filling lunch and it always hits the spot#i lovee kale she will always be superior to lettuce... sorry not sorry#if any of u make this or the chicken please let me know what u think omg#recipes#food
8 notes
·
View notes
Photo


National Spinach Day
It’s not just Popeye who will be strong to the finish on National Spinach Day. In fact, anyone who chooses to celebrate the day by consuming some of this leafy green plant will get to join in on the health benefits as well!
Packed with nutrients such as Iron, Vitamin A and Calcium, spinach is known for being a healthy part of a balanced diet – but do we eat enough of it?
Well, that’s what National Spinach Day is all about!
History of National Spinach Day
Originally from Persia (the area that is now Iran), spinach made its way to China in the 7th century, where the people referred to it as the “Herb of Persia” or the “Persian Green”. The vegetable eventually ended up in Europe a few hundred years later, when it landed in Spain. In fact, for some time the English referred to spinach as “The Spanish Vegetable”. It didn’t make its way to being cultivated in North American until sometime in the early 1800s.
Possibly the most famous person in history to be associated with spinach is 16th-century noblewoman, Catherine de’ Medici, who ruled France from behind her three sons for many years. Originally from Florence, Italy, she moved to France when she married King Henry II. It is said that Catherine loved spinach and made sure her cooks served it at every meal. Because of this, even today, meals that are made with spinach are often known as “Florentine” in honor of the birthplace of Catherine de’ Medici.
This dark, leafy green vegetable that grows in groups that form a rosette-type shape is part of the “goosefoot” family, with its close relatives being Swiss chard and quinoa, as well as beets. Spinach has a few different varieties that offer different shapes and sizes of leaves.
Taking some time to celebrate National Spinach Day acts as a little nod to this tasty, healthy vegetable.
How to Celebrate National Spinach Day
While it might seem a little far-fetched to spend the day celebrating the wonders of spinach, it’s possible–and can even be a load of fun! People who want to celebrate National Spinach Day can employ a variety of ideas for ways to the day, it just takes a bit of creativity.
Consider giving these ideas a try or come up with other ideas of your own:
Try Creative Ways to Serve Spinach
Why not try a new recipe on National Spinach Day? Sauté it in olive oil and a little bit of garlic – or what about a baby spinach salad with mozzarella cheese, avocado slices, and crispy bacon crumbled on top? Delicious!
Other tasty ideas for meals that include spinach are:
Bacon, spinach, and gorgonzola pasta
Spinach, artichoke, zucchini dip (with pita bread or baguette)
Spinach spanakopita (a traditional Greek pastry dish)
Creamy spinach soup
Spinach lasagna (a vegetarian take on the traditional Italian dish)
Spinach pesto on flatbread pizza
Spinach quiche (also called Quiche Florentine)
Mushroom and spinach risotto
Some people like to purée spinach up and hide it in soups and pizza sauces for the finicky eaters in the family who may not prefer to eat it straight up.
So, no excuses – get your leafy greens down on National Spinach Day!
Learn About the Health Benefits of Spinach
Just like many vegetables, the healthiest way to serve and eat spinach is fresh and raw. However, even when it is cooked, it still remains one of the healthier vegetables. These are just some of the many nutritional benefits:
Fiber aids the digestive system
Vitamin A (carotene), for healthy organs and eyes
Iron helps with red blood cells and tissue health
Vitamin C, antioxidants, and a booster for the immune system
Folic Acid, useful in cell function and tissue growth
Calcium, essential for bone health
Antioxidants, help remove free radicals that cause oxidative damage
While spinach also has a small amount of natural sugars and carbohydrates, these are small in comparison to the myriad of other health benefits provided by this tasty veggie.
Try Growing Spinach in the Garden
Getting enough leafy greens in the diet is much easier for people who can grow their own! And, actually, spinach is not a particularly difficult one to grow. It’s an annual plant, meaning that it needs to be re-planted from seed each year, but it’s hardy and enjoys weather that is somewhat cool (but not cold).
National Spinach Day might be a bit too soon in the year to start a garden outdoors in many parts of the world. If this is the case, it’s simple to begin an indoor planting of spinach from seed and then move it outside when the weather permits. Spinach likes cool weather. So, as long as there is no risk of frost, the spinach plants should do fine outside in the spring.
As soon as the leaves are large enough to eat, the spinach is ready for harvest. It is healthiest when eaten as quickly as possible after harvesting. However, it can be stored, loosely packed, in a sealed plastic bag for several days. Don’t wash it ahead of time as it could get mushy. Simply wash it just prior to eating or cooking with it. It can also be frozen while it is still fresh.
Since it only takes about 6 weeks from the sowing of seeds to harvest time, it has a quick turnaround time. This means that it’s a great vegetable to grow in the spring as well as in the cooler autumn months so that there’s enough for the family to eat all throughout the growing season.
Take in Some ‘Popeye, the Sailor Man’
Some younger folks might not be familiar with the connection between Popeye and spinach. But those of a certain generation will possibly remember not only the Saturday morning cartoon but also the little jingle song that went along with it!
Going further back, even before it was an animated cartoon, more mature folks might remember that Popeye started out as a comic strip in the newspapers in the late 1920s. Eventually, decades later, a live-action film tribute was created in 1980, starring Robin Williams.
The theme of the character, Popeye, was that he was a rather average little sailor guy, with eerily large, tattooed forearms who smoked a pipe. And when he ate his spinach? Well, he would immediately gain superhuman strength and be able to punch the lights out of his arch-nemesis, Bluto, in order to help one of his friends who were in need. (Popeye and Bluto were constantly fighting over the affections of the tall, extremely skinny Olive Oyl.)
As it turns out, pop culture actually can have a positive influence on the world, proven by Popeye. After the character started eating spinach, children began asking for it and sales in the United States skyrocketed by one-third. That was quite a boost for the spinach industry–and the health of those children!
Source
#Turkey Bacon and Spinach Melt#Artichoke and Spinach Dip#pita bread#tortilla chips#fries#USA#Canada#food#appetizer#entrée#Beef Two Ways#steak#Maze by Gordon Ramsey#Taco Salad#National Spinach Day#26 March#salmon#Brix Restaurant & Gardens#travel#summer vacation#NationalSpinachDay#vegetable#original photography#restaurant
2 notes
·
View notes
Text

Raw veganism is a plant-based diet
Raw veganism is a plant-based diet that consists of uncooked and unprocessed foods, such as fruits, vegetables, nuts, seeds, and sprouted grains. This type of diet is becoming increasingly popular due to its numerous health benefits, including improved digestion, increased energy levels, and weight loss. However, planning a raw vegan meal can be challenging, especially if you are new to this type of diet. In this article, we will discuss some tips for planning a raw vegan meal and provide you with some delicious and healthy raw vegan meal ideas.
Tips for Planning a Raw Vegan Meal
Include a variety of foods: To ensure that you are getting all the necessary nutrients, it is essential to include a variety of fruits, vegetables, nuts, and seeds in your meal. Try to incorporate different colors, textures, and flavors in your meal.
Balance your macronutrients: While it is important to include a variety of foods in your meal, it is also essential to balance your macronutrients. This means including enough healthy fats, carbohydrates, and proteins in your meal. Good sources of healthy fats include avocados, nuts, and seeds. Carbohydrates can be found in fruits and vegetables, while proteins can be obtained from nuts, seeds, and sprouted grains.
Use quality ingredients: When planning a raw vegan meal, it is essential to use quality ingredients. Look for organic and locally sourced fruits and vegetables to ensure that you are getting the freshest and healthiest produce.
Be creative: Raw veganism is all about creativity and experimentation. Don't be afraid to try new foods and recipes. Mix and match different ingredients to create a meal that is both delicious and nutritious.
Raw Vegan Meal Ideas
Green Smoothie Bowl: Start your day with a refreshing and nutrient-packed green smoothie bowl. Blend together spinach, kale, banana, mango, and almond milk. Top with sliced kiwi, strawberries, and a sprinkle of chia seeds.
Zucchini Noodles with Pesto: Spiralize zucchini into noodles and toss with a homemade pesto made from basil, pine nuts, garlic, lemon juice, and olive oil. Top with cherry tomatoes and sunflower seeds.
Raw Tacos: Fill collard green leaves with a mixture of seasoned walnut meat, avocado, and fresh salsa. Top with a drizzle of cashew sour cream.
Raw Pad Thai: Spiralize sweet potato and zucchini into noodles and toss with a spicy almond butter sauce. Top with sliced red bell pepper, green onions, and chopped peanuts.
Raw Pizza: Top a cauliflower crust with a homemade tomato sauce, sliced mushrooms, bell peppers, and sun-dried tomatoes. Sprinkle with nutritional yeast for a cheesy flavor.
In conclusion, planning a raw vegan meal can be challenging, but it doesn't have to be. By following these tips and incorporating some of the meal ideas above, you can create delicious and healthy raw vegan meals that will keep you energized and satisfied throughout the day. Remember to be creative and experiment with different ingredients and flavors to find the meals that work best for you.
#rawvegan#vegan#plantbased#rawfood#raw#veganfood#healthyfood#glutenfree#vegansofig#fruitarian#healthylifestyle#fruit#veganlife#veganrecipes#govegan#health#5 minute vegan garlic noodles#oragnic
6 notes
·
View notes
Text
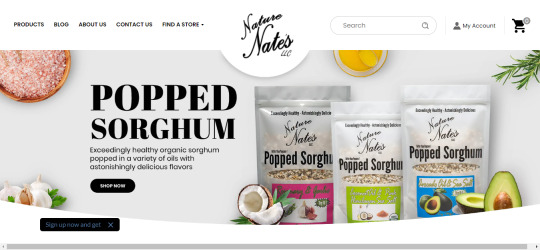
Popping Sorghum | Sorghum Popcorn | Naturenatesllc
Shop for Popping Sorghum at Naturenatesllc. Made from a gluten-free super grain, popping sorghum is the perfect any day healthy snack for on the go, at office, or at home. Sorghum is a whole grain that can be popped into a delicious and nutritious snack called popping sorghum. You can buy high-quality popping sorghum from Naturenatesllc. Made solely with organic sorghum, avocado oil, and sea salt, Nature Nate's Popped Sorghum snacks are as simple as they come. The munchies are free of the 12 most common allergens, GMOs, preservatives, additives, and natural flavorings. Naturenatesllc offers many healthy snacks like popping sorghum, best sorghum for popping, sorghum popcorn, organic popping sorghum, popped sorghum recipe, non gmo sorghum, popped sorghum snacks, allergy free snack, buy sorghum popcorn, buy popping sorghum online etc.

Best Sorghum for Popping | Sorghum Popcorn | Naturenatesllc
Looking best sorghum for popping? Naturenatesllc produces best sorghum for popping which are gluten free and densely nutritious, puff up beautifully when popped over high heat. Our best sorghum for popping is exceedingly healthy organic sorghum popped in a variety of oils with astonishingly delicious flavors. Popped sorghum grain is a gluten-free healthy alternative to popcorn that packs plenty of fiber and minerals.
Sorghum Popcorn | Organic Popping Sorghum | Naturenatesllc
Shop for sorghum popcorn at Naturenatesllc. Sorghum popcorn is nutritious and delicious snack for healthy alternatives to popcorn. Sorghum can also be popped like popcorn and is a popular snack in many parts of the world. Sorghum popcorn is a healthy gluten free whole grain and it is a powerhouse in the world of grains.

Organic Popping Sorghum | Popped Sorghum Recipe
Looking for organic popping sorghum? Naturenatesllc produces best organic popping sorghum which are gluten free and densely nutritious, puff up beautifully when popped over high heat. Our organic popping sorghum is exceedingly healthy organic sorghum popped in a variety of oils with astonishingly delicious flavors.
Popped Sorghum Recipe | Non Gmo Sorghum | Naturenatesllc
Looking for popped sorghum recipe? You can save some money, eat a freshly popped healthy snack by popping your own sorghum. For those who enjoy it and want something healthy and delicious to snack on, sorghum is an excellent alternative. Sorghum is frequently thought to be a healthier alternative to popcorn. Check Naturenatesllc online store to check out Popped sorghum recipe and buy organic popping sorghum.
Non Gmo Sorghum | Popped Sorghum Snacks
Buy non gmo sorghum from Naturenatesllc. Sorghum is a naturally non-GMO, gluten-free grain that not only contains an abundance of antioxidants, vitamins. Popping sorghum is created without any genetic engineering. Non Gmo Sorghum are made with organic, nonGMO ingredients and have no artificial colors or flavors added. Organic popping sorghum are healthier for you than most snacks you find at the grocery store.
Popped Sorghum Snacks | Allergy Free Snack | Naturenatesllc
Shop for popped sorghum snacks at Naturenatesllc. Made from a gluten-free super grain, popped sorghum snacks is the perfect any day healthy snack for on the go, at office, or at home. Sorghum is a whole grain that can be popped into a delicious and nutritious snack called popping sorghum. You can buy high-quality popped sorghum snacks from Naturenatesllc. Made solely with organic sorghum, avocado oil, and sea salt, Nature Nate's popped sorghum snacks are as simple as they come. The munchies are free of the 12 most common allergens, GMOs, preservatives, additives, and natural flavorings.
Allergy Free Snack | Buy Sorghum Popcorn | Naturenatesllc
Are you looking for allergy free snack? Naturenatesllc offers healthy allergy free snacks as a alternative to popcorn. When you have food allergies to deal with, you have option to make your own allergy friendly snacks. You can save some money, eat a freshly popped healthy snack by popping your own sorghum. It is a healthy allergy free snacks option for kids or even adults. Naturenatesllc popping sorghum are non gmo, gluten free, easy to digest and top 12 allergy free snacks.
Buy Popping Sorghum Online | Popping Sorghum | Naturenatesllc
Buy popping sorghum online at Naturenatesllc. Popping sorghum is nutritious and delicious snack for healthy alternatives to popcorn. Made from a gluten-free super grain, popping sorghum is the perfect any day healthy snack for on the go, at office, or at home. Sorghum is a whole grain that can be popped into a delicious and nutritious snack called popping sorghum. You can buy high-quality popping sorghum from Naturenatesllc. Naturenatesllc sells many healthy keto friendly snacks such as popping sorghum, best sorghum for popping, sorghum popcorn, organic popping sorghum, popped sorghum recipe, non gmo sorghum, popped sorghum snacks, allergy free snack, buy sorghum popcorn, buy popping sorghum online etc. Sorghum popcorn is a healthy gluten free whole grain and it is a powerhouse in the world of grains. Tastes like popcorn only better. It's super healthy for you. Visit our online store at www.naturenatesllc.com
#popping sorghum#best sorghum for popping#sorghum popcorn#organic popping sorghum#popped sorghum recipe#non gmo sorghum#popped sorghum snacks#allergy free snack#buy sorghum popcorn#buy popping sorghum online
2 notes
·
View notes
Text
Sorry I’ve been a bit MIA with my Fallout Cookbook Series but I’m back and here’s a new recipe I tested last night: The New California Cobb Salad
It’s got Green Cabbage as the base (tried to use lettuce but apparently it doesn’t exist in the Fallout universe… yet lol). Switched the blue cheese with Feta (but def could use blue cheese). A Cobb Salad usually comes with tomatoes but couldn’t use them so Green Apples (or Muttfruit) were the choice. Some Medium-boiled Eggs (could be hard), halved. Some Chicken Breast (it’s why I used to substitute Gecko and Iguanna meat lol) chunks cooked on a pan with couple of herbs and spices. Wanted to use Nopales (cactus) but couldn’t find any so just omitted it (was gonna use that as a substitute for avocado which is normally found in a Cobb Salad).
The dressing was a Red-Wine Blackbery Vinegratte I made puréing blackberries, olive oil, red wine vinegar, salt, black pepper, garlic, sugar, and parsley.
All tasted incredibly delicious, ngl lol. But next time will add some red onions.
3 notes
·
View notes
Text
Delicious chickpea tortillas in a frying pan. Healthy breakfast 16

They can be used instead of bread, along with soup, salad, or any other dish. And they can also be used as a separate dish or snack.
In tortillas, you can wrap an omelet with coconut milk, quinoa with vegetables, or just sticks of raw vegetables with tahini.
If you like articles subscribe to our newsletter and you will learn more - https://elenasunshinemagazine.substack.com/
You can also make "cream tubes": to do this, fill the tortilla with soft avocado, tahini, or even thick applesauce for children.
You can also make a dessert for the whole family from chickpea tortillas. You just need to add a little coconut sugar to the dough and dip the finished masterpiece in hot chocolate or honey.
Healthy breakfast of sweet potato falafel with sesame seeds. Lesson 15
About the benefits

As I have already written, I was brought to chickpea tortillas by necessity – doctors forbade eating gluten-containing products, which include wheat and rye flour. The problem of non-tolerance or allergy to gluten has recently become more common, and the complexity of the diagnosis makes many people continue to unknowingly eat foods that are harmful to their health. Therefore, in any case, even a partial replacement of gluten-containing products with gluten-free ones will benefit.
In addition, chickpeas are representative of legumes and have a high content of vegetable protein, and this is important for those who, for one reason or another, restrict the intake of animal food.
Chickpea flour contains many useful elements and vitamins. And such an essential amino acid as methionine is found in chickpeas in greater quantities than in all other agricultural crops.
It is necessary for the human body, as it is directly involved in the synthesis of neurotransmitters, such as epinephrine and acetylcholine. And these substances, in turn, affect the full transmission of various impulses by nerve fibers, that is, normalizing the work of nerve cells.
Back in the early 19th century, Australian scientists found that chickpea flour products practically do not increase blood glucose levels, which means that they can safely be consumed by people suffering from diabetes.
Ingredients:
Chickpea flour 1 cup
Water 1-1,2 cup
Egg 1 piece
Salt to taste
Garlic 1 clove
Cumin 1/2 tablespoon
Turmeric 2 teaspoons
Sunflower oil 6 tablespoons
The choice of spices can be any, to your taste. I gave the recipe the ones that I use myself.
Cooking procedure
Mix chickpea flour with salt, turmeric, and cumin in a container. While stirring, gradually pour in 1-1. 5 cups of water. The consistency is slightly more liquid than on pancakes. Add the egg and mix everything together.
Chickpea flour has a special feature – the dough forms lumps that are poorly mixed. But there is also a secret to how to deal with it. You need to put the dough in for half an hour or an hour in the refrigerator. After that, mix again, and there will be no trace of the lumps.
Heat a frying pan with sunflower oil. Pour the dough into a thin layer-just as it happens when baking pancakes. Squeeze a clove of garlic into a frying pan using a garlic press.
After the first side is fried, turn the "pancake" over. You can finish by frying the second side. And you can make a tortilla with a filling. For example, putting grated cheese in it. While the second side is being fried, sprinkle the tortilla with cheese.
And then, already on a plate, roll it into a roll. I tried variations of fillings from mushrooms and eggplant. Another option is to wrap raw chopped vegetables (for example, tomatoes and cucumbers) in a ready-made tortilla. All the variations are very tasty. Perhaps you can come up with your own version. Bon Appetit!
https://elenasunshinemagazine.com/cooking/delicious-chickpea-tortillas-in-a-frying-pan-healthy-breakfast-16/
1 note
·
View note
Text
Kitchen Confidence Booster: Mastering Meals with Fresh Ghee from Madurai
Are you ready to up your cooking game and unleash your inner chef? Look no further than fresh ghee in madurai! Hello Ghee Lovers, I am glad to welcome you all to this blog. In this blog post, we’ll explore how this golden elixir can boost confidence in your kitchen and take your food to new heights of flavor and satisfaction.
The Magic of Fresh Ghee:
Ghee, also known as clarified butter, is a key ingredient in Indian cooking, known for its rich flavor and versatility. Made by boiling ghee and removing the milk solids, ghee has a higher smoke point than butter, making it suitable for sautéing, frying and frying. But not all ghee is created equal — sourcing fresh ghee in madurai holds the key to unlocking its full potential.
Why Madurai Ghee?
Madurai, known as the cultural capital of Tamil Nadu, is famous for its rich culinary heritage and traditional cooking methods. The ghee produced here is no exception — Madurai ghee, made with locally sourced ingredients and time-honoured techniques, has a depth of flavour and aroma unmatched by mass-produced alternatives.
Tips for using Madurai ghee in your cooking:
Fry with confidence: Try heating Madurai ghee in a pan. Use it to sauté vegetables, meats or aromatics for flavour and richness that elevates any meal.
Fries: Dip your favorite foods in Madurai ghee and watch them turn golden and crispy. Be it samosas, pakoras or puris, frying in ghee adds a delicious aroma to any recipe.
Roast with flavor: Drizzle with Madurai ghee before roasting vegetables or meats in the oven. Ghee helps caramelize ingredients and provides a rich, nutty flavor that will make your taste buds sing with joy.
Bake with love: Add ghee instead of butter or oil to your favorite baking recipes for a healthy and delicious alternative. From cakes and cookies to bread and pastries, ghee adds a unique flavor and moisture that will take your baked goods to the next level.
Finish with richness: Add the finishing touch of Madurai ghee to your finished dishes for an extra layer of richness and flavor. Whether sprinkled over lentils or mixed into rice, a little ghee goes a long way in enhancing the taste and texture of your dish.
In conclusion, fresh ghee in madurai will give you a boost of kitchen confidence that will transform your cooking from ordinary to extraordinary. With its rich flavor, versatility and ability to enhance a variety of dishes, Madurai ghee is a must-have for any aspiring home cook. So why wait? Elevate your meals with the magic of Madurai Ghee and unleash your culinary creativity today!
Frequently Asked Questions
1. Is ghee suitable for lactose-intolerant people?
Yes, ghee is generally well tolerated by lactose-intolerant individuals because the milk solids are removed during the clarification process. However, if you have specific dietary concerns, it is always best to consult with a healthcare professional.
2. How to store Madurai ghee?
Madurai ghee should be stored in an airtight container in a cool dark place away from sunlight and heat. Proper storage will help maintain its freshness and flavour for a long time.
3. Can we make ghee at home?
Yes, you can make ghee at home by boiling the ghee on a low flame until the milk solids separate and sink to the bottom. The clarified butter is then strained to remove the solids, leaving pure ghee.
4. Is Madurai Ghee suitable for vegetarian cooking?
No, ghee is a dairy product and is not suitable for vegetarian cooking. However, there are many vegan alternatives such as coconut oil or avocado oil instead of ghee.
5. Can Madurai ghee be used for skin care?
Yes, Madurai ghee can be used topically for skin care. It is rich in vitamins and antioxidants that nourish the skin, leaving it soft, supple and hydrated.
Find us inside Subiksha Foods at No 110 A, Bypass Road, Bethaniyapuram, Opp Babu Sharkar Marriage Mahal, Madurai — 625016, or call us at +91 80567 44906. You will be able to browse our website at https://subikshafoods.in/ for details.
0 notes
Text
Crispy and Sweet: Your New Favorite Keto Churro Recipe

Craving churros on your keto journey? Don't sacrifice flavor! This incredible Keto Churro recipe delivers the same crispy, cinnamon-sugar goodness in a low-carb, sugar-free format. Perfect for satisfying your sweet tooth without derailing your keto goals. Discover more delicious keto desserts and churro variations at CreamFilledChurros.com.
Keto Churros

This recipe caters to those following a ketogenic diet while still allowing for the indulgence of churros. It uses keto-friendly ingredients for a low-carb, sugar-free treat.
- Medium saucepan
- Whisk
- Wooden Spoon or Spatula
- Large pastry bag fitted with a large star tip
- Deep fryer or large pot
- Tongs or slotted spoon
- Paper towel-lined plate
- Shallow dish for cinnamon-sugar mixture
- 1 Cup Water
- 1/4 Cup Unsalted butter or coconut oil
- 1/4 Cup Keto-friendly sweetener (erythritol, monk fruit blend, etc.)
- 1/4 Tsp Salt
- 1 Cup Almond flour
- 1/4 Cup Coconut flour
- 1 Large Egg
- 1 Tsp Vanilla extract
- Oil for frying (coconut oil, avocado oil, or neutral frying oil)
- 1/4 Cup Keto-friendly sweetener
- 1 Tsp Ground cinnamon
- Make the Dough: In a saucepan, heat water, butter (or coconut oil), sweetener, and salt over medium heat. Bring to a boil, stirring constantly. Reduce heat to low. Add almond flour and coconut flour and stir vigorously until the dough pulls away from the sides and forms a ball. Remove from heat and let cool for 5 minutes. Beat in the egg and vanilla extract until fully incorporated.
- Heat Oil: Fill a deep fryer or large pot with 2 inches of oil. Heat to 360°F (180°C). Use a candy thermometer for accuracy.
- Pipe and Fry: Transfer dough to the pastry bag. Pipe 4-5 inch ropes of dough directly into the hot oil, using a knife or scissors to cut the dough. Fry in batches until golden brown, turning for even cooking.
- Drain and Coat: Remove churros with tongs or a slotted spoon and drain on paper towels. Immediately roll in the keto-friendly sweetener and cinnamon mixture.
Net Carbs per Serving:
Approximately 3-5g
Serving Suggestions:
Enjoy warm with a keto-friendly chocolate dipping sauce (look for sugar-free options) or a simple whipped cream made with heavy cream and a touch of keto sweetener.
Storage Guidance:
Best eaten fresh, but leftovers can be stored in an airtight container at room temperature for a day.
Recipe Notes:
Sweetener Choice: Different sugar substitutes vary in sweetness levels. Adjust amounts to your preference.
Flavor Enhancers: Consider adding a tiny pinch of nutmeg or cardamom for warmth.
Oil Choice: Choose a high smoke-point oil appropriate for frying.
DessertAmerican, Mexican, SpanishChurro, Keto Churro, Keto Churro Recipe, Keto Churros, Keto Churros Recipe
This Keto Churro Recipe allows you to enjoy the classic flavors and textures of churros while sticking to your dietary goals. These churros are a guilt-free indulgence, perfect for satisfying your sweet cravings when following a ketogenic diet. Serve them warm with a sugar-free chocolate sauce or a dollop of whipped cream (sweetened with a keto-friendly sweetener) for a delightful and satisfying treat.
Experiment with different keto-friendly dipping sauces and toppings! Try a creamy peanut butter sauce, a sprinkling of toasted chopped nuts, or even a drizzle of sugar-free caramel for extra-special occasions.
Ready to explore more keto-friendly desserts? Discover a variety of delicious variations along with expert baking tips within our comprehensive guide. And don't forget to check out our selection of fun churro-themed merchandise for the ultimate enthusiast!
Read the full article
0 notes
Text
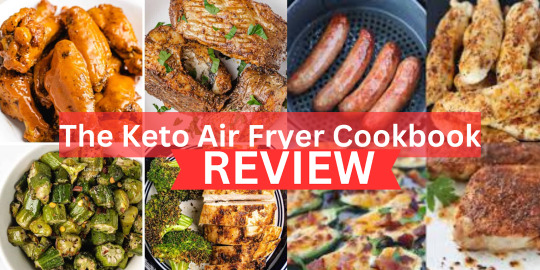
How "The Keto Air Fryer Cookbook" Transformed My Keto Cooking Experience: A Detailed Review
Click Here to Get It . . .. .
Introduction:
For anyone following a ketogenic diet, finding delicious and convenient recipes that align with their nutritional goals can be a game-changer. With the rise in popularity of air fryers as a versatile cooking appliance, "The Keto Air Fryer Cookbook" promises to deliver a collection of recipes tailored specifically for keto enthusiasts. In this review, I delve into my experience using this cookbook, exploring its content, usability, and overall value.
I used the following product:
As a devoted follower of the ketogenic lifestyle, I eagerly purchased "The Keto Air Fryer Cookbook" to expand my culinary repertoire while adhering to my dietary requirements. Packed with promises of easy-to-make, flavourful dishes suitable for air frying, I was keen to put this cookbook to the test in my own kitchen.
Review:
Click Here to Get It . . ..
Upon receiving the cookbook, I was impressed by its sleek design and enticing food photography adorning the pages. The layout was clear and user-friendly, with recipes neatly categorized for easy navigation. As I delved into the content, I appreciated the introductory sections providing valuable information on the ketogenic diet, air frying techniques, and essential kitchen tips.
The cookbook boasted a diverse range of recipes, covering everything from appetizers and main courses to desserts and snacks. Each recipe was accompanied by detailed instructions, ingredient lists, and nutritional information, making meal planning a breeze. What stood out to me was the creative use of keto-friendly ingredients and innovative cooking methods to produce satisfying dishes without compromising on taste.
One aspect I particularly appreciated was the emphasis on simplicity and accessibility. The recipes featured readily available ingredients, with minimal prep time and cooking steps. This made it perfect for busy individuals or those new to the keto lifestyle who may be daunted by complicated cooking processes.
Throughout my culinary journey with "The Keto Air Fryer Cookbook," I was consistently impressed by the quality and flavour of the dishes produced. From crispy chicken wings and cheesy cauliflower bites to indulgent chocolate avocado brownies, each recipe surpassed my expectations, proving that keto eating can be both nutritious and delicious.
Beyond the recipes themselves, the cookbook provided invaluable insights into the benefits of air frying for keto cooking. Not only does air frying offer a healthier alternative to traditional frying methods by reducing oil consumption, but it also produces perfectly cooked meals with a satisfying crunch.
In terms of profitability, investing in "The Keto Air Fryer Cookbook" can offer significant returns for those committed to their ketogenic journey. By providing a diverse array of recipes that cater to different tastes and dietary preferences, this cookbook empowers individuals to stay on track with their health goals while enjoying a varied and exciting culinary experience.
Furthermore, the versatility of air fryers ensures that the recipes can be easily adapted to accommodate individual preferences and dietary restrictions. This makes the cookbook a valuable resource for households with diverse dietary needs, ensuring that everyone can enjoy delicious and nutritious meals together.
In conclusion, "The Keto Air Fryer Cookbook" exceeded my expectations on all fronts. With its wealth of mouth-watering recipes, user-friendly format, and emphasis on simplicity and health, it has become an indispensable tool in my keto kitchen. Whether you're a seasoned keto veteran or just starting out on your journey, this cookbook is sure to inspire and delight, proving that eating well on the ketogenic diet has never been easier or more enjoyable.
Click Here to Get It . . ..
Profitability:
From a profitability standpoint, investing in "The Keto Air Fryer Cookbook" offers excellent value for money. Priced competitively and packed with a wealth of recipes and culinary inspiration, it provides a cost-effective solution for those seeking to maintain a keto-friendly lifestyle without sacrificing flavour or variety. Additionally, the potential health benefits of air frying, coupled with the convenience and versatility of the recipes, make this cookbook a worthwhile investment for anyone committed to their health and wellbeing.
DISCLAIMER: This post contain affiliate links.
#KetoCookbook#AirFryerRecipes#HealthyEating#KetoLifestyle#LowCarbLiving#KetoDiet#AirFryerCooking#CookbookReview#EasyCooking#AirFryerMagic
0 notes
Text
How To Prepare Healthy Fast Food
Preparing healthy fast food involves making mindful choices about ingredients, cooking methods, and portion sizes to create nutritious and balanced meals quickly. Here are some tips for preparing healthy restaurant style fast food at home that you can get only at Fast Food Restaurant:
Choose Whole Ingredients: Opt for whole, minimally processed ingredients such as lean proteins (chicken, turkey, fish), whole grains (brown rice, quinoa, whole wheat), fruits, vegetables, and legumes. These ingredients provide essential nutrients and fiber without added sugars, unhealthy fats, or artificial additives.
Limit Added Sugars and Unhealthy Fats: Minimize the use of added sugars, refined grains, and unhealthy fats (trans fats, saturated fats) in your recipes. Instead, sweeten dishes naturally with fruits or small amounts of honey or maple syrup, and use healthier fats such as olive oil, avocado, or nuts in moderation.
Control Portion Sizes: Pay attention to portion sizes and avoid oversized servings, which can contribute to excess calorie intake. Use smaller plates and utensils to help control portions and prevent overeating, and aim to fill half of your plate with vegetables, a quarter with lean protein, and a quarter with whole grains or starchy vegetables.
Prioritize Lean Proteins: Incorporate lean protein sources such as grilled chicken breast, turkey, fish, tofu, or legumes into your fast food recipes. Protein helps keep you feeling full and satisfied, supports muscle growth and repair, and provides essential amino acids for overall health.
Emphasize Vegetables: Load up on vegetables to add flavor, texture, and nutrition to your fast food meals. Include a variety of colorful vegetables such as leafy greens, peppers, tomatoes, carrots, broccoli, and mushrooms in your recipes, either raw, steamed, roasted, or stir-fried.
Experiment with Flavorful Spices and Herbs: Use herbs, spices, and natural flavorings to enhance the taste of your fast food dishes without adding extra calories or sodium. Experiment with garlic, ginger, turmeric, chili powder, cumin, paprika, basil, oregano, and other seasonings to create delicious and satisfying meals.
Cook Smart: Choose healthier cooking methods such as grilling, baking, broiling, steaming, or sautéing with minimal oil instead of frying. These methods help retain the natural flavors and nutrients of the ingredients without adding excess calories from added fats.
Plan Ahead: Plan your meals in advance and prep ingredients ahead of time to streamline the cooking process and save time during busy weekdays. Batch-cook grains, proteins, and vegetables, and store them in portioned containers for quick and easy assembly when you need a fast meal.
Be Mindful of Condiments and Sauces: Be cautious with high-calorie condiments, sauces, and dressings, which can add hidden calories, sugars, and unhealthy fats to your fast food meals. Opt for lighter options such as salsa, mustard, vinegar, or homemade dressings made with yogurt, herbs, and spices.
Hydrate with Water: Stay hydrated by drinking plenty of water throughout the day, especially when consuming fast food meals. Water helps support digestion, metabolism, and overall health, and can help prevent overeating by keeping you feeling full and satisfied.
By incorporating these tips into your meal planning and cooking routine, you can enjoy healthy fast food options that are nutritious, delicious, and convenient for your busy lifestyle. Experiment with different ingredients, flavors, and cooking techniques to create satisfying meals that nourish your body and support your health and well-being.
0 notes
Text
Top 5 Keto-Friendly Desserts That Won't Ruin Your Diet
Introduction
In the world of dietary regimens, the ketogenic diet stands out for its focus on high-fat, low-carb eating. It's a lifestyle that emphasizes the consumption of healthy fats and restricts carbohydrates to induce a state of ketosis, where the body burns fat for fuel instead of glucose. While adhering to this diet can be challenging, especially for those with a sweet tooth, the availability of keto-friendly desserts makes the journey more enjoyable and sustainable.
Elevate your keto culinary journey with The Keto Air Fryer Cookbook, where delicious meets healthy in every crispy bite.
Understanding Keto-Friendly Desserts
When it comes to desserts suitable for a ketogenic diet, certain criteria must be met to ensure they align with the principles of the regimen. Keto-friendly desserts are typically low in carbohydrates and sugar while being rich in healthy fats. They often utilize alternative sweeteners and flours that have minimal impact on blood sugar levels. Common ingredients found in keto desserts include almond flour, coconut flour, cocoa powder, and sugar substitutes like erythritol or stevia.
Top 5 Keto-Friendly Desserts

Elevate your keto culinary journey with The Keto Air Fryer Cookbook, where delicious meets healthy in every crispy bite.
Keto Chocolate Avocado Mousse
This decadent dessert combines ripe avocados with cocoa powder, coconut milk, and a low-carb sweetener to create a creamy and indulgent mousse. Avocados provide a creamy texture and healthy fats, while cocoa powder adds rich chocolate flavor without the added sugar.
Low-Carb Cheesecake with Almond Flour Crust
A classic dessert gets a keto-friendly makeover with this recipe featuring a buttery almond flour crust and a creamy, tangy cheesecake filling sweetened with erythritol or stevia. It's the perfect balance of sweetness and richness without the carb-laden guilt.
Sugar-Free Coconut Macaroons
These chewy and coconutty treats are made with shredded coconut, egg whites, and a sugar-free sweetener. They're easy to whip up and satisfy cravings for something sweet and satisfying without derailing ketosis.
Berry Chia Seed Pudding
Chia seeds are a nutritional powerhouse, packed with fiber, protein, and healthy fats. When combined with unsweetened almond milk, vanilla extract, and a touch of low-carb sweetener, they transform into a creamy pudding base that pairs perfectly with fresh berries for a refreshing and guilt-free dessert option.
Almond Flour Brownies
Indulge your chocolate cravings with these fudgy almond flour brownies that are both keto-friendly and delicious. Almond flour provides a moist and tender texture, while sugar substitutes like erythritol or monk fruit keep the carb count low without sacrificing sweetness.
Benefits of Keto-Friendly Desserts

Elevate your keto culinary journey with The Keto Air Fryer Cookbook, where delicious meets healthy in every crispy bite.
Incorporating keto-friendly desserts into your meal plan offers several advantages beyond satisfying your sweet tooth. These desserts help curb cravings for sugary treats while keeping you in ketosis, making it easier to stick to your dietary goals. Additionally, they provide alternative options for individuals with dietary restrictions, such as those following gluten-free or diabetic-friendly diets.
Tips for Making Keto-Friendly Desserts
When making keto-friendly desserts at home, it's essential to choose ingredients wisely to ensure they fit within your carb limits. Opt for low-carb sweeteners like stevia, erythritol, or monk fruit instead of sugar. Incorporate high-fat ingredients such as coconut oil, avocado, or cream cheese to boost the fat content and keep you feeling satisfied.
Precautions and Considerations
While keto-friendly desserts can be a delicious addition to your meal plan, it's crucial to practice moderation and be mindful of portion sizes. Even though they're low in carbs, overconsumption of keto desserts can still lead to excess calorie intake, which may hinder weight loss efforts. Additionally, always check ingredient labels for hidden sugars and carbs, as some products marketed as "sugar-free" may still contain hidden sources of carbohydrates.
Where to Find Keto-Friendly Dessert Recipes
If you're looking for inspiration or new recipe ideas, there are plenty of resources available for finding keto-friendly dessert recipes. Online keto recipe blogs and websites offer a wealth of creative and delicious options, ranging from simple no-bake treats to elaborate baked goods. Additionally, many keto cookbooks and recipe collections feature dessert chapters filled with mouthwatering sweets to satisfy your cravings.
Experimenting with Flavor Variations
One of the joys of cooking and baking on a ketogenic diet is the opportunity to experiment with different flavor combinations and ingredients. Whether you prefer classic flavors like chocolate and vanilla or more adventurous combinations like matcha or lavender, there's no shortage of options to explore. Don't be afraid to get creative and add spices, extracts, or nuts to your desserts for added flavor and texture without the extra carbs.
Incorporating Keto-Friendly Desserts into Meal Plans
Elevate your keto culinary journey with The Keto Air Fryer Cookbook, where delicious meets healthy in every crispy bite.
When planning your meals on a ketogenic diet, don't forget to include keto-friendly desserts as part of your overall dietary strategy. By incorporating these treats into your meal plan, you can enjoy delicious sweets while staying within your carb limits and maintaining ketosis. Just remember to balance your dessert choices with nutrient-dense meals that provide essential vitamins, minerals, and macronutrients for optimal health and well-being.
Conclusion
Keto-friendly desserts offer a delicious and satisfying way to indulge your sweet cravings while staying true to your dietary goals. From rich and creamy mousses to chewy coconut macaroons, there's a keto-friendly dessert for every palate and preference. By choosing high-quality ingredients, practicing moderation, and getting creative in the kitchen, you can enjoy delicious sweets without ruining your diet.
DISCLAIMER: This Post contains affiliate links of Ultimate Keto Diet Plans.
#wellnessjourney#healthyliving#healthyhabits#healthandwellness#Ketodiets#Ketorecipes#healthylifestyle#keto#KetoCooking#KetoKitchen#KetoAirFryerCookbook#CrispyCravings
0 notes
Text
How to Make Homemade Sushi Rolls
New Post has been published on https://thekitchnpro.com/how-to-make-homemade-sushi-rolls/
How to Make Homemade Sushi Rolls
What can we say about sushi rolls that haven’t already been said? It’s healthy, it’s delicious, and best of all, and it’s endlessly customizable! No matter how long you’ve been in the kitchen, there are always new skills to master when it comes to this classic dish. Even better, sushi doesn’t have to be intimidating or difficult—just follow these steps to get started with your own homemade sushi rolls!
Things you will need
-Rice Cooker
-A bamboo rolling mat
–Two long-handled wooden chopsticks
-Nori (seaweed) sheets -Dried Seaweed (optional)
-Sushi rice (approximately 1 cup per roll, preferably made with short grain rice)
Buy Now!
Step One:
Prepare your ingredients. The first step in making sushi rolls is acquiring all of your ingredients. These include but are not limited to salt, sesame seeds, Nori sheets, raw fish and various vegetables for toppings. Begin by preparing a large pot of boiling water. Once you add your sticky rice it should be boiled on a high heat for five minutes before being turned down slightly and simmered on a low heat for another 10 minutes while covered with a lid.
While your rice is cooking, prepare whatever vegetables or meats you intend to use as a topping. When you can see that there are only three minutes left on your timer, remove the lid from your pan, turn up its heat slightly and stir continuously until steam rises through holes placed in the center of its surface.
This will help ensure an even consistency throughout each sheet of sushi when rolled later. Sticky rice will now need to cool completely for approximately 30 minutes so line a surface below with cling film which has been lightly dusted with either white or brown sugar depending upon whether you’re making sweet or savory rolls respectively.
Next, place half a teaspoon of oil into your hands along with some salt and dip each individual grain of rice individually. This process will prevent any grains from sticking together once cooked, improving both taste and appearance alike. Using these same hands push aside any grains towards one side of your mixing bowl while pouring additional cold water over them if needed until they’ve reached room temperature.
Now, pour these cooled grains onto your prepped working surface where they’ll be easier to work with. If your sushi involves a filling such as a tuna then slice it thinly prior to placing it atop your rice. Vegetables should also be sliced into thin strips after being rinsed thoroughly with cool water. If desired, sprinkle extra toppings such as sesame seeds or soy sauce prior to wrapping before using cling film to seal each roll tightly yet gently.
Store them in your refrigerator once completed for at least two hours; however they can remain wrapped for around four hours without issue. Other recipes may call for a simple layer of mayonnaise or a small pat of butter atop your rice instead. Be sure to make a double batch since it never lasts long! Before cutting, allow your sushi to come back to room temperature unless stated otherwise.
Buy Now!
Step Two
Preparing your fillings. In most cases, sushi chefs choose to use seafood with their uncooked fillings since most types of meat do not generally take well with uncooked rice. However, most types of seafood do, especially those prone to spoiling quickly such as shrimp and squid. While whole shrimp must always be peeled prior to tossing them within rice others like mussels should simply be removed from their shells before dipping within the rice. After dipping, ingredients such as cucumber and avocado can be used to top your rolls. This is done prior to rolling as these ingredients will not hold up well with rice or seaweed.
Buy Now!
Step Three
Roll your sushi. As you begin to create each roll, use a rectangular piece of plastic wrap (cling film) and lay it out flat on a smooth surface. Covering much of its surface with a moist paper towel prior to adding rice is recommended for best results, helping reduce its likelihood of drying out during storage after being wrapped in it.
To begin each roll, begin scooping rice from your mixing bowl into your hands until you have enough to cover much of its surface area evenly. This is referred to as a rice ball. The amount of rice you use should be relative to how thick you want your rolls to be. If you want them thick, use a little more rice. If you want them thin, useless.
Once ready, begin flattening out your rice ball until it resembles a rectangle in shape. Place your chosen ingredients evenly atop its surface and bring up opposite sides from its corners until it touches itself from opposite ends. Your ingredients will now be in a vertical line in between these sides while positioned horizontally on each end of it. At last, roll up your fillings horizontally in between these sides while squeezing any excess air within their center away from its edge for best results. Repeat with the remaining ingredients to complete your sushi rolls.
Buy Now!
Step Four
Preserve your sushi rolls. For best results, wrap each of these rolls in clear cling film (plastic wrap) before storing them in your fridge for no longer than 48 hours. If you’d prefer to freeze them, it’s best to do so immediately after completing their creation for the best results since they don’t do well at room temperature or warmer temperatures once frozen. This is due to rice swelling as it thaws, losing its texture, and becoming overly soft with extended exposure to warm conditions compared to seafood items which are better suited for freezing. Frozen sushi can be stored for up to three months.
Buy Now!
Step Five
Slice your sushi rolls. Although you could eat your sushi as is, most people will want to cut them into smaller pieces prior to consuming them. This can be accomplished by first removing their cling film (wrap) and slicing their roll with a knife atop a clean surface such as wood or marble rather than directly on your countertop or table which may become stained from its oils/flavors after time and ruin its finish if not cleaned afterward.
When creating these slices, it’s best to use a gentle rocking motion at first while applying light pressure until you feel that all of its ingredients are beginning to separate before pushing harder until they do so uniformly into equal-sized pieces. Don’t forget to remove any leftover bits of rice as well as its nori (seaweed) from your roll before doing so.
Now, Serve and enjoy your sushi rolls!!
1 note
·
View note
Text
A Show Stopping Smoked Salmon Platter for Easter
I’ve had a Cameron Stovetop Smoker for years now and in the past used it often. For some reason, I got out of the habit of using it, but recently pulled it out and smoked some chicken! It was so delicious that the other day, I decided to smoke a side of salmon! OMG it was such a treat and soooo easy! The hardest part of using this little smoker is washing it and Baldy is so good at it that I just let him do it…it’s a good trade, he gets to eat the delicious food and I don’t have to wash the dishes!
Anyway, after that first salmon experiment, I thought it would be fun to make a platter and surround the salmon with delicious garnishes, somewhat inspired by a Salad Nicoise! It turned out better than I could have hoped…it was beautiful and so delicious! After I finished artfully arranging the other ingredients around the salmon, I drizzled it with a simple maple vinaigrette (since I used maple smoking chips), squeezed a bit of lemon juice over the salmon and added a few slices of lemon! Wow, it really was a showstopper and I’ll definitely be making this often! I think this recipe will serve 4 adults generously. You could always add more of the “garnishes” or serve with another vegetable. I’m serving it for Easter lunch and will probably smoke two pieces of salmon for six adults and two children. I never mind leftovers…in fact, I have just a bit left in the refrigerator that I’ll put on avocado toast later today and that will be such a treat for my lunch!
I hope you enjoy this recipe!
If you don’t have a smoker, you could grill or roast the salmon in the oven and it would still be delicious! Don’t let that stop you from trying this recipe!
{"image":"https://i.imgur.com/BCGugk6.png","name":"Smoked Salmon Platter","prepTime":"PT40M","cookTime":"PT25M","totalTime":"PT1H5M","description":"This salad that's not really a salad was inspired by a Salad Nicoisé that's traditionally made with tuna. I decided to use some of the same elements to make this fabulous and very delicious presentation!","yield":"4 Servings","author":{"@type":"Person","name":"Suzanne Smith"},"recipeIngredient":["1 2-pound piece of organic or wild caught salmon","Salmon seasoning (any brand you like)","Salt & freshly ground black pepper","Olive oil","1 lb thin asparagus","2 lbs small yellow potatoes, halved or quartered depending on size","1 avocado sliced","1/2 red onion thinly sliced","Boiled eggs, halved","Baby cucumbers, sliced","Pickled red onions","Black olives","Micro greens","Juice of 1/2 lemon plus lemon slices","For the vinaigrette - In a small bowl, add 3 cloves garlic, finely minced and mashed into a paste, 1 generous teaspoon mustard, 6 tablespoons white wine vinegar, 1 tablespoon maple syrup, salt and pepper to taste. Drizzle in about 3/4 cup olive oil while whisking to emulsify dressing. Taste and adjust seasonings."],"recipeInstructions":["Season salmon generously with salt, pepper and salmon seasoning.","Place in a stovetop smoker with smoke chips (I used maple) and smoke for 20 minutes over a high flame. When done, open smoker and let rest. Alternately, grill or roast salmon in the oven.","While the salmon is cooking, prepare the asparagus and potatoes. On separate baking sheets, drizzle potatoes and asparagus with olive oil, salt and pepper. Roast asparagus at 400 degrees for 5 - 6 minutes or until desired doneness...I like mine crispy. Roast potatoes at 400 degrees for 25 minutes or until browned.","Assemble the platter - Using two large metal spatulas, remove salmon from skin and place on a large platter. Arrange the remainder of the ingredients decoratively around salmon and serve."],"@context":"http://schema.org","@type":"Recipe"}
0 notes
Last Seen Blogs