#1280 x 1920
Text
2K notes
·
View notes
Photo
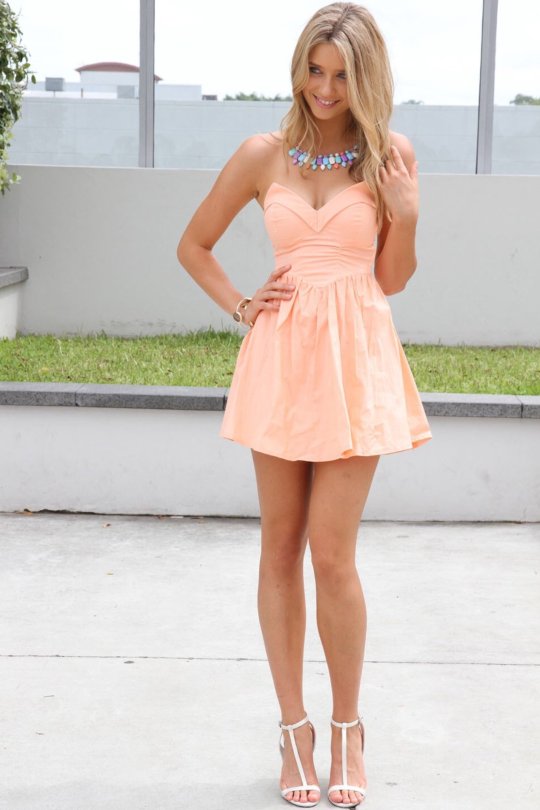
Caitlyn Paterson
#kirstydreaming#Caitlyn Paterson#feminine fashion#peach dress#beautiful model#smiling#pretty outfit#feminine inspiration#high resolution#1280 x 1920
2K notes
·
View notes
Text

19 notes
·
View notes
Photo

10 notes
·
View notes
Note
How do you get your drawings to be high quality? Whenever I post art the quality is SO bad 💔
uhm... sorry this is got long. for some reason you activated my work mode. i don't have a constumer service voice but i have like an explenation mode for clients so... uhm. here is way more information that you asked for. my apologies...
Resolution is what determines the sharpness of the artwork. The low-resolution illustration will appear pixelated when scaled in large sizes. this is why it is recommended to work on a digital canvas with a resolution of at least 300 dpi when you work. (i prefer 400dpi)
dpi are Dots Per Inch. dots just being a different name for pixels. the more pixels are contained in an inch the smoother lines and gradients are. an indication of higher quality. but, the device you are working on has to use up most of its ram/power to calculate the preview on the screen. so higher quality demands more capacity from your device but also from websites that display your artwork. Soo...
I have two files.
One on 400 dpi is way larger for me for smooth comfortable drawing.
and the second drawing is sized down to 150dpi to accommodate the recommended resolution of the website I want to post the image.
luckily for us, most social media sites have a similar resolution.
Tumblr's Dashboard images have a minimum size of 500 x 750 pixels, a maximum expanded the size of 2048 x 3072 pixels, and a recommended size of 1280 x 1920 pixels for a 2:3 aspect ratio.
I use a with of 1280. the high depends on the drawing
It's way easier and recommended to size images down rather than up.
sizing artwork up would put them through an interlacing process, which means that the graphics program of your choice would calculate the average between two pixes and add it in between them. It adds pixels to make the image larger. easy answer it blurs your image.
it isn't the end of the world if you have to size up the image a tiny bit.
I kind of have to do a bit all the time for work. and most of the time it's fine! it depends on your art style and how forgiving it can be.
It's also a difference if you post images in a JEPG or PNG.
uhm... without going into much detail... take PNG just trust me.
now... a tiny little last trick out of my sleeve.
if you... use photoshop. and you want some extra sharpness.
you can sharpen your images with the high pass filter.
Duplicate your artwork
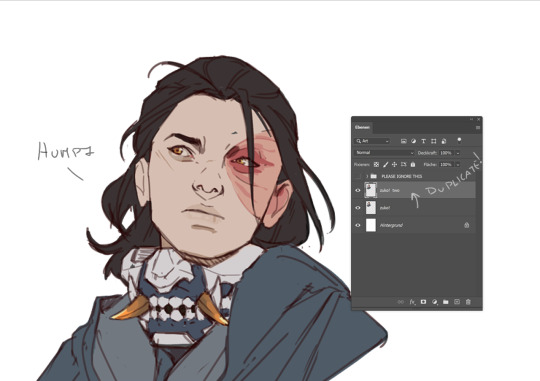
Filter > other >highpass

As soon you select High Pass, your image will turn grey

It works by filling the entire image with flat, neutral grey. It then looks for edges in the image and highlights them by making the light side of the edge lighter and the dark side darker.
Don't overdo it. keep the contrast low. a radius of 1,5px is enough most of the time!
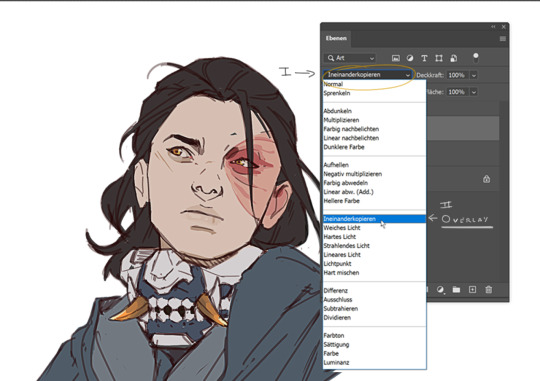
Click okay to exit the menu and set the layer on overlay.
ta-da! it is sharp and crisp!!!
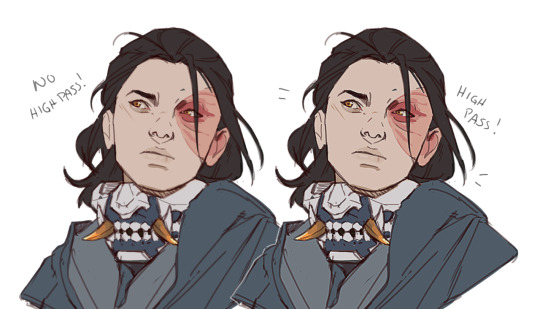
It's all a trick!!! vary subtle... i know but ehh i like it
I am sorry I don't know if other programs also have this option. I know CSP has a sharpening filter. but... you can keep images crisp by keeping resolution and dpi in mind too.
uhm... well so... -hides-
#chip!ask#chip!talks#i maybe overdid it here#but i ended wrtiting it and now i just... eh. i don't want to delate it... sorry!#zuko
972 notes
·
View notes
Text
Graphics tutorial requested by anonymous
All made with adobe photoshop 2023 (you can find free downloads of cracked versions on here occasionally, photopea.com is also good I've heard) I'm assuming basic knowledge of photoshop/similar editing platforms and their tools, but you can always message me or comment if you are confused about anything!
Also, I used keyboard shortcuts sometimes to change the size of a brush or toggle the brush options, I'm not going to annotate this because it's a lot but here is a resource for basic photoshop keyboard shortcuts
Firstly, the sizing of your edit matters! Max sizing for best quality on Tumblr is 1280 x 1920. If you want to put to put two images next to each other sizing should be 640 x 960.
Next, always try to find the highest quality picture of whatever you're using. Good resources include taylorpictures.net, 4k Taylor Swift, and if I can't find them here I do a google image search of my photo to see if any other websites have a bigger/hq file.
This video is a couple clips I screen recorded for you to see my process and demonstrate a few different tools I use regularly. I added timestamps for you to follow along as you read the rest of this.
Here's a photo of my workspace I am working with and what I will do first is cut out Taylor from this photo and move her to my correctly sized canvas. There are multiple ways to cut out an image in photoshop, the easiest I've found is the select subject function and using the quick selection tool (see toolbar beneath the photo). Other tools include the magic wand tool, lasso tool, and quick selection tool which I will show later.
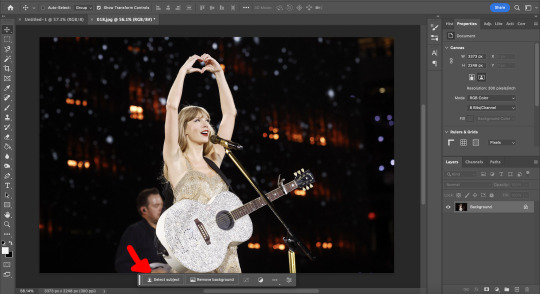
Now you will see that my selection isn't perfect, so I will use the quick selection tool to fix a few areas that I'd like to manually select/correct. This isn't totally necessary at this stage as you can always perfect your cutout in the next few steps, but it does help save some time.
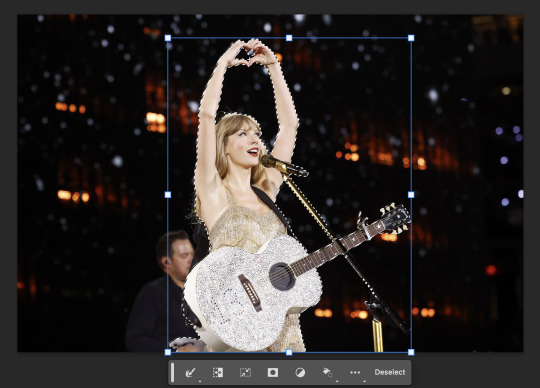
This is where I'll use the quick selection tool to either subtract or add to my selection. There are keyboard shortcuts to toggle between + and - to make this quicker.
See my screen recording of the process from 0:00-1:07
Now that we have our image selected and cut out, I copy and paste it to my canvas I want to work with (size 1280 x 1920) and this is what I've got:
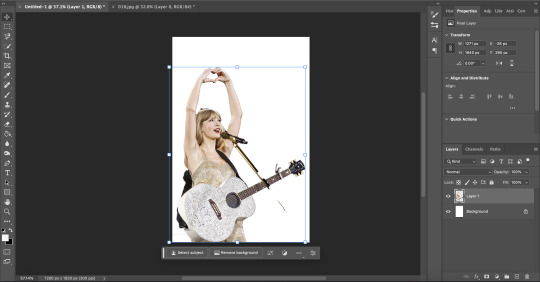
As you can see there's a few spots that need cleaning up in order to make our cutout perfect. You can do this with the eraser tool, magic wand, quick selection, or lasso tool.
See my screen recording of the process from: 1:08-3:50
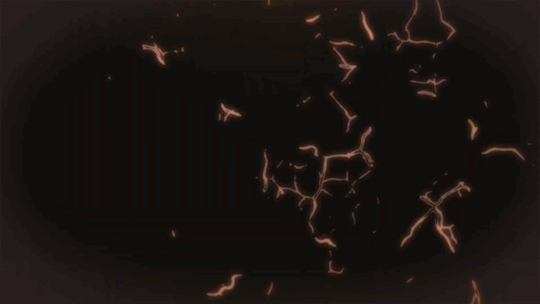
Now that we're happy with our cutout, we can play around with it in any ways we want! Typically you're gonna do things like change the background color/texture, add elements with the square/circle tool to create what you're looking for, overlay elements and/or textures, and finally recolor it to your preferences.
This part is where you can try new techniques and play around to find what you like. I recorded some of my process of playing with different ideas and elements until I got to something I was happy with! The video explains the tools I was using as well
See my screen recording of the process from: 3:51 - the end
I hope this helps you with creating graphics in the future! The fun thing about photoshop is there are multiple ways to get what you want done. I showed you my way but there's plenty of other techniques and methods out there to try if you're unable to achieve what you want!
Best of luck and feel free to reach out to me if you are struggling/have questions! <3
#Tessa talks#requested#my tutorials#this took forever pls share!!!#photoshop tutorial#graphics tutorial#photoshop
32 notes
·
View notes
Text
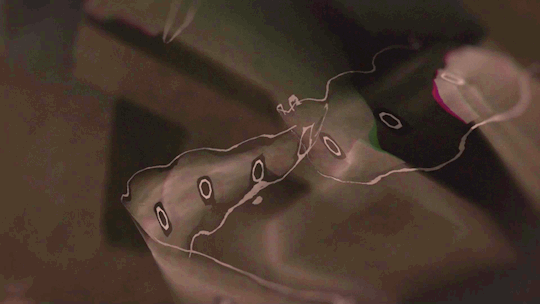


Splatoon 3 DLC: Side Order
1920 x 1080 @ 24fps
1280
#crabgif#splatoon#splatoon 3#side order#nintendo direct#side order of fries trailer#do not repost or i will eat you#these four are my favorite and deserve a 1920 x 1080 upload#its a little crunchy that is simply how it is bc the non crunchy were too!! big!!!!
60 notes
·
View notes
Photo

Berchtesgaden, Bavaria, Germany [OC] [1920 x 1280]
31 notes
·
View notes
Text

Olga - 12 years ago
218 notes
·
View notes
Photo
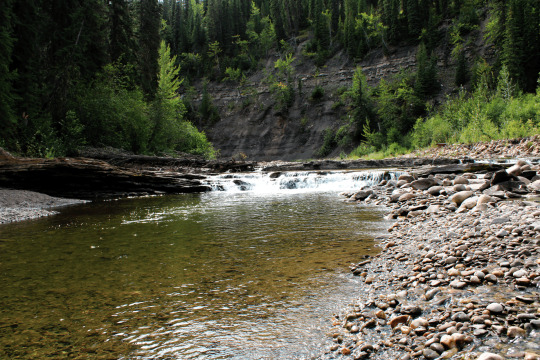
Flatbed Creek, British Columbia, Canada [1920 x 1280]
#river#waterfall#rocks#nature#photography#landscape photography#trees#forest#canada#british Columbia#bc#nature reference#water#mountains
70 notes
·
View notes
Text
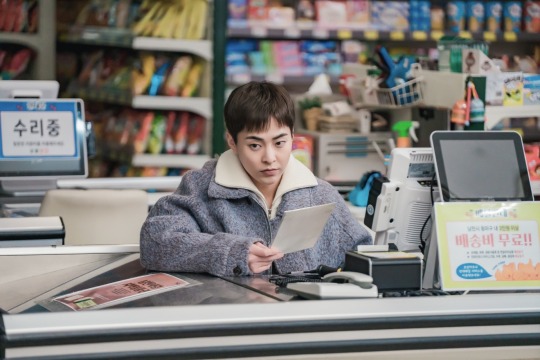
1920 x 1280
13 notes
·
View notes
Text
Peachy Dreams Wallpaper Set!
I made a set!
Phone {480 x 854 px}
Tablet (Landscape){1280 x 800 px}
Tablet (Portrait){800 x 1280 px}
Computer{1920 x 1080 px}
I found all images on Pinterest!
Please share with your hearts content, hell, I don't even care if you claim it as your own! Just share!
You can follow me there to get the individual images!
@ DelicateWill0w
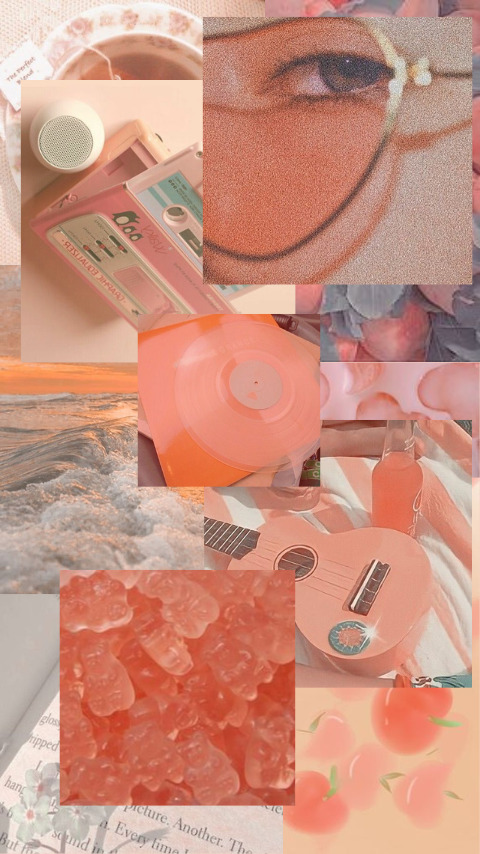


#wallpaper#phone wallpaper#tablet wallpaper#computer wallpaper#laptop wallpaper#phone background#computer background#480 x854
4 notes
·
View notes
Photo
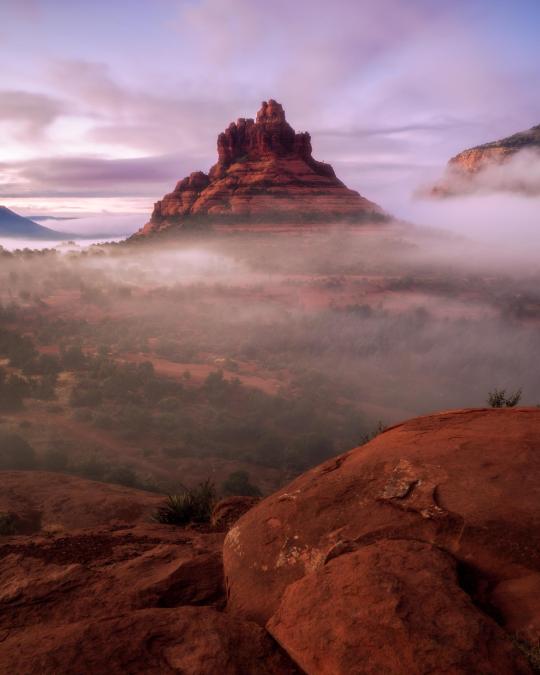
Bell Rock, Sedona, Arizona, USA [OC] 1920 x 1280 https://ift.tt/xb1ELCA
3 notes
·
View notes
Photo
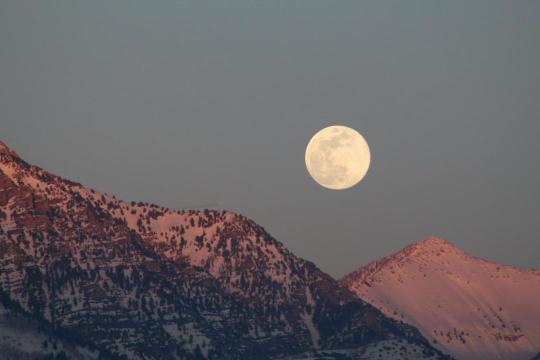
Full Moon rising over Cascade Mountain near Orem, UT 1920 x 1280 [OC]
📷: Sonnentanz69
13 notes
·
View notes
Last Seen Blogs

madisonfan-blog-blog
Untitled
highland-halstead
Highlands' loves
2amconfession-blog1
2am_confession

mariettaturkmay-blog
Untitled

peaceistentative
in pursuit of the better