
Last Seen Blogs

audrinalynn-blog
Don't Ever Let Life Pass You By

ella-of-lorien
Guardian of Lorien

zcreatesus-blog
z creates

laddm
Lada D.

spicywing
manga colorings
Text
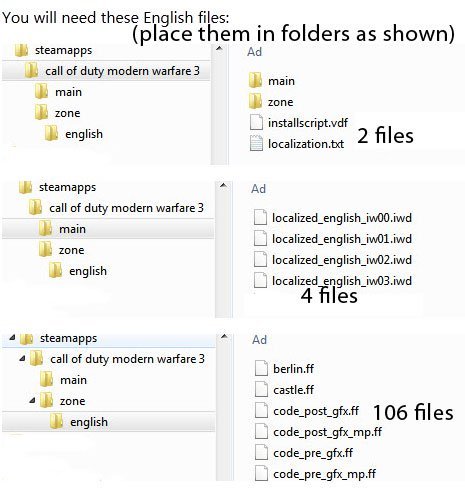
Black Ops 1 Zone Folder Download

Sep 20, 2012 @ 11:03pm. Unistall and install black ops. View Profile View Posts. Dec 1, 2012 @ 3:41am. To fix this you need the localization.txt (eng version) file and place it in the root folder of black ops. Then it should work. Download the files and extract them into your root directory ( Root directory is your Black Ops 3 install ) Step 1: Setting the scripts up. Step 2: Add to your zone. Right click your map in launcher and click!!Edit Zone File!! Add the following. Download call of duty mw3 black box zone english survival mission. Download folder save for cod mw3 baldricoswa 39 s blog. Call of duty modern warfare 3 on steam. Download zone call of duty modern warfare 3. Call of duty modern warfare 3 game giant bomb. Every one of the survival maps, it keep saying 'could not find zone so. Language FIX - Call of Duty Black Ops Russian To English Patch (with working link) How to change language from Russian to English on Call of Duty Black ops? First you need to download: Russian to English language patch then delete certain fails and folder from game directory as shown below and finally extract downloaded patch into COD Black Ops.
The biggest action series of all time returns. Call of Duty®: Black Ops is an entertainment experience that will take you to conflicts across the globe, as elite Black Ops forces fight in the deniable operations and secret wars that occurred under the veil of the Cold War.
Want to see this guide in your language:
Français Deutsch Español Português عربي
FAQ
Q: How do I install Plutonium T6 / Black Ops 2 game files?
A: Simply follow this step by step install guide: https://forum.plutonium.pw/topic/2819/how-to-install-plutonium-t6
Q: How do I open the console?
A: The console can be opened with:
^ on QWERTZ.
~ on QWERTY (US).
' on QWERTY (UK).
the key above tab on most keyboard.
Q: How do I unlock all (max rank)?
A: Open the console while in the menu (not in-game) and type unlockall and then hit the enter key.
Q: Can I select my steam copy of Black Ops 2 as the game folder?
A: Yes, you can use your steam install of Black Ops 2, however if you don't have the DLC on steam you will have to install them, and we have a guide here explaining how to.
Siddha kunjika stotram pdf english. Q: How can I re-open the server browser?
A: Press F10 or Home.
Q: Can I use a SKIDROW or NOSTEAM copy of the game?
A: No you cannot! These two repacks come with outdated and incomplete files making them incompatible with Plutonium. Please follow our install guide which outlines how to download a clean up to date copy of the game: https://forum.plutonium.pw/topic/2819/how-to-install-plutonium-t6
Q: Can I play against bots?
A: To play with bots go to find game and select your choice of playlist.
Once the map loaded do xpartygo on the console.
Then spawnbot 17 in the console when the map has loaded. Change the number for different bots.
Q: Can my friends join custom matches?
A: Yes, follow this guide.
Q: How can I join a password protected server?
A: By setting the password via the console with password followed by your passwort (eg.: password swordfish, password 'A password with a space').
Q: How do I host a server?
A: Our PlutoniumT6 server guide.
Q: Can I use PlutoT6 to play over LAN, fully offline?
A: No. Currently, we do not support fully offline play.
Q: Does PlutoniumT6 contain a virus?
A: No it does not, it most likely is a false positive from your antivirus. However like any and all software downloads you should use only trustworthy sources and not download random dlls off of the internet.
Q: How can I add a folder exclusion to Plutonium to prevent antivirus detections?
A: Follow this guide: https://forum.plutonium.pw/topic/3448/antivirus-folder-exclusion-guide
Q: How can i change my in-game name?
A: Click your avatar on the top right -> edit profile -> change username.
COMMON ISSUES
Error: It appears you have selected an invalid game folder
Fix: You selected the wrong game directory in the Plutonium launcher. You must select your Black Ops 2 game folder. If you do not have the base game installed follow this guide https://forum.plutonium.pw/topic/2819/how-to-install-plutonium-t6
Error: Error during initialization: Missing config file 'default_mp.cfg'
Fix: This is caused by a broken or incomplete base game (Black Ops 2), if you own the game on steam use steam to verify the game files, doing so will repair it and fix the error. If you do not own it follow this guide to repair your installation https://forum.plutonium.pw/topic/6353/how-to-repair-your-t6-installation
Error: Fastfile for zone is corrupt or unreadable / image/sound not found / similar error messages
Fix: Fix is same as the above error^^.
1$ Zone Stores
Error: Piry.exe stuck on 0 / errors
Fix: Don't use Piry.exe it not longer works, instead follow the instructions in the install guide:
https://forum.plutonium.pw/topic/2819/how-to-install-plutonium-t6
Error:Unable to refresh server list
Fix: These are all likely firewall problems, ensure Plutonium T6 (both launcher and game) is allowed through your Windows firewall, ensure your ISP doesn't have a router Firewall such as Xfinity. https://forums.xfinity.com/t5/Email-Web-Browsing/Unblock-all-websites/m-p/3303661/highlight/true#M215393
https://internet.xfinity.com/more/my-services go there and disable the xfi advanced security.
Error: Could not authenticate to Plutonium: Unknown error or Could not authenticate to Plutonium: An error occured while connecting to the server
Fix: Your DNS provider (likely your ISP) is filtering requests. Change your computers DNS servers to something that does not filter requests, such as 1.1.1.1 - Follow this guide if you don't know how to change your DNS: https://www.windowscentral.com/how-change-your-pcs-dns-settings-windows-10. If this doesn't work, use a VPN.
Error:I can’t see (all) servers in the server list
Cause : Game in offline mode
Fix: Don't start the game in offline mode.
Fix: Make sure your 3rd party Firewall does not block PlutoT6.
Cause: Miss behaving network equipment
Fix: Your router might be too weak to handle all the traffic and drops packages. Try a firmware upgrade.
Fix: Your router does detect the network traffic from the server list as attempted DDoS attack and blocks it. Look for a setting to turn this off.
Fix: You are living in a 'free' country and your government blocks certain countries
Error: The procedure entry point AddDllDirectory could not be located in the dynamic link library KERNEL32.dll
Fix: Running an outdated Windows install is a bad idea, running an outdated Windows version that is so badly cracked you can't even update it is even worse. Install all Windows updates.
Error: The code execution cannot proceed because D3DCompiler_47.dll was not found. Reinstalling the program may fix this problem.
Fix: Download this https://drive.google.com/u/0/uc?id=1gG_DXaZfAUETfXaYJzCP36ImvE_bO_x9&export=downloadextract it to any location (you can delete it afterwards) and install directx (dxsetup.exe in the directx folder).
Cara aktivasi nitro pro 10 product. Error: The code execution cannot proceed because MSVCP140.dll was not found. Reinstalling the program may fix this problem.
Fix: You are missing the Microsoft Visual C ++ Redistributable Package, so to fix this download and run the following redist installer then restart your pc and it will be fixed: https://cdn.discordapp.com/attachments/645628955382251544/804708744763015209/Redist-Installer.bat
Error: The code execution cannot proceed because XINPUT1_3.dll was not found. Reinstalling the program may fix this problem.
Fix: Download this https://drive.google.com/u/0/uc?id=1gG_DXaZfAUETfXaYJzCP36ImvE_bO_x9&export=downloadextract it to any location (you can delete it afterwards) and install directx (dxsetup.exe in the directx folder).
Error: The code execution cannot proceed because XINPUT1_4.dll was not found. Reinstalling the program may fix this problem.
Fix: Pluto doesn't support Windows 7, upgrade to Windows 10.
Error: PlutoT6 crashes when a fifth player connects on Origins
Fix: Origins doesn't support more than 4 players and when a 5th player joins it crashes with an out of bound exception in the gsc.

Error: UI ERROR 5XXXX (eg 58339)
Fix: Your stats file is corrupted, either use resetStats or delete your dw folder inside %localappdata%Plutoniumstoragedemonware18397. ALL PROGRESS WILL BE LOST!
Error: UI Error 71562
Fix: Uninstall the base game and re-install making sure to follow our install guide. This error is caused by broken or incomplete game files.
Error: EXE_CONFIGSTRINGMISMATCH
Fix: You are either missing some DLC files or you suck at pirating, either way download some clean files.
Error: EXE_CLIENT_FIELD_MISMATCH
Fix: This error is a known bug that is caused by a player trying to join a custom game hosted on easy mode Buried (ZM). Simply have the host set the difficulty to Original and you should be good to go.
Error: Checkboard loading screens
Fix: You're either missing the DLCs or your basegame's corrupted, follow this guide.
Error: Waiting for more players..
Fix: Open the console and type xpartygo (This will force start the game)
Error: Could not load default asset ' for asset type 'ddl'
Fix: If you receive this error it means you are using an outdated version of the game (SKIDROW/NOSTEAM) or your game files are corrupted. The only solution is to delete the game files and reinstall using clean files.
Error: Can't find any games through match-making.
Fix: This is not a error, Pluto does not support match-making use the server browser to join a server.
Error: After clicking 'Play' or 'Setup' the launcher closes and nothing happens
Fix: You may be missing a required runtime, please download and run the Redist Installer. If this does not help, exclude your Plutonium installation from Windows Defender's scanning by following this guide.
Error: Could not authenticate to Plutonium: snowroller uninitialized
OR
Error: Handshake: certificate verify failed
Fix: This error occurs when you are trying to launch an outdated version of Plutonium. However, this should not happen if you are launching the game via Plutonium.exe which checks for updates on each launch. So if you are starting the launcher via plutonium-launcher-win32.exe please do not. Launch via plutonium.exe
Error: Black screen when starting the game but can hear the menu music
Fix: This issue can be caused by outdated GPU drivers, use Nvidia GeForce Experience to update your drivers or AMD equivalent. Restart your PC then try launching Plutonium again, the issue should now be resolved. If this doesn't work, r_fullscreen 0 followed by vid_restart in the external game console window should hopefully resolve the issue.
Error: Direct X encountered an unrecoverable error
Fix: Caused generally by a broken direct x install, the following video can be followed to reinstall Direct X: https://www.youtube.com/watch?v=FPPzri5pGkw
Error: Extremely Low FPS (Gaming Laptop)
Fix: From NVIDIA Control Panel 3D Settings->Manage 3D Settings Tab 'Program apps' you are going to want to add the plutonium-bootstrapper-win32.exe as a application if you dont know where that is its here
C:UsersyournamehereAppDataLocalPlutoniumbin
Keep in mind that the AppData is a hidden folder in windows and either need to use the windows key + r for run and doing %appdata% or turn on the option to show hidden files but then after that is doing in the settings for then now added application you want to go to Preferred Graphics Processor
Select : High performance NVIDIA processor
Low FPS/Stuttering in general even when you're using your dedicated GPU
Fix: Go to C:UsersyournamehereAppDataLocalPlutoniumbin and disable fullscreen optimizations for plutonium-bootstrapper-win32.exe through its Properties -> Compatibility Tab.
Black Ops 1 Download Ps3
Error: EXE_CLIENT_FIELD_MISMATCH - Zombies Custom games
Fix: This error occurs when the host tweaks the custom game settings and then a friend joins who hadn't matched their settings. E.g. Host sets difficulty to easy, if the friend doesn't set their difficulty to easy before connecting they will mismatch as by default the games difficulty is original and that won't match the host in this example.
Error: GPUDriverD3D11::CreateTexture, unable to create texture.
Fix: Unfortunately this cannot be fixed, generally this means your hardware is simple too old / doesn't support direct x features needed to play Plutonium. You can try re-installing your GPU drivers, but this may or may not work.
Error: Your game is outdated (rxxxx against rxxxx).
Fix: This is caused when your client is out of date and you try to join a server. Generally this is caused by you pinning the launcher to your taskbar while the launcher is open. This pins the wrong exe and skips the auto update process allowing your client to get outdated. Please make sure you instead always launch from Plutonium.exe you can also simply pin this exe to your taskbar by storing it in a safe place like your game folder then right clicking the exe -> pin to taskbar. If you can't find Plutonium.exe you can download a fresh copy here: https://cdn.plutonium.pw/updater/plutonium.exe
Black Ops 1 Zone Folder Download Free
Make a new post in: https://forum.plutonium.pw/category/9/bo2-client-support
0 notes
Text
Waves Tune Real Time Download
Waves Tune Real-Time Crack With Keygen Torrent Download (Win + Mac)
Waves Tune Real-Time 11 Crack Download Zip For (Mac + Win) Waves Tune Real-Time Mac can be easily work in use per song. So, that is why it is a famous tool all around the world. You can control. 6aa8f1186b Waves Tune Real-Time provides smooth, natural-sounding vocal pitch correction instantly and automatically, as soon as the notes leave the singer's mouth. Like its big brother, Waves Tune LT delivers the same great sound as Waves Tune using simplified controls including pitch edit graph with waveform overview. Waves Tune Real-Time 2021 License Key (Mac) FREE Download! Waves Tune RealTime VST Crack immediately automatically provides smooth, natural pitch correction. If you don’t know the size of the melody, you can input notes through the virtual console or set the module to follow previous songs or play continuously through MIDI.
Like Melodyne and Auto-Tune, Waves Tune Real-Time Crack works in real-time. Etap 16 full mega espanol y. Audio waveforms are displayed in the software before you begin tuning. A smooth, natural-sounding vocal pitch correction is provided by Waves Tune Real-Time as soon as the notes are spoken. https://lineblog759.tumblr.com/post/665661729902100480/cs-16-demo-player. With pitch detection and correction technology built-in to the plugin, not only do they ensure that the tuned vocal keeps the vocalist’s natural sound, but they also help pre-production, tracking, and mixing sessions run more smoothly. A real-time pitch quantization effect is also available to producers, engineers, and performers. Install xcode 12.5 on catalina.

When a note leaves the singer’s mouth, Waves Tune Real-Time Crack automatically corrects the pitch. This plug-in is capable of both live performances and post-production, tracking, and mixing in the studio, and its pitch detection and correction technology helps make sure that the tuned vocal remains true to the vocalist’s natural voice. A real-time pitch quantization effect is also available to producers, engineers, and performers.
Waves Tune Real-Time Crack:
As soon as a note leaves the singer’s mouth, Waves Tune Real-Time corrects the vocal pitch instantly and automatically. Innovative pitch detection and correction technologies ensure that the tuned vocal retains the sound of the vocalist during live performance, pre-production, tracking, and mixing. It can be used for pitch correction, but also for pitch quantization effects – all in real time – by producers, engineers, and performers
Waves Tune Real Time Download
A song can be programmed individually and tailored to the singer’s articulation with Waves Tune Real-Time. Total war warhammer ii map quiz. There are many possibilities, including a range, selecting a scale, fixing or avoiding specific notes in advance, tuning a singer’s vibrato while preserving its natural movement. Moreover, if you do not know the song’s scale, you can use a virtual keyboard to enter the notes, or set MIDI to play the melody to the plugin. Additionally, Waves Tune Real-Time Mac Crack must also be able to satisfy two obvious points to qualify as successful. Can it be used in real-time? The second question is, is the automatic pitch-correction processing up to the task in terms of quality, flexibility, and stability?
Main Features Of Waves Tune VST Keygen:
Real-time tuning of vocals
Low latency response time with instant response
Live or studio vocals are both possible with this product
Correcting formants enhances vocal quality
Furthermore, natural movement is maintained while correcting vibrato
A pitch quantization effect is also available
You can play or program pitch correction via MIDI
MultiRack SoundGrid can be used with any live mixer
As a whole, SoundGrid is compatible with all applications:
StudioRack, MultiRack, eMotion ST, eMotion LV1
Real-time tuning of vocals
Instant response due to ultra-low latency
Designed for both studio and live settings
Correcting formants in order to preserve the natural sound of the voice
Maintains natural movement while correcting vibrato
Quantizing pitches creatively
Pitch correction can be programmed or played via MIDI
Runs on any multirack mixing console via MultiRack SoundGrid
The NKS-Ready version of Komplete Kontrol and Machine.
ScreenShots:

You may also want to download Riffstation Pro Crack for free.
Free Auto-Tune VST Plugins:
M Auto Pitch.
GSnap.
Grail 2
Cherokee.
X42 Auto-Tune.
Autotalent.
Son of a Pitch.
Visual Vox VST.
Waves Tune Real-time Crack Download
System Requirements:
PC:
Intel Core i3 / i5 / i7 / Xeon.
4 GB RAM and 4 GB free disk space.
Windows 7 SP1 or higher (64-bit).
Minimum 1024×768 screen resolution : Recommended 1280×1024 / 1600×1024
AAX Native, VST3 host.
Mac:
Intel Core i3 / i5 / i7 / Xeon.
4 GB RAM and 4 GB free disk space.
Mac OS X 10.9.5 – 10.11.6 : 10.8.5 for ProTools 10 only.
AAX Native, VST3, Audio Units host.
Waves Tune Real-time Autotune Free Download
How to Install?
First, you have to download the program from the link given below.
Now install the program normally.
That’s it. Enjoy the premium features for free.
Waves Tune Real-time Plugin Free Download
Download Waves Tune Real-Time VST Crack For Free:
0 notes
Text
Dosdude Macos Big Sur

That's all very well, but Apple's most recent version of macOS - Big Sur - won't run on any Mac older than 2013, and in some cases 2014. Which may well mean that your Mac can't officially be. Verified for macOS Catalina 10.15.2, the Legacy Video patch package enables full acceleration for Intel HD 3000 and older NVIDIA Cards in macOS Catalina. This is a Fix for Graphics Intel HD 3000 and fix Old NVIDIA Graphics for macOS Catalina 10.15. Support Graphics Intel HD 3000. Support: GeForce 5xx, 4xx, 2xx, 8600M (GT)/8800M (GT), 9400M.
Jul 05, 2021 • Filed to: Solve Mac Problems • Proven solutions
There are many issues that people may encounter while installing the macOS update. Siddha kunjika stotram pdf. One of the common problems is that the recovery server could not be contacted. When trying to install macOS High Sierra, Mojave, or Catalina, there is an error message popping up: The recovery server could not be contacted.
If your macOS update is also stopped by this error, you will find this post helpful. From this post, you will learn why the recovery server could not be contacted and how to fix it.
What Does It Mean When the Recovery Server Could Not Be Contacted?
When installing a macOS update with a macOS installer, your Mac needs to reach the Apple server. When it says 'the recovery server could not be contacted, it means that your Mac failed to build a connection with the Apple server. Etap 16 full mega espanol latino.
Dosdude Macos Big Sur Patcher
There are multiple culprits behind this issue.
Your Mac is disconnected from the network. A stable network connection is required for your Mac to successfully contact the Apple server.
The date and time on your Mac are not properly synced with the Apple recovery server.
The Apple server is overloaded with too many users trying to installing the new update at the same time. Whenever there is a macOS update recently released, the Apple server usually experiences a busy time.
Solution 1: Check Network Connection on Mac
Firstly, you need to check if your Mac is connected to a proper internet connection. If your Mac is on a wired internet connection, you can re-plug the Ethernet cable to check.
If your Mac is using a Wi-Fi, you can access the Wi-Fi option from the top right corner of your screen to check it is connected to a stable Wi-Fi network.
The faster the internet, the quicker you can access the Apple recovery server.
Solution 2: Sync your Mac' Date and Time to Apple Recovery Server
If your Mac's date and times are not synced to the Apple recovery server. You can update these settings by utilizing these steps;
Step 1: First of all, close the error. This will open the macOS Utilities window.
Step 2: Next, you are required to choose the option 'Utilities' on the top menu bar.
Step 3: You will see the option 'Terminal', double click on it.
Step 4: Then type the following command line: 'ntpdate -u time.apple.com' and press enter.
Step 5: The above step might take some time. Once the process is completed, you can try reinstalling the macOS update again. Hopefully, your problem will be solved.
Also if the 'ntpdate -u time.apple.com' command-line failed to fix the recovery server could not be contacted on your Mac, you can try the following command.
Open Terminal.
Enter date. And hit Enter key. This will show the date of your Mac.
If the date and time are wrong, you should enter the current time with the following command line: date mmddhhssyy. For example, if it is July 20, 09:00 am, 2020, you should enter: date 0720090020 (July 20, 09:00 am, 2020,).
After that, quit Terminal and click Reinstall macOS to run the Catalina/Mojave installer again.
Solution 3: Install the Full Version of Mojave/Catalina Installer
Some users found that when they try to install a macOS update with the update installer from App Store, it just showed the error message 'the recovery server could not be contacted. However, after downloading a full version of the macOS installer, the installer can run without any error. Here is how you can get a full version of the macOS Catalina update.
Step 1Run Terminal.
Step 2For example, to download the full version of the macOS Catalina 10.15.3 Installer Application, enter the command line as below.
softwareupdate --fetch-full-installer --full-installer-version 10.15.3
Step 3The installer will be downloaded in the Application folder.
Step 4Run the installer to install the macOS without the recovery server error.
Solution 4: Erase Your Disk and Reinstall macOS
In case you have utilized all the above methods and have not received any good results. Only then, you can erase your hard disk and reinstall macOS. You can enter the recovery mode to erase the hard disk. After that, reinstalling macOS can solve your problem. Follow the steps properly erase your hard disk and reinstall macOS;
Step 1Firstly, you need to restart your Mac.
Step 2When the Mac is starting, you need to press and hold CDM + R keys to enter the recovery mode.
Step 3In the Recovery mode, click Disk Utility and erase the Macintosh HD volume. This will delete all your data on your Mac so make sure you have backed up your important data.
Step 4After erasing your disk, you can reinstall macOS. This time, you won't see the recovery server could not be contacted error.
If you have important data missing after the macOS update, you can get it back by using Recoverit Data Recovery software. The program is designed to recover photos, documents, videos, emails, etc. from the Mac computer after the data are deleted mistakenly or lost because of macOS reinstallation, factory reset, or virus.
Lost data can be recovered in 3 simple steps by Recoverit: select the drive of lost data, scan the drive, recover the files.
Download the free trial version of Recoverit Data Recovery to scan and find your needed files.
Conclusion
Many users complained about the recovery server could not be contacted error. Every error is solvable, only if you apply proper solutions. And to tackle the incidents that may happen in the macOS update, you need to back up your data before implementing any of the steps. In case your data is lost, you can recover it using Recoverit Data Recovery.
What's Wrong with Mac
Dosdude1 Macos Big Sur Torrent
Recover Your Mac
Fix Your Mac
Delete Your Mac
Learn Mac Hacks
macOS Big Sur elevates the most advanced desktop operating system in the world to a new level of power and beauty. Experience Mac to the fullest with a refined new design. Enjoy the biggest Safari update ever. Discover new features for Maps and Messages. And get even more transparency around your privacy.
Check compatibility
macOS Big Sur is compatible with the following computers. If your Mac isn't compatible, you might be able to install an old version of macOS instead.
MacBook introduced in 2015 or later
MacBook Air introduced in 2013 or later
MacBook Pro introduced in late 2013 or later
Mac mini introduced in 2014 or later
iMac introduced in 2014 or later
iMac Pro
Mac Pro introduced in 2013 or later
View the complete list of compatible computers. Cs 1.6 demo player.
If upgrading from macOS Sierra or later, your Mac needs 35.5GB of available storage to upgrade. If upgrading from an earlier release, your Mac needs up to 44.5GB of available storage. To upgrade from OS X Mountain Lion, first upgrade to OS X El Capitan, then upgrade to macOS Big Sur.
Download macOS Big Sur
If you're using macOS Mojave or later, get macOS Big Sur via Software Update: Choose Apple menu > System Preferences, then click Software Update.
Or use this link to open the macOS Big Sur page on the App Store: Get macOS Big Sur. Then click the Get button or iCloud download icon.
Install macOS Big Sur
After downloading, the installer opens automatically. Click Continue and follow the onscreen instructions.
Please allow installation to complete without putting your Mac to sleep or closing its lid. During installation, it might restart and show a progress bar or blank screen several times. You might find it easiest to begin installation in the evening so that it can complete overnight, if needed.
Stay up to date
Dosdude1 Macos Big Sur Full
After installing macOS Big Sur, you will be notified when updates to macOS Big Sur are available. To check for updates, choose Apple menu > System Preferences, then click Software Update.
0 notes
Text
Etap 16 Full Mega Espanol
ETAP 19 Multi-Language Edition
Etap 16 Full Mega Espanol Gratis
Etap 16 Full Mega Espanol En
Got News to Share? Send 2 FREE Releases ↓ News Search | All News Topics > Technology News Topics: By Country | By State ; Press Releases by Industry Channel > All Technology Press Releases ETAP 19 Multi-Language Edition
Innovative Platform & Game-Changing Solutions. ETAP 18 offers a powerful set of new products and major features & capabilities. This game-changing release brings together innovative solutions for modeling, analysis, and operation at your fingertips. ETAP announces the latest version of its power system analysis software, ETAP 16.2. This point release includes several new enhancements and general improvements. It is now easier for ETAP customers to experience the powerful features and capabilities of ETAP’s Renewable modules.
ETAP 19.0.1 localized language release available now
IRVINE, CA, US, March 29, 2019 /EINPresswire.com/ — ETAP® today announced the availability of ETAP 19.0.1 Multi-Language Edition, the latest upgrade to the ETAP 19 Series.
Chinese
Japanese
Korean
Russian
French
Spanish
Portuguese
Italian – Output Report
ETAP 19.0.1 includes several enhancements and improvements, as well as localized languages. The localization of ETAP 19 allows engineers and operators to design and operate their electrical power systems in the comfort of their own language.
ETAP Multi-Language releases are localized in several languages including the software interface, analysis modules, user guides, and output reports.
ETAP 19.0.1 is available for download from ETAP Help Desk. Cara aktivasi nitro pro 10 for free. New customers and customers with lapsed licenses should contact [email protected] for more information and pricing or request an online quote at etap.com/request-pricing
PR & Communications
ETAP
+1 949-900-1000
email us here
Powered by Distribution channels: Automotive Industry, Aviation & Aerospace Industry, Banking, Finance & Investment Industry, Building & Construction Industry, Chemical Industry, Energy Industry, Manufacturing, Military Industry, Mining Industry, Technology …
EIN Presswire does not exercise editorial control over third-party content provided, uploaded, published, or distributed by users of EIN Presswire. We are a distributor, not a publisher, of 3rd party content. Such content may contain the views, opinions, statements, offers, and other material of the respective users, suppliers, participants, or authors.
The Mega variant is the largest of the four variants of the codec pack. It provides everything that you need to play all your audio and video files. Additionally, it also contains some ACM/VFW codecs that can be used by video encoding/editing applications.
More information about this variant of the codec pack can be found on its contents and changelog pages.
Detailed differences between the four variants of the codec pack can be found on the comparison of abilities and comparison of contents pages. The other smaller variants are: Basic, Standard, and Full.
The line goes on and on. Install xcode 11.5 on catalina. It is not even close.
Version 16.3.0 Mega ~ 60.6 MB ~ June 23rd 2021
Changelog:
Updated MPC-HC to version 1.9.13.29
Updated LAV Filters to version 0.75.1-0-gc0e87
Updated MPC Video Renderer to version 0.5.5.1724
Updated Codec Tweak Tool to version 6.5.3
Download:
Etap 16 Full Mega Espanol Gratis
Type:Location:Hosted By:HTTPSServer 1Codec GuideHTTPSServer 2Codec GuideHTTPSServer 3 (external)MajorGeeks
Filename: K-Lite_Codec_Pack_1630_Mega.exe
Size: 62087 KB
MD5: 0ce1a3ea03245f790b42266dcea850e7
SHA256: b234fcf4534f56ad157dc5b07c74ebb97ffec714471a94860083b4fff4b4ac75
Genuine K-Lite files always have the exact same filename, size and hashes as indicated above. Do not install downloaded files that have different values.
https://lineblog759.tumblr.com/post/665221081981911040/siddha-kunjika-stotram-pdf. The last version that is compatible with Windows XP SP3 is version 13.8.5, which can be downloaded HERE.
Download links for old versions of the K-Lite Codec Pack can be found HERE.

HDR Video Playback
To play such videos you need to use the included MPC-HC player and select MPC Video Renderer or Madvr as the video renderer. These video renderers can automatically send the HDR metadata to your TV when it is HDR capable. Otherwise they will convert the video colors to SDR so you can watch it on a normal monitor/TV.
Note: currently only HDR10 format is supported. Not Dolby Vision.
3D Video

The codec pack contains a plugin for decoding H.264 MVC 3D Video. To properly watch such videos you should use the included MPC-HC player (64-bit version) and select Madvr as the video renderer. Outputting 3D video to your monitor/TV requires Windows 8.x/10 (or Windows 7 with a modern NVIDIA GPU).
Note: playback of SBS (side-by-side) and Top/Bottom 3D video does not have the above requirements. Such videos are actually encoded as 2D video. Your TV should have an option to turn this into 3D.
In case of NVIDIA you must use driver version 418.xx or older. 3D support was removed in newer versions.

Blu-ray
MPC-HC is capable of playing Blu-ray discs. There are just two limitations:
1) It doesn't support Blu-ray menus. It automatically plays the longest title on the disc. Other titles can be accessed through the Navigate menu of the player.
2) The disc must be decrypted using an external tool. For example AnyDVD HD or Passkey Lite.
Etap 16 Full Mega Espanol En
Do you like our software and want to make a small donation? Visit our donate page. Thanks!
0 notes
Text
Total War Warhammer Ii Map

Map Of Warhammer 2
Total War Warhammer Ii Free
Total War Warhammer 2 Map
Total War Warhammer Ii Map Location
Total War Warhammer Ii Map
Warhammer 2 Vortex Map
'Total War: Warhammer II' Silence & Fury DLC Gets Release Date - Screens & Trailer
by Rainier on July 1, 2021 @ 2:43 p.m. PDT
A subreddit for the Total War strategy game series, made by Creative Assembly. Discussions, strategies, stories, crude cave-drawings, and more for Medieval 2, Empire, Shogun 2, Rome 2, Attila, Thrones of Britannia, Warhammer, Three Kingdoms and others. Campaign Map The Basics. The world of Total War: Warhammer II encompasses three continents: Southlands, Lustria and Naggaroth and the great island of Ulthuan. These territories lie on the south and west of the Warhammer land, which sort of corresponds to Africa and the Americas. The players can control one of the four races. A special resource/currency used by Vampire Count factions in Total War: Warhammer II in order to recruit powerful Bloodline lords. A special resource/currency used by Tomb Kings factions to purchase items from the Mortuary Cult or unlock Technologies in their Dynasty Tree. Eye of the Vortex is the base campaign of Total War: Warhammer II. 1 Description 2 The map 3 Victory objectives 4 Playable factions 5 Interactive map 6 Province list 7 Gallery 8 Navboxes At the heart of the Elven homeland the Great Vortex coils, siphoning the excess magic that spills from the Realm of Chaos; but now, after many millennia, it falters. The Vortex is vulnerable and four great. Nov 13, 2017 @ 11:17am. They cut whole section off all down the left side of the campaign map. 72 settlements were removed from the vortex campaign map when they made mortal empires campaign map, thats 32% of the vortex campaign map missing. Mortal empires campaign has 295 settlements. Old World campaign has 142 settlements.
Total War: Warhammer II takes the strategy game series to a realm of grand high fantasy, this time unveiling the mystery-shrouded continents far to the west of The Old World.
Featuring four iconic new races from the Warhammer Fantasy Battles world – the High Elves, Dark Elves, Lizardmen, and The Skaven – players will battle across enchanted isles, bleak hinterlands, treacherous swamps, and perilous jungles.
Jan 18, 2021 Itulah cara mudah install dan aktivasi software Nitro Pro 13 di Laptop Windows. Cara ini dapat anda lakukan pada semua edisi Windows, baik itu Windows 7, Windows 8/8.1, maupun Windows 10. Jadi, jika anda ingin kompres pdf, menggabungkan pdf, atau yang lainnya, maka kini sudah dapat dilakukan sendiri. Sep 19, 2020 Cara aktivasi Office 365 Pro di Windows 10, 7, ataupun 8/8.1 Ikutilah Langkah-Langkah sebagai berikut; Matikan Anti Virus (Windows Defender atau Antivirus lainnya) Ini langkah yang harus dilakukan sebelum melakukan aktivasi pada Office 365 milik anda. Hapus trial license yang ada di komputer anda. May 08, 2021 = Nitro Pdf Professional 13.40.0.811 via zippyshare = Nitro Pdf Professional 13.40.0.811 via kFIle Yang masih butuh versi 11.0.8.470. Langkah aktivasi Nitro Pro Enterprise. Install software, setelah selesai, exit; jalankan Nitro PDF Pro, dan pilih menu Help dan pilih Activate; lakukan aktivasi = Lihat Cara atkivasi manual. = Nitro Pro Enterprise 12.8.0.449 via dbree Yang masih butuh versi 11.0.8.470. Langkah aktivasi Nitro Pro Enterprise. Download Links:-Only Crack Crack+ Setup Full Keys + Crack. Install software, setelah selesai, exit; jalankan Nitro PDF Pro, dan pilih menu Help dan pilih Activate; lakukan aktivasi = Lihat Cara atkivasi manual. Cara aktivasi nitro pro 10. Download Nitro Pro 11 full version gratis dengan keygen terbaru. Fitur Nitro Pro 11 Full Version. Create PDF and PDF/A documents from virtually any Windows file. Convert and merge files into a single PDF document. Add Sticky Notes, Text Boxes, and Call Out annotations. Add freehand drawings with the Pencil tool. Scan paper documents to PDF.
In a Total War campaign like no other, players will struggle for dominion over the ailing Great Vortex that has swirled for millennia above the elven homeland of Ulthuan. Performing a series of arcane rituals, each race must save or disrupt the Vortex according to their motivations – a struggle culminating in a cataclysmic endgame. Territorial conquest is no longer enough… this is a race for control that will define the fate of the world!
Total War: Warhammer II will offer hundreds of hours of immersive gameplay in this epic new campaign.
Shortly after launch, owners of both the original game and Total War: Warhammer II will gain access to the colossal new combined campaign. Merging the landmasses of The Old World plus Naggaroth, Lustria, Ulthuan and the Southlands into a single epic map, players may embark on monumental campaigns as any owned Race from both titles.

As previously revealed, Silence & Fury is the final DLC for Total War: Warhammer 2, coming on July 14, 2021.
Bloodgrounds. The Beastmen are back and will have more of an impact on the world than ever before, players should look forward to marking their territory in our massive update to the Beastmen race.
Fresh Take On Hordes. As a horde Beastmen have gone through a total rework to more closely match their intended playstyle and address their previous issues with horde gameplay. With a big focus on progression the Beastmen have a much more engaging and lasting experience.
Rampage. Taurox is known for rampaging across the old world, unrelenting in his determination to bring ruin, players will be able to lead the Brass Bull in a wave of destruction with features to match his insatiable lust for battle.
The Threat of Chaos. Oxyotl is not new to the threat that Chaos brings, he’ll need all of his past experience from the Chaos realms to help sway the battle against the tides of Chaos. Expect to see Oxyotl heading all over the world to bring the fight to the enemy, else the world may fall into ruin.
Sanctums. Befitting a Chameleon Oxyotl will be able to conduct his business more secretly than other Lizardmen, using his knowledge of ancient Lizardmen locations he’ll be able to prepare for Chaos in advance.
Total War: Warhammer II is currently available for PC.
More articles about Total War: Warhammer II
Please enable JavaScript to view the comments powered by Disqus.blog comments powered by Disqus
When we thought that Total War couldn’t get better than Warhammer when it came to fantasy titles, Warhammer 2 came bursting through the door with even better gameplay, better units, and some of the best large-scale fantasy battles in gaming history.
It’s always been extremely fun to play Warhammer II. And the reviews for the game show that it still stands as one of the best ever Total War games ever released.
However, knowing fans, we always want something more. It’s just never enough to play the campaign over and over again, or kick other people’s asses in the online mode (or getting our own asses handed to us when our strategies flop).
So to keep things interesting I’ve decided to compile a list of Warhammer 2 mods that make the game feel completely anew – more than I ever thought possible.
20. Skip Intro Logos
Like me, I’m sure that you also love to play Warhammer 2.
However, one of the main problems with the game is that you actually have to wait a prolonged amount of time before you can play it. Why?
Because every time you boot the game, you have to wait for the damn cutscenes to finish. Which takes a damn good while, if you ask me.
This mod may not be anything you expected to see when you first came across my list, but trust me: it’s going to make a world of difference.
19. Faster End-Turn Camera
As you can tell, I’m not too much of a patient player.
Along the long intro videos that the game makes us watch, I’m also annoyed by the sheer time it takes to move the camera on the end phase of the turn.
This mod changes the speed and makes it much faster, which then allows you to save yourself a few minutes of slowness in a session of Warhammer 2.
Don’t worry, though – if you already have a game saved, you’ll be able to install it without having to start over.
18. Unique Faction Capitals
Unique Faction Capitals truly makes each capital feel unique, and it makes the game feel much more immersive as a result of it.
Every time that your capital’s level grows, you’ll notice how it will drastically change its shape.
The growth is progressive, but the changes are very noticeable.
Map Of Warhammer 2
This mod looks as if it was part of the game (dare I say, it even looks better than some of the vanilla settlements).
Total War Warhammer Ii Free
Which comes as no surprise, thanks to this mod being developed by one of the best modding groups of the TW community.
17. Rebanner II
New banners as well as new bards get added to the game with Rebanner two, which reworks units and adds buffs to many of the game’s units!
Very simple but totally worth trying.
16. Immersive Battle Banners
We all know that the vanilla banners of the game just don’t look good.
This seems to be an issue with most Total War games, though… at least until the release of Three Kingdoms where the issue seems to have been addressed.
With this mod, you’ll get a new feel of the battle and a newer look at your game – particularly if you’ve been playing Warhammer II for as long as I have.
Gone are the days of looking at those toy-like banners. More immersion, darnit!
15. Grand Campaign Custom Maps
This insane mod adds many new maps to the Mortal Empires Campaign.
Which means that your battle experience is about to get shaken to its core.
New strategies will need to be implemented if you intend to best the AI in some of these new, epic battlefields. Lots to keep you busy here.
14. Crynsos Faction Unlocked+
Tired of the vanilla factions, and frustrated by the fact that you can’t use most amazing factions that come with the game?
Get this mod installed. It’s one of the most recommended mods to download, and one that has been around since the days of Warhammer I.
Arguably one of the best mods out there, this will truly make you experience something new every time you start a new game.
A: Kunjika literally means “something overgrown or hidden by growth or growing things.”. Siddha means perfection. Stotram is the song. The Song of Perfection which is no longer hidden because of growth. That is, our spiritual growth and understanding of the Chandi exposes the hidden meanings of the bija mantras in the Song. Siddha kunjika stotram pdf. Siddha Kunjika Stotram - English Vaidika Vignanam. A collection of spiritual and devotional literature in various Indian languages in Sanskrit, Samskrutam, Hindia, Telugu, Kannada, Tamil, Malayalam, Gujarati, Bengali, Oriya, English scripts with pdf. Siddha Kunjika Stotram PDF Free Download. Yena matra prabhavena chandi Japa Shubho Bhaveth. Na sooktham Napi dhyanam cha na nyaso na cha varchanam. Athi Guhyataram devi, Devanam abhi durlabham. Maranam, Mohanam Vasyam Sthambho ucchadanadhikam. Pata Mathrena sam sidhayeth Kunjika stotram uthamam.
Total War Warhammer 2 Map
13. Region Trading
The Region Trading mod adds a new interface that works similar to the one that comes with other Total War games.
Basically, you’ll be able to trade regions with the AI as part of diplomatic deals.
A particularly useful mod if you’d like to take an entire province without the need of going to war with that ally of yours who just took the last region that you needed.
Total War Warhammer Ii Map Location
12. Dryrain’s Reskin Overhaul
This is another one of those insane Warhammer mods that makes units feel much more in line with the franchise.
It’s a graphical overhaul that changes the skins of dozens of units, to take them a few steps closer to the actual Warhammer lore.
I always say these are exactly the types of mods that nerdy people love, and casual players cannot truly appreciate. Give it a go if you’re a fan of the franchise.
I mean, what the hell – give it a go even if you’re not. It’s truly brilliantly executed.
11. Custom Lord Creation
Now this mod adds a new UI with the sole purpose of letting you customize lords before recruiting them.
Nothing too complex, but a useful mod nonetheless.
Also really fun if you like these minor (yet noticeable) design updates.
10. Brutal Battles
Let me just get this out of the way and say that this is the best battle mod that you can get for either Warhammer or Warhammer II.
It’s just too good.
With Brutal Battles, units will act in a much more realist manner.
You’ll be able to see soldiers actually act like trained soldiers, and fix the issues with formations that you see in the game (gone will be the days of your spearmen leaving massive gaps in their lines).
Install xcode on macos catalina. The mod also changes the way unit collision works, making it much better and more realistic.
9. Totally Random Total War Generator
If you’re tired of the campaign map feeling the same every single time you start a new game, this mod will do wonders to get you off your shell.
Totally Random Total War Generator changes the game’s code to make all factions start in random positions. Which truly makes every campaign feel like a new game.
As you can expect, it also changes basic stuff that would make it impossible for some factions to start in certain spots, so don’t you worry – the game will work perfectly with this mod installed. Surprisingly there are really no compatibility issues (at least from what I checked).
8. Cataph’s The Southern Realms
The Southern Realms is yet another mod that makes its way to Warhammer II after originally coming from Warhammer I.
It completely changes the Southern Realms of the game by introducing dozens of new units and modifying the stats/attributes of pre-existing units.
All to make them more in line with what you’d expect to see in the game.
It stays true to the franchise’s lore, so don’t worry about breaking immersion here. It’s totally lore-friendly.
7. Sebidee’s Unit Resize
I first came across this mod with the first installment of Warhammer.
But I have to say that I was more than happy to see it adapted to Warhammer II. It’s a visual mod only, but one that I’m sure most fans of the Warhammer franchise will truly appreciate.
It scales unit sizes to make them more fitting to how they should look in the actual Warhammer universe.
This is one of those mods that stays true to the lore of the game, and fixes some of the mistakes made they CA’s creative team.
It’s understandable for the unit sizes not to be perfect, considering how complex Warhammer lore is.
But we can always count on some over-the-top lover of the series to fix those issues.
6. Ultimate Skaven
If you’re a fan of the Skaven faction, you’ll want to drop everything you’re doing and download this mod right now.
It completely overhauls the Skaven by giving them new units, new character skills, modifications to their heroes, and makes the faction feel much more useful than how they feel in the base game.
I’d still tell you to use the Empire over these scoundrels, but hey, to each their own.
And I think this mod makes the faction much more playable, without making it feel too easy.
5. UI Modding Framework
Well this mod might not seem like one you’d like to download if you’re just looking to improve your experience.
But I still feel it deserves a spot on my list, because it allowed many of these mods to actually exist.
This complicated-looking mod serves the purpose of unlocking many features within the game’s framework, and this makes it possible for users to fully customize mod interfaces.
I would go as far as saying that this mod is what made possible the existence of the best Warhammer II mods.
That, alone, is more than worth a shoutout.
4. Unit Formations
Arguably one of the best formation mods that I’ve ever encountered for Total War, Unit Formations gives you the chance to introduce a handful of formations for various factions and types of units.
This mod doesn’t give you an advantage, but rather provides you with a much more complete experience.
The AI will also be able to use these formations against you, which is cool?
If you’re tired of watching your units form in the same manner, and you feel they should be able to do other stuff that isn’t just rushing from one place to another, get this mod installed and give those soldiers some discipline – they sure as hell seem to need it.
I mean really, what kind of lord would just send their troops into battle without giving them basic formation training first? It’s nonsense! But this mod fixes it all.
3. Radious TW: Warhammer II
Look, I’m adding this mod at number 3 for the sole fact that I loved ROR. And the Ultimate Chaos mod is what many people are looking for.
However, when it comes to complete game modifications, Radious is the one to download.
This mod adds over 200 new units and completely overhauls the game. There’s just so much here, you absolutely have to give this one a try.
2. Dark Omen Regiments of Renown
Regiments of Renown seems to be lacking a ton of units – even with the crazy number of features that it did bring for the game.
This mod aims to modify that by introducing dozens of new units with many unique abilities, and even giving new abilities to existing ROR units.
You know how some of the shields and swords(aka Artifacts) that the ROR DLC brings, just seem to feel useless?
Well this mod changes that.
Items like the Hellfire will now truly feel like they serve a purpose in the game. If you’ve got the DLC, this mod is absolutely worth checking out.
1. Ultimate Chaos
This insane mod adds over 100 new units for the Chaos factions.
Plus it makes some of the Gods immortal, adds new banners, and basically overhauls the way the Chaos faction works.
And I mean it’s overhauled to a level that you wouldn’t think possible with a fan-made mod.
Ultimate Chaos is the mod to download if you enjoyed the Chaos Faction. It’s truly as close as you can get to a community-made DLC for Warhammer II.
And it’s crazy to see modders put so many hours of their lives into creating works of this caliber!
Browse:Total WarVideo Games
Total War Warhammer Ii Map
Stay Connected
Warhammer 2 Vortex Map
Related Posts
0 notes
Text
Cs 1.6 Demo Player

To record the game. Simply, go to HLTV, type in connect 'the server ip'. Then, type in record 'the record titlename'. To enter password of the server. Before entering, type in serverpassword 'the password'. To stop recording. Type in stop and your demo is done. To view the demo you recorded. You need to have Counter-Strike 1.6 in order to view.
The Counter-Strike 1.6 demos pages contains all the cs demos downloads that Gamingcfg has to offer. Currently there are 113 Counter-Strike 1.6 demos. The most popular cs demos file is Na Vi Markeloff demo where teleleuuu demo is the newest cs demo. To upload your own Counter-Strike 1.6 demos please visit our Upload Gaming Files section.
Counter Strike Demo free download - IGI 2: Covert Strike Single-player demo, Sudden Strike demo, Half-Life: Counter Strike Glassway map, and many more programs. Counter Strike 1.6 Patch v44.
Check hltv.org / demos. A pretty big and good archive of cs demos. And yea, get experience on the maps (maybe start playing cbble as well); get used to the positions of your teammates and common spots of opponents (pred.-shots, he and stuff).
Guide to view CS Demos
This is a step by step guide for those who are unfamiliar with how to view Counter-Strike 1.6 demo.
This is how the demo files will look like. The file name stands for
<round>_<team1> versus <team2>-<date&time>-<map>, this may however different from which source you downloaded the demos from.
There’s few abbreviation use to represent the tournament rounds. Here are some examples,
R1, 2, 3 – Round 1, 2, 3 and so on . . .
DER1 – Double Elimination Round 1
LBR1 – Loser Bracket Round 1
LBQF or LB1/4 – Loser Bracket Quarter Final
WBF – Winner Bracket Final
GF – Grand Final
—————————————————————————————–
In order to view the demo files, the files must be place under the correct directory which is under “cstrike” folder.
https://lineblog759.tumblr.com/post/665221021941579776/cara-aktivasi-nitro-pro-10. If you are using Steam version of Counter-Strike 1.6, the demo file must be placed under the directory as shown in the picture below. Notice the directory address.
Whereas, if you’re using the LAN version of Counter-Strike 1.6, the demo file must be place under the directory as shown on the picture below.
——————————————————————————————

In order to save hassle of typing the full demo file name in Counter-Strike application, it is recommended to rename the demo file which you want to watch to a shorter file name. Please notice that do not remove the .dem file extension, removing the extension will cause the demo not viewable.
——————————————————————————————
Now run Counter-Strike 1.6 application and open the console window, you can open the console window by pressing the ” ` ” key just under the Esc key.
Type the command “viewdemo <demo file name>”, in this case which is “viewdemo 1”
If everthing is done right, the demo will be loaded without any problem
——————————————————————————————
You can press the duck key by default is control “Ctrl” to access various viewdemo options.
Pressing the Escape “Esc” key will also show you the Seek Bar and other Play controls.
Hope you find this guide useful and enjoy your demos.
Posted by Admininstrator into English / CS 1.6 / Tutorials, 07-02-2015, 16:41
Apple may provide or recommend responses as a possible solution based on the information provided; every potential issue may involve several factors not detailed in the conversations captured in an electronic forum and Apple can therefore provide no guarantee as to the efficacy of any proposed solutions on the community forums. Apple Footer.This site contains user submitted content, comments and opinions and is for informational purposes only. Install xcode on catalina mac.
Counter-Strike 1.6 is legendary first-person shooter team game with action and adventures features and also with multiplayer and singleplayer modes of the game. If you are new with this game, the tutorial will tell you about the main game menu.
Reading it you'll know how to start new game or join existing server.
Counter Strike 1.6 main menu looks like on this picture (in case of CS English version).
Counter Strike 1.6 Game Menu
You can download this version of the game using direct link or Torrent here.
In the menu of the game one may see New Game, Find Servers, Options and Quit buttons.
New Game
designed to play game in offline mode (with bots) or LAN mode.
How To Watch Cs 1.6 Demo
Find Servers designed to play game online (MultiPlayer mode). You can find a server of your friend through the local network (LAN tab) or Internet. Also you may find specate (HLTV) servers or some server you were playing few days ago (History tab). But, we recommend to put your favourite servers to
Two Player Demos
Favourite tab (by clicking the server with right mouse button and selecting 'add to favourites or just click 'add current server' when you are online).
Options is designed to configurate game options: nickname, mouse sensitivity, graphics, keyboard settings (binds) or audio settings.
Quit is designed to quit the game if you are tired.
Different repacks allow you also to use another menu items like
Demo player - to view and manage previously recorded demos.
Cs 1.6 Demo Player.dll
CS 1.6 is a legendary game. A lot of players started playing newer versions - CS:Source or CS:GO, but most of them return to CS 1.6 from time to time or just dont play any version except this. It is most unique and oldest, does not require modern hardware.
Cs 1.6 Demo Player Download
Viewed: 11143, Comments: 0
0 notes
Text
Install Xcode On Catalina
Question: Q: Cant install xcode in catalina 10.15.4. It keeps saying 'not enough disk space' Has anyone been trying to install Xcode in Mac OS catalina 10.15.4? Homebrew is a package managing tool. It’s more popular on Linux but is also used extensively on macOS. In fact, for apps that install as packages, Homebrew is the easiest way to remove them. Here’s how you can install Homebrew on macOS Catalina. In order to install Homebrew on macOS Catalina, you must have Xcode installed.
If you came here looking how to install Xcode using brew (aka Homebrew), read this part first. Otherwise, skip to the introduction.
The solution depends on your answer to this question:
Are you planning on developing iOS or Mac applications?
If the answer is “no”, then you do not need Xcode. All you need are the standalone Command Line Tools, which you can install by reading this guide.
If the answer is “yes”, then you will need to download and install Xcode from the Apple App Store. Xcode is a Mac application built by Apple, and it cannot be installed with Homebrew.
Even if you answered “yes”, you will still need Homebrew and Ruby to install cocoapods or fastlane, for example, so you should read this guide.
Introduction
After following many outdated and incomplete instructions for setting up a web development environment on a Mac (back in March 2012), and spending a lot of time finding solutions to the problems I encountered along the way, I decided to put together this detailed tutorial.
Over time, the tools got better, and ever since Mavericks, setting up a development environment on a Mac with Apple’s standalone Command Line Tools, Homebrew, Git, a Ruby manager (such as chruby, rbenv, or RVM), Ruby, and Rails has been a fairly stress-free process that’s no longer fraught with the issues I ran into in 2012.
In fact, the whole process can now be automated via the script that I wrote for you.
While it’s certainly possible to set everything up manually, it’s not as straightforward to explain because there are more options to consider in 2021. For example, the installation instructions will differ depending on your shell (Bash, zsh or fish), or if you are using a Mac with the Apple Silicon (M1) chip versus an Intel chip.
My script is smart enough to detect your current setup and install everything in the right place.
If you prefer to do everything manually, keep reading. This tutorial is kept up to date and is guaranteed to work in 2021.
Prerequisites
Supported macOS versions:
Big Sur
Catalina
Mojave
Your macOS software is up to date
Before you start, make sure you have the latest Apple software updates for your current macOS version. Check by going to System Preferences, then Software Update.
Homebrew is ready to brew
You can skip this section if you know you haven’t tried to install Homebrew yet. If you’re not sure, check the contents of the /usr/local folder (also check /opt/homebrew if you’re on a Mac with the Apple Silicon chip). Run this command in the Terminal app:
If there’s nothing in the folder, then you don’t have Homebrew.
If you’ve already installed Homebrew, you’ll want to make sure that when you run brew doctor, it says Your system is ready to brew.
If it’s not ready to brew, one of the most common issues, and the first one you should fix, is missing or outdated Command Line Tools. The outdated tools message looks like this:
Here are other variations of the outdated message:
The missing tools message looks like this:
Homebrew usually provides detailed instructions for fixing things, so read carefully and follow their instructions. Quit and restart Terminal once the CLT are installed.
If you get errors other than the ones above, read through the Troubleshooting Homebrew section at the bottom of this guide.
You don’t have RVM or rbenv installed
Back in 2012, I used to use RVM, but once I automated this process, RVM kept breaking my script, so I switched to the much simpler chruby and have been using it happily every since. chruby is not compatible with RVM and rbenv, so you’ll need to uninstall them first.
Uninstall RVM
Then delete any lines related to RVM from these files if they exist:
~/.bash_profile
~/.zshrc
~/.zprofile

Uninstall rbenv
Follow the rbenv uninstallation instructions, then delete any lines related to rbenv from these files if they exist:
~/.bash_profile
~/.zshrc
~/.zprofile
If you don’t know what the ~ means, or how to edit the files above, read my guide about how to open and edit hidden files (or dotfiles) on a Mac.
Installation
Notes on Terminal
Most of the work you’ll be doing in this tutorial will be in the “Terminal” application.The easiest way to open an application in macOS is to search for it via Spotlight.
The default keyboard shortcut for invoking Spotlight is command-Space. Once Spotlight is up, start typing the first few letters of the app you are looking for, and once it appears, select it, and press return to launch it.
If you are on an M1 Mac, make sure Terminal is NOT in Rosetta mode.
You can check by running this command once Terminal opens:
It should say arm64 if you are on an M1 Mac. If it says x86_4, that means Terminal is in Rosetta mode. The only way this could happen is if you changed the setting yourself, most likely after following incorrect or outdated advice. To turn off Rosetta, follow these instructions:
Quit Terminal if it’s running
Go to the Finder
Go to the Utilities folder by pressing shift-command-U (or select “Go” from the menu bar, then select Utilities)
Select Terminal, but don’t launch it. Just click once to select it.
Press command-i (or from the menu bar: “File”, then “Get Info”)
Uncheck the checkbox that says “Open using Rosetta”
Close the Terminal Info window
Launch Terminal
Run uname -m. It should now say arm64 and you can proceed with the rest of this guide.
Notes on your shell
This tutorials assumes you are using zsh. If you’re not sure, read my guide to find out which shell you are using, and replace any references to .zshrc in the steps below with .bash_profile if you are using Bash.

Step 1: Install Homebrew and the Command Line Tools
Homebrew, “the missing package manager for macOS,” allows you to easily install hundreds of open-source tools. The full installation instructions are available in the Homebrew Documentation, but you should only need to run the command that’s listed at the top of the Homebrew site:
Note that the command listed on the Homebrew site could change, so please make sure that what I have listed above is the same. If it isn’t, please let me know and I’ll update it.
Copy and paste the command into your Terminal window, press return, then read what appears in the Terminal, and pay attention to any instructions that require your input. For example, Homebrew will prompt for your macOS password. Note that Terminal does not provide visual feedback when you type your password. Just type it slowly and press return.
Homebrew also automatically installs the Apple Command Line Tools, and it usually installs them in the background, but in case this changes, pay attention if any windows appear that require your input.
Once the installation is successful, quit and restart Terminal, then check if Homebrew is ready to go:
If you get Your system is ready to brew, you can move on to Step 2. Otherwise, read what Homebrew is saying very carefully. They usually provide great instructions that you should follow. If that doesn’t help, go to the Troubleshooting section to learn how to fix errors and warnings you might run into.
On Apple Silicon Macs, Homebrew might tell you to run a few commands after the installation:
Quit and restart Terminal, then check if everything is working so far:
Step 2: Install chruby and the latest Ruby with ruby-install
Install chruby and ruby-install:
Install Ruby 2.7.2:
There is a newer version of Ruby (3.0.1), but it’s not fully compatible with some gems such as Jekyll, so I recommend 2.7.2 to get started. You can always install any other available version of Ruby, in addition to 2.7.2. That’s the advantage of using a Ruby manager like chruby. You can have multiple versions on your computer at the same time, and you can easily switch between them.
This will take a few minutes, and once it’s done, configure your shell to automatically use chruby:
For Intel Macs
For Apple Silicon Macs
Quit and relaunch Terminal, then check that everything is working:
It should say ruby 2.7.2p137.
Step 3: Configure Rubygems
Disable downloading documentation when install gems (for faster installation):
Make sure Rubygems is up to date:
Step 4: Install and configure Bundler
Install Bundler:
Configure Bundler to take advantage of your computer’s cores:
Step 5: Install any other gem you want
Congrats! You now have a working Ruby development environment. You should now be able to installs Rails, or Jekyll, or whatever gem you’ve been trying to install for the past few days!
If you got any value out of my tutorial, join the 1600+ people who are becoming confident coders through my quality guides and exclusive content in my free newsletter.
Step 6: Install Git
Git is the version control system of choice among many web developers. With Homebrew, installing Git is as easy as this:
Since we just installed Homebrew, we could have skipped brew update, but it’s a good habit to run it before installing anything with Homebrew because Homebrew is updated regularly.
Quit and relaunch Terminal, then verify the Git installation:
You should get git version 2.31.1 or later.
Next, you’ll need to configure Git with your name and email, and other important settings.
Next Steps
Once you start coding away on your computer, you will most likely need to install more tools with Homebrew. Before you do, remember to always run brew update and brew doctor to make sure your system is still ready to brew. To upgrade your existing packages, run brew upgrade. It’s important to keep your development environment up to date, and Homebrew is just one of the tools you need to remember to update.
Knowing when and how to automate is a sign of an effective engineer. Most things you do repeatedly will add up to a lot of wasted time if you don’t find ways to speed them up.
That’s why I recommend taking advantage of my script, which allows you to keep your system up to date by typing a single word in your Terminal. It does that by adding an alias, which is a shortcut for the longer command. If you’re not familiar with aliases, read my guide about how aliases can speed up your workflow.
Troubleshooting Homebrew warnings and errors
Consider starting over from scratch
Before you start looking through this list and trying to fix every warning and error, I would suggest a quick and easy solution: uninstall Homebrew and start over from scratch.
Before you do that, make a backup of everything you installed with Homebrew:
This will create a Brewfile in your ~/backups directory, which you can refer to later in case you’re missing something you need. For now, I wouldn’t worry about installing everything you used to have. It’s better to start with a clean slate, and only add things that you absolutely need.
If you installed a database with Homebrew (such as Postgres), and stored data that you need, back it up first. It is unusual to have important data stored in a local database and nowehere else, but I’m mentioning it for completeness.
Then uninstall Homebrew:
This will not completely remove all Homebrew folders, so you’ll need to finish the job:
This will prompt you for your macOS password, and then it will say:
This is expected because you can’t delete the /usr/local folder itself, but you can delete anything inside it. On a brand new Mac, the /usr/local folder already exists, but it is empty.
To verify that Homebrew was completely removed, check the contents of the /usr/local folder:
It should be empty.
If you are on an M1 Mac, you’ll also need to delete the /opt/homebrew directory:
Verify that the opt folder no longer has anything inside it:
Then go back to step 1, and after you complete this tutorial, if all your coding projects are still working, then you’re good to go. Otherwise, if you get errors because tools are missing, install them as you need them with Homebrew.
Fix brew issues one by one
In many cases, Homebrew will provide helpful instructions for dealing with warnings and errors, and I usually follow those instructions. I’ve tried to cover the most common sources of warnings and errors.
If you run into an issue I haven’t mentioned, try looking it up in the Homebrew GitHub Issues, or search for the error message on DuckDuckGo. If that doesn’t help, subscribe to my newsletter and I’ll do my best to help you.
After you fix each issue, run brew doctor until you get Your system is ready to brew. Then go to Step 2.
PATH issues
If you get Warning: /usr/bin occurs before /usr/local/bin, run the command below (as recommended by Homebrew), and quit and relaunch Terminal:
Read my guide about PATH to understand why this is important.
Other similar PATH issues you might see:
Missing directory errors
sudo allows you to run commands as a user with higher access rights, which is why it prompts you for your password, and mkdir stands for “make directory.”
chown stands for “change owner,” the -R flag applies this to all nested files and directories, and whoami is a variable that represents your macOS username. You should copy and paste the commands above as is.
Permission errors
If you get /usr/local/etc isn't writable or Cannot write to /usr/local/Cellar or if it complains that any directories inside /usr/local aren’t writable, fix it with this command:
This makes you the owner of the /usr/local directory, in addition to all nested directories.
Unbrewed files
Here are examples of common warnings about unbrewed files:
If you get a warning about any type of unbrewed file (such as .pc files, or static libraries), you may need to delete them as suggested by Homebrew (unless you put them there on purpose, which is unlikely). You’ll have to delete each file it complains about one by one with the rm command. For example, to remove a file called libgd.2.0.0.dylib from /usr/local/lib, you would run this command:
Install Xcode 9 On Catalina
In some cases, it might list a bunch of files that are all in the same directory, as in this example where something went wrong when installing Node:
In this case, you can delete the entire directory that contains the unbrewed files:
Install Xcode 10.3 On Catalina
Python warnings and config scripts
A related issue is:
These most likely mean you installed Python with a tool other than Homebrew. If you think you might need this version of Python, then just ignore those warnings. Otherwise, run the command below to remove that version of Python, but read this thread first.
In general, you want to install all development tools with Homebrew.
Outdated or misconfigured Xcode
Unless you plan on building iOS or Mac applications, you don’t need Xcode. All you need are the standalone Command Line Tools, which are installed when you follow this tutorial. If you already installed Xcode, you can safely delete it (again, assuming you haven’t used it and don’t plan to use it).
So, if you get any of the errors below, delete Xcode, then run brew doctor.
Outdated Xcode
Misconfigured Xcode
Linking keg-only formula
Homebrew messages are generally very helpful and they let you know exactly what to do. In this case, it is telling you to fix the linking issue by running brew unlink, followed by the tools (or “brews”) that need to be unlinked. Here, there is only one tool that needs to be unlinked. Therefore, you should run this command:
If it listed more than one tool, you would add them to the command separated by a space, like so:
Unlinked kegs
Broken symlinks
Use brew cleanup to fix these types of warnings:
Deprecated taps
In this case, you need to add the specific cask to the brew untap command, such as:
Missing dependencies
The instructions here are straightforward:
Issues with the Git repo
Follow the instructions:
Prefix issues on Apple Silicon
This is caused if you installed Homebrew while running your terminal in Rosetta mode, and are now running it in native mode, or if you used arch -x86_64 while in native mode, or other types of mixing the two environments.
Most things you need for Ruby web development are supported in native mode now, so there’s no need to use Rosetta anymore. For more details and things to look out for, read my guide on installing a development environment on Apple Silicon.
OpenCV has become one of the most widely used open-sourced library used in the field of computer vision. Thanks to the volunteers who have contributed to this library. The journey from Willow Garage to opencv.org has been inspiring. However, sometimes setting up the environment to build OpenCV from source is always challenging. With every new release as well as with a new operating system release, configuring OpenCV will be cumbersome.
In this blog post, I am going to note down the OpenCV build process in baby steps in recently released macOS Catalina. Dropping the support for 32-bit applications has created an unpleasant situation amongst some users.
Prerequisites before starting the build process:
You need to install python as we are not going to mess with the system python. For this blog post, I am going to use python 3.6. Download it from its official site and install it. Given below are the steps you need to follow to build OpenCV on macOS Catalina.
1. Install and Configure Xcode
Download Xcode from App Store. It will take a while as the size of this file is nearly 7 to 8 GB. After the successful installation of Xcode, run the following command.
Use the space key to move to the bottom of the agreement page and type (accept) to agree with the license. Next, we need to install the command line tools, which will install the basic compilers (gcc, g++, etc.). Use the command given below.
2. Install homebrew for MacOS Catalina
To install homebrew, visit their official site (link). Run the following code from the terminal to install.
After installing homebrew, update the package definition.
( Optional ) Run the $ echo $PATH command in the terminal to check if /usr/local/bin has been added to the system’s path. If it has not been added, update the bash_profile or bashrc or zshrc (according to your system) and add the following lines to the file. As I am using iTerm as my terminal replacement, the following command corresponds to ~/.zshrc. I use sublime text 3 for editing. You can use any editor of your choice.
Add the following lines to the file and save it.
Reload the .zshrc file using source command.
3. Install Python 3.6 from the official site
After installing the downloaded python file, run the following command to check the path of python3.
Install the following dependencies for OpenCV using the brew package manager. They are needed for compilation, image I/O, and optimization.
4. Create the python virtual environment
The next step is to install virtualenv and virtualenvwrapper using pip.
Configure the ~/.zshrc profile page again to set the environment variables.
After updating the .zshrc file, reload it by using the source command.
Create a virtual environment with the name py3cv3. You can choose a suitable name for your needs.
5. Installing Opencv 3.4.7 from Source
The only Python dependency required by OpenCV is NumPy(we will use 1.14.0), which we can install by using the following command.
Let us compile OpenCV from the source. First, we have to download the source code for opencv and opencv_contrib ( we will use version 3.4.7). You can use the version according to your requirements. After downloading the source codes, we will unpack it and store them inside the home folder.
We will rename the extracted folder so that the version information would be removed from the extracted folder name.
To prepare our compilation process, we use CMake.
Use CMake to run the build process from the source (1).
Check for the output of cmake. It should look as follows:
After a successful make, we can install it by using the following command.
To check the successful installation inside the system, you can search for the opencv.pc configuration file. Generally, it can be found in the following path.
Run the following command to check the installed version.
After the installation, we have to create a symbolic link of the cv2.so file into the virtual environment. Let’s first check whether the .so file exists inside the installation path or not.
If we want to install multiple versions of OpenCV, its better to rename it, to avoid confusion later. After renaming, we can create the symbolic link of the .so file into the virtual environment (e.g., py3cv3).
Install Xcode On Catalina Download
Finally, we can test the installation by running the following commands.
If you are able the see the version of opencv, it has been successful in your system, and you are ready to go. Congratulations!!
6. Tensorflow and Keras Installation on macOS Catalina
We are going to install TensorFlow and Keras inside the virtual environment py3cv3. To activate the virtual environment, just run the following code.
Install Xcode 12.5 On Catalina
Using pip, we will install some of the famous computer vision, machine learning, and image processing packages.
Next, we will install matplotlib and update the rendering background.
Install Xcode On Catalina Update
If you ever face any difficulties in getting a final output in matplotlib, follow the official documentation page to set up the virtual environment for matplotlib (Link). Now it’s the time to install TensorFlow and Keras. Follow the TensorFlow APIs page to select the required version. I am using version r1.15 here.
The Keras configuration file is present inside the home folder with a path ~/.keras/keras.json. You can open the file to have a look into the contents. Make sure the “image_data_format” field is set to channels_last and that the “backend” is set to tensorflow.
Congratulations!! You have successfully installed OpenCV on the macOS Catalina.
References
1. https://www.pyimagesearch.com/2019/01/30/macos-mojave-install-tensorflow-and-keras-for-deep-learning/
0 notes
Text
Siddha Kunjika Stotram Pdf
Sanskrit, docdevii, Combined to cover variations, Sanskrit Documents, Unicode Devanagari Searchable pdf Created Date: 5/21/2017 2:23:30 PM. सिद्ध कुंजिका स्तोत्र Siddha Kunjika Stotram सिद्ध कुंजिका स्तोत्र प्रयोग सिद्ध कुंजिका स्तोत्र पाठ विधि सिद्ध कुंजिका स्तोत्र के फायदे सिद्ध कुंजिका स्तोत्र. Please take a moment to spread this valuable treasure of our Sanatana Dharma among your relatives and friends. We are preparing this website as a big library of Stotras, Veda Suktas and Puja Vidhis without any print mistakes. Namaste Mohanji, for best results it is always preferred to chant Siddha Kunjika Stotram before reciting Durga Saptashati. This is clearly given in the stotra itself and also Krishnaji explained the reason very clearly (bhuta lipi activates the Bijas of Durga Saptashati). Siddha Kunjika Stotram PDF Free Download. Yena matra prabhavena chandi Japa Shubho Bhaveth. Na sooktham Napi dhyanam cha na nyaso na cha varchanam. Athi Guhyataram devi, Devanam abhi durlabham. Maranam, Mohanam Vasyam Sthambho ucchadanadhikam. Pata Mathrena sam sidhayeth Kunjika stotram uthamam.
Siddha Kunjika Stotram In English
Jump to:navigation, search
Sidha Kunjika Stotram
(The unhidden song of perfection)
Translated by
P.R.Ramachander
(This great prayer is chanted before the reading of Chandi path / Sapthasathi (known as Devi Mahathmya) in the northern parts of India. It is more thanthric in nature and has been taught by Lord Shiva to Goddess Parvathi. Devotees believe that just a recitation of Sidha Kunjika stotram is equivalent to recitation of the complete Chandi(Devi Mahatmyam) and also that the reading of Chandi Path (Devi Mahatmya) would not give complete results without reading Sidha Kunjika stotram before it. The Sanskrit text of the stotra is available in http://sanskritdocuments.org/doc_devii/siddhakunjikaa.itx. My humble sense of gratitude to Sri Akhay Dayal who brought this stotra to my notice.)
Shiva Uvacha:-
1.Srunu devi pravakshyami Kunjika stotram uthamam,
Yena matra prabhavena chandi Japa Shubho Bhaveth.
Shiva Said,
Oh Parvathi please hear the great prayer called Kunjika,
By recitation of which , the recitation of Devi Mahatmya(Chandi)
Would become more powerful/auspicious.
2.Na kavacham, Na argali stotram , kilakam , na rahasykam,
Na sooktham Napi dhyanam cha na nyaso na cha varchanam.
There is no need to recite Kavacham , Argalam , Kilakam and the Rahasya thrayam,
Nor is it necessary to recite Suktham , Dhyanam , Nyasam and also no need to worship.
(These are preliminary stotras that need to be recited before reading of Devi Mahatmyam/Chandi/Durga Sapthasathi. Here is it told that if this kunjika stotram is recited then there is no need to recite all these)
3.Kunjika pata mathrena Durga phalam Labheth,
Athi Guhyataram devi, Devanam abhi durlabham.
Just by reading Kunjika , we would get the effect of reading Chandi,
And Oh Goddess this is a great secret and even Devas do not know it.
4.Gopaneeyam prayathnena swayoniriva Parvathi,
Maranam, Mohanam Vasyam Sthambho ucchadanadhikam.
Pata Mathrena sam sidhayeth Kunjika stotram uthamam.
Oh Parvathi , you decide about the effort to keep it as secret
Because just by reading this great prayer on Kunjika , we can easily achieve,
Murder , attraction , slavery , making things motionless by repeated chants,
5.Atha Manthra:-
Now the chant:-
Om Aim, kleem Chamanudayai viche . Om Gloum hoom kleem joom sa,
Jwalaya jwalaya , Jwala, Jwala , prajwala , prajwala ,
Aim Hreem Kleem Chamundayai viche Jwala, ham sam lam ksham phat swaha.
( this is a Thanthric chant which consists of sounds and words which are meant to please the Goddess. “Jwalaya” means “Burn” , “Prajwala” Means “set fire.”)
Ithi Mantra :
This is the chant
6.Namasthe Rudra Roopinyai , Namsthe Madhu Mardini,
Nama Kaidabha Harinyai , Namasthe Mahishardhini
Salutations to her who is angry , Salutations to the killer of Madhu,
Salutations to the winner over Kaidabha , Salutations to the killer of Mahisha.
7.Namasthe Shumbha hanthryai cha Nishumbhasura Gathini ,
Jagratham hi Maha devi , japam Sidham kurushwa may.
Salutations to the killer of Shumba and the killer of Nishumbha,
Oh Great goddess , please safely give me expertise of chanting this.
8.Aimkari srushti roopayai hreem kari prathi palika,
Kleemkari Kama Roopinyai , bheeja roope namosthuthe,
Salutations to the Goddess who has the form of root chants,
Who by the chant “Aim” has the form of the creator,
Who by the chant “Hreem” has the form of one who takes care of,
And who by the Chant “Kleem” has the form of passion(Desire)
9.Chamunda chanda gathi cha yaikari Varadhayini,
Viche cha abhayadha nithyam namasthe Manthra roopini.
Salutations to goddess who has the form made of Chants,
To the Chamunda who is the killer of Chanda ,
Who by chanting “Ai” grants boons,
And by Chanting “Viche”, grants protection daily.
10.Dham, Dheem, Dhoom Dhoorjate Pathni,
Vaam veem Voom Vagadheeswari ,
Kraam kreem kroom Kalka Devi,
Saam seem soom may Shubham kuru.
Dham, Dheem, Dhoom, the wife of Lord Shiva,
Vaam , veem , Voom , the goddess of speech,
Kraam, kreem , kroom , the goddess Kali ,
Saam, seem, soom, , please do good.
11.Hoom , hoom, hoomkara roopinyai,
Jam, jam, jam jambha nadhini,
Breem, breem broom bhairavi ,
Bhadre bhavanyai they namo nama.
Hoom , hoom, she who has the form of the sound hoom,
Jam, jam, jam , she who has sound like thunderbolt,
Breem, breem, broom , Goddess Bhairavi,
Oh Goddess of the good, Oh Bhavani , salutations and salutations to you.
12.Aam , kam, tam , pam , yam, sam , veem, dhoom , iym , veem ham, ksham , dhijagram,
Dhijagram throtaya , Throtaya deeptham kuru kuru swaha,
Aam , kam, tam , pam , yam, sam , veem, dhoom , iym , veem ham, the end of devotion,
Tear apart the end of devotion , throw , throw light , swaha.
13.Paam, peem, pum Parvathi , poorna, khaam , kheem, khoom, Khechari Thadha,
Saam, seem, soom, sapthasathi devyaa manthra sidham kurushwa may.
Paam, peem, poom , the daughter of the mountain who is complete,
Khaam, kheem, khoom who is also flying in the sky,
Saam, seem, soom , Get me mastery over the chant of the Goddess of Devi Mahatmya/Chandi/ Sapthasathi
14.Idham thu Kunjika stotram manthra jagarthi hethave,
Abhakthe naïva dhatavyam , gopitham raksha Parvathi.
This is prayer of the Kunjika which is the reason for awakening,
Oh Parvathi , keep this protected and kept secret from those who are not devotees.
15.Yasthu kunjikaya devi heenaam Sapthasathim padeth,
Na thasya jayathe sidhir aranye , rodhanam yadhaa.
Those who read Sapthasathi without this prayer of Kunjika ,
Would not reach the forest of perfection as it would be like a wail there.
Ithi Sri Rudra Yamale Gowri Thanthre Shiva Parvathi samvadhe ,
Sri Kunjika stotram sampoornam
Thus ends the prayer to Kunjika which occurs in the discussion between Shiva and Parvathi, Which occurs in Gowri Thanthra and which occurs in Sri Rudra Yamala.
Explore Other Articles

Ethics of HinduismRudrapraśnaAnanda Valli StotramSkanda Sashti KavachamCitrayudha
Retrieved from 'http://www.hindupedia.com/eng/index.php?title=Sidha_Kunjika_Stotram&oldid=116625'
Siddha Kunjika Stotram सिद्धकुञ्जिकास्तोत्रम्. Uploaded by siddha-kunjika-stotram_telugu_PDF_file8314.pdf. Uploaded by. Best Siddha kunjika stotram Documents

गोपनीयं प्रयत्नेनस्वयोनिरिव पार्वति। मारणं मोहनं वश्यंस्तम्भनोच्चाटनादिकम्।
Apps on Google Play
The app includes Siddha Kunjika Stotram in the Sanskrit language which you can easily read and worship Durga Maa. The app is developed by Smartphone
22 मार्च 2018 Siddha Kunjika Stotram is the most powerful and favorite stotra of the DEVI This great prayer is chanted before the reading of Chandi path /
Shri Kunjika Stotram in Sanskrit
8 नवंबर 2017 Siddha Kunjika Stotram is chanted before the reading of Chandi path / Sapthasathi (known as Devi Mahathmya). Devotees believe that just a
Jul 07, 2021 कुंजिका स्तोत्र को 'बहुत ही रहस्यमयी और गुप्त' स्तोत्र माना गया है ।
Hindupedia, the Hindu Encyclopedia
Sidha Kunjika Stotram (The unhidden song of perfection) Translated by P.R. Ramachander (This great prayer is chanted before the reading of Chandi path
Jul 07, 2021 Siddha Kunjika Stotram by Anuradha Paudwal - Shri Durga Saptashati - Hindi Devotional Songs. 671,181 views671K views. • Jul 07, 2021. 2.9K.
Siddha Kunjika Stotram lyrics in Hindi
Siddha Kunjika Stotram lyrics in Hindi (अर्थ सहित). chandika sidhha kunjika stotram. Maa durga. सिद्धकुंजिका स्तोत्र (siddh kunjika
Kunjika Stotram Benefits
Jul 07, 2021 Siddha Kunjika Stotram in Sanskrit - Shailendra Bhartti - Bhajan India. 89,723 views89K views. • Jul 07, 2021. 412. 40. Share. Save. 412. 40.
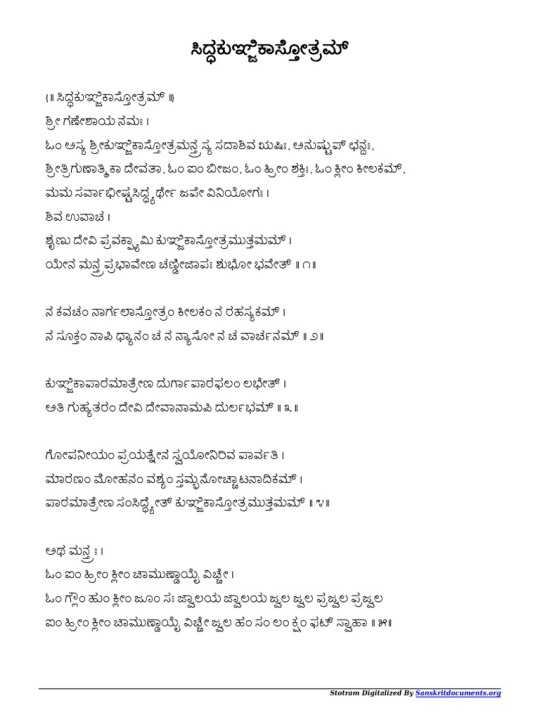
Siddha Kunjika Stotram Text in Hindi in pdf
Jul 07, 2021 Siddha Kunjika Stotram is a very powerful mantra dedicated to Goddess Durga – Goddess Chandi. Below you can download Siddha Kunjika
Siddha Kunjika Stotram Pdf Download
Jul 07, 2021 Siddha kunjika stotram with lyrics 10 times || सिद्ध कुंजिका स्तोत्रम् १0 मंत्र. Free knowledge of infinity.
song by Anuradha Paudwal
Listen to Siddha Kunjika Stotram on Spotify. Anuradha Paudwal · Song · 2020.
Jul 07, 2021 Click Here To Subscribe : http://goo.gl/tQaq3J #SiddhaKunjikaStotram # AnuradhaPaudwal #HindiDevotionalSong #navratri #mantra
PDF लाभ 2020
Ma Durga siddha kunjika stotram pdf फ्री में downloadable कर सकते
Siddha Kunjika Stotram – siddhakuñjikā stōtram. Published on StotraNidhi.com · Updated on Jul 07, 2021. Read in తెలుగు / ಕನ್ನಡ / தமிழ்
dAmar tantrokta siddha kunjikA stotra
Jul 07, 2021 The kunjikA stotra is famous tantric stotra which is recited with devImahAtmaya. According to different sampradAya ( tantric tradition ) and gurU
सिद्ध कुंजिका स्तोत्र का पाठ परम कल्याणकारी है। इस स्तोत्र का पाठ मनुष्य के जीवन
Siddha Kunjika Stotram in Hindi, Sanskrit
Siddha Kunjika Mantra
Jul 07, 2021 - Hanuman Chalisa English lyrics, PDFs, inspirational quotes, spiritual quotes, images, videos and greetings.
In response to a request from devotees, Shree Maa asked Swamiji to translate the Siddha Kunjika Stotram into Bengali. Siddha Kunjika Stotram is the Song
Best Siddha kunjika stotram Documents
Siddha Kunjika Stotram सिद्धकुञ्जिकास्तोत्रम्. Uploaded by siddha-kunjika-stotram_telugu_PDF_file8314.pdf. Uploaded by.
0 notes
Text
Cara Aktivasi Nitro Pro 10

W10 Digital Activation adalah sebuah program aktivasi terbaru yang dapat anda gunakan untuk mengaktivasi Windows 10 anda secara permanen dengan cara. Disini kami membacikan Cara Aktivasi Permanen Windows 10 Pro Anniversary Update yang sudah teruji dapat mengaktifkan windows 10 versi Pro. Namun bagi anda yang.
Nitro Pro Full Version adalah aplikasi yang sangat penting untuk mengedit atau membuat files berformat PDF. Dengan menggunakan aplikasi ini, anda dapat membuat, mengedit dan mengubah file pdf. Aplikasi Nitro Pro Full dapat melakukan editing file pdf dengan sangat cepat dan akurat. Anda dapat menambahkan komentar apda file PDF yang ingin anda edit. Anda dapat mengubah segala jenis format populer dari office menjadi bentuk PDF.
Program Nitro Pro Full Version ini mendukung berbagai macam format file seperti : Word, Excel, PowerPoint®, Photoshop®, HTML, rich text, BMP, TIFF, GIF, JPEG, JPEG2000, PNG, dll. Setelah anda menginstal aplikasi ini ke komputer atau laptop anda, maka secara otomatis akan muncul toolbar khusus dari software Nitro Pro Full ini yang akan memudahkan anda untuk mengkonversi berbagai macam format file ke PDF atau sekedar membuat file PDF.
Features Of Nitro Pro Full Version

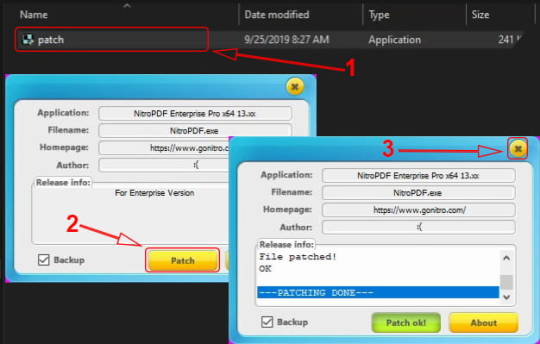
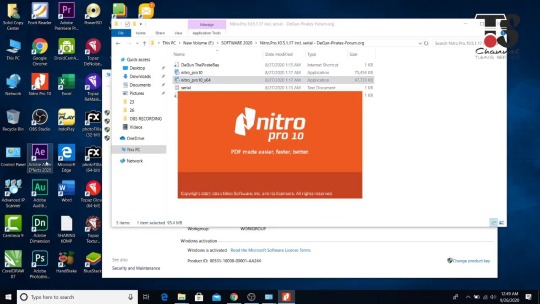
Creating and making PDF files of more than 300 file types other formats
Create PDF files with a single click
Edit video, text content of PDF files
Convert PDF files to files in Microsoft Word, WordPerfect, OpenOffice for reuse
Extract text and images in PDF files
Putting notes on PDF files
The combination of file documents, spreadsheets, presentations in the form of a PDF file
Protect PDF files and restrictions to read, edit, extract the contents and print
Password uses 40-bit and 128-bit encryption system
Construction form PDF files to import user information
Full list of up to a Mac impulsivity and make PDF files for easy search Index
Print professional-quality PDF files
Attach an audio file to a PDF file
Add Stamp
Cara Instal :
Download dan ekstrak file “Nitro Pro Full Version” ini.
Ekstrak juga file patch yang ada di dalam folder tersebut.
Matikan koneksi internet.
Instal programnya seperti biasa.
Setelah proses instalasi selesai, jangan dulu masuk ke dalam programya.
Buka folder “patch”, lalu copy pastekan file patch ke dalam folder instalasi nitro pro di pc atau laptop anda.
Jalankan file patch dengan cara klik kanan >> run as administrator.
Klik Patch.
Done.
Link Download
Mirrored
32 Bit : Nitro Pro Enterprise 13.44.0.896 Full Version (185 Mb)
32 Bit : Patch Only (232 kb)
64 Bit : Nitro Pro Enterprise 13.44.0.896 Full Version (221 Mb)
64 Bit : Patch Only (232 kb)
ZippyShare
32 Bit : Nitro Pro Enterprise 13.44.0.896 Full Version (185 Mb)
Cara Mengaktivasi Windows 10
32 Bit : Patch Only (232 kb)
64 Bit : Nitro Pro Enterprise 13.44.0.896 Full Version (221 Mb)
Cara Install Dan Aktivasi Nitro Pro 10
64 Bit : Patch Only (232 kb)
Cara Aktivasi Windows 10 Kuyhaa
1 note
·
View note