
Last Seen Blogs

proto-mysapathy
Proto-Mysapathy

wavbrosintl-blog
.WAVBLOG

akira-is-queen
Just a Blog

socialdisorderly-blog
did i win ?

einszweins
zweins!
Text
Utorrent Mac Os X

OldVersion.com provides free. software downloads for old versions of programs, drivers and games. So why not downgrade to the version you love? Because newer is not always bett. UTorrent is the world's most popular BitTorrent client, and is now available for Mac. UTorrent Mac introduces uTP, a new lightweight BitTorrent protocol that makes incredibly efficient use of. Xtorrent P2P VS uTorrent. One of the best MAC OS X clients is probably Xtorrent P2P, due to its platform user-experience and the way it has built its functionalities around the need of the users to download fast and be able to enjoy what they have downloaded with a good quality. As with any other uTorrent alternative for mac, in order for.
Pick a software title...to downgrade to the version you love!
Utorrent Mac Os X 10.5 Download
uTorrent Latest Version

uTorrent 3.2 Build 27636
Released:
Jul 30, 2012
Size:
875.39 KB
Downloads:
965
Rating:
Tested: Free from spyware, adware and viruses
uTorrent Popular Version
uTorrent 2.2.1
Released:
Mar 9, 2011
Size:
389.87 KB
Downloads:
3,554
Rating:
Tested: Free from spyware, adware and viruses
Select Version of uTorrent to Download for FREE!
Software VersionRelease DateSizeuTorrent 0.9.0.5Add info1.47 MBuTorrent 1.2Nov 9, 2005105.00 KBuTorrent 1.2.1Nov 27, 2005107.50 KBuTorrent 1.2.2Dec 15, 2005107.00 KBuTorrent 1.3Jan 8, 2006114.50 KBuTorrent 1.4Mar 7, 2006130.00 KBuTorrent 1.4.2Jun 8, 2006142.50 KBuTorrent 1.5Jun 8, 2006154.44 KBuTorrent 1.5.1Add info2.39 MBuTorrent 1.6Feb 14, 2007574.24 KBuTorrent 1.7Jul 12, 2007218.75 KBuTorrent 1.7.1Jul 13, 2007218.75 KBuTorrent 1.7.2Sep 3, 2007213.50 KBuTorrent 1.7.3Sep 6, 2007214.80 KBuTorrent 1.7.4Sep 11, 2007214.80 KBuTorrent 1.7.5Jan 15, 2008214.80 KBuTorrent 1.7.6Jan 15, 2008214.80 KBuTorrent 1.7.7Aug 9, 2008214.80 KBuTorrent 1.8.1Oct 6, 2008263.80 KBuTorrent 1.8.2Jan 24, 2009267.80 KBuTorrent 1.8.3Jun 13, 2009281.30 KBuTorrent 1.8.4Aug 12, 2009281.80 KBuTorrent 1.8.5Nov 2, 2009282.80 KBuTorrent 2.0 (beta)Nov 25, 2009306.80 KBuTorrent 2.0Feb 4, 2010311.80 KBuTorrent 2.0.1Apr 16, 2010313.80 KBuTorrent 2.0.2May 13, 2010314.80 KBuTorrent 2.0.3Jul 21, 2010319.80 KBuTorrent 2.0.4Aug 25, 2010320.37 KBuTorrent 2.2Nov 10, 2010385.37 KBuTorrent 2.2.1Mar 9, 2011389.87 KBuTorrent 2.2.1 Build 24217 (Beta)Jan 20, 2011386.37 KBuTorrent 2.2.1 Build 25203Apr 13, 2011390.37 KBuTorrent 3.0 (RC 3)May 26, 2011538.87 KBuTorrent 3.0 (RC 4)Jun 3, 2011539.87 KBuTorrent 3.0 (RC 5)Jun 13, 2011539.87 KBuTorrent 3.0 (RC 7)Jun 20, 20114.59 MBuTorrent 3.0Jun 23, 2011624.37 KBuTorrent 3.0 (x64)Jun 23, 2011717.37 KBuTorrent 3.0 Build 25440Jul 8, 2011624.37 KBuTorrent 3.0 Build 25460Jul 18, 2011624.87 KBuTorrent 3.0 Build 25570 (x64)Aug 23, 2011789.87 KBuTorrent 3.0 Build 25583Aug 25, 2011625.87 KBuTorrent 3.0 Build 25683Sep 20, 2011626.37 KBuTorrent 3.0 Build 25756Oct 7, 2011626.37 KBuTorrent 3.0 Build 25806Oct 18, 2011626.37 KBuTorrent 3.0 Build 25824Nov 2, 2011626.37 KBuTorrent 3.0 Build 26473Nov 17, 2011627.37 KBuTorrent 3.0.1 Build 25815Oct 19, 2011630.87 KBuTorrent 3.1 Build 26591Dec 8, 2011718.87 KBuTorrent 3.1 Build 26616Dec 15, 2011718.37 KBuTorrent 3.1 Build 26671Jan 20, 2012720.37 KBuTorrent 3.1.1 Build 26674 (Beta)Jan 24, 2012727.87 KBuTorrent 3.1.2 RC 2Jan 31, 2012720.87 KBuTorrent 3.1.2 RC 4Feb 2, 2012720.87 KBuTorrent 3.1.2 Build 25763Feb 21, 2012722.87 KBuTorrent 3.1.2 Build 26696Jan 26, 2012727.87 KBuTorrent 3.1.2 Build 26710Feb 3, 2012720.87 KBuTorrent 3.1.2 Build 26726Feb 6, 2012720.87 KBuTorrent 3.1.2 Build 26729Feb 10, 2012720.87 KBuTorrent 3.1.2 Build 26740Feb 10, 2012721.37 KBuTorrent 3.1.2 Build 26745Feb 14, 2012721.37 KBuTorrent 3.1.2 Build 26773Feb 22, 2012722.87 KBuTorrent 3.1.2 Build 26821Mar 6, 2012723.87 KBuTorrent 3.1.3 Build 26837Mar 9, 2012724.87 KBuTorrent 3.1.3 Build 26994Apr 5, 2012858.86 KBuTorrent 3.1.3 Build 27022Apr 8, 2012724.87 KBuTorrent 3.1.3 Build 27060Apr 16, 2012859.36 KBuTorrent 3.1.3 Build 27081Apr 18, 2012859.36 KBuTorrent 3.1.3 Build 27092Apr 20, 2012859.36 KBuTorrent 3.1.3 Build 27099Apr 24, 2012859.36 KBuTorrent 3.1.3 Build 27120Apr 27, 2012859.36 KBuTorrent 3.1.3 Build 27167May 6, 2012859.36 KBuTorrent 3.1.3 Build 27207May 11, 2012859.86 KBuTorrent 3.1.3 Build 27220May 14, 2012859.86 KBuTorrent 3.1.3 Build 27237Jun 1, 2012859.89 KBuTorrent 3.1.3 Build 27385Jun 11, 20120.97 MBuTorrent 3.1.3 Build 27443Jun 19, 20120.97 MBuTorrent 3.1.3 Build 27498Jun 26, 20120.97 MBuTorrent 3.2 Build 26904 (Beta)Mar 21, 2012732.87 KBuTorrent 3.2 Build 26986Mar 31, 2012733.87 KBuTorrent 3.2 Build 27026 (Beta)Apr 9, 2012864.86 KBuTorrent 3.2 Build 27226 (Beta)May 15, 2012871.86 KBuTorrent 3.2 Build 27295 (Beta)May 29, 2012873.89 KBuTorrent 3.2 Build 27547Jul 2, 2012874.39 KBuTorrent 3.2 Build 27568Jul 5, 2012874.39 KBuTorrent 3.2 Build 27636Jul 30, 2012875.39 KB
Do you have software version that is not currently listed?
Upload it now and get rewarded!
Need a software version that is not currently listed?
Make a software request now!
uTorrent Description
Popular uTorrent light client for Mac.
Other Internet Software

uTorrent Comments
Utorrent Mac Os X Yosemite
Please enable JavaScript to view the comments powered by Disqus.blog comments powered by Disqus
0 notes
Text
Best Torrent App Osx

The overall scope of torrent websites is increasing at a very rapid pace day by day and as a result, torrent websites have unlocked its door for Mac users as well. There are millions of Mac users who are willing to access the most popular torrent sites to get their favorite torrent files exclusively for free. But when it comes to Mac torrent sites, the only thing which is a matter of concern for Mac users is privacy. Due to all the privacy norms set up by Apple for their manufactured devices, it has been made impossible for a virus or any suspicious files to penetrate the security layers of Apple devices. That’s why we recommend Mac users to use these sites to get all torrent files in exactly one place.
Best Torrent App On Android
Best Torrent App Os X El Capitan
Best Torrent App Sites
Best Torrent App Mac 2020
Pro Tools Osx Torrent
But before you use them to get your favorite torrent files, we wanted to let you ensure that they have installed a proper VPN product on your Mac device so that you can escape from being caught or fined by ISP. As we all know that accessing blocked or unblocked torrent sites is an offensive task in most countries due to copyrights violation, that’s why we suggest our users install a VPN on their Mac device so that it can behave as a shield to their identity and will provide Mac users an extra layer of security as well. Feel at a loss which VPN to choose? Maybe you can find the answer in the article – Top 5 Best VPN Browsers Online for PC, Mac, Android & iOS 2019. Now let’s show you the list of the 10 best Mac torrent sites and clients in 2019.
Part 1. 5 Best Mac Torrent Sites in 2019
The Best Torrent Downloader For Mac Os X Download When we look at this list, we can clearly see that Folx is the most powerful solution for every MacOS user’s download needs. This is due to its great integration of powerful features such as the ones mentioned above. Solid BitTorrent clients are few and far between, but Transmission ranks among the best. The lightweight app excels when it comes to download speed, and blends seamlessly with MacOS. The Vuze Bittorrent Client is an end-to-end software application for all your torrent needs. Although it is a complete bittorrent downloader, the Vuze program maintains a lightweight footprint, doesn't slow your computer down, and quickly downloads torrents.
1) The Pirate Bay
Torrent downloading for Mac users is certainly inseparable from The Pirate Bay which commonly appears first in most people’s brains. The way in which this torrent website delivers the content to users is just magnificent. There are separate sections available on this website which contain a lot of different torrent files. Mac users can easily download their favorite torrent files to get some satisfactory results. The graphical user interface is another outstanding feature of this website which can be ignored for no reason. All you need to do is to enable the VPN on your Mac device and access this website to get a personalized experience in accessing the best torrent files.
Tip: Here we recommend you a useful tool called Jihosoft Video Converter you may need when you find the format of your downloaded video not compatible with your media player. Jihosoft Video Converter is very professional in converting video formats between a series of formats, such as P4, M4V, MPEG, MKV, RMVB, TS, VOB, H.264, HD WMV, etc. You can click on it to learn more!
2) EZTV
TNTMac on reddit is an official profile. This account will help you to find and download macOS Softwares and Games which will be 100% working.
This Mac torrent website is really a very awesome website which contains millions of different torrent files on its database. Since users are required to login to this website, it is not so popular among Mac users. But as a Mac user, you can easily create your free account to access all the torrent files without any issue. Though the user interface of this website is not pretty much appealing, it can be negotiated if the content availability is the main concern. This torrent website is well known for providing torrent files of the newly released TV series and other TV shows as well.
3) RARBG
RARBG is another very good torrent website for Mac users since it offers a lot of awesome features to its users for free. Like EZTV, this website also requires users to login with the username and password. The presence of a huge database on this website will ensure that you have selected one of the best torrent websites. This website offers a lot of entertaining stuff like torrent files of movies, TV shows, music, and various paid software packages as well. That’s why this website is satisfying all its Mac users with its performance and we hope that the smooth functioning of this torrent website will remain to be the same in the future as well. By the way, there are many alternative sites for RARBG that you can try!
4) 1337X
Another very satisfying option present in this list for all Mac users is 1337X which can complete torrent downloading for Mac users. Inside the trending section of this Mac torrent website, you can access all the latest trending torrent files which are most frequently downloaded by users on a large scale. The content on this website is displayed in the most elegant way and due to this reason, 1337X holds the massive popularity among Mac users. The overall graphical user interface and the presence of a huge database on this site will surely let you feel you have made exactly the right choice. To find more websites similar to 1337X, you can read an article about the best alternatives to 1337X.
5) LimeTorrents
An absolute beauty of this Mac torrent website is providing content for users who are looking for the best source of torrent files for free. On the homepage of LimeTorrents, you will see an input search option box where you can search for the torrent file you are looking for. Moreover, you can easily browse torrent files according to the various sections whose icons are represented at the bottom end of the homepage. This website is also known for getting updated with the latest trends and popularity so that users will get all the related stuff which will satisfy them at the best levels. Though this website lacks a good GUI, still, it is a sure shot choice for every Mac user.
Part 2. 5 Best Torrent Clients for Mac in 2019
Torrent clients are another very good source of getting all the torrent files by requesting to the strangers who are online on that client server. Basically, a torrent client will let all users gather on a specific platform where they can share all the resources they have with each other. That’s why it is recommended to get a good torrent client platform which will surely help you get the torrent file not available on the above-mentioned torrent websites. We have gathered 5 different suggestions about the top Mac torrent clients in 2019 which we are going to mention below.
1) uTorrent (Mac)
uTorrent is undoubtedly the best Mac torrent client present in this list which might help you out in getting your desired torrent file. There are lots of incredible features present in this client, which makes it a perfect choice for all Mac users. You can use the “Add Torrent” feature of this app to help you add or upload the torrent file which you have in your system. However, the regular updates of this app might annoy you a bit, but updating the firmware of this app to the latest version will surely allow you to access the premium user experience for free.
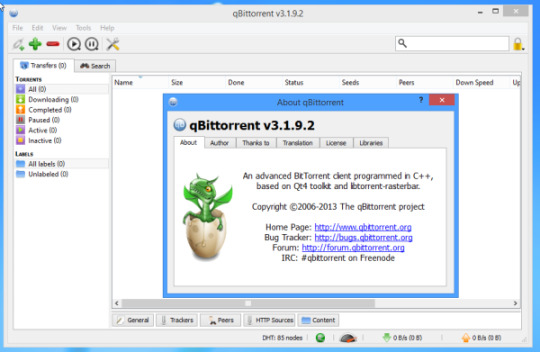
2) qBitTorrent (Mac)
Best Torrent App On Android
qBitTorrent is another fantastic choice as a Mac torrent client which is developed with an excellent user interface. This Mac torrent application is developed with lots of handy tools, making the searching complexity much lower. Moreover, the qBitTorrent app is having one of the best torrent search engines to increase the search efficiency of different results. The essential features present in this torrent client are pretty much good in our opinion and that’s why we like the overall functioning of it. So, just get this application installed on your Mac device to get your desired quality stuff for free.
3) BitTorrent (Mac)
The developers of BitTorrent maintain and operate this Mac torrent client by themselves. That’s why you will see a lot of optimistic features for a better searching process to enhance the user experience. However, in this Mac torrent client application, you will get a lot of ads which are totally annoying, but there is no concern about the content quality issue. BitTorrent official client app for Mac is pretty much smaller in file size which will not take extra space in your Mac device storage. Overall, this BitTorrent official client app seems to be more furnished and well optimized in terms of features if compared with the older version of it.

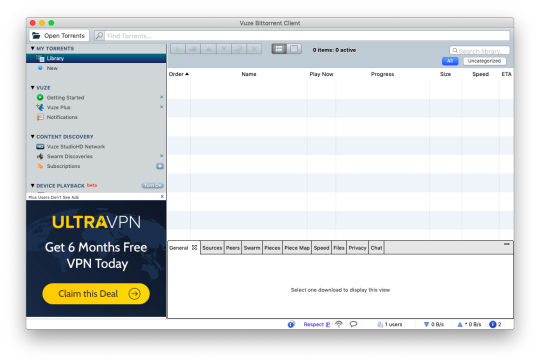
4) Vuze (Mac)
Packed with lots of extraordinary features, this Mac torrent client is another very good choice for Mac users. Users can easily download torrent files from this client application unlimitedly for free. The user interface of this app is also very good, which makes it a complete all-round choice for users. But the ultimate strong feature of this Mac torrent client application is its powerful search engine. The search engine of this app is really very strong and powerful which is capable of fetching the required torrent files very easily from the web server. There is an integrated virus protection pack available with this Mac torrent client which can reduce the risk of virus attacks up to a great extent.
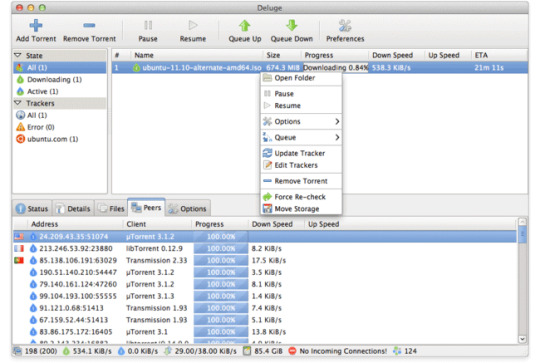
5) Deluge BitTorrent Client (Mac)
Best Torrent App Os X El Capitan
Last but not the least, Deluge BitTorrent Client for Mac is another excellent option available for Mac users who have not been used to the functioning and features of the above-mentioned Mac torrent client applications. This Mac torrent client is having most of the rich features which will make the overall torrenting experience pretty much enhanced. The scheduled downloading of different torrent files is another very excellent option present in this Mac torrent client for an easier downloading task.
Conclusion:

Best Torrent App Sites

Best Torrent App Mac 2020
In a nutshell, we can conclude that there are several Mac torrent sites and clients in 2019 for Mac users to download torrents easier. We have mentioned the best suggestions above in this article and hopefully, we can think that you are taking the best advantage of them. And please leave the name of your favorite torrent site below in the comments section.
Related Articles
Pro Tools Osx Torrent
New Articles
0 notes
Text
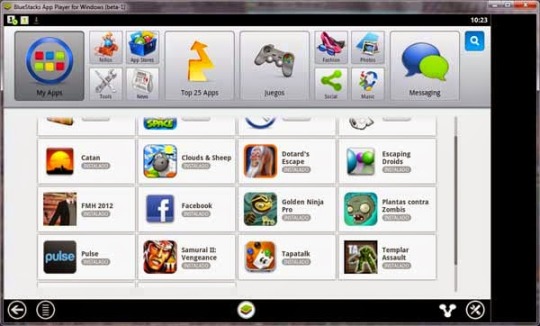
Bluestacks 1 Gb Ram

How to install BlueStacks on Windows with no update VGA driver and 1gb RAM: 1. Download BlueStacks old version for low graphic or VGA here choose BlueStacks beta version 0.7.0721 or if the computer or laptop with good specs that BlueStacks can download here, which I use is windows 8. It is 100% possible to install Bluestacks with 1 GB RAM. Instructions to install Bluestacks without any. My pc configuration is intel atom 1.66ghz 1gb. Bluestack para PC de 1 GB Ram Instalar. Descargar bluestacks 1 GB RAM.75,729 views.
Bluestacks For 1gb Ram Tablet
Install Bluestacks 1
Bluestacks For 1 Gb Ram
Bluestacks For Windows 7 1 Gb Ram

Any version of BlueStacks App Player distributed on Uptodown is completely virus-free and free to download at no cost. 4.250.0.1070 Dec 9th, 2020 4.2 Nov 23th, 2020. It has always been specified that BlueStacks or similar applications can only be installed on the systems having higher RAM i.e. At least 2GB of RAM. It also demands a proper graphics card in order to run smoothly. But however there is a possible way to install the BlueStacks in system having RAM of 1 GB. Furthermore it is also possible to.
How To Increase Bluestacks RAM Size ?
Contents
1 How To Increase Bluestacks RAM Size ?
2 How To Increase Size Of RAM In Bluestacks App Player :
Are you irritated with slow speed of Bluestacks? Don’t worry, here is How to Increase Bluestacks RAM Size. You can easily increase Bluestacks Android emulator RAM by following this simple tutorial. BlueStacks is the best Android emulator for Windows. We can use our any Android apps on PC by using Bulestacks. We are able to use Whatsapp, Hike, Instagram or any other apps or games on our windows PC by using Bluestacks. But one of the main problem faced by every user od this emulator is it’s RAM size. It only works on small size of RAM, so it won’t works with speed. But you can easily increase RAM in Bluestacks app player using this guide. Bluestacks is the android emulator which allows users to install and run any android app in it.
If you have no Android mobile and wants to use Whatsapp, as it’s only available for android so many people can’t able to use Whatsapp because they don’t have an Android phone. Now what to do for using Whatsapp messenger?, Here is the best solution of this problem. Yes!! off course that’s is Bluestacks App Player. By installing any Android emulator on your Computer, you are able to install and run any Android app on your PC.
Bluestacks For 1gb Ram Tablet
But when we install and use Bluestacks on our PC, it will works too slow and it takes something 5 minutes in starting. So we feels tired by using Bluestacks just because it works slow. But do you know Why Bluestacks works too slow? If no then let me explain reason behind it. Actually Bluestacks is an android emulator which acts like and Android mobile and it have all features which a normal Android mobile have, so it also needs RAM like and Android phone to work. But that’s not a gadget that’s why there is no RAM available in Bluestacks, so it share’s our PC’s RAM to run itself. Bluestacks only shares something 700MB RAM of your PC, that’s why it worls too slow. It have default settings so it only share 700MB RAM from your Computer’s RAM. But it is possible to increase Bluestacks RAM.
You don’t need any type of Other software to increase RAM of Bluestacks App Player Android Emulator, it can be easily done from your PC. In this article I am going to describing trick to increase RAM of Bluestacks to make it run fast. Just follow the steps given below to increase Bluestacks RAM. You can increase RAM according to your need, but your PC’s also must have at least 4GB RAM so that it can share its RAM with Bluestacks smoothly. If your PC have too low RAM like 1GB or 2GB, then don’t follow these steps otherwise your PC will also works too slow after increasing Bluestacks RAM.
Install Bluestacks 1
Must Read:-Best WiFi Names
What Is Bluestacks ?
Bluestacks App Player is an Android emulator which turns your PC into an Android device. After installing Bluestacks on your Computer, you are able to install and run any Android app on your PC. You don’t need to use Android phone for using Whatsapp while you are using Laptop or PC to access Whatsapp messages because with the help of Bluestacks, you are able to use any Android app on your PC.
Why You Needs To Increase RAM In BlueStacks ?
Actually BlueStacks isn’t a gadget like and Android phone so it is less with some parts of Android phone like it don’t Have any Battery, RAM, etc. But our Android mobile needs Battery, RAM and all. So BlueStacks share these pasrts of our Computer (PC). It shares our PC’s RAM and run itself. But it only takes something 700MB of our Pc’s RAM that’s why it works too slow. So we needs to increase size of BlueStacks RAM. In this article I am going to sharing method to increase RAM size in BlueStacks.
Must Read:-How To Access Blocked Websites On PC
How To Increase Size Of RAM In Bluestacks App Player :
1) First of all press WinKey+R from your kryboard.
Bluestacks For 1 Gb Ram
2) Type regedit and press OK.
3) Now one list will appear on screen, click on HKEY_LOCAL_MACHINE from the list.
4) Then another list will appear, now click on SOFTWARE from the list.
5) Search and click on BlueStacks from the Software’s list.
Bluestacks For Windows 7 1 Gb Ram
6) Noe click on Guests and then click on Android from BlueStacks list.
7) This time another list will appear in Right column in which you will see the file called Memory, click on it.
8) Double click on Memory and change its Base from Hexadecimal to Decimal.
9) Now you can change your RAM’s size from left side, its default size is 768MB, you can increase it according to your need.
10) Done, that’s the method to increase size of RAM in Bluestacks.
Now if your PC works too slow after increasing BlueStacks’s RAM, you can also able decrease its RAM by following same steps again.
Must Read:-How to Hack Any WiFi Using Andorid

Final Words
So friends this is an article about how to increase size of RAM in BlueStacks?. I am describes step by step guide to increase Bluestacks RAM in this article by which you can easily increase BlueStacks RAM to run it more faster than before. You don’t need to install any external software like BlueStacks Tweaker or anything to increase BlueStacks App Player’s RAM, it can easily done manually from your system. I hope my article is helpful for you. If you have any doubt or query, feel free to comment below. I will reply you shortly.
3.9/5(7 votes )
0 notes
Text
Msi For Mac Os

https://crookedwitchcollective.tumblr.com/post/642624611683631104/autocad-2017-for-mac-update. Create precise 2D and 3D drawings with AutoCAD CAD software. AutoCAD includes industry-specific features for architecture, mechanical engineering, and more. The 2017.2 version fixed compatibility issues with macOS High Sierra. It also improves overall stability of the product. This is a full AutoCAD 2017 installation with 2017.2 update integrated.
Last time I tried using MSI-X (on OS X) 10.10/10.11 it didn't seem to be supported properly. I never got around to fully diagnosing it though. – pmdj Oct 27 '17 at 10:36 add a comment. MacOS Mojave video uploaded. Time to upgrade your Rigs. No full support for 1080Ti. Anyhow, Intel UHD 630 is supported natively. Older Nvidia GPUs will work.
Mac Os Download For Windows
Download Mac Os On Windows 10
Winzip For Mac Os Free Download
Msi Afterburner Mac Os X
If your site administrator has turned on Webex Productivity Tools options for your Webex site, all Webex Productivity Tools are installed automatically on your site. In addition, whenever newer versions are available, Webex Productivity Tools are updated automatically.
Mac Os Download For Windows
If necessary, you can also download and install Webex Productivity Tools manually.
If you have a previous version of the Productivity Tools, uninstall that version before installing the new version.
To help troubleshoot the Mac client, use the CMDiagnostics tool included with the Mac client package. Use it to collect the following diagnostic information: A list of running processes; The Mac OS X operating system version; Mac OS X crash reports relating to the Configuration Manager client including CCM.crash and System Preference.crash.
Download Mozilla Firefox, a free Web browser. Firefox is created by a global non-profit dedicated to putting individuals in control online. Get Firefox for Windows, macOS, Linux, Android and iOS today!
Before installing Webex Productivity Tools, ensure that your computer meets the following minimum system requirements:
You must have administrator privileges for your computer.
Refer to the Webex Meetings Suite system requirements for supported operating systems, browsers, and other minimum system requirements (WBS39).
1
Log in to your Webex site.
2
Select the Webex Meetings tab.
3
In the left navigation bar, under Support, select Download.
4
On the Webex Meetings Downloads page under Productivity Tools, make sure Mac is selected, and then select Download.
5
Save the cwptools.dmg installation file to your computer.
6
Open the cwptools.dmg file, and then open the Webex Productivity tools.pkg Jabra speak 410 for mac os. file that appears. https://crookedwitchcollective.tumblr.com/post/642624442663567360/mac-make-up-for-free.
7
When prompted, enter your email address, password, and Webex site URL.
Learning to code is one of the best moves you can make. In our complete guide to programming and coding on a Mac, we cover each of the programming languages and how to learn them, how to set up. TextMate - a classic code editor for Mac OS X. As TextMate developers note, this text editor for coding on Mac is able to compensate for IDE system minuses. It is an easy-to-use and scalable app, unlike many slow IDE. TextMate software. Coders use TextMate code editor for its speed. And really, snippets and macros automatize coding noticeably. Swift is a robust and intuitive programming language created by Apple for building apps for iOS, Mac, Apple TV, and Apple Watch. It’s designed to give developers more freedom than ever. Swift is easy to use and open source, so anyone with an idea can create something incredible. For most Unix systems, you must download and compile the source code. The same source code archive can also be used to build the Windows and Mac versions, and is the starting point for ports to all other platforms. Download the latest Python 3 and Python 2 source. Download and install the best free apps for Programming Software on Windows, Mac, iOS, and Android from CNET Download.com, your trusted source for the top software picks. Coding software for mac free.
Set Up Webex Productivity Tools
To set up Webex Productivity Tools or to verify your settings, open the Preferences dialog box, using one of the following options:
1
To set up Webex Productivity Tools or to verify your settings, select Preferences from the Webex menu on the Mac menu bar.
2
Make any necessary changes to the following:
Account: Confirm the Webex site URL and your username. To choose a different Webex site, sign out and sign back in.
General: Select which options you want enabled:
Start Productivity Tools when system starts: Automatically starts Webex Productivity Tools every time you start you computer.
Schedule or start WebEx meetings from Microsoft Outlook: Allows you to use the Webex integration to Microsoft Outlook to schedule and start Webex meetings.
Meetings: 'Meet Now' settings: Select Edit to go to your My Webex > Preferences page of your Webex site and edit your 'Meet Now' settings.
The My Webex tab of your Webex site appears. For more information, see Edit Your Webex Preferences.
Audio: Verify your Audio PIN and your audio account information. For example, you may have one or more Webex Personal Conference Number accounts or you may have another teleconference account. If you need to make changes to your audio preferences, select Preferences > Audio and Video on your Webex site.
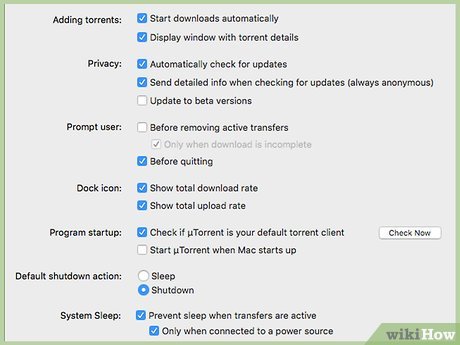
How to get updates for macOS Mojave or later
If you've upgraded to macOS Mojave or later, follow these steps to keep it up to date:
Choose System Preferences from the Apple menu , then click Software Update to check for updates.
If any updates are available, click the Update Now button to install them. Or click ”More info” to see details about each update and select specific updates to install.
When Software Update says that your Mac is up to date, the installed version of macOS and all of its apps are also up to date. That includes Safari, iTunes, Books, Messages, Mail, Calendar, Photos, and FaceTime.
To find updates for iMovie, Garageband, Pages, Numbers, Keynote, and other apps that were downloaded separately from the App Store, open the App Store on your Mac, then click the Updates tab.
To automatically install macOS updates in the future, including apps that were downloaded separately from the App Store, select ”Automatically keep my Mac up to date.” Your Mac will notify you when updates require it to restart, so you can always choose to install those later.
How to get updates for earlier macOS versions

Download Mac Os On Windows 10
If you're using an earlier macOS, such as macOS High Sierra, Sierra, El Capitan, or earlier,* follow these steps to keep it up to date:
Open the App Store app on your Mac.
Click Updates in the App Store toolbar.
Use the Update buttons to download and install any updates listed.
When the App Store shows no more updates, the installed version of macOS and all of its apps are up to date. That includes Safari, iTunes, iBooks, Messages, Mail, Calendar, Photos, and FaceTime. Later versions may be available by upgrading your macOS.

To automatically download updates in the future, choose Apple menu > System Preferences, click App Store, then select ”Download newly available updates in the background.” Your Mac will notify you when updates are ready to install.
* If you're using OS X Lion or Snow Leopard, get OS X updates by choosing Apple menu > Software Update.
How to get updates for iOS
Learn how to update your iPhone, iPad, or iPod touch to the latest version of iOS.

Learn more
Winzip For Mac Os Free Download

Msi Afterburner Mac Os X
Learn how to upgrade to the latest version of macOS.
Find out which macOS your Mac is using.
You can redownload apps that you previously downloaded from the App Store.
Your Mac doesn't automatically download large updates when it's using a Personal Hotspot.
0 notes
Text
Mac Os Download For Virtualbox

VirtualBox for Mac OS X12
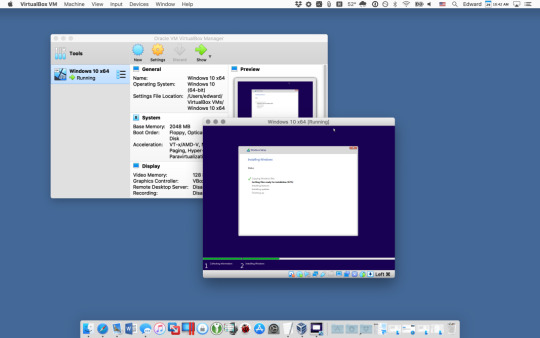
VirtualBox for Mac OS X is an extremely popular virtualization application with an amazingly rich functionality. The tool is absolutely cross-platform and is available for Windows, Linux, Solaris and Mac OS systems. It can run everywhere from small embedded systems or desktop class machines to Cloud solutions. The tool has been popular for more than ten years and currently contains dozens of useful functions for the most efficient work. You can download Oracle VM VirtualBox for MacBook right here and get the most important virtualization tool in a couple of seconds.
VirtualBox has a user-friendly interface and contains all the needed functions in its main menu. Both web developers and users with no additional knowledge can easily start using the app without any difficulties. Coding on mac. The program runs smoothly on almost all machines with Mac OS X system, including your favorite MacBook. Moreover, the application is currently free to use and still does not contain any paid tools or trial period.
VirtualBox for Mac OS X has a range of benefits:
completely free to download and use
no trial period
no annoying ads or pop-up windows
a handy manual to help your on any stage of installation and running the app
top quality software with no bugs or malware
enormous possibilities for virtualization
designed for professionals, offering an advanced number of handy utilities
shared clipboard, as well as drag and drop technology: easy data sharing between the host and the virtual operating systems
snapshots: once you configured your VirtualBox, you can easily save the machine's state by creating a special snapshot
powerful functionality for developers and IT gurus
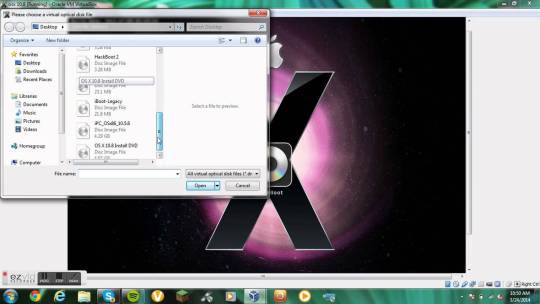
Type (Mac OS X). Version (Mac OS X 64-bit). Memory 4 GB (recommended 8 GB or higher). Hard Disk: Select Use an existing virtual machine hard disk file. Click on the Folder icon to browse the macOS Catalina VMDK file. Click Add and select the Catalina VMDK image. Oracle VM VirtualBox Extension Pack. Free for personal, educational or evaluation use under the terms of the VirtualBox Personal Use and Evaluation License on Windows, Mac OS.
Rechargeable battery. Works with PCs and any Bluetooth enabled devices. Jabra speak 410 manual. Connect via Bluetooth or USB, up to 100m wireless range. It has a compact and portable design in black and comes with voice guidance to keep you updated with who is calling, battery status, and more.Features:.
You can start using VirtualBox for Mac OS X for free and get a full package of the needed option for effective virtualization!
VirtualBox for Mac OS X
Full Setup Size:
Mac OS X
Setup File Name:

32-bit (x86), 64-bit (x64)
License:
5.1.22
For devices:
Oracle
Download VirtualBox
*VirtualBox for Mac OS X is available for free downloading without registration.
Downloads VirtualBox for Mac OS X?
Share the page on your site:
MacOS Mojave might be an old version of macOS but it still has its lovers and users who want to download, install, and use macOS Mojave. Because macOS Mojave has supported many old Mac versions, users with old versions choose macOS Mojave to install on their Macs. You can download and install macOS Mojave by following the guidance which we will provide you. This part is only about downloading and the installing part is included in another page. So let’s Download macOS Mojave VMware & VirtualBox Image.
MacOS Mojave can be downloaded and installed in many different computers with different tools and operating system but for most of the users, the downloading method will be the same but the installation is completely different. For example, if you have an unsupported mac and you want to download and install macOS Mojave it is a little different from other methods but doesn’t worry and you can check this How to Install macOS Catalina on Unsupported Mac and solve your problem.
Mac make up for free. Offering more than 100 shades of professional quality cosmetics for All Ages, All Races, and All Genders. Enjoy free shipping and returns on all orders. Find the latest selection of MAC Cosmetics Makeup in-store or online at Nordstrom. Shipping is always free and returns are accepted at any location. In-store pickup and alterations services available. Free Shipping & Returns. Shipping offer valid on orders shipped to US addresses. Free Standard Shipping and Returns. with any purchase. Upgrade to 2nd Day Shipping for $5.00 or Overnight Shipping for $10.00. Standard Shipping is always complimentary on MAC Gift Cards. No offer code necessary. Shipping offer not applicable to Pro members.
MacOS Mojave is one of the most favorite macOS until 2020 because it has one of the amazing security systems from all the macOS. MacOS Mojave is loved by most mac lovers despite another reason also. That is the downloading and installing space. For installing macOS Mojave you need at least 2GB of memory and 12.5GB of storage space. In total, you will need a 14.5GB storage space. But for downloading and installing the latest macOS (macOS Catalina) you need at least 4GB of memory and 12.5GB of storage space. In total, you need a 16GB or 18GB storage space. Here’s how to download macOS Mojave VMware & VirtualBox Image.
Download macOS Mojave VMware image – Latest version
macOS Mojave
Users can install and download macOS Mojave on a Windows operating system also. You might think that it is impossible because you have one hard disk and that has Windows in it, so how can we have both of them in one operating system. You have two ways, first, you can download and install macOS Mojave and Windows operating with the help of VirtualBox. Second, you can download and install macOS Mojave on the Windows operating system with the help of Dual Boot. you can check this How to Dual Boot macOS Catalina & Windows 10 on PC to download macOS Mojave and windows operating system. Now we’ll download macOS Mojave VMware & VirtualBox Image.
The information that we will provide will help you with the installation and downloading process. For the installation, you need to understand the sentences and for the and the meaning behind them but for the downloading, you just need to go to a link, click on the download button and wait. You can download VirtualBox image or VMware image. According to your device and operating system. Go ahead and download macOS Mojave VMware & VirtualBox Image.
Download macOS Mojave VMware & VirtualBox Image
Great news for Windows users is that now they can also download Mac operating systems on the Windows which is the wish of most of the Windows users to download mac operating systems on their Windows computer. But the windows users can’t download macOS Mojave directly like Mac users. For downloading Mac operating systems on Windows, the first thing they need to download is macOS Mojave VMware and Virtualbox Image. Then they can install macOS Mojave on their PC.
So Now if you are a Mac user or want to Update your High Sierra to macOS Mojave or want to newly enjoy macOS Mojave on your PC. You have to take a look at the article below because they can easily and directly download macOS Mojave on their Computer.
Related: Download macOS Mojave ISO For VMware & VirtualBox

Download macOS Mojave on VMware and VirtualBox doesn’t have many differences. Also, you can download any of them. Which you want or want to download because the work of both of them are the same. The VMware and Virtualbox both allow you to easily run multiple guests operating systems on a single host. But the difference between VMware and VirtualBox is that VirtualBox truly has a lot of support . Because it’s open-source and free. But VMWare Player is seen as having a better drag-and-drop between host and VM, yet VirtualBox offers you an unlimited number of snapshots. Now that we’ve download macOS Mojave VMware & VirtualBox Image.
Related:Download macOS Mojave DMG File – (Direct Link)
Install macOS Mojave on VMware & VirtualBox on Windows PC
VirtualBox is one of the systems all the world knows. VirtualBox allows you to have more than one operating system in a single drive and single device. If you are a Mac user you can use the VirtualBox image. But we mostly recommend Windows, Linux, and other brand users for VirtualBox image. Mac users can probably use a VirtualBox image. You have a complete choice if you want to use VMware image for installing macOS Mojave. Or you want to use VirtualBox image for downloading and installing macOS Mojave.
Related: Fast Install of macOS Mojave on VirtualBox on Windows PC
Mac Os X Iso Download For Virtualbox

Mac Os X Iso Download For Virtualbox
That was download macOS Mojave VMware & VirtualBox Image. Now everything is done you can download anything which you want from our side. Also if you have any problem and want to know more we are always here to help you guys. We hope that you enjoyed and learned some useful tips. We have tried our best to provide the best content and solve all your problems in the computer industry. If you have any questions, problems, or any suggestions for us please mention that in the comment section below.
0 notes
Text
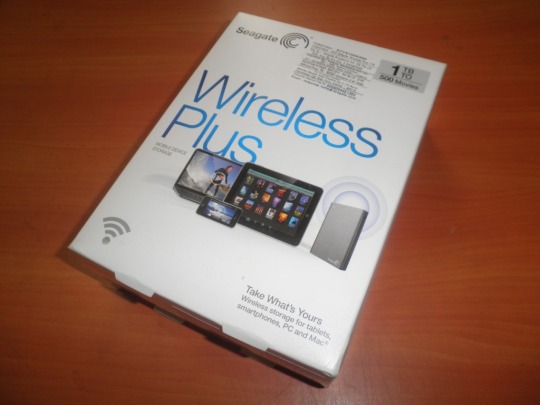
Seagate Wireless Plus For Mac

The Seagate Wireless Plus’ Wi-Fi runs 802.11 b/g/n which is a slower Wi-Fi standard than 802.11ac which the newer Macs, iPhone and iPads run. And there is a limitation on the Seagate Wireless Plus to consider, connection to Internet, Wi-Fi and uploading content at the same time that could catch you out – as it can’t do all at the same time. Give your Seagate Backup Plus a Name. You’ll find it useful to give your Seagate Backup Plus drive a. Seagate® Media App. Easily browse your universe of files from anywhere with this free app. Seagate® Media Sync for Mac. Copy and synchronize your media files with your external drive. Seagate® Media Sync for Windows. Copy and synchronize your media files with your external drive. Seagate Backup Plus Slim 1TB External Hard Drive Portable HDD – Black USB 3.0 for PC Laptop and Mac, 1 year Mylio Create, 2 Months Adobe CC Photography (STHN1000400) 4.7 out of 5 stars 635 $52.49 $ 52. 49 $79.99 $79.99.
Seagate Backup Plus For Mac
Seagate Wireless Plus Macbook
Seagate Wireless Plus App For Macbook
Seagate Wireless Plus Manual
Seagate Wireless Plus For Mac
Seagate Wireless Plus Drivers
I've seen similar questions on here but I'm asking anyway because it's starting to annoy me..
I have the newest Macbook Pro 13' Retina Display (2015). Processor: 2.7 GHz Intel Core i5, Memory: 8 GB 1867 MHz DDR3. It's running on OS X Yosemite 10.10.3
I bought a Seagate Backup Plus for Mac external hard drive and the computer was recognizing it just fine, all I had to do was plug it in and it lit up. The icon showed on the main screen, and it was automatically backing the computer up.
Spontaneously that has stopped. It is still plugged in and lit up but Finder does not recognize the hard drive. It isn't showing up on my screen. Time Machine says it isn't here.
I already attempted to try different USB ports since it is USB connected, in case those were damaged. But I don't think there is any damage to either end of the USB connection because it is lighting up when I plug it in.
Around the same time that the computer stopped recognizing the Seagate drive, it started moving slower. My internet crashes pretty frequently while other computers in the house are running fine on the modem, videos become choppy and the audio is sometimes off, and things take longer to load, or sometimes it just gets stuck loading. I don't know if this is part of the problem or not.. I did opt for the smaller hard drive which is why I am using an external.
MacBook Pro with Retina display, OS X Yosemite (10.10.3)
Posted on
Summary: When plugging your Seagate Backup Plus into a Mac computer, you may find the drive stops working and is not mounting in Disk Utility. Have you been troubled by the issue? This post will give you 7 workable solutions to fix Seagate Backup Plus drive not mounting/working issue on Mac.
Seagate Backup Plus external hard drive is often used for Time Machine backup. But many users reported that they were unable to mount Seagate Backup Plus drive on Mac computers. And some say theirSeagate Backup Plus couldn't work on Mac after plugged in. Here is a real example:
'I really need your help. My Seagate Backup plus just stopped getting detected (led not working anymore) with my MacBook Pro 2016 model (with USB Type C to USB 3 connector) suddenly. It was working fine 1 month before. I tried this backup disk with a Windows computer and the LED light is working in that case but I am not able to get it to work with my MacBook Pro anymore. Any idea guys?'
In fact, this issue is very common, especially for those who frequently share the same drive between different computers. This page will help when Seagate Backup Plus drive doesn't work on Mac.

7 solutions to fix Seagate Backup Plus not mounting, not working on Mac
For some reason, Seagate external hard drives could not be recognized by Mac. If you can't mount the Seagate Backup Plus drive in Disk Utility, the hard drive won't work on Mac. And you can't access the data stored on it. So it's very urgent to fix the problem to make it work again.
Here are solutions to the Seagate Backup Plus not working or mounting issue.
1. Have some basic checks
Sometimes, the Seagate Backup Plus drive won't mount on Mac is due to the bad USB port or cable. Thus, once the Seagate Backup Plus drive stops working, you can first do some routine checks as below.
Step 1. Check if the cable of the Seagate Backup Plus drive is connected properly to your Mac
If the drive isn't properly plugged in, it will fail to mount as it received not enough or even no power.
Step 2. Make sure the USB cable is not at fault
Try using a different USB cable to see if that fixes the problem.
Step 3. Check if the USB port is damaged
Plug the Seagate Backup Plus into another USB port if you have another one. Otherwise, insert another external storage device in this USB port.
Step 4. Check whether the Seagate Backup Plus external hard drive is powered properly
In general, the current of USB port 2.3 and 3.0 are enough for the most external portable hard drives. But sometimes this amount of current may be insufficient while the drive is spinning up.
In this situation, you can try to connect the Seagate Backup Plus with a USB Y cable if you have one. And for Seagate Backup Plus Hub and Expansion Desktop, a power adaptor is required for power supply.
Step 5. Access the drive on other Macs
Connect the Seagate Backup Plus drive to another Mac computer to see whether it works on that one or not. If the drive works on another Mac computer, there is something wrong with your Mac computer rather than the drive. What you should do is to ask for help from Apple support.
Step 6. Check if the format of Seagate hard drive is supported by macOS
For example, a Windows BitLocker encrypted drive will not be working on Mac originally. Your Mac computer is not able to mount it. To fix the problem, you can plug the Seagate Backup Plus into a PC and then access the drive on Windows.
Seagate Backup Plus For Mac
2. Check whether the Seagate Backup Plus is showing up in Disk Utility
To troubleshoot this problem, you first need to know if this Seagate hard drive is detected by your Mac. Open the Utilities folder in your Applications folder. Launch Disk Utility and check the left pane then. If you can't see the external hard drive in macOS, the drive probably has been physically damaged. In that case, you should send the drive to the local repair shop. Otherwise, you can move to the next solution.
3. Check if the Seagate Backup Plus drive is mounted in Disk Utility
If the Seagate Backup Plus is mounted in Disk Utility, you should blame the wrong computer settings or outdated computer. Fortunately, it's easy to fix these issues. Just try solution 4 and solution 5. If the external hard drive is greyed out in Disk Utility, it's not mounted. You can try right-clicking the Seagate Backup Plus and choose the 'Mount' button. If that doesn't work, the drive has some file system problems. Please follow the solution 6 to repair the problem.
4. Show the Seagate Backup Plus on the desktop
If the Seagate external hard drive is mounted in Disk Utility, but it still doesn't show up on Mac. Mac make up for free. First of all, you should make sure the settings in Finder display drive icons on the desktop.
Step 1: Go to Finder > Preferences > General tab.
Step 2: Select 'External disks' under 'Show these items on the desktop' and then the connected external hard drive will appear on the desktop.
5. Repair Seagate Backup Plus drive via First Aid
Seagate Backup Plus not mounting issue on Mac can be caused by file system problems. Disk Utility's First Aid is a built-in tool on Mac to deal with errors related to disks, such as file system corruption. So you can try to fix the unmountable/corrupted Seagate Backup Plus external hard drive in Disk Utility by following the steps below.
Seagate Wireless Plus Macbook
Step 1: Go to Utilities Disk Utility.
Step 2: Click 'View' in the top menu bar (Or click 'View' on the top window). Then select 'Show All Devices'.
Step 3: Select the Seagate Backup Plus external hard drive from the left sidebar.
Step 4: Click 'First Aid' on the top of the Disk Utility window.

Step 5: Click 'Run' to perform hard disk diagnostics and fix the not mounting/not working Seagate Backup Plus.
6. Update the software on Mac
Seagate Wireless Plus App For Macbook
Software updates keep your computer and programs secure, deal with quite a few bugs, and provide new features. Out-of-date software can cause a variety of issues. It's possible that the operating system will become sluggish and the connected device may not function properly. Fortunately, you can easily update the software on Mac.
Case 1. Update the software on macOS Mojave or Catalina. If you upgrade to macOS Mojave or macOS Catalina, you should choose 'System Preferences' from the Apple menu, then click 'Software Update' to check for updates. If any updates are available, click 'Update Now' to install them.
Case 2. Update the software on earlier macOS versions. Just launch the Mac App Store, click the 'Update' tab on the top and then choose the 'Update All'.
Seagate Wireless Plus Manual

7. Fix the not mounting or working Seagate Backup Plus drive by reformatting
If First Aid failed on the external hard drive, it might have some serious errors that are beyond its reparation capability. In that case, you need to recover lost data from the Seagate Backup Plus external hard drive as soon as possible.
Learning to code is one of the best moves you can make. In our complete guide to programming and coding on a Mac, we cover each of the programming languages and how to learn them, how to set up. TextMate - a classic code editor for Mac OS X. As TextMate developers note, this text editor for coding on Mac is able to compensate for IDE system minuses. It is an easy-to-use and scalable app, unlike many slow IDE. TextMate software. Coders use TextMate code editor for its speed. And really, snippets and macros automatize coding noticeably. Swift is a robust and intuitive programming language created by Apple for building apps for iOS, Mac, Apple TV, and Apple Watch. It’s designed to give developers more freedom than ever. Swift is easy to use and open source, so anyone with an idea can create something incredible. For most Unix systems, you must download and compile the source code. The same source code archive can also be used to build the Windows and Mac versions, and is the starting point for ports to all other platforms. Download the latest Python 3 and Python 2 source. Download and install the best free apps for Programming Software on Windows, Mac, iOS, and Android from CNET Download.com, your trusted source for the top software picks. Coding software for mac free.
Step 1. Recover lost data from the unmountable/corrupted Seagate Back Plus
iBoysoft Data Recovery for Mac is free external hard drive data recovery software. It can easily recover files when the hard drive is not working or mounting on Mac. Also, it canrecover deleted photos and lost data from formatted drives, unreadable drives, corrupted drives, and recover deleted/lost partitions, etc. It's compatible withmacOS 10.15/10.14/10.13/10.12/10.11/10.10/10.9/10.8/10.7.
1. Download and install iBoysoft Data Recovery for Mac on Mac.
2. Launch iBoysoft Data Recovery for Mac.
3. Select the Seagate Backup Plus and click the 'Scan' button to scan for all lost data.
4. Preview the searching results, choose files you want to get back, and click the 'Recover' button.
Here is a short video tutorial which shows you how to recover lost data from unmountable/corrupted external hard drives:
Step 2: Reformat the Seagate Backup Plus to make it work
After recovering data from the unmounted Seagate Backup Plus, you can now go to Disk Utility and reformat it without worrying about data loss.
• Steps to reformat Seagate Backup Plus external hard drive
If unfortunately, you can't reformat the Seagate Backup Plus drive, it must have physical issues. In this case, you have to look for help from a local data recovery company.
Bonus Part: Introduction to different Seagate Backup Plus drives
Seagate Wireless Plus For Mac
You probably use a Seagate desktop drive like Backup Plus Hub and Expansion. Or you could use a Backup Plus Portable drive like Ultra Touch and Slim. No matter which Seagate Backup Plus drive you choose, it could not work on the Mac for some reason.
Therefore, it's important to know the differences between those Seagate Backup Plus drives. This helps you to use the Seagate Backup Plus drive more correctly and efficiently, and then avoid hard disk corruption.
Seagate Wireless Plus Drivers
1. Seagate Backup Plus Hub: This Seagate Backup Plus Desktop drive has large capacities with cross-platform compatibility, which means you don't have to format the drive for both Mac and Windows again. It's an all-in-one data hub and recharging station for tablet, smartphone and camera.
2. Seagate Backup Plus Ultra Touch: Backup Plus Ultra Touch portable hard drives feature password protection and hardware encryption, USB-C compatibility, and file sync. You can't open the Seagate Backup Plus drive on Mac until it's unlocked. Moreover, an NTFS for Mac software is needed to use Backup Plus Ultra Touch on Mac, as it's preformatted with NTFS.
3. Seagate Backup Plus Slim: Seagate Backup Plus is small enough for a loaded laptop bag. It's an ideal external hard drive with easy portability and enough storage space. But avoid dropping your Seagate Backup Plus drive during transportation, in case it's damaged and not working.
4. SeagateBackup Plus Portable: Backup Plus portable drives offer easy-to-use software tools like Seagate Dashboard, so that you can schedule automatic backup and mirror folders easily.
Conclusion
No matter what caused Seagate Backup Plus not mounting, working, or readable issue on Mac, such as logical problems and physical damages, the most important thing is to back up important data or recover lost data with free Mac data recovery software. iBoysoft Data Recovery for Mac is a powerful and reliable data recovery tool on macOS which supports various external drives, including external hard drives, SD cards, USB flash drives, etc.
If you have any suggestions to solve this issue or experience any questions when using iBoysoft Data Recovery for Mac, please feel free to let us know.
0 notes
Text
Network Dongle For Mac

Get support for your Jabra Speak 410. Find all product guides, resources and FAQs. Office Headsets. Wired and wireless calls, music and concentration. True Wireless Earbuds. 100% wireless for calls, music and sport. Wireless Stereo Headphones. Find all Jabra's support content. This includes bluetooth pairing guide, FAQs, documents, videos, firmware, software and apps for your product. Jabra speak 410 for mac os. Jabra Series Jabra Speak 410 Uc Speakerphone for Pc Item model number Q710610 Item Weight 6.5 ounces Product Dimensions 8.27 x 4.33 x 8.27 inches Item Dimensions LxWxH 8.27 x 4.33 x 8.27 inches Color Black Batteries 1 C batteries required. Manufacturer Jabra Language: English ASIN B004MOWGZ2 Is Discontinued By Manufacturer No. The Speak 410 is the easy to use personal conference call speakerphone with simple USB connectivity for efficient UC meetings whenever and wherever you need them. Comes with a protective neoprene pouch to keep it scratch free and ideal for travelling.
It's the only text editor I've loved since Homesite (RIP). –Brackets – a free code editor with the minimum distracting featuresBrackets is another app for cleaning up your code. Nevertheless, download a demo version of Coda and it should help you make up your mind.I don't write much code anymore, but I still open Coda, just to have it open. https://crookedwitchcollective.tumblr.com/post/642624533048819712/coding-software-for-mac-free.
Once identified use Google to search for Apple Mac OS drivers for your WiFi chipset/product, in my case this was a RTL8191SU based dongle and it had a working Apple Mac OS X driver for the most current Mac OS X Mountain Lion version (Apple Mac OS X 10.8.4). A simple download and install, followed by a reboot did the trick as shown below. Netgear Nighthawk AC1900. Best USB Wi-Fi Adapter. Netgear Nighthawk. Foscomax WiFi Adapter, 1200Mbps USB 3.0 WiFi Dongle Dual Band 5.8GHz/2.4GHz Wireless Network Adapter with 5dBi Antenna for PC/Desktop/Laptop Support Win 10/8/7/Vista/XP Mac OS 10.6-10.15.
Network Adapter For Macbook Air
Network Adapter For Macbook Pro
Dongle Amazon
Network Adapter For Macbook Air
Topics Map > OS and Desktop Applications > Operating Systems > Mac OS X
This document details how to delete/reset network adapters in OS X.
Note: You will need Administrative privileges on the computer to perform this action.
Open System Preferences from within the Apple menu.
Choose the Network option.
Highlight the network adapter that is causing difficulties and press the '-' sign in the bottom of the left hand column.
Click Apply in the bottom right hand corner of the page to apply these changes.
It is strongly recommended that you restart the computer to apply these changes.
After restarting the machine, open the Network panel by repeating Steps 1-2.
If the adapters which you previously removed have not appeared, you will need to press the '+' sign in the bottom of the left hand column.
Choose the interface of the adapter that you deleted prior to restarting your computer and click Create.
After clicking Apply, this adapter should be added and functional once again.
See Also:
Keywords:mac reset network quick fix 10.6 10.7 10.8 reinstall reset delete deleting wifi wi-fiSuggest keywordsDoc ID:26681Owner:Jeff W.Group:DoIT Help DeskCreated:2012-10-03 12:31 CDTUpdated:2019-02-24 11:36 CDTSites:DoIT Help Desk, DoIT Tech StoreFeedback:2965CommentSuggest a new document
What's new

See the release notes and the readme.txt file for installation instructions, supported hardware, what's new, bug fixes, and known issues.
Overview
This download installs base drivers, Intel® PROSet for Windows* Device Manager, and Intel® PROSet Adapter Configuration Utility for Intel® Network Adapters with Windows® 10.
Which file should you download?
Note:10-GbE adapters (those that support Windows 10) are only supported by 64-bit drivers.
PROWin32.zipfor 32-bit (x86) editions of Windows*
PROWinx64.zipfor 64-bit (x64) editions of Windows
How to use this download
Download the self-extracting archive and run it. It will extract the files to a temporary directory, run the installation wizard, and remove the temporary files when the installation is complete. All language files are embedded in this archive. You don't need to download an extra language pack.
Supported devices
This software may also apply to Intel® Ethernet Controllers. Support for built-in network connections is provided by the system or board manufacturer.
Not sure if this is the right driver for your Intel® Ethernet device?
Run Intel® Driver & Support Assistant to automatically detect updates.
About Intel® drivers
Network Adapter For Macbook Pro
The driver or software for your Intel® component might have been changed or replaced by the computer manufacturer. We recommend you work with your computer manufacturer before installing our driver so you don’t lose features or customizations.
Dongle Amazon
See a list of manufacturers’ Support websites.
0 notes
Text
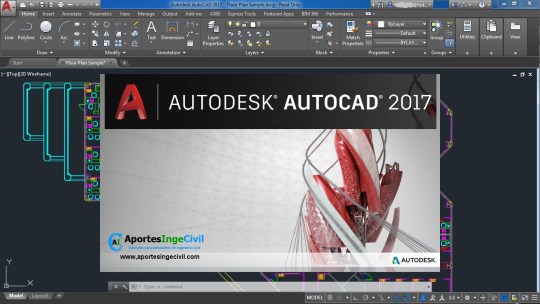
Autocad 2017 For Mac Update

Contents include:
Autocad 2017.1.2 Update
Autocad 2017 Update
Autocad 2017 For Mac Update Download
Autocad 2017 For Mac Torrent
Autodesk Autocad 2017 Crack + Keygen Latest Download Updated
The 2017.1 Update can be installed over the official release of AutoCAD 2017 for Mac and AutoCAD 2017 for Mac with 2017.0.1 Hotfix. To install 2017.1 Update, do the following: Close all Autodesk applications before you begin to install the update. Double-click AutoCADMac2017.1UpdateCombo.dmg to mount the volume. AutoCAD bisa digunakan di sistem operasi Windows dan juga Mac, namun kali ini siberuang akan membagikan untuk pengguna Windows secara gratis versi terbaru 2017. Banyak kegunaan software ini terutama untuk anda yang berkecimpung di bidang arsitektur dan engineer karena berhubungan dengan desain sebuah bangunan dan mesin-mesin yang rumit.
Autodesk Autocad 2017 Crack + Keygen Latest Download Updated
Autodesk Autocad 2017 CrackFree Download is the latest edition of the Autocad graphics creation and designing software that provides a complete collection of required tools. It is a very well known 2D and 3D creation software.I do create and edit the already created projects. Mostly used by the graphic designers. It is used by the Engineers for the making of the blueprints of different projects. Autodesk Autocad 2017 Crack provides free and full activation for the users. There is no fake activation technologies installation and also the activation is genuine. The whole process of the Autocad 2017 Activation does not take much time. you can also download AutoCAD 2015 Crack & Autocad 2016 Crack.
Autodesk Autocad 2017 Crack Download is multi-product activator for the products. It activates the variety of the products as offered by the Autodesk industry. There is no need of the extra Autocad 2017 Keygen as it is given in the screenshot below with the whole process of activation. The detailed activation process is well explained at the end of the given post. There is no need for the other fake activators and other methods. It works very well for the activation process of the latest Autocad 2017. Moreover, the user interface for the crack is very simple. The user can easily understand the activation process which is quite simple. you can also download Autodesk AutoCAD 2018 Crack.
Screenshot for your help:
Requirements for Autodesk Autocad 2017 Cracked:
Support for all Microsoft Operating Systems as well as Mac.
Minimum of Pentium 4 processor but more the processor more the performance.
At least 2 GB RAM for the running but better is 8 GB RAM for improved functioning.
Required at least 6 GB of hard disk space.
.NET framework for the running.
Bigger screen resolution better the operation.
Additionally, you can also useX-Force 2017 All Autodesk 2018 Products for Activation
How to Use Autodesk Autocad 2017 Keygen:
First, you have to download Autocad 2017 setup from the official website.
Install the software by properly following the installation steps.
After the successful installation of the program does not open the program.
Now “download Autocad 2017 Crack” from the links given here at the website.
It has a crack for Autocad 2017 both 32-bit and 64-bit editions.
Use the crack wisely according to the version installed on your machine.
If is also wise to keep the firewall off and Antivirus as they may pose a problem in the activation process.
You have to copy the crack to the location of the default installation directory of the program.
After this run the “Autodesk Autocad 2017 Patch” and provide the required information.
It will activate the products.
Enjoy “Activated Autodesk Autocad 2017 with Crack”.
Autodesk Autocad 2017 Crack + Keygen Latest Free Download
Share
AutoCAD 2017 Crack + Product Key
AutoCAD 2017 Crack is really an intelligent program who enable you to design your drawing and also make sketches in all the formats who provides you an efficient platform where you can manage your images drawing and also AutoCAD enables you to design car structure, bike, design apartments, maps of houses, etc.
AutoCAD 2017 Mac is an efficient program used in the hands of all over the world professionals, engineers and also in the hands of architectures. With the help of this AutoCAD 2017, you can design all the type of drawing and also design structures. You can manage length, dimensions, colors and also provides you the fully customizable tool with short keys compatibility.
Qualities Of AutoCAD 2017 Activation Code
AutoCAD 2017 is an outstanding 2D and also in the 3D format designing program who enables you to design your structures and also design in this program.
The latest version of this program used in all over the world hands of professionals, engineers, architectures, car designers, bike designers and many others.
Through this program, you can design all the type of structure on your operating system and also you can manage the dimensions, length, feet, header, footer and also fill colors.
You can make the tutorial about the guidance of how to use this AutoCAD program and also enhanced your designed project.
It’s fully compatible with your Microsoft Window and also Mac operating systems with fully customizable tools.
How Can We Download AutoCAD 2017 Crack?
For using this program, simply download the complete setup of AutoCAD 2017 from our blog.
When you completely download AutoCAD 2017 from our blog.
Simply install the complete setup of AutoCAD 2017 on your OS.
When the procedure of installation of AutoCAD 2017 is done.
Run your completely installed AutoCAD 2017.
Wow, this latest version AutoCAD 2017 is working efficiently.
It’s time for Bingo.
Let’s HUrrah.

Autocad 2017.1.2 Update
Incoming Queries:
Autocad 2017 Update
autocad 2017 crack
crack autocad 2017
autocad 2017
autocad 2017 download full version
download autocad 2017 full crack
Bobby Deol
Autocad 2017 For Mac Update Download
AutoCAD 2017 Crack
Autocad 2017 For Mac Torrent
4
0 notes
Text
Coding Software For Mac Free

Coding On Mac
Coding Programs For Mac Free
Coding Software For Mac Free Photo Editing Software
TextMate - a classic code editor for Mac OS X. As TextMate developers note, this text editor for coding on Mac is able to compensate for IDE system minuses. It is an easy-to-use and scalable app, unlike many slow IDE. TextMate software. Coders use TextMate code editor for its speed. And really, snippets and macros automatize coding noticeably. Brackets is a lightweight, yet powerful, modern text editor. We blend visual tools into the editor so you get the right amount of help when you want it. With new features and extensions released every 3-4 weeks, it's like getting presents all year long.
Great editors can help you code faster, find syntax errors, and much more. Below is a roundup of code editors that will help your web development without breaking the bank.
UNLIMITED DOWNLOADS: Email, admin, landing page & website templates
Starting at only $16.50 per month!
Editors Choice: Atom.io
Now over the years, many text editors have been created, but only a few have stayed and improved over the years. Atom.io right now is used by all my programmer friends, myself include.
If you want to use the best WYSIWYG HTML editor, that will save you tons of time when coding or doing any editing use Atom. Just try it, you’ll thank me later. Oh and watch their demo video, it’s super cool as well. Best of all.. Atom.io is free and it’s made by Github!
If you don’t love it – come back here and you can call me the meanest words, but I know that will never happen!
Morse code software, free download. Education software downloads - Morse Code Master by Stratosoft and many more programs are available for instant and free download. Use the Visual Studio debugger to quickly find and fix bugs across languages. The Visual Studio for Mac debugger lets you step inside your code by setting Breakpoints, Step Over statements, Step Into and Out of functions, and inspect the current state of the code stack through powerful visualizations.
1. Aptana Studio (Windows, Linux, Mac OS X) (FREE)
Aptana Studio is a complete web development environment that combines powerful authoring tools for HTML, CSS, and JavaScript, along with thousands of additional plugins created by the community.
Features of Aptana Studio:
Unified Editing for Web Apps
Ajax and JavaScript Libraries
Ruby on Rails, Python and PHP
Desktop Ajax
Free, Open Source and Cross Platform
2. SlickEdit (Windows, Linux, Mac OS X)
SlickEdit is the multi-platform, multi-language code editor that gives programmers the ability to create, navigate, modify, build, and debug code faster and more accurately.
Features of SlickEdit:
Display symbol details with List Members, function/method argument help, and formatted Javadoc/XMLdoc/Doxygen comments
Analyze symbols and hierarchy with a rich set of tools including Symbols, Class, References, and Find Symbol tool windows
Check in and check out from version control
Diff files and directories
Preview the definition for the symbol under the cursor automatically without lifting a finger. The Preview tool window shows the definition and formatted Javadoc/XMLdoc/Doxygen comments.
Edit files up to 2 GB
3. jEdit (Windows, Linux, Mac OS X) (FREE)
jEdit is a mature programmer’s text editor with hundreds (counting the time developing plugins) of person-years of development behind it.
Features of jEdit:
Built-in macro language
Plugins can be downloaded and installed from within jEdit using the “plugin manager” feature.
Auto indent and syntax highlighting for more than 130 languages.
Supports a large number of character encodings including UTF8 and Unicode.
Folding for selectively hiding regions of text.
Word wrap.
Highly configurable and customizable.
4. IntelliJ IDEA (Windows, Linux, Mac OS X)
IntelliJ IDEA is a code-centric IDE focused on developer productivity. IntelliJ IDEA deeply understands your code and gives you a set of powerful tools without imposing any particular workflow or project structure.
IntelliJ IDEA is your dream pair-programmer who knows its way around the codebase, makes great suggestions right when you need them, and is always ready to help you shape your code.
Features of IntelliJ IDEA:
Advanced Code Editing
Supported Languages
Technologies & Frameworks
Teamwork Facilitation
Code Quality Features
Integrated Environment
Customization & Extensibility
Coding On Mac
5. Notepad++ (Windows) (FREE)
Notepad++ is a free source code editor and Notepad replacement that supports several languages. Running in the MS Windows environment, its use is governed by GPL License.
Features of Notepad++:
Syntax Highlighting and Syntax Folding
WYSIWYG
User Defined Syntax Highlighting
Auto-completion
Multi-Document
Multi-View
Regular Expression Search/Replace supported
Full Drag ‘N’ Drop supported
Dynamic position of Views
File Status Auto-detection
Zoom in and zoom out
Multi-Language environment supported
Bookmark
Brace and Indent guideline Highlighting
Macro recording and playback
6. SCREEM (Linux)
SCREEM is a web development environment. It’s purpose is to increase productivity when constructing a site, by providing quick access to commonly used features. While it is written for use with the GNOME desktop environment in mind it does not specifically require you to be running it, just have the libraries installed.
Features of SCREEM:
Broken Link Checking
CTags Support
Cut / Paste
CVS Support
Document Structure Display
DTD/Doctype Parsing
Helper Applications
Inline Tagging
Intelliclose
Link Fixing
Page Previewing
Page Templates
Publishing
Recent documents / Projects
Search / Replace
Select Context
Spell Checking
Syntax Highlighting
Tag Trees
Task management
Wizards
7. EmEditor (Windows) (FREE Trial; €32.15)
EmEditor is a lightweight, but extensible, commercial text editor for Microsoft Windows. Although designed for Windows XP, the program is also certified for use with Windows Vista. Available editions of the program include the 32-bit edition and the 64-bit edition, and the program also includes a portability option to set up a removable drive, such as a USB drive, through an Import and Export Wizard.
Feature-wise, the program includes unicode and large file support, a tabbed window design, and is extensible via plugins and scripts (macros), many of which have been written by the users.
Features of EmEditor:
New Snippets Plugin
Brackets/Quotation Mark Auto-Complete
Narrowing
CSV, TSV and DSV
Full Screen View
Clipboard History
Wildcard Support
Workspace Including Undo Information
New External Tools
Pin to List
Save in Protected Folder
Supports Windows 7 Jump List
New Buttons on Toolbar
8. Programmer’s Notepad (Windows)
Programmer’s Notepad is an open-source text editor targeted at users who work with source code.
Features of Programmer’s Notepad:
Bookmarks (both numbered and plain)
Code Folding/Outlining
Docking tool windows
Excellent external tool support with user-configurable output matching
Export to HTML (using CSS) and RTF
File association manager
In-file method/definition navigation (using Ctags)
No limit on file size (although large files may take a while to load)
Non fixed-width font support
Projects and Project Groups with multi-level folders and file system mirroring
Quick Search toolbar with links to Google and Google Groups
Regular expression search and replace
Support for unicode files
Support for windows, unix and macintosh file formats
Syntax highlighting for many languages through “schemes”.
Tabbed MDI interface
Text Clips
Unlimited number of schemes supported, powerful syntax highlighting supporting both user-defined and built-in schemes
User-defined schemes (XML)
Word-wrapping
9. PSPad (Windows)
PSPad editor is a freeware text editor and source editor intended for use by programmers.
Features of PSPad:
Work with plain text
Create web pages
Want to use a good IDE for their compiler
10. HTML-Kit (Windows)
HTML-Kit is an HTML editor for Microsoft Windows. The application is a full-featured HTML editor designed to edit, format, validate, preview and publish web pages in HTML, XHTML and XML -languages.
Features of HTML-Kit:
Navigate tags and scripts
Code Folding
Batch Search and Replace
Upload Options
Incremental Search and Go-To
File Versioning and Auto Backup
HTML-Kit Shorthand
Not Lost in Translation
Remote Editing with Local Copy
Dockable Plugins
Paste Plus
Native Unicode Support
Multi-Page Templates
Re-order Document Tabs
11. EditPlus (Windows)
EditPlus is a text editor, HTML editor, PHP editor and Java editor for Windows. While it can serve as a good Notepad replacement, it also offers many powerful features for Web page authors and programmers.
Features of EditPlus:
Multiple document interface
Overlappable windows
Tabbed document interface
Window splitting
Spell checking
Regex-based find & replace
Encoding conversion
Newline conversion
Syntax highlighting
Multiple undo/redo
Rectangular block selection
Bracket matching
Auto indentation
Auto completion
Code folding (Text folding)
Compiler integration
12. Crimson Editor (Windows)
Crimson Editor is a professional source code editor for Windows. This program is not only fast in loading time, but also small in size (so small that it can be copied in one floppy disk).
Features of Crimson Editor:
Edit multiple documents
Syntax highlighting
Multi-level undo / redo
Project management
Directory tree view window
Find & Replace
Column mode editing
Natural word wrapping
Spell checker
User tools and macros
Edit remote files directly using built-in FTP client
Print & Print preview
13. Coda (Mac OS X))
Coda is a $99 commercial web development application for Mac OS X, developed by Panic.
Features of Coda:
Plugins
Open quickly
Smart Spelling
Subversion
Find across files
14. BBEdit (Mac OS X) (FREE Trial; From $49 to $125)
Whenever you need to work with text, whether you want to create or maintain a website, write a program or shell script, search log files and extract data, or write a few paragraphs (or pages, or books), BBEdit offers what you need to make accomplishing your task quicker and easier.
BBEdit 9 adds over one hundred new features and over one hundred improvements over the previous version.
Features of BBEdit:
Text Handling
Web Development
Programming
File Handling
Display
Search
UNIX & Admin
15. TextMate (Mac OS X)
TextMate brings Apple’s approach to operating systems into the world of text editors. By bridging UNIX underpinnings and GUI, TextMate cherry-picks the best of both worlds to the benefit of expert scripters and novice users alike.
Features of TextMate:
Coding Programs For Mac Free
Ability to Search and Replace in a Project
Auto-Indent for Common Actions Like Pasting Text
Auto-Pairing of Brackets and Other Characters
Clipboard History
Column Selections and Column Typing
Completion of Words from Current Document
CSS-like Selectors to Pinpoint the Scope of Actions and Settings
Declarative Language Grammars for Graceful Mixing and Hacking
Dynamic Outline for Working With Multiple Files
Expand Trigger Words to Code Blocks With Tab-able Placeholders
File Tabs when Working With Projects
Foldable Code Blocks
Function Pop-up for Quick Overview and Navigation
Plug-able Through Your Favorite Scripting Language
Recordable Macros With No Programming Required
Regular Expression Search and Replace (grep)
Run Shell Commands from Within a Document
Support for Darcs, Perforce, SVK, and Subversion
Support for More Than 50 Languages
Switch Between Files in Projects With a Minimum of Key Strokes
Themable Syntax Highlight Colors
Visual Bookmarks to Jump Between Places in a File
Works As External Editor for (s)ftp Programs
Works Together With Xcode and Can Build Xcode Projects
16. SubEthaEdit (Mac OS X)
Coding Software For Mac Free Photo Editing Software
SubEthaEdit is a powerful and lean text editor. And it’s the only collaborative one that is a joy to use. By combining the ease of Bonjour with the world’s best text collaboration engine, it makes working together not only possible but even fun…
Features of SubEthaEdit:
SubEthaEdit includes various advanced features: A UNIX command line utility to enable complex and interactive pipe workflows with your terminal. Overhauled printing, including all bells and whistles, even with collaborative metadata.
Exporting to HTML, again with metadata. Completely user customizable syntax highlighting through styles. Support for editing files as administrator. Improved AppleScript support to allow control of sharing features.
17. CSSEdit (Mac OS X)
Design beautiful, innovative and fast-loading web sites… with a beautiful, innovative and fast app. CSSEdit’s intuitive approach to style sheets and powerful previewing features will make you deliver awesome standards-based sites in no time!
Features of CSSEdit:
With CSSEdit, you see changes to your style sheet applied in real-time. Without saving. Without uploading. Without hassle. For any Web App or HTML file. You can edit style sheets for absolutely any site, on- or offline.
Thanks to our innovative Override technology, you can even apply your open style sheets to any site and see it change instantly! Styling a Web App used to be a cycle of type — upload — refresh. CSSEdit destroys this waste of time. Making your Web 2.0 App beautiful is now easy and productive.

18. Taco HTML Edit (Mac OS X)
Taco HTML Edit is the premier HTML editor and PHP editor for the Mac. As an HTML editor, Taco HTML Edit empowers its users to rapidly create their own web sites. It is designed exclusively for Mac OS X and has many advanced features including spell checking, live browser previewing, PHP previewing, syntax checking, and much more.
Features of Taco HTML Edit:
Component Library
Code Coloring
Preview
Code Completion
Syntax Checking
Live Preview
Code Clips
19. skEdit (Mac OS X)
skEdit is a text editor for Mac OS X, aimed at web designers and programmers.
Features of skEdit:
Tabbed interface
Project based site management
Code hinting and completion
Code folding
Code snippets
Syntax highlighting
File uploading and remote editing (using FTP, SFTP or WebDAV)
HTML Tidy integration
Search and replace with support for regular expressions
Which software for coding is your favorite? Do you use any of these code editors? If you haven’t got one, now you certainly have some promising programs to choose from!
This post may contain affiliate links. See our disclosure about affiliate links here.
0 notes
Text
Mac Make Up For Free

Buy makeup and skin care products on sale at Macy's. Shop our clearance section to get your beauty products for less! FREE shipping on all beauty sale products. Offering more than 100 shades of professional quality cosmetics for All Ages, All Races, and All Genders. Enjoy free shipping and returns on all orders.
Mac Make Up For Free Shipping
Mac Make Up For Free Shipping
Mac Do Makeup For Free
Mac Make Up For Free Slots
Mac Make Up For Free Robux
Optimized Storage in macOS Sierra and later* can save space by storing your content in iCloud and making it available on demand. When storage space is needed, files, photos, movies, email attachments, and other files that you seldom use are stored in iCloud automatically. Each file stays right where you last saved it, and downloads when you open it. Files that you’ve used recently remain on your Mac, along with optimized versions of your photos.

* If you haven't yet upgraded to macOS Sierra or later, learn about other ways to free up storage space.
Find out how much storage is available on your Mac
Choose Apple menu > About This Mac, then click Storage. Each segment of the bar is an estimate of the storage space used by a category of files. Move your pointer over each segment for more detail.
Mac Make Up For Free Shipping
Click the Manage button to open the Storage Management window, pictured below. This button is available only in macOS Sierra or later.
Manage storage on your Mac
The Storage Management window offers recommendations for optimizing your storage. If some recommendations are already turned on, you will see fewer recommendations.
Store in iCloud
Click the Store in iCloud button, then choose from these options:
Desktop and Documents. Store all files from these two locations in iCloud Drive. When storage space is needed, only the files you recently opened are kept on your Mac, so that you can easily work offline. Files stored only in iCloud show a download icon , which you can double-click to download the original file. Learn more about this feature.
Photos. Store all original, full-resolution photos and videos in iCloud Photos. When storage space is needed, only space-saving (optimized) versions of photos are kept on your Mac. To download the original photo or video, just open it.
Messages. Store all messages and attachments in iCloud. When storage space is needed, only the messages and attachments you recently opened are kept on your Mac. Learn more about Messages in iCloud.
Storing files in iCloud uses the storage space in your iCloud storage plan. If you reach or exceed your iCloud storage limit, you can either buy more iCloud storage or make more iCloud storage available. iCloud storage starts at 50GB for $0.99 (USD) a month, and you can purchase additional storage directly from your Apple device. Learn more about prices in your region.
Mac Make Up For Free Shipping
Optimize Storage
Click the Optimize button, then choose from these options.

Automatically remove watched movies and TV shows. When storage space is needed, movies or TV shows that you purchased from the iTunes Store and already watched are removed from your Mac. Click the download icon next to a movie or TV show to download it again.
Download only recent attachments. Mail automatically downloads only the attachments that you recently received. You can manually download any attachments at any time by opening the email or attachment, or saving the attachment to your Mac.
Don't automatically download attachments. Mail downloads an attachment only when you open the email or attachment, or save the attachment to your Mac.
Mac Do Makeup For Free
Optimizing storage for movies, TV shows, and email attachments doesn't require iCloud storage space.
Empty Trash Automatically
Empty Trash Automatically permanently deletes files that have been in the Trash for more than 30 days.
Mac Make Up For Free Slots
Reduce Clutter
Reduce Clutter helps you to identify large files and files you might no longer need. Click the Review Files button, then choose any of the file categories in the sidebar, such as Applications, Documents, Music Creation, or Trash.
You can delete the files in some categories directly from this window. Other categories show the total storage space used by the files in each app. You can then open the app and decide whether to delete files from within it.
Learn how to redownload apps, music, movies, TV shows, and books.
Where to find the settings for each feature

The button for each recommendation in the Storage Management window affects one or more settings in other apps. You can also control those settings directly within each app.
If you're using macOS Catalina, choose Apple menu > System Preferences, click Apple ID, then select iCloud in the sidebar: Store in iCloud turns on the Optimize Mac Storage setting on the right. Then click Options next to iCloud Drive: Store in iCloud turns on the Desktop & Documents Folders setting. To turn off iCloud Drive entirely, deselect iCloud Drive.
In macOS Mojave or earlier, choose Apple menu > System Preferences, click iCloud, then click Options next to iCloud Drive. Store in iCloud turns on the Desktop & Documents Folders and Optimize Mac Storage settings.
In Photos, choose Photos > Preferences, then click iCloud. Store in iCloud selects iCloud Photos and Optimize Mac Storage.
In Messages, choose Messages > Preferences, then click iMessage. Store in iCloud selects Enable Messages in iCloud.
Mac Make Up For Free Robux
If you're using macOS Catalina, open the Apple TV app, choose TV > Preferences from the menu bar, then click Files. Optimize Storage selects “Automatically delete watched movies and TV shows.”
In macOS Mojave or earlier, open iTunes, choose iTunes > Preferences from the menu bar, then click Advanced. Optimize Storage selects “Automatically delete watched movies and TV shows.”
In Mail, choose Mail > Preferences from the menu bar, then click Accounts. In the Account Information section on the right, Optimize Storage sets the Download Attachments menu to either Recent or None.
Empty Trash Automatically: From the Finder, choose Finder > Preferences, then click Advanced. Empty Trash Automatically selects “Remove items from the Trash after 30 days.”
Other ways that macOS helps automatically save space
With macOS Sierra or later, your Mac automatically takes these additional steps to save storage space:
Detects duplicate downloads in Safari, keeping only the most recent version of the download
Reminds you to delete used app installers
Removes old fonts, languages, and dictionaries that aren't being used
Clears caches, logs, and other unnecessary data when storage space is needed
How to free up storage space manually
Even without using the Optimized Storage features of Sierra or later, you can take other steps to make more storage space available:
Music, movies, and other media can use a lot of storage space. Learn how to delete music, movies, and TV shows from your device.
Delete other files that you no longer need by moving them to the Trash, then emptying the Trash. The Downloads folder is good place to look for files that you might no longer need.
Move files to an external storage device.
Compress files.
Delete unneeded email: In the Mail app, choose Mailbox > Erase Junk Mail. If you no longer need the email in your Trash mailbox, choose Mailbox > Erase Deleted Items.

Learn more
The Storage pane of About This Mac is the best way to determine the amount of storage space available on your Mac. Disk Utility and other apps might show storage categories such as Not Mounted, VM, Recovery, Other Volumes, Free, or Purgeable. Don't rely on these categories to understand how to free up storage space or how much storage space is available for your data.
When you duplicate a file on an APFS-formatted volume, that file doesn't use additional storage space on the volume. Deleting a duplicate file frees up only the space required by any data you might have added to the duplicate. If you no longer need any copies of the file, you can recover all of the storage space by deleting both the duplicate and the original file.
If you're using a pro app and Optimize Mac Storage, learn how to make sure that your projects are always on your Mac and able to access their files.
0 notes
Text
Jabra Speak 410 For Mac

What we’ve got on the review bench today is another quality audio product from a company known to make such great devices, this time in the form of a Conference Call aimed speakerphone: the Jabra Speak 410. This device is able to act as a speakerphone by connecting to your PC via USB, sound coming from the 3.5mm headset jack or its own speaker, with sound-in covered by one omni-directional microphone allowing what Jabra notes (and we agree) is a 1-to-2 meter range. This speaker works with Windows machines and Apple computers of all kinds with both plug-and-play capabilities as well as included drivers on a mini-CD in the box – if need be.
This device is pretty darn slick. You pop it out of the box and you’ve got a carrying case that zips up around it right away. There’s a USB cord that’ll allow you to get a couple of feed away from the device you’re plugging into, and just a couple of taps on your computer and you’re ready to go. I had the Jabra Speak 410 up and running in under 5 minutes, starting at the moment I tried to open the box – and it had tape on it!
Jabra Speak 410 Amazon

You’ll find that the device is extremely intuitive to use with touch-sensitive buttons in each location around the speaker. There’s volume up, volume down, microphone on, microphone off, Answer/on, End/off, and a headphone jack. You can keep the device plugged in and use the hangup button to turn it off at night, or you can simply unplug it. There’s no battery capacity here because you’ve got to have it plugged in for it to act as a speaker / microphone anyway, and everything works with the one build-in USB cord right out of the box.

As you’ll see in the Q and A section on the Speak 410 on Jabra’s website, this device will receive software updates throughout its lifespan. This should be indicator enough that Jabra isn’t messing around with its products like so many other companies do.
Not many other companies offer a speakerphone that would benefit from software updates, of course, but right when you first plug this one in to your PC, you can use the disk that comes in the box to install a program called Jabra PC Suite. From there, you’ll be upgrading to newer and more excellent versions of the device’s firmware through the future. This won’t work on a Mac (not yet, anyway), and if you have no idea what any of this means, you shouldn’t need to do it anyway as it almost certainly wont be vital to your device’s future. No worries!
Jabra SPEAK 410 Features. Wideband audio for exceptional sound quality. Omni-directional microphone. Fully integrated call controls for remote softphone operation. Page 4: Installation CONNECTING To connect the Jabra SPEAK 410, connect the USB cable attached to the speakerphone to any available USB port on a PC or power-supplied hub. The Speak 410 is the easy to use personal conference call speakerphone with simple USB connectivity for efficient UC meetings whenever and wherever you need them. Comes with a protective neoprene pouch to keep it scratch free and ideal for travelling.
Jabra Speak 410 Macbook
Wrap-up
In the end, this device is a boost for your computer’s microphone and speaker system. If you’ve already got these enhancements over the basic build on your PC, then you might never need a device such as this. On the other hand, the microphone quality is surprisingly clear and the speaker can get quite loud, the quality quite surprising for the size of the device, bass thumping and all.

The only down side on this device is the price – at right around $100 USD, this might be a hold-back for some consumers who just want it as an everyday device. For those of you looking to bump up the capabilities of your computer with which you conference call with colleagues every day – we certainly recommend the Jabra Speak 410.
Jabra Speak 410 Best Buy
Story Timeline
0 notes
Text
Flashfxp For Mac Os

Flashfxp Mac Os X
Flashfxp Xbox
Flashfxp For Mac Os 10.10
Flashfxp Mac Os
1193
Os-x tiger Free Download,Os-x tiger Software Collection Download. Tiger-like volume display 1.2 This Widget displays the system volume and/or mute like Mac OS X tiger does.: Download now. SecureFX for Mac OS X - A highly configurable secure file transfer client for SFTP, FTP/TLS. FlashFXP - FlashFXP uses a familiar explorer-like interface that even the most novice user can master in minutes. It offers features such as drag-and-drop, FTP, SFTP, and SSL/TLS transfers, enterprise-friendly rollout options, firewall and proxy. Secure, reliable, and efficient file transfers. Use FlashFXP to publish and maintain your website. Upload and download files, such as documents, photos, videos, music and more! Transfer or backup local and remote files, plus (FXP) server to server ftp transfers. FlashFXP offers unique and complimentary advanced features for client configuration. The Best Free FTP Software app downloads for Mac: FileZilla Cyberduck Fetch ForkLift CuteFTP Mac Professional Transmit CrossFTP Classic FTP Plus Flow.
FileZilla
Открытое ПО | Mac, Windows, Linux
FileZilla - свободная программа, являющаяся отличным инструментарием для безопасной работы с сайтами. По сути, FileZilla - это FTP клиент для работы с удаленными FTP/SFTP серверам с локального компьютера.
ftp, file-transfer, ftp-client

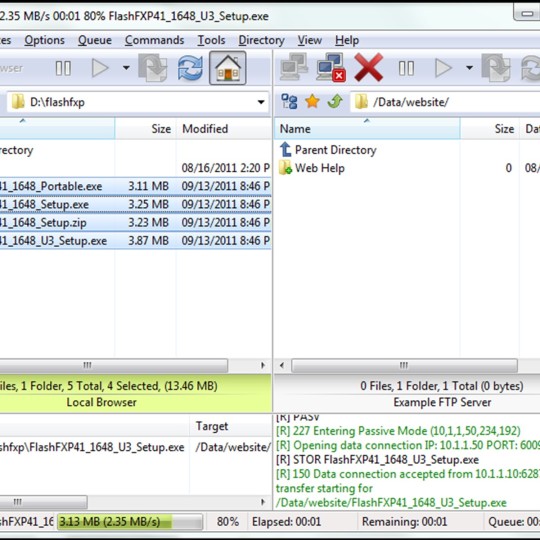
357
WinSCP
Открытое ПО | Windows
WinSCP is an open source SFTP client and FTP client for Windows. Its main function is the secure file transfer between a local and a remote computer. Beyond this, WinSCP offers basic file manager...
ftp, ssh, sftp, ftp-client
71
FireFTP
Бесплатно | Mac, Windows, Linux, firefox
FireFTP is a free, secure, cross-platform FTP client for Mozilla Firefox which provides easy and intuitive access to FTP servers. FireFTP is an add-on for Firefox. It is VERY easy to use.
ftp, ftp-client
16
CarotDAV
Бесплатно | Windows
CarotDAV is a Simple WebDAV / FTP / SkyDrive / DropBox / GoogleDrive / Box / SugarSync client for Windows OS, available free of charge. It is also able to read GoogleDocs or IMAP.
file-transfer, cloud-storage, dropbox, webdav, dropbox-sync
15
SmartFTP
Платно | Windows
SmartFTP allows you to transfer files across the Internet. It features an Explorer-like, customizable interface and supports drag-and-drop functions. Multiple FTP connections can be opened at the same time,...
ftp, file-transfer, ftp-client
10
CuteFTP
Платно | Mac, Windows
Cute FTP is an utility for transferring files between your computer and a remote File Transfer Protocol (FTP) server anywhere on the Internet. It offers the perfect blend of ease-of-use and performance for...
ftp, file-transfer, ftp-client
3
Interarchy
Платно | Mac
For close to 17 years Interarchy has been the leading Mac FTP client. First released in 1993, Interarchy has been used by hundreds of thousands of Mac users to upload, download and transfer files across the...
ftp, sftp, ftps, rackspace, s3-client
1
Free FTP
Бесплатно | Windows
Free FTP is a simplified, intuitive, and best of all free FTP client! It uploads and downloads files quickly and reliably, keeps your FTP server settings in one place, and allows you to pause or cancel...
html, ftp, zip, protocol, free-ftp
1
Flashfxp Mac Os X
bareFTP
Открытое ПО | Linux
Flashfxp Xbox
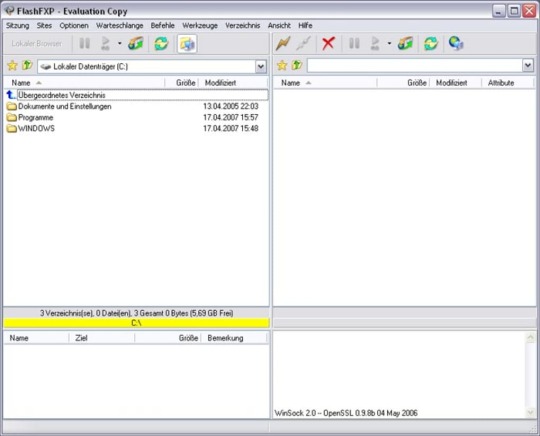
bareFTP is a file transfer client supporting the FTP, FTP over SSL/TLS (FTPS) and SSH File Transfer Protocol (SFTP). It is written in C#, targeting the Mono framework and the GNOME desktop environment. bareFTP...
ftp, ssh, gnome, ftp-client, ssh-client
1
AnyConnect
Бесплатно | Windows
AnyConnect is a a free FTP/FTPS/SSH/Telnet/Terminal client software. AnyConnect supports multiple connections at once in a mixed mode where you can both FTP and make a terminal connection at the same time....
ftp, ssh, terminal, sftp, telnet
1
UpFTP
Открытое ПО | Windows
Inspired by the Upload Manager of Linux Mint, UpFTP 2 is a Windows program that allows you to share files using an FTP server in a couple of clicks.
file-sharing, share-files, ftp, open-source-projects, ftp-upload
0Synchromagic Pro
Платно | Windows
Synchronization & backup for local network and FTP
backup, ftp, synchronization, sftp, synchronize
0FTPCafe FTP Client
Условно-бесплатно | Android

File transfers using: - FTP - FTPS (Implicit and Explicit FTP over SSL). - SFTP (FTP over SSH). Login with password or RSA/DSA OpenSSL (Traditional SSLeay PEM) or ConnectBot (PKCS#8 PEM) private key. -...
server, ftp, file-transfer, ssh, sftp
0Steed
Платно | Windows
Stop bothering to jump between applications, you can handle multiple protocols within Steed. Whether you need access to an FTP or SFTP server, or store files in the cloud on Amazon S3 or Microsoft Azure, Steed...
ftp, sftp, ftp-client, amazon-s3, azure
0Syncplify.me FTP!
Бесплатно | Windows
FTP! is the interactive graphical FTP(S) and SFTP client by syncplify.me. It supports the FTP, FTPS (FTP over SSL, both implicit and explicit) and SFTP protocols, and it's very easy to use as well as...
ftp, sftp, ftp-client, ftps, sftp-client
0Staff-FTP
Бесплатно | Windows
Staff-FTP is a Freeware FTP-Client that has many unique features you will not find in any other software.
ftp, ftp-client
0FtpScripter
Условно-бесплатно | Windows
FtpScripter is a FTP/S (with support for implicit and explicit SSL) and SFTP client, designed from the ground up for your unattended and automated file transfer tasks. No drag'n'drop GUI, but a...
ftp, file-transfer, ssh, sftp, ftp-client
FlashFXP 5.4 Crack Full Serial Key 2017
FlashFXP 5.4.0 Crack full serial key is a powerful FTP client for Windows. With its intuitive and customizable user interface, Flash FXP provides the fastest and easiest way to transfer or backup files between your local computer and a remote server, or directly between two servers. In addition to FTP, FlashFXP Crack for mac and windows provides additional security with SFTP (Secure Shell/SSH), FTPS (Secure Socket Layer (SSL) over FTP) and a smooth one time password support.
FlashFXP Crack with serial key and keygen unique features include multi-firewall and proxy support, speed limiting, server file searching, remote editing with automatic (or manual) uploading, automated transfer scheduling with email notifications, priority transfer lists and extensive file transfer rules. Therefore download now FlashFXP 5.4.0 Crack build 3965 free.
FlashFXP Crack build 3965 Key features:
High performance FTP file transfers.
On-the-fly compression (MODE Z).
Download and upload speed limiting. So now download FlashFXP activation keys and patch
Support for FEAT and “stat -l” fast directory listing reduces overhead and improves compatibility.
Remote Server folder caching.
New Improved performance on multiple small file transfers.
Automatic and manual time zone support.
Automatic transfer resume.
Transfer rules based on size. So get now FlashFXP Crack mac and windows.
Automatic ASCII/Binary selection.
Anti-idle keeps connection active.
Roll back on file transfer resume to prevent corruption.
Transfer files of all sizes, no 2gb/4gb file size limit.
:System Requirements:
Windows Xp | Vista | 7 | 8 | 8.1 | 10 [32-bit | 64-bit]
Intel Processor For Mac and Windows
Mac OS X 10.8 or later
-:How To Install:-
1. Unpack and install FlashFXP Crack Full serial keys
Flashfxp For Mac Os 10.10
2. Go through Installation Guide provided in File
3. Done.!.
FlashFXP 5.4 Crack Full Serial Key 2017
Flashfxp Mac Os
Link Given Below
0 notes
Text
Origin For Mac Ea

Origin For Mac White Screen
Origin For Mac Os Catalina
Download the latest version of Origin for Mac. Access Electronic Arts video games from this platform. Origin is a digital shopping and downloading platform. The Sims 3 Mac Help Thread - - The Sims 4 Mac Help Thread -The Sims 3 Mac super patch 1.67 - - Origin Reset Tool for Mac -I am not affiliated with EA in anyway - Please do.
Origin is a digital shopping and downloading platform from Electronic Arts. Basically, it's a sort of Steam that you need to install and use if you want to play any of this North American company's most important releases.
To enjoy all the latest games from EA, you'll need to access this platform, through which you can comfortably buy games and download them as many times as you need to. You can also maintain a list of friends and talk to them whenever you want - even gift them games.
A great thing about Origin is that it allows you to keep everything on the Internet, so you don't have to worry if something happens to your computer. You can always go back and re-download your purchase, even starting a saved game right where you left off, since those files are stored in the cloud.
On top of everything, the platform comes with some free games so that you can start enjoying the system without even having to take out your wallet. Battlefield Heroes, Need for Speed World, and Battleforge are just some of the titles that you can play.
At the moment, Origin is not as essential as Steam. But if EA continues to make its big new releases exclusive to the platform, there's no doubt that you'll need to have it installed on your hard drive.


Origin For Mac White Screen
Requirements
Origin For Mac Os Catalina
Minimum system requirements:OS X 10.6.8Intel Core 2 Duo processor
0 notes
Text
Star Wars Battlefront For Mac Os

The Empire’s ultimate weapon makes its debut in STAR WARS™ Battlefront™ Death Star. For the first time, you can take part in exciting space battles or fight against the Empire inside the Death Star with new maps, new weapons, Star Cards, and two new heroes – bounty hunter Bossk and everyone’s favorite Wookiee, Chewbacca.
Celebration Edition Upgrade. Star Wars™ Battlefront™ II: Celebration Edition Upgrade. Upgrade your copy of STAR WARS™ Battlefront™ II to the new STAR WARS™ Battlefront™ II: Celebration Edition and own the complete collection of customization content acquirable through in-game purchase from launch up to – and including – items from STAR WARS™: THE RISE OF SKYWALKER™!.
Star Wars Battlefront For Pc
Star Wars Battlefront Ii Mac Os
Star Wars Battlefront For Mac Os Versions
Star Wars Battlefront For Mac Os 10.10
Year of release: 2005
Version: 1.0
Hey guys, as mentioned in this thread, Star Wars Battlefront is not compatible with Mac OS. I don't want to start a discussion about PCs and Macs and which is more powerful, since they both have their strengths and weaknesses. 38 Games Like Star Wars Battlefront 2 for Mac. Star Wars Battlefront™ II adds all-new space combat, playable Jedi characters, and never-before-seen environments straight out of Star Wars:Episode III Revenge of the Sith.
Developer: Pandemic Studios
Platform: Intel only
System requirements:
Mac OS version: OS X 10.4.11 or higher
Min. Processor: Intel Core Duo
Min RAM: 1024 MB
Video RAM: 128 MB
Harddisk space: 5,2 GB
interface Language: English
medicine: Not required
Description: The sequel to the popular multiplayer shooter’a in the entourage of “Star Wars”
significant changes have affected the single-player campaign. If earlier it was a set of skirmishes with bots, but now there will appear certain tasks, designed to fill the “single” sense. To heighten the diversity of the locations introduced a rigid rule of “each of the 12 planets – on one level.” Among them – Utapau, place of residence is evil General Grievous and the volcanic planet Mustafar, where they held the final battle between Obi-WAN and Annie Skywalker.


Battles in Star Wars: Battlefront 2 unfold not only on earth but also in space. Armed to the teeth with heavy cruisers, shuttles with the landing groups and fighters of all models (including the famous X-Wing and TIE Fighter) attached.
Star Wars Battlefront For Pc
the List of classes will increase, but LucasArts does not hurry to reveal a new type of character. Existing classes will be the finalization – the authors intend to make them truly unique. The Jedi, who played in the first SWB role immortal terminators, after performing a certain number of conditions are available to everyone. However, despite the awe-inspiring abilities and lightsaber in hand, they won’t “last argument”.
among the other joys declared: running, ability to change character class on the fly (this is now enough to approach the nearest “command post”) and the server, carefully leading the personal statistics of players.
the Graphics and sound have remained the same – the basic platform is again taken PS2. PC version will boast up to 64 players on one map and the lack of rigid fixation of the frame rate (which irritated many in the Star Wars: Battlefront).
On the Internet to play will not work as it requires the original Sidi Kay.
Additional information
the Owners GMA950 download is not recommended, the game runs but there are terrible problems with graphics.
Magnet Link: magnet:?xt=urn:btih:A3B42C4B655E507C022D14C5AE1FBEB34F77CCBA&tr=http%3A%2F%2Fbt2.t-ru.org%2Fann%3Fmagnet | Size:
Star Wars Battlefront Ii Mac Os
3.73 GB
Star Wars Battlefront For Mac Os Versions
Поделиться:
Star Wars Battlefront For Mac Os 10.10
0 notes
Text
Cd Drive For Mac External

You Will Be Impressed. Dell really managed to surprise the users with the DW316 slim. Product Title External DVD Drive USB 3.0 Burner,Optical CD DVD RW Row Reader Writer Player Portable for PC Mac OS Windows 10 7 8 XP Vista (Black) Average Rating. Shop for external cd dvd drive for mac at Best Buy. Find low everyday prices and buy online for delivery or in-store pick-up.
Cd Drive For Macbook
Best External Cd Drive For Mac
Sharing discs
If your Mac doesn't have a built-in optical drive and you need to use a CD or DVD, you can connect an external drive like the Apple USB SuperDrive. You can also share discs from the optical drive of another Mac, or from a Windows computer that has DVD or CD Sharing Setup installed. DVD or CD sharing allows you to access documents stored on these discs, and allows you to install some software.
DVD or CD sharing isn't designed for some kinds of optical media. Connect a compatible optical drive directly to your Mac if you need to use one of these discs:
Audio CDs
Blu-ray or DVD movies
Copy protected discs (such as some game discs)
Recordable CDs or DVDs that you want to burn or erase
Microsoft Windows installation discs
If you have a Microsoft Windows install disc that you want to use with Boot Camp, you can create a disc image of this disc and copy it to a USB flash drive for installation instead.
Setting up a Mac to share discs
To share discs from a Mac that has a built-in or external optical drive, use these steps:
On the Mac that has an optical drive, choose System Preferences from the Apple menu.
Click the Sharing icon in the System Preferences window.
Make sure you've entered a name that you can easily recognize in the Computer Name field.
Enable the checkbox for DVD or CD Sharing.
You can also restrict who has access to your optical drive by selecting 'Ask me before allowing others to use my DVD drive.'
Setting up a Windows PC to share discs
To share discs from a Windows PC that has a built-in or external optical drive, use these steps:
Download and install DVD or CD Sharing Update 1.0 for Windows.
From Control Panel, open 'Hardware and Sound'
Click 'DVD or CD Sharing Options.'
Select the checkbox for DVD or CD Sharing.
You can also restrict who has access to your optical drive by selecting 'Ask me before allowing others to use my DVD drive.'
If you're sharing discs from a Windows computer and your PC has firewall software enabled, be sure to allow access to the following programs from your firewall:
ODSAgent
RemoteInstallMacOSX
Use a shared DVD or CD
After you've enabled DVD or CD Sharing, you can use that computer's optical drive at any time. Insert a disc in the optical drive of the computer that's being shared. The disc should then be available on any Mac that's connected to the same network.
On the Mac that doesn't have an optical drive, open a Finder window.
Select Remote Disc in the Devices section of the sidebar. You should see the computer that has DVD or CD Sharing enabled.
Double-click the computer's icon, then click Connect to see the contents of the CD or DVD available from that computer.
If you can't use a shared disc
If your Mac already has a built-in optical drive, or an external optical drive connected, you won't see the Remote Disc feature appear in the Finder or other apps.
If you're using a compatible disc and you don't see it from Remote Disc, make sure the sharing computer is turned on, is connected to the same network as your Mac, and has a compatible CD or DVD in its optical drive. If you've enabled the option to ask for permission before using the drive, click Accept on the computer that is sharing its optical drive.
Get a data lifeguard for Mac
Disk Drill brings deleted files back from the dead.
Most of the time, when you connect an external hard drive to your Mac’s USB port, you soon see it mount on the desktop. Apple likes to ensure these are easy to find, so they also appear in the Finder in the left-hand column under Devices, since Mac’s treat them the same way as another computer.
However, sometimes, an external hard drive doesn't show up. It’s annoying, especially when you need to transfer something right then. And besides, there can be a risk that data on the external USB pen, hard, or flash drive is corrupt, which means you can’t transfer what you need between devices at all.
Corrupt data can be one reason your Mac won't recognize an external drive, but there are other reasons too. Let’s take a look why this is happening and how you can get an external drive to appear on your Mac and get recover data to access to your documents.
How to fix an external disk drive that won't show up on a Mac
Why an external disk drive is not showing up? There could be a few reasons why a USB flash drive isn’t making an appearance.
Open an External Drive Not Showing on Mac
Get a huge set of top utilities for troubleshooting external hard drives not mounting on a Mac
Start with the basics:
Check whether the drive is properly plugged in. It sounds obvious, but since this relies on a wire - either a USB cable or HDMI cable - if it’s not connected properly then it won’t appear on your desktop.
Faulty cable. Assuming it’s plugged in correctly, not wobbly or loose, the cable could be at fault. Try connecting the same device with a different cable.
Damaged USB or flash drive port. It could be a hardware issue with the Mac. If you’ve got another port, try connecting the device to that one.
Reboot your Mac. Sometimes, if a USB disk won't boot, the cause is macOS issue. Hopefully, some data damage that can be fixed by restarting. Choose the Apple menu > Restart. Or press and hold the power button and, when a dialog box appears, click the Restart or press R. Restarting your Mac essentially clears your macOS’s memory and starts it up fresh.
Incorrectly formatted drive. Not every external drive is optimized for Macs. It could be that you are trying to connect something only fit to interact with Windows devices. If you’ve got a PC or laptop, it’s worth connecting and seeing if you can access the files through another device. The best way to look for an incorrectly formatted drive is to go to
Apple (in the top toolbar menu) > About This Mac > Storage.
See if the external drive shows up here. For more information, go to the same menu option, then select System Report.
Mac not formatted to display external drives on the desktop. It could be that your Mac already recognizes the device, but just isn’t showing its icon on the desktop screen. Even if that is the case, the drive will still appear in the left-hand column of the Finder menu under Devices. You should be able to access your drive that way, and, in the Finder menu under Preferences > General, you can check External Drives to ensure that from now on it shows up on your desktop too.
Reset NVRAM. To do this, shut down or restart your Mac, switch it back on and immediately press these four keys together for at least 20 seconds: Option, Command, P, and R. It should look as though your Mac has started again; if it has, release the keys when you hear the second startup chime. Hopefully, the hard drive has shown up now.
Check Apple’s Disk Utility to see if an external drive is showing up. Disk Utility is within System Preferences, or you can find it using Spotlight. If it is visible, then click the option to Mount, which should make it visible on the desktop and in the External Drives option in the Finder menu.
Unfortunately, if none of those options has worked and the external drive still isn’t visible, then it could have crashed, or be well and truly broken. But there might still be a way you can recover the data on the external drive.
How to show connected devices in Finder
Go to the Finder menu and select Preferences (Cmd+comma).
From General tab tick External disks to ensure that from now on it shows on the desktop.
In the Sidebar tab you can choose which folders and devices will be shown in the left-hand column of the Finder window.
How to add cloud storages to Finder
You can also mount cloud storage as local drive on your Mac. By connecting Google Drive, Dropbox, or Amazon to your computer, you get more space for securely accessing and sharing files. For your ease, add cloud drives to Finder with CloudMounter app, so that you keep them close at hand. You can read detailed instructions on managing cloud storage as local drives here.

Repair the failed external drives with First Aid
If your drive is having problems, you can try to fix them yourself with First Aid and therefore get access to your files. First Aid tool will check the disk for errors and then attempt a repair as needed. It helps to verify and repair a range of issues related to startup HD and external drive problems. If you are able to fix the hard drive or SSD in your Mac (or an external drive) using Disk Utility you will hopefully be able to recover your files.
To run Fist Aid on an external hard drive:
Open Disk Utility. You can searching for it using Spotlight Search or via Finder > Application > Utility
Check on your external hard drive, click the First Aid tab and select Run to start running diagnostics.
If First Aid successful in fixing errors, the external drive should be available to mount. If the utility unable to repair issues, your drive truly is broken or formatted using a file system that the Mac cannot read - in this way we suggest you follow the next steps to recover data from a damaged disk drive.
How to recover data from a crashed drive
Thankfully, there is an app for that. Disk Drill is the world’s premier data recovery software for Mac OS X. Powerful enough to retrieve long-lost, mistakenly deleted files from Macs, external hard drives and USB drives and camera cards.
Get a file recovery app
With Setapp you get a pack of professional tools for file recovery and Mac maintenance.
An easy way to recover lost files on an external hard drive
Providing you already have Disk Drill Pro version, which you can get automatically by downloading from Setapp:
Connect your drive to the Mac.
Quit all other applications on the Mac, especially those that may be trying to access the external drive (e.g. iPhoto, Words)
Launch Disk Drill.
Click on the external drive that you are trying to recover files from. If it has partitions, you will see all of them. If, however, you still don’t see any volume to the external drive then you may need to try some of the steps above again or read the Disk Drill Scanning FAQs.
To avoid the external drive being accessed during the recovery process, click Extras next to the drive or drive partition or file, then select Remount Volume As Read Only. A padlock will appear, protecting the drive during the process.
Now click Rebuild (or Recover) next to the file(s) you are trying to recover. Once the scan is finished - it may take some time if the files are large - a list of files will appeal.
Next, click Mount Found Items as Disk button on the bottom-left below the scan results.
Disk Drill “strongly suggest saving the files to a different drive than the one you are trying to recover files from. Saving to the same drive substantially lowers your chances of recovery.”
A drive icon will appear, which once you double click will give you the option to open the files as you would do before they were lost. Drag them to another location, such as your desktop or a folder on your Mac.
Open the files to ensure they have been recovered properly and safely eject the external drive.
Cd Drive For Macbook
Disk Drill does have other ways to recover lost files but assuming there aren’t complications, this method is the most effective. Disk Drill Pro recovery app is available from Setapp, along with dozens of Mac apps that will make your life easier. Never have to worry about a crashed or corrupted external drive again.
A few more tips on getting your files back
Macs and third-party apps that look after Macs, such as Disk Drill and iStat Menus come with a S.M.A.R.T. (also known as Self-Monitoring, Analysis and Reporting Technology) status monitor. If a SMART check reports errors, then it could mean the hard drive is at risk of failing completely. Within Disk Utility and Disk Drill, there are several solutions for this: Repair Disk Permissions and Repair Disk. If neither work, it’s recommended that you backup all of the data from the disk, erase, then run a SMART check again. The external hard drive should show up as Verified.
Partitions can get lost within hard drives, temporarily hiding all of the information contained within. Disk Drill can help to identify and restore this information.
Within Disk Drill, you can restore data when a hard drive is damaged or add formatting, which is also something Disk Utility can help with.
CleanMyMac, another useful app available from Setapp, can help you identify external hard drive errors and repair them. It is an essential tool worth trying when you’re having external hard drive difficulties.
Try all these apps for free
Get a huge set of top apps for keeping your Mac in shape. Best utilities in one pack, give it a go!
Alternative ways to recover data from an external hard drive
Reset the System Management Controller (SMC) if your Mac shuts down when you plug in an external hard drive. Then use a different port to connect the external hard drive. If you’ve got a battery that you can’t remove:
Shut down and unplug the power adapter
Press Shift-Control-Option and the power button at the same time. Do this for 10 seconds
Release all keys
Plug the power adapter back in and switch your Mac back on
For Macs with removable batteries, you need to switch them off, remove the battery, then press and hold the power button for 5 seconds. After that, put the battery back in, plug in the power adapter and switch the power on again.
What’s your file format? One reason your Mac isn’t recognizing the hard drive is the file format. Windows uses NTFS file formats, while Macs, up until the introduction of Sierra, have used HFS+. Now, Apple has introduced the Apple File System (APFS) for newer operating systems. It is possible to format a hard drive so it can be read on Mac and Windows computers, providing you format using exFAT. However, if you’re having problems accessing the files and the issue is due to formatting, you will need to connect it to a device it can be read on, and then format the files correctly for the computer you are going to use it on next.
How to make Ext2/Ext3 drives readable on Mac
The common issue is Ext2- and Ext3-formatted drives are not readable on macOS. There are two ways to access such external drives on your Mac – via Linux OS or FUSE system. The easiest would be installing Linux to a secondary drive or virtual machine.
If you go with Linux installation, dual boot your Mac with Linux on another drive and use FAT32 as a transfer intermediary. If you don’t have a drive to install Linux to, use virtual machine as an interface for it. Transferring can be done the same way – with FAT32, or via network.

Another option for reading Ext2/Ext3 disks is mounting disk with Filesystem in Userspace (FUSE). Basically, it works as an extra interface enabling file system access via specially installed modules. Here’s how to mount drives with FUSE:
Install FUSE for macOS or MacFUSE as well as fuse-ext2 module.
Use the following Terminal command to enable Disk Utility’s debug menu and see all partitions: defaults write com.apple.DiskUtility DUDebugMenuEnabled 1
Attach your Ext2/Ext3 drive and locate the device name via Disk Utility.
In your user account, create a folder to be used as a mount point.
Use the following Terminal command to mount the drive as read-only: fuse-ext2 /dev/disk2s2 /Volumes/mountpoint
For write support, use the command: fuse-ext2 -o force /dev/disk2s2 /Volumes/mountpoint
And that’s not the only case where Terminal helps you access external drive.
Employ the handy all-powerful Terminal, which always comes forward with solutions for difficult problems. Especially if System Information does recognize the USB or hard drive, but continues to hide it from you, disconnect the drive and try to find it using the Terminal, which you can find in Applications > Utilities.
Once in the Terminal, type in the command diskutil list
A list with information about volumes and drives should appear
Look for a section labelled /dev/disk_ (external, physical)
Make a note of the whole line after the word disk
Now put the following command into the Terminal diskutil info disk followed by the number or digits assigned to that disk
Now you should see detailed information about the drive, therefore confirming that your Mac can and does recognize it
Eject using the Terminal by entering the command diskutil eject disk followed by the number or digits assigned to that disk
Physically remove the disk from you Mac
Plug it back in and your Mac should recognize it
Best External Cd Drive For Mac
Console is also reliable when it comes to solving tricky problems, although it isn’t always that easy to use. You can find Console under Applications > Utilities > Console. Console shows if an external drive or any error is detected under the Errors and Faults tab. If no errors show up, then the problem is not caused by the device.
To sum up, there are lots of potential solutions for a Mac not reading an external hard drive. If we were to pick one, Disk Drill seems to be the most well-rounded, offering plenty of customizations and power in an easy-to-use interface. Disk Drill Pro recovery app is available via Setapp, along with 150+ Mac apps that strive to make your life much much easier. At the very least, you’ll never have to worry about a crashed or corrupted external drive ever again.
Setapp lives on Mac and iOS. Please come back from another device.
Meantime, prepare for all the awesome things you can do with Setapp.
Read on
Sign Up
Setapp uses cookies to personalize your experience on our website. By continuing to use this site, you agree to our cookie policy.
0 notes
Text
Defragment For Mac Os X

Alternative Way to Defrag Mac Method 1. Install Latest Updates of Your MacOS. The latest update will provide stability, better performance,. Clean Unnecessary and Big Files. By deleting the files which are big and useless, you can improve the. Boot Mac in Safe Mode. Aug 11, 2017 However, despite the obvious advantage, a Mac running any version of OS X later than 10.2 generally doesn’t need to be defragmented. The reason for this is that OS X and macOS have their own built-in Apple Mac utilities that clean up fragmented files from the hard drive. Therefore, for most users it eliminates the need to perform a regular defrag.
You might be experiencing some performance issues with your Mac and you knew from your PC days about defragging computers. Well, you won’t find any command or utility to do that on Mac. The point is that the Mac File System is designed differently than Microsoft's, and it defragments files automatically. However, there are still some situations when you may need to defrag Macbook once in a few years.
In this article, we’ll tell you how to defrag a Mac, all advantages and pitfalls of doing this, and what alternatives to defragging are out there. Anxious to find out? Then let’s start!
Do you need to defragment a Mac?
First of all, let’s find out why we do a Mac disk defrag. To cut a long story short, defragmentation is aimed at boosting a computer’s performance by reorganizing the data on your drive. As a result, the related bits are grouped together and loading files and programs takes less time. Simply put, Mac defragment moves everything back in order and can greatly speed up a slow system.

However, despite the obvious advantage, a Mac running any version of OS X later than 10.2 generally doesn’t need to be defragmented. The reason for this is that OS X and macOS have their own built-in Apple Mac utilities that clean up fragmented files from the hard drive. Therefore, for most users it eliminates the need to perform a regular defrag. But there is an exception to every rule and in a few rare cases a defrag for Mac can make a difference.
When do Macs need to be defragged?
If your hard drive is more than 90 percent full, the macOS may have problems with automatic defragmentation routines. This situation is common for multimedia creators who produce plenty of large files in pro tools like Adobe Premiere, Final Cut or Photoshop.
Therefore, if you have hundreds or even thousands of large (1GB and larger) movies, audio files or creative documents, you should consider removing them to free up the storage. Another alternative is defragging a Mac.
Concerning the first option, there is a fast and safe way to remove unnecessary files from your Mac — a powerful app CleanMyMac X. It finds above 74 GB of junk on an average computer, including old and large files, app leftovers and system clutter. It helps to boost computer performance, so you probably won’t even need to defrag a Mac.
However, if you still wonder “How do I defrag my Mac?” read on. We’ve prepared all essential guidelines for you.
How to defragment a Mac

One of the simplest and most user-friendly methods of a Mac defrag is to use a trusted third-party defragmentation program. But before choosing and installing the app, make sure to back up your data. Should something go wrong, you’ll be able to easily restore all necessary files. For this purpose, you can use Time Machine, iCloud, Dropbox or any other external storage at hand.
When choosing the defragmentation app, pay a special attention to the compatibility requirements. Macs running operating systems older than OS X 10.2 are not compatible with the latest modern defragmentation software, so finding a relevant tool is challenging.
Once you’ve installed the program of your choice, open the utility and follow the instructions of a disk defragmenter for Mac. Give the process plenty of time to complete and don’t move your computer anywhere until the defragmentation is finished. Usually, you’ll need to restart your Mac as well.
Will defragmentation harm my HDD?
You may not worry: OS X defrag will not harm your HDD. As you already know, disk defragmentation can greatly speed up the traditional hard drive. It’s because HDD fragments all the data and stores it in multiple locations. And it may take quite a time to read the file with its pieces situated in different places. The procedure of arranging the data is not harmful for your HDD and is aimed at boosting the computer’s performance. And while it is not advisable to turn to such extreme measures, defragmenting a hard drive disk is a safe procedure if, of course, performed accurately.
Why you should never defrag Mac’s SSD
The process described above is applied only to the hard drives. If you have a newer Mac that comes with SSD (solid state drive), you should never defrag its data. SSDs operate in a different way to a traditional HDD and already have a built-in automatic maintenance process. Therefore, it is not necessary to defrag a solid state drive to boost a Mac’s performance.
Furthermore, all defragmentation attempts can even hurt your SSD. Flash memory used by a solid state drive has a finite lifespan because of the limited write and read cycles. And disk defragmentation is a process of reading the data from one place and writing it to another. So if you defrag SSD, you will perform thousands of write operations each time on the drive. It can speed up the degradation of a solid state drive and lead to its wear and tear. And that’s not what you need.
What are alternatives to defragment a Mac?
If your Mac is running slowly, you don’t necessarily need to defrag Mac hard drive. Sometimes it’s not your HDD that’s having problems. Therefore, try some alternative methods that may help you speed up the system without disk defrag on Mac.
Repairing Disk Permissions
“Try repairing your disk permissions” is a standard Mac troubleshooting tip. Permissions are file settings that affect the ability to read, write and execute the file. And if they are no longer set correctly, software that uses the file may not work right.
In OS X Yosemite or earlier, the file permissions on a startup disk can be repaired with the help of Disk Utility. Note that beginning from OS X EI Capitan, disk permissions are automatically protected and there is no need to verify them with Disk Utility.
How do I repair my Mac startup disk?
Here are the steps for optimizing your Mac:
Defragmenting Mac Os X Hard Drive
Open Disk Utility (Applications > Utilities).
Choose your startup disk.
Click the First Aid tab.
Click Verify Disk Permissions to check permissions.
Click Repair Disk Permissions to repair any inconsistent permissions.
If you don’t want to repair disk permissions manually, you can easily perform the action with an utility we mentioned above — CleanMyMac X. It has the Maintenance module that will help you optimize your Mac, including verifying startup disk and repairing disk permissions. Thus, you’ll ensure that your Mac’s operating system is functioning properly. You can download CleanMyMac here.
Therefore, before defragging your Mac, try to perform the Mac disk cleanup to increase the disk speed. It’s an easy and risk-free process that will not take more than a few minutes.
General speedup tips
Sometimes your Mac needs a good kick-start to run smoothly. Here are some tricks to speed up your computer.
How do I improve my Mac performance?
Cached
1. Update macOS software
Try to update your software to the latest versions as it performs better than the previous ones. Usually system updates include performance and bug fixes that could be the reason of slowdowns.
2. Delete unnecessary files
Ensure that your Mac has at least 10 percent of total drive storage available at any time to perform background actions and provide enough space for temporary files, caches, and virtual memory. Once again, CleanMyMac X is a great solution for finding and removing useless and large files that take gigabytes of space on your Mac.
3. Stop programs from launching automatically
A large number of apps may launch simultaneously when you turn your Mac on. Some of them run in the background and are only visible in a menu bar, so it’s even hard to define if they’re actually running. You can stop them from loading by opening System Preferences, clicking on Users & Groups and then choosing Login Items. You’ll see a list of applications that launch during the startup. You can switch off the ones you don’t need by clicking the minus sign (-) button.
Disk Defragmenter For Mac Os X
If you’re looking for some utilities that can help with all of that and even more, try Mac maintenance software like CleanMyMac X. It will optimize Mac performance safely and quickly.
We hope this article was helpful and you found the answers to all your questions here. Thanks for reading and share this article if you liked it!
These might also interest you:
1 note
·
View note