art-casul
Juri's Art Blog
Juri's home for arts and crafts! I'm slowly learning how to draw/paint digitally and how to make physical crafts!
~
Please do not repost to other sites!
~
Main Blog :: @cappurrccino
~
Ask Box :: [ Open ]
478 posts
Don't wanna be here? Send us removal request.
Last Seen Blogs

squidling2005
moccasins main blog lol

hotafmomdomme
💄ourkinkycrusades👠
unfilteredaj
Just Your Local Owl-Kin
b1ackpaws
Blackpaws

maximumthrill
Maximum Thrill
Text
I made a potholder! But this isn’t any old potholder, it’s my reconstruction of a potholder my great grandma made in the 40s.

My potholder is made with cotton yarn so it won’t melt like her acrylic yarn has, and I didn’t use rubber Mason jar rings as the basis of my rings like she did. The green and orange is her original potholder.

As you can see, it’s been though some things and the rubber rings on the inside are starting to degrade to the point where I’m uncomfortable handling it.
This was my first time making a pattern from someone else’s finished object and I had a lot of fun. I’m sure my great grandma used a published pattern, but I couldn’t find one on APL or on Ravelry.
I’ve put the pattern up on my Ravelry store for free if anyone is interested. It’s not pattern tested or anything, so be aware of that.
2K notes
·
View notes
Text

The Unicorn's Garden, my cross stitch take on the medieval tapestry "The Unicorn Rests in a Garden"
The Unicorn's Garden Cross Stitch Pattern | Sprouting Lupine Shop
11K notes
·
View notes
Text
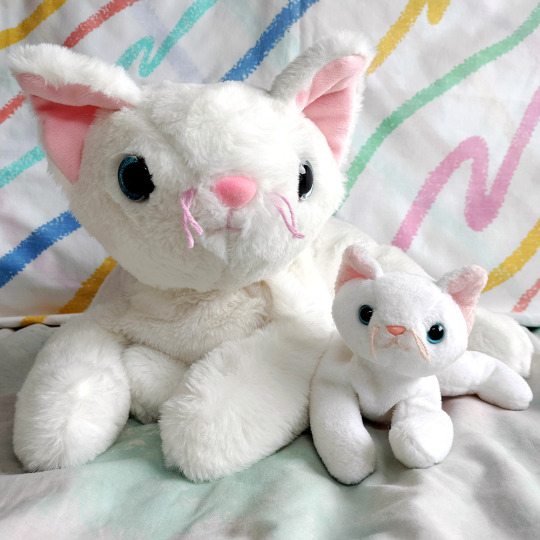
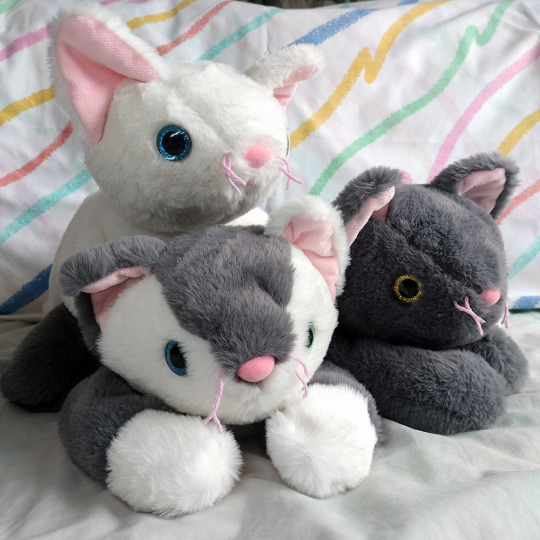
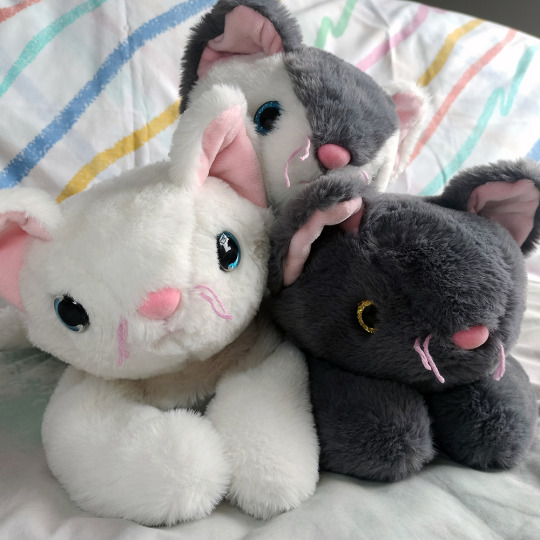
how to make your own beanie buddy!!
first: sacrifice a beanie D: this was a damaged and worn zip the cat. farewell sweet prince. thanks for your service. anyway take that beanie to bits
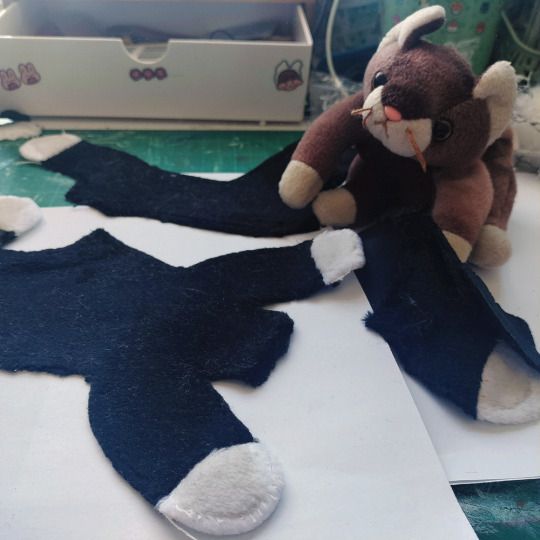
iron the pieces and trace them to make a pattern (make notes about how to reassemble NOW before you forget!)
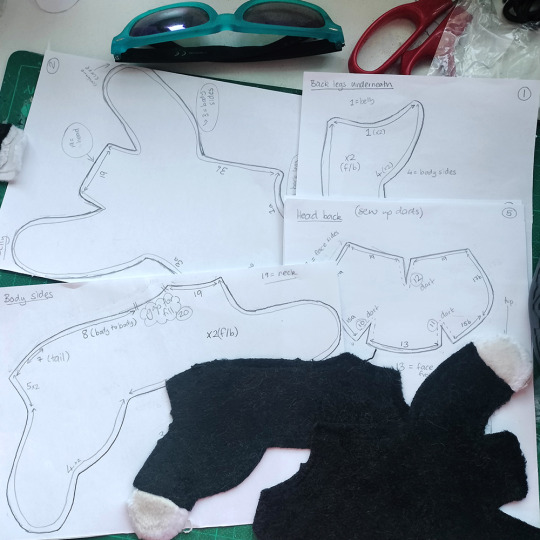
Ask your sister to use her work printer to blow up the pattern from A5 to A3! thats four times bigger!!
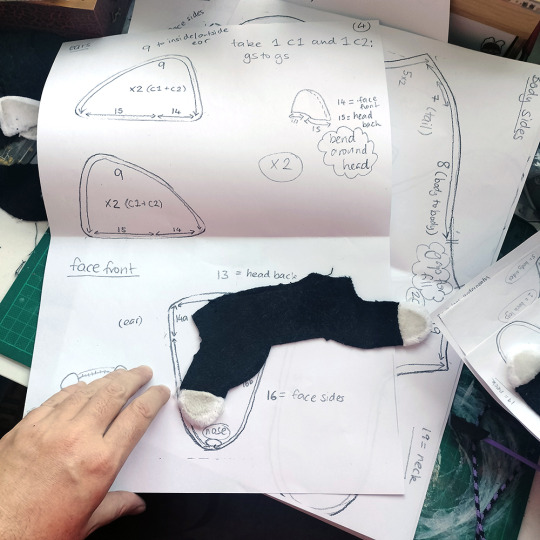
get some plushy fabric from the craft store and get tracing and cutting (using medical scissors from that surgery you had four years ago)

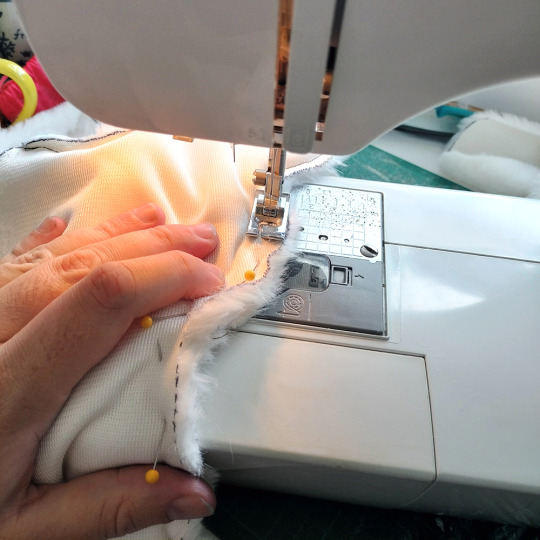
SEW THAT BABY TOGETHER and then pick apart the head because you messed up AND THEN SEW IT BACK TOGETHER PROPERLY!!
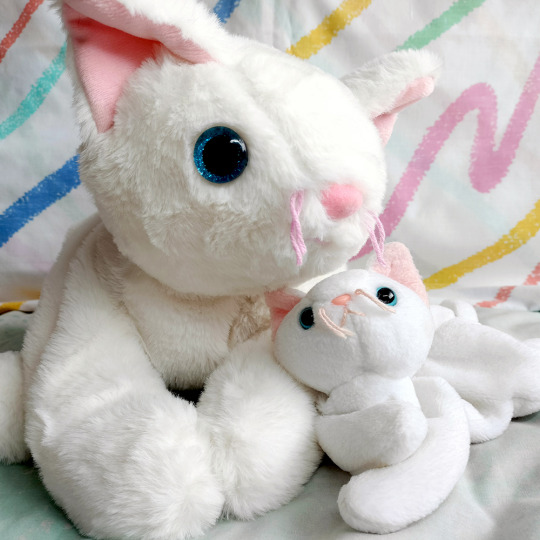
make a little face :3 eyes, nose and whiskers!!
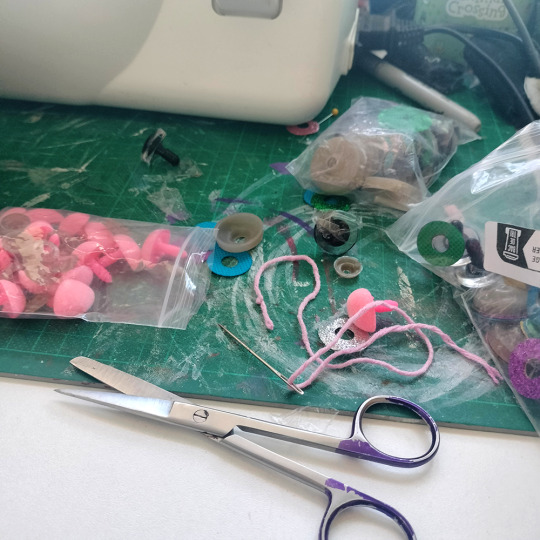
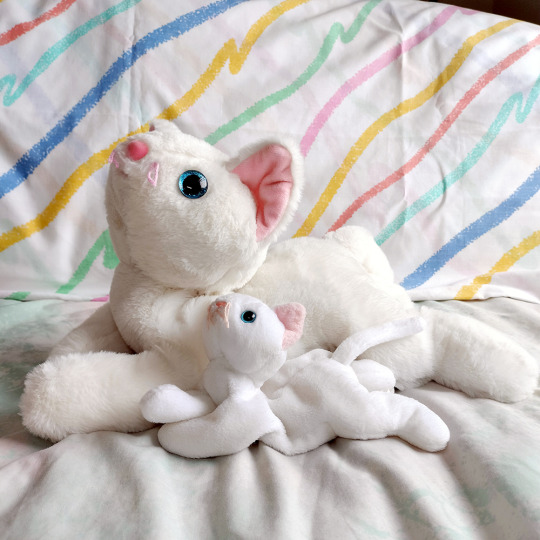
fill that beast with BEANS using your sister's hamilton shotglass (and some fluff for the head and body)

sew her up.... and take some photos!!
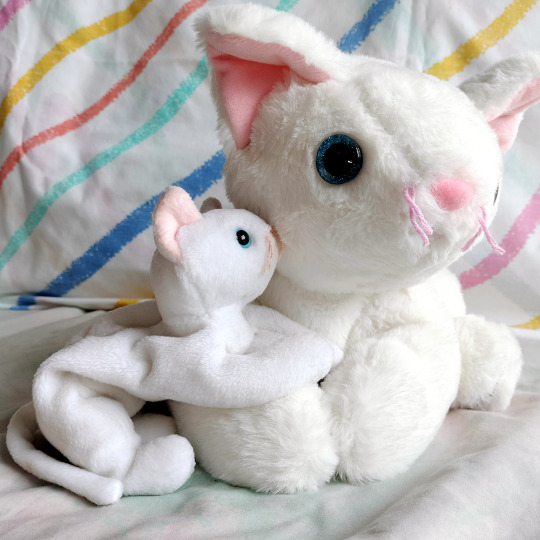
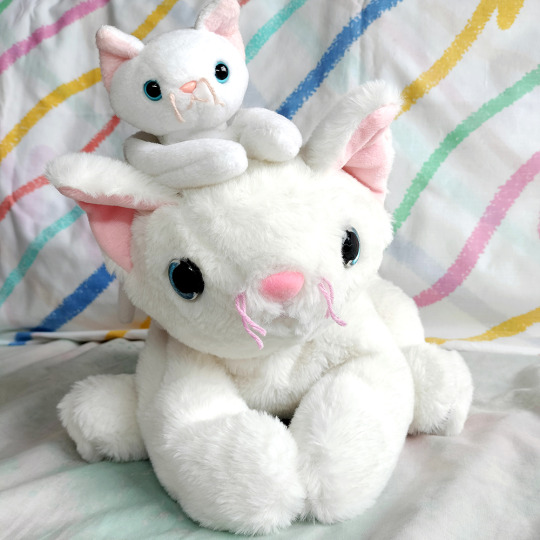
optional step: repeat the process to make some siblings!
5K notes
·
View notes
Text
yall know that post with all of those absolutely stunning crochet flowers? well i just bought a pattern from the shop those are from and Good Fucking Lord.
I was expecting a like a Chart or two, maybe some written instructions. not Seventy Seven full color pages for One type of rose.
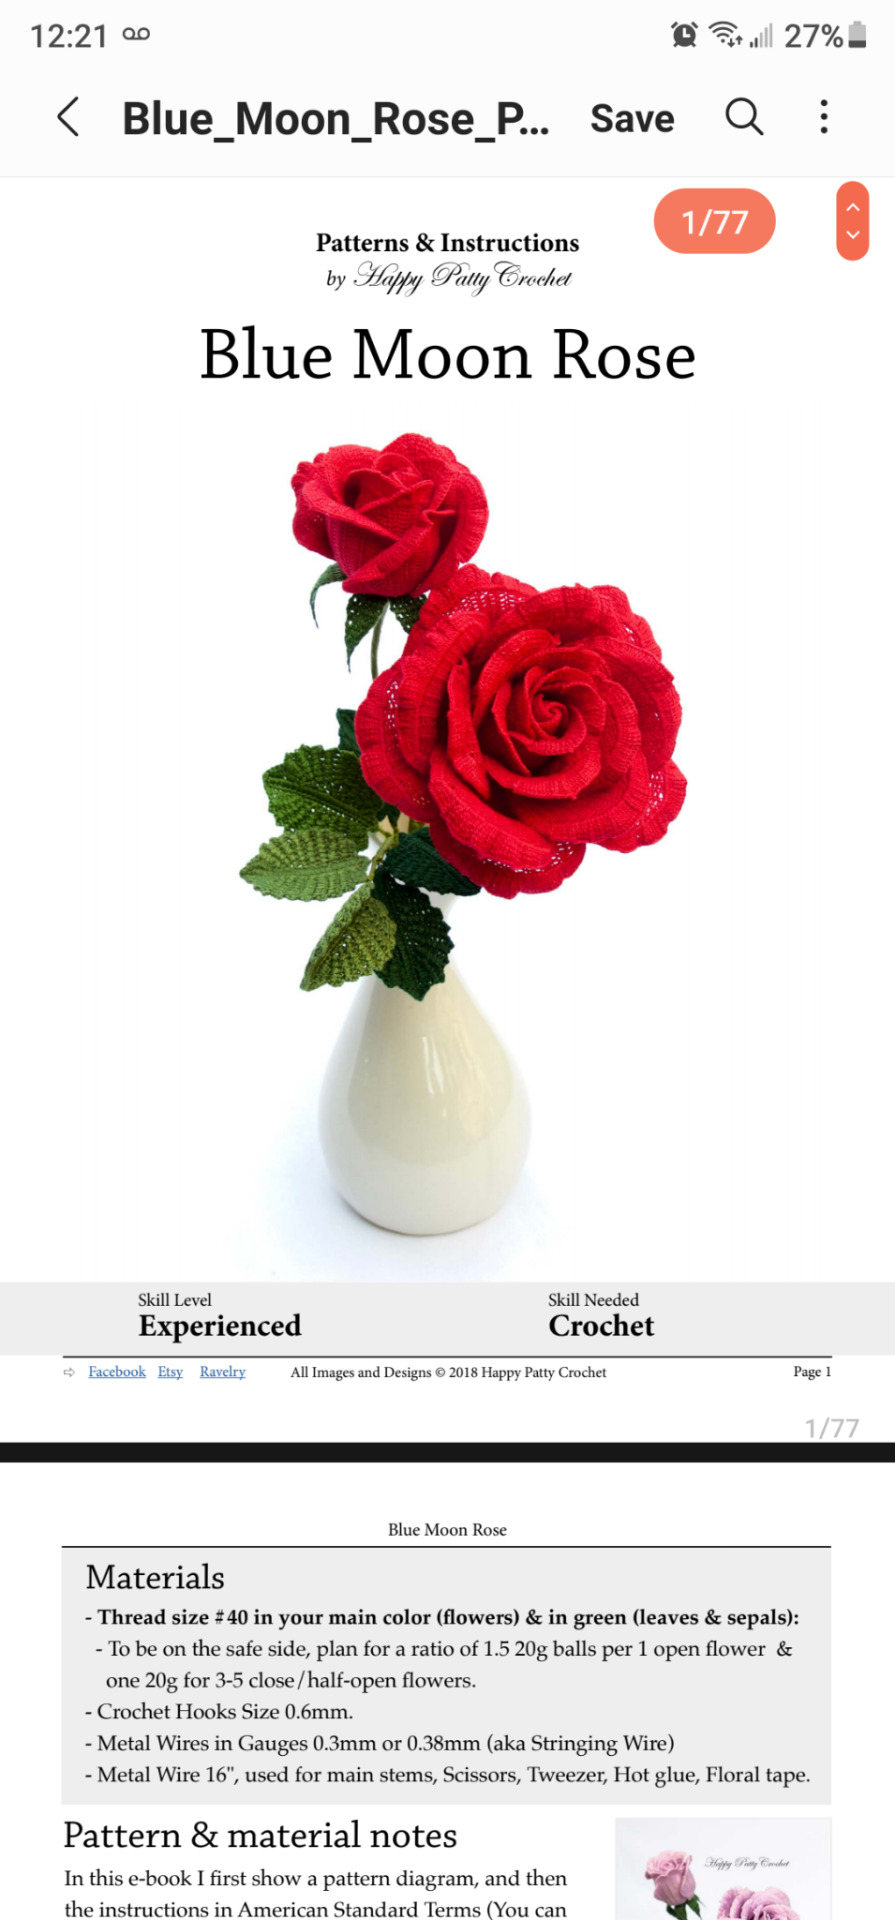

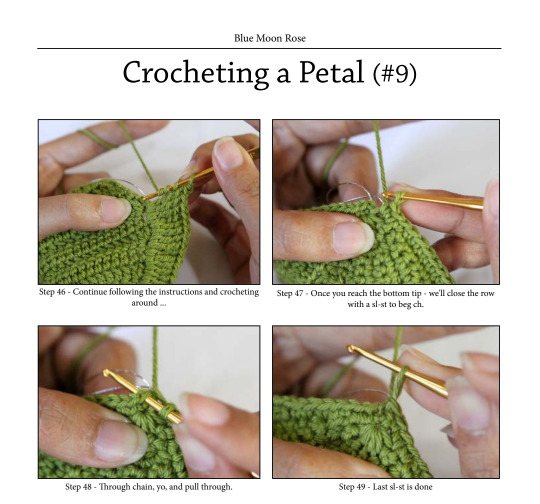
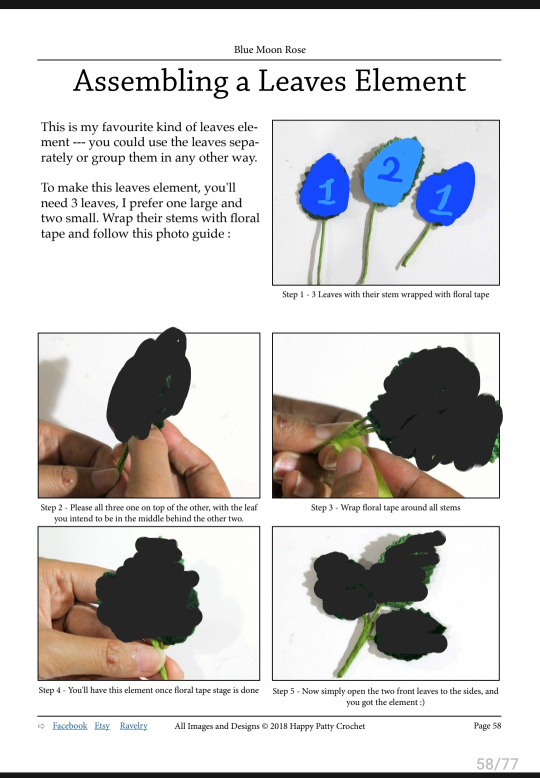

this was like 8 bucks???? obviously i did some redacting but Good Lord. if you are even a little bit into crochet go throw money at this absolute Mad woman its Definitely worth it.
39K notes
·
View notes
Text

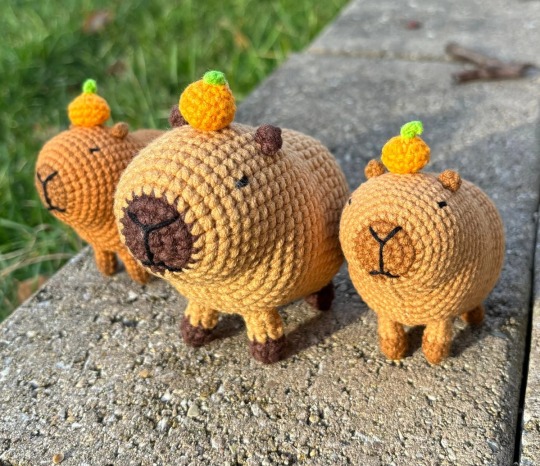
Crochet Capybara // Betsy Handmade Studio
4K notes
·
View notes
Text


Made a cat grass today. The pattern is here
I used weight 3 yarn for the cat and weight 4 yarn for soil and succulent so the cat looks slightly smaller compared to everything else.
251 notes
·
View notes
Text
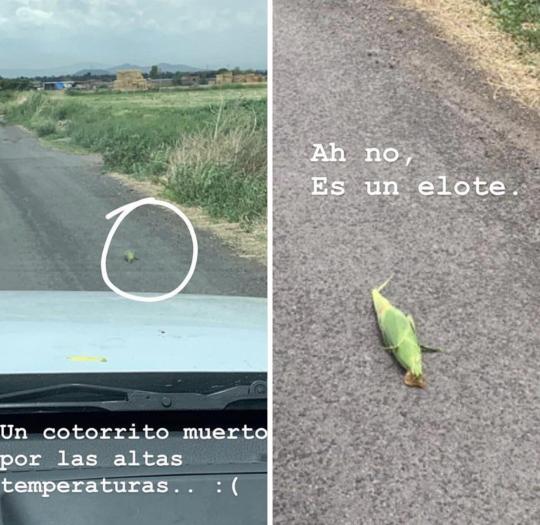
Sometimes things get stuck in our brains that we can’t stop giggling about.
This was one of those things for Prism.
4K notes
·
View notes
Text
sewing patterns for bugs! (pt 2)
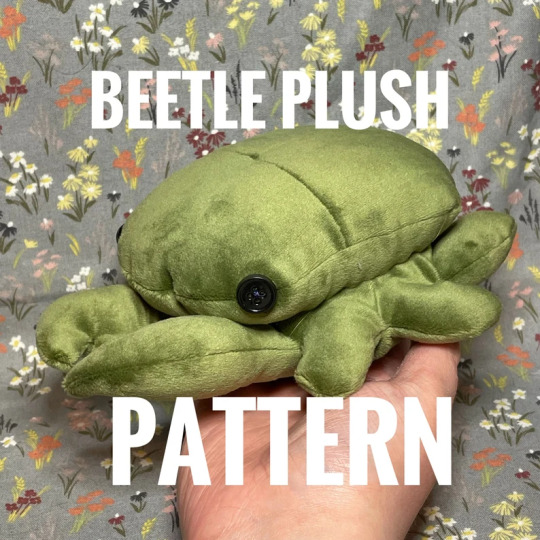
beetle plush pattern by ApothecaryOcto

simple fabric moth/butterfly pattern by willowynn

bee plush pattern by TooStuffedPatterns
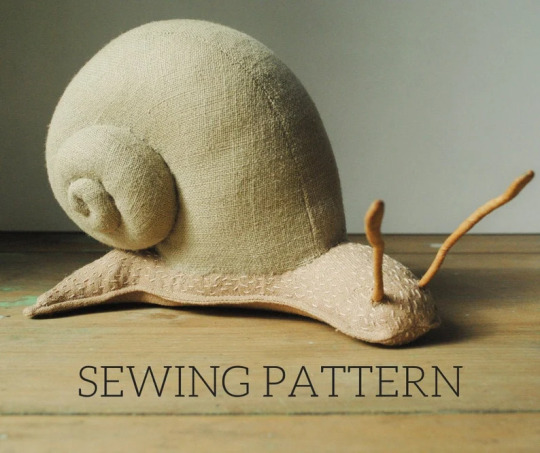
snail plush pattern by willowynn

beetle plush pattern by MasterPlush
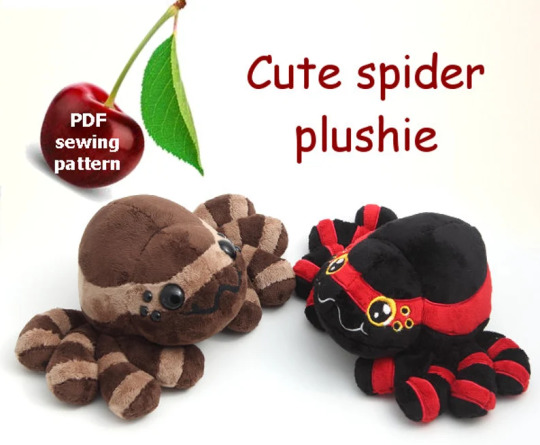
spider plush pattern by SugarcubeCherry
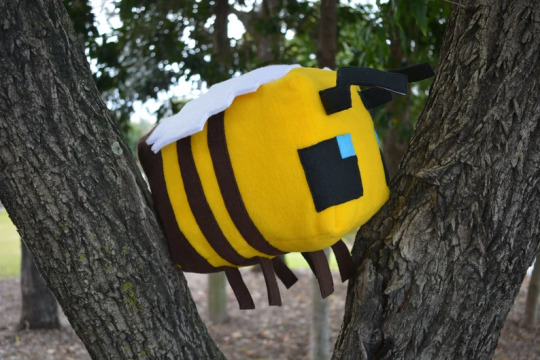
minecraft bee plush pattern by HabbiesAus
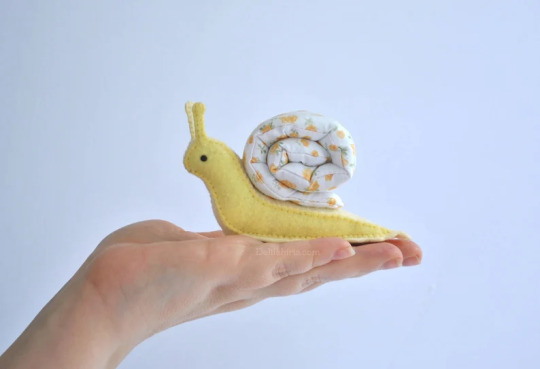
snail plush pattern by Delilah Iris

butterfly / moth plush pattern by Victoria Zhuk
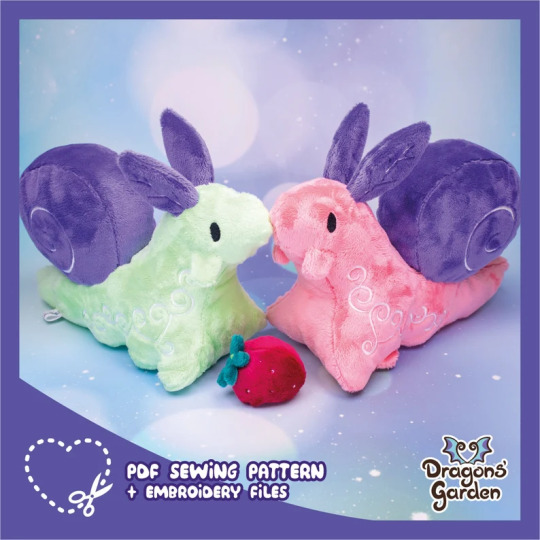
garden snail pattern by DragonsGardenShop
3K notes
·
View notes
Text
A thing I love to do is telling prepper dudes that one of my disaster readiness skills is making stuffed animals. They never get it. Like, my dude, when things get very bad and we're all sharing overcrowded shelters, you're gonna want the power to comfort children. Trust me.
20K notes
·
View notes
Text
upside to making a gauge swatch: your stuff comes out the intended size
downside to making a gauge swatch: why the FUCK is this not a square, what am I even supposed to do with this information >:(
0 notes
Text

Speaking of the goat!
Free crochet pattern:
10K notes
·
View notes

Text


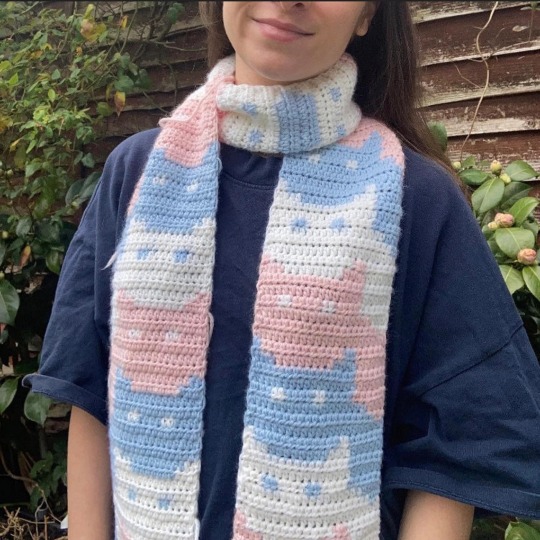
Cat Scarf Pattern // Crochet By Ula
15K notes
·
View notes
Text
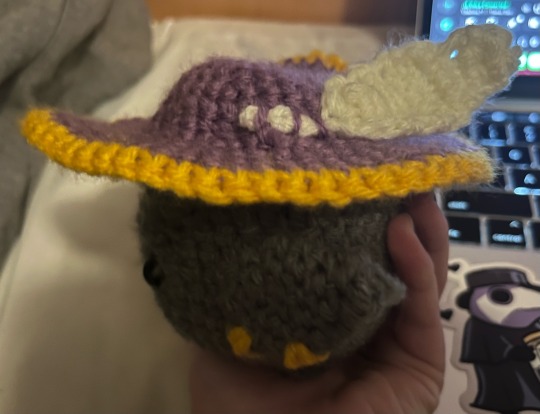
so i was requested by @enbyartist to drop the pattern for my jarlaxle plush, and i’m more than happy to deliver. this is gonna be a very long post, so pattern will be under the cut
materials used:
- 3.25mm crochet hook
- yarn needle, to stitch everything together
- 10mm safety eyes
- grey, black, purple, magenta, gold, and rainbow colored yarn (weight doesn’t really matter)
- poly-fil stuffing
pattern guide:
mr: magic ring
ch: chain
sc: single crochet (uk double crochet)
ss: slip stitch
inc: increase
dec: decrease
i’d also like to preface this by saying:
1. a lot of this was me tweaking preexisting patterns that i found online. the rest was me just winging it
2. i’m sorry i don’t have more progress shots, i hope what i’m writing here makes sense
actual pattern:
head (borrowed from 53stitches charmander pattern)
1. in grey: mr 6 (6)
2. inc x 6 (12)
3. [inc, sc]x 6 (18)
4. sc, [ inc, sc 2 ]x 5, inc, sc (24)
5. [inc, sc 3] x 6 (30)
6. sc 2, [ inc, sc 4 ]x 5, inc, sc 2 (36)
7-12. sc 36 (36)
13. [ inc, sc 5 ]x 6 (42)
14-15. sc 42 (42)
16. [ dec, sc 5 ]x 6 (36)
17. sc 2, [ dec, sc 4 ]x 5, dec, sc 2 (30)
18. [ dec, sc 3 ]x 6 (24)
finish off and cut long tail for sewing. insert 10mm safety eyes in between rows 12-13, leaving about 7 stitches in between, stuff
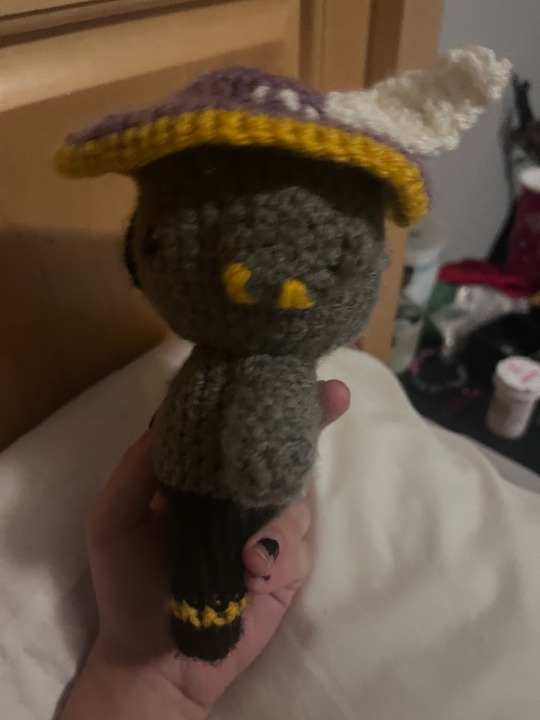
ears (borrowed from heartandsew christmas elf pattern, make 2):
1. in grey: mr 4 (4)
2. [sc, inc]x 2 (6)
3. [sc, inc]x 3 (9)
4. [sc 2, inc]x 3 (12)
5. sc 12 (12)
6. [sc 2, dec]x 3 (9)
7. [sc, dec]x 3 (6)
finish off and leave long tail for sewing
in gold, add earrings. stitch to either side of the head, level with the eyes
eyepatch (borrowed from amigurumibook beautiful pirate sophie pattern)
1. in black: mr 6 (6)
2. inc 6 (12)
3. [sc 3, inc]x 3 (18)
ch enough stitches to fit around the head. stitch patch over the eye of your choosing.
hat (borrowed from crazypatterns pirate hat pattern and altered slightly)
1. in purple: mr 6 (6)
2. inc 6 (12)
3. [inc, sc]x 6 (18)
4. [inc, sc 2]x 6 (24)
5. [inc, sc 3]x 6 (30)
6. sc 30 (30)
7. [sc 4, inc]x 6 (36)
8-9. sc 36 (36)
10. [sc 2, inc]x 12 (48)
11. [sc 7, inc 4, sc 5]x2, [ss 2, sc 5, inc 4, sc 5] (60)
12. [sc 10, inc 2, sc 8]x2, [ss 2, sc 8, inc 2, sc 8] (66)
13. [sc 22] x 2, [ss 2, sc 20] (66)
14. in gold: sc around the edge of the hat, skipping the two slip stitches (64)
finish off and stitch to head
feather:
1. in white or rainbow: ch 5
2. 3 sc into last ch (3)
3. [inc, sc]x 2, inc (5)
4-8. sc 5 (5)
9. ss, sc 3, sl (3)
10-11. sc 3 (3)
12. ss, sc, ss
finish off and stitch to side of hat

legs (borrowed from 53stitches charmander pattern and altered slightly, make 2)
1. in black: mr 6 (6)
2. [inc, sc]x 3 (9)
3-4. sc 9 (9)
5. in gold: sc 9 (9)
6-8. in black: sc 9 (9)
finish off and stuff. i used some gold yarn to add shoelaces as well.
body (also borrowed from 53stitches charmander pattern and altered):
1. mr 6 (6)
2. inc 6 (12)
3. [inc 2. stitch leg w/ sc 4 through both the leg and body]x2 (18)
4. sc, [inc, sc 2]x 5, inc, sc {around perimeter of body and legs} (24)
5. [inc, sc 3]x 6 (30)
6. sc 30 (30)
7-8. in black: sc 30 (30
9. [dec, sc 3]x 6 (24)
10-12. sc 24 (24)
13. [dec, sc 2]x 6 (18)
14-15. sc 18 (18)
finish off and stuff, stitch to head
arms (once again borrowed from 53stitches pattern and altered, make 2):
1. in grey: mr 6 (6)
2. [inc, sc 2]x 2 (8)
3-4. sc 8 (8)
5. dec, sc 6 (7)
6-8. sc 7 (7) stuff
9. fold top of arm closed and sc 3 through both sides (3)
stitch to sides of the body, in between head and body

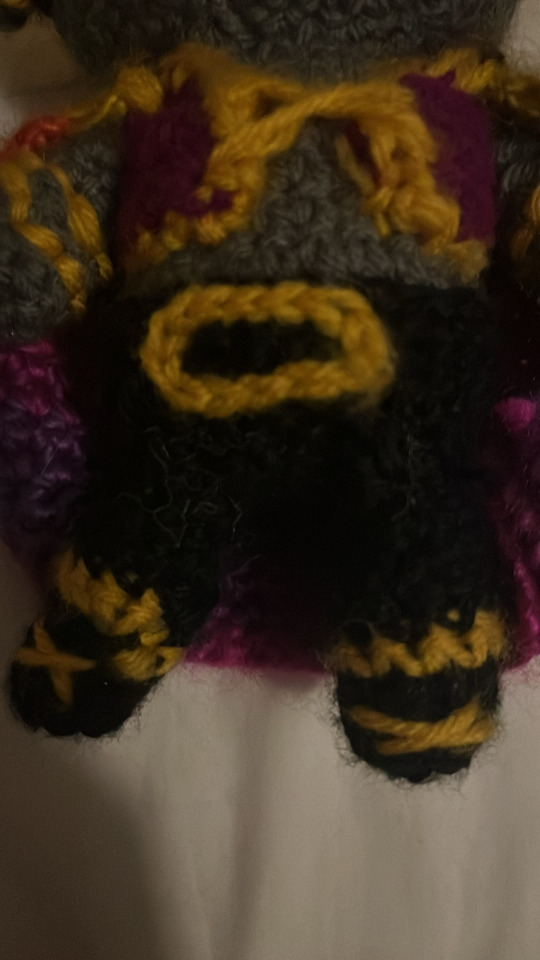
shirt:
1. in gold: ch 25 (25)
2-3. in magenta: sc 25 (25)
4. sc 4, ss, ch 8, ss into 4th stitch from the last ss, sc 7, ss, ch 8, ss into 4th stitch from last ss, sc 4
5. ss, sc 3, skip next stitch, ss 8, skip next stitch, sc 8, skip next stitch, ss 8, skip next stitch, sc 3, ss
for the front, repeat for both sides
6. skip 1st stitch, ss, sc 2
7. skip 1st stitch, ss 3
tie off
for the back
8. starting from bottom of strap, ss, sc 8, ss
9. in gold: ss around the entire perimeter of the shirt, except for the bottom which is already gold
tie off and stitch to the body. using gold yarn and a yarn needle, add the lacing to the front of the shirt


belt:
1. in black: ch 30, ss into 1st chain to make a circle (30)
2-3. ch 30 (30)
for the buckle:
5. in gold: ss the shape of a rectangle in the front of the belt
stitch to the body at the top of the pants
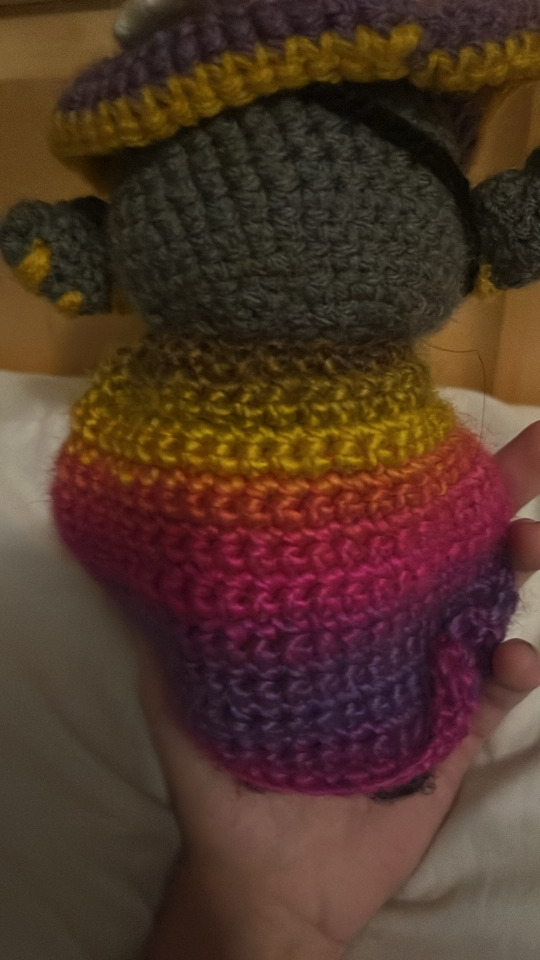
cape:
1. in rainbow: ch 26 (26)
2-17. sc 26 (26)
18. ss, sc 24, ss (26)
19. skip 1st stitch, ss, sc22, ss (24)
20. skip 1st stitch, ss, sc 20, ss (22)
stitch to body, on shoulders and back of neck. if desired, use gold yarn to stitch cape down to shoulders more firmly

i also used some gold yarn to stitch some bracelets onto him, went around twice for each bracelet.

and you’re done! now go forth and make yourself a tiny jarlaxle!
27 notes
·
View notes
Text
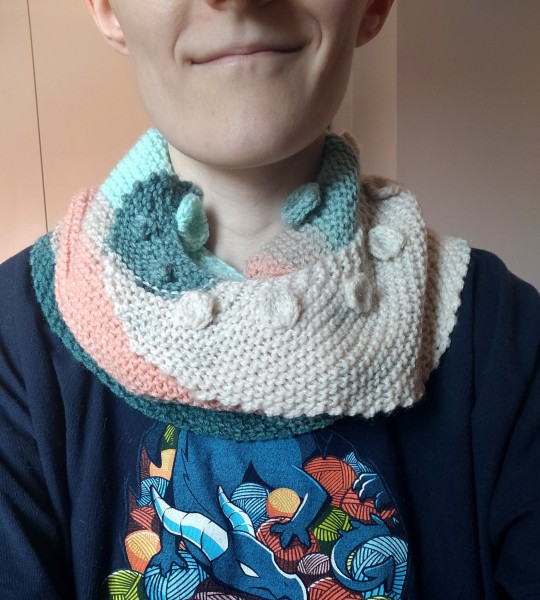
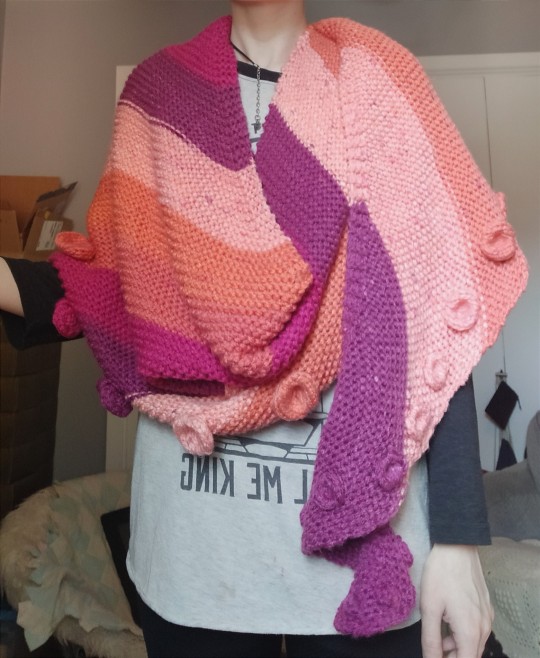
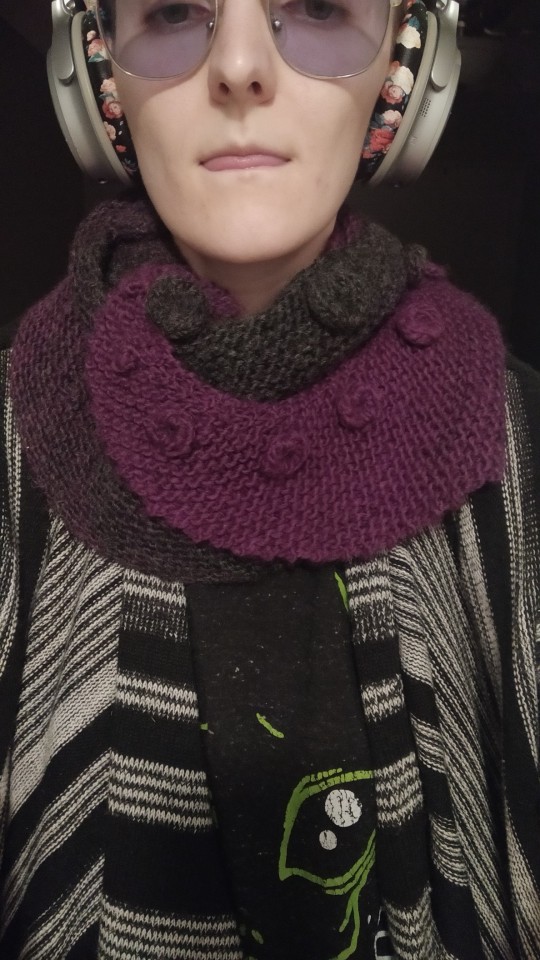
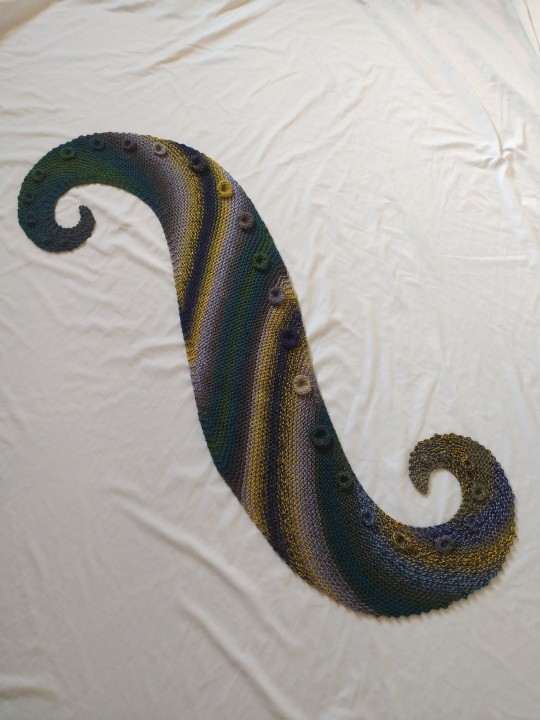
Hi I'm Jareth and I knit tentacle scarves and shawls 🐙


8K notes
·
View notes
Text
Mood Fabrics has free pdf patterns
Mood offers
All-Gender Patterns
Activewear & Athleisure Patterns
Adaptive Patterns
Basic Sewing Patterns
Cosplay Patterns
Dress Patterns
Lingerie Patterns
Menswear & Unisex Patterns
Outerwear Patterns
Outfit & Ensemble Patterns
Pants & Shorts Patterns
Shawl & Cardigan Patterns
Shirt Patterns
Skirt Patterns
Suiting Patterns
Swimwear Patterns
Mood’s Adaptive or Accessible sewing patterns are patterns that can easily slip on and off the body, ideal for sewists with disabilities or limited mobility.
This is the Oliver Jumpsuit (sizes 2-30) Adaptive Tips


They use Velcro but you could also use magnetic clasps, snaps, buckles, anything that works for you.
Here is the sizing chart:

587 notes
·
View notes